How to Capture Website Screenshots with a Cloudflare Worker
Build a Cloudflare Worker endpoint that captures website screenshots through Browser Rendering, with runnable code, safe URL handling, options and troubleshooting.
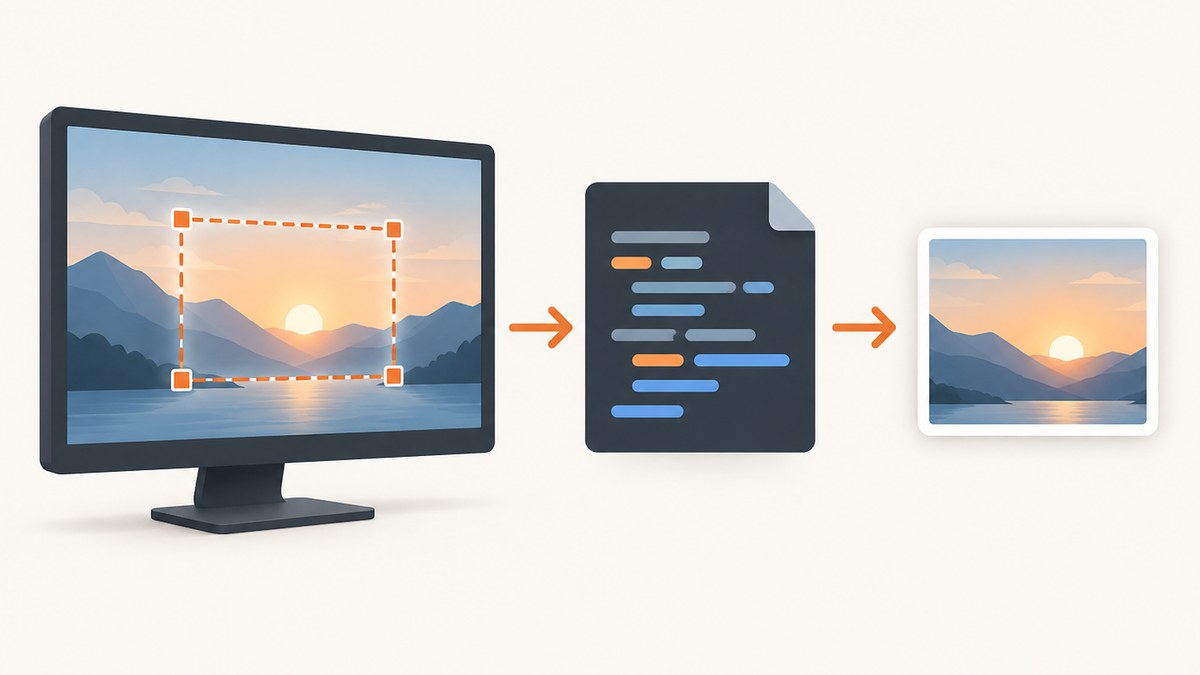
A Cloudflare Worker can provide a small HTTP endpoint for website screenshots. The Worker sends a request to Cloudflare Browser Rendering’s Screenshot API, then returns the resulting image to its caller. The API accepts a URL or supplied HTML; it requires Cloudflare API authorization with the Browser Rendering Write permission. Keep the API token in a Worker secret and validate caller-supplied URLs so your endpoint cannot be abused as an open proxy. See Cloudflare’s Screenshot API reference and request documentation.
The implementation below uses a Worker to call the REST endpoint. It accepts a URL and optional capture settings, checks the URL protocol and host, sends a JSON request to Cloudflare, and relays the response. Replace the account ID, create a narrowly scoped API token with Browser Rendering Write permission, and save it as a Worker secret.
1. Create the Worker and store credentials
Create a Worker project using Wrangler, then add two secrets or variables. The account ID is not an API credential, but keeping configuration together makes deployment simpler. The token must remain server-side; never put it in HTML or JavaScript delivered to a browser.
npx wrangler init screenshot-worker
cd screenshot-worker
npx wrangler secret put CLOUDFLARE_API_TOKEN
When prompted, paste the token. Set the account ID in wrangler.toml:
name = "screenshot-worker"
main = "src/index.js"
compatibility_date = "2026-09-29"

[vars]
CLOUDFLARE_ACCOUNT_ID = "YOUR_ACCOUNT_ID"
Grant only the permission needed for this integration: Browser Rendering Write. Cloudflare documents API-token bearer authorization and that permission for the Screenshot endpoint. See the endpoint security and permission details.
2. Add the screenshot endpoint
This example exposes GET /screenshot?url=.... The allowlist is intentionally explicit. Add hostnames you actually need. If the endpoint is private to your own application, add authentication appropriate to that application as well; an allowlist alone does not authenticate callers.

export default {
  async fetch(request, env) {
    const incoming = new URL(request.url);
    if (incoming.pathname !== "/screenshot") {
      return new Response("Not found", { status: 404 });
    }
    if (request.method !== "GET") {
      return new Response("Method not allowed", {
        status: 405,
        headers: { Allow: "GET" }
      });
    }

    const rawTarget = incoming.searchParams.get("url");
    if (!rawTarget || rawTarget.length > 2048) {
      return new Response("Provide a URL no longer than 2048 characters", { status: 400 });
    }

    let target;
    try {
      target = new URL(rawTarget);
    } catch {
      return new Response("Invalid URL", { status: 400 });
    }
    if (target.protocol !== "https:" && target.protocol !== "http:") {
      return new Response("Only HTTP and HTTPS URLs are supported", { status: 400 });
    }

    const allowedHosts = new Set(["example.com", "www.example.com"]);
    if (!allowedHosts.has(target.hostname.toLowerCase())) {
      return new Response("Host is not allowed", { status: 403 });
    }

    const options = {
      url: target.toString(),
      viewport: { width: 1440, height: 900 },
      fullPage: false,
      type: "png",
      encoding: "binary"
    };

    let upstream;
    try {
      upstream = await fetch(
        `https://api.cloudflare.com/client/v4/accounts/${env.CLOUDFLARE_ACCOUNT_ID}/browser-rendering/screenshot`,
        {
          method: "POST",
          headers: {
            Authorization: `Bearer ${env.CLOUDFLARE_API_TOKEN}`,
            "Content-Type": "application/json"
          },
          body: JSON.stringify(options)
        }
      );
    } catch {
      return new Response("Screenshot service could not be reached", { status: 502 });
    }

    const headers = new Headers();
    headers.set("Cache-Control", "no-store");
    headers.set("X-Content-Type-Options", "nosniff");
    const contentType = upstream.headers.get("Content-Type");
    if (contentType) headers.set("Content-Type", contentType);

    return new Response(upstream.body, {
      status: upstream.status,
      headers
    });
  }
};
Save this as src/index.js. The API route is POST /accounts/{account_id}/browser-rendering/screenshot. The request accepts URL or HTML input. The endpoint’s configuration and response behavior are described in Cloudflare’s API reference. The Worker passes the upstream body through instead of assuming every response is a valid image: authorization failures and API errors should stay visible to the caller as errors.
3. Deploy and call your Worker
Deploy the Worker, then request an image. URL-encode the target as a query parameter so characters such as & inside it do not get interpreted as Worker parameters.
npx wrangler deploy
curl --get "https://YOUR_WORKER.workers.dev/screenshot" \
  --data-urlencode "url=https://example.com/" \
  --output page.png
Equivalent caller code in Python and Node.js:
# Python
import requests

response = requests.get(
    "https://YOUR_WORKER.workers.dev/screenshot",
    params={"url": "https://example.com/"},
    timeout=90,
)
response.raise_for_status()
with open("page.png", "wb") as output:
    output.write(response.content)
// Node.js 18+
const endpoint = new URL("https://YOUR_WORKER.workers.dev/screenshot");
endpoint.searchParams.set("url", "https://example.com/");
const response = await fetch(endpoint);
if (!response.ok) {
throw new Error(`Screenshot request failed: ${response.status} ${await response.text()}`);
}
await Bun.write("page.png", response.body); // Bun
// In Node.js, use: import { writeFile } from "node:fs/promises";
// await writeFile("page.png", Buffer.from(await response.arrayBuffer()));For direct API debugging, cURL removes the Worker from the path and helps separate an API-token or request issue from Worker logic. Do not use this form in a public client application because it exposes the token.
curl "https://api.cloudflare.com/client/v4/accounts/$CLOUDFLARE_ACCOUNT_ID/browser-rendering/screenshot" \
  -H "Authorization: Bearer $CLOUDFLARE_API_TOKEN" \
  -H "Content-Type: application/json" \
  --data '{"url":"https://example.com/","viewport":{"width":1440,"height":900},"type":"png","encoding":"binary"}' \
  --output page.png
4. Choose capture settings
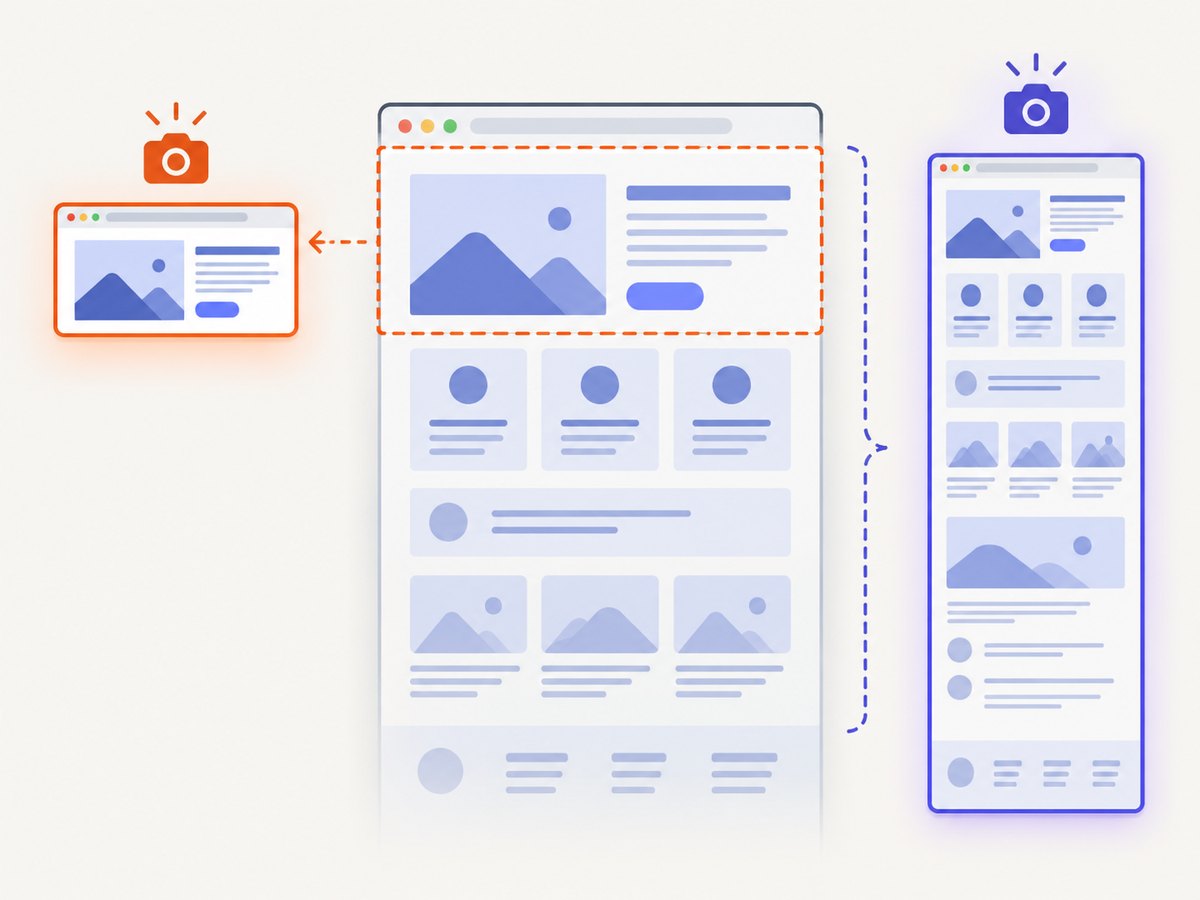
Start with a viewport capture and change one setting at a time. The API supports viewport dimensions, full-page capture, clipping, image type, response encoding, waiting, and request or resource blocking. Use only settings documented by Cloudflare for the endpoint; names and accepted structures matter. Review the Screenshot request options before adding less common fields.
| Need | Setting to consider | Notes |
|---|---|---|
| Match a desktop layout | viewport |
Set width and height explicitly to make repeated captures comparable. |
| Capture beyond the fold | fullPage: true |
Tall pages produce larger images and can take longer to render or transfer. |
| Capture a region | clip |
Specify a clipping rectangle when only a known part of the page is needed. |
| Reduce file size | type: "jpeg" or "webp" |
PNG is useful for sharp text and transparency; compare output formats for your content. |
| Wait for dynamic content | waitForSelector |
Wait for a meaningful element rather than applying an arbitrary long delay. |
| Skip unnecessary network work | Request/resource blocking | Blocking can improve capture time, but may also prevent fonts, styles or content from loading. |
Selector waiting supports a selector, visibility or hidden conditions, and timeout; documented selector and wait timeout maxima are 120,000 ms. The action timeout maximum is also 120,000 ms. A timeout is a ceiling, not a recommended default. Prefer a selector that indicates the page is ready. For pages without a stable selector, use a short wait timeout only if necessary and account for variable load times.
The API can accept HTML instead of a URL. This is useful for rendering generated markup, but any referenced assets still need to be available to the rendering service. Do not assume a relative asset path will resolve the same way it does in your application; provide absolute URLs or the appropriate base context.
5. Protect a public screenshot Worker
A screenshot endpoint is a browser-backed fetch service. If an arbitrary caller can ask it to visit arbitrary addresses, it can be abused to reach destinations you did not intend or consume your quotas. The endpoint documentation establishes URL input and request options; the controls below are implementation guidance for a public proxy.
- Restrict allowed hostnames when the product only needs a known set of sites.
- Require application authentication or a signed request when callers should not be anonymous.
- Reject credentials in URLs, unexpected ports, and URL schemes other than HTTP and HTTPS.
- Revalidate the destination after redirects if your policy requires strict host restrictions; a first-host allowlist does not by itself constrain redirect destinations.
- Set request and response limits appropriate to your use case, and avoid returning upstream error details that reveal secrets.
- Keep the Cloudflare token in a Worker secret, rotate it if exposed, and grant only Browser Rendering Write.
- Apply rate controls per user or key so one caller cannot exhaust shared capacity.
Do not treat a static host allowlist as a complete network security boundary. If users need arbitrary public websites, consider a dedicated URL validation policy and abuse monitoring that account for redirects and DNS behavior.
6. Handle response formats and errors
Keep the output format consistent between the API request and your caller. A binary response can be streamed through the Worker as shown. If you choose base64 encoding, the caller must decode the returned representation before saving an image; writing base64 characters directly to a .png file produces a corrupt file. Confirm the response format from the API documentation for the encoding setting you choose.
Check the HTTP status before treating the body as an image. When a capture fails, preserve a useful status for the caller and log a request identifier or sanitized error details on the server. Avoid logging the full URL if query parameters may contain private information. Do not retry every error blindly: invalid credentials, unsupported parameters, and forbidden hosts will not be fixed by immediate repetition.
7. Improve speed and reliability
- Use the smallest useful viewport and output. Full-page images, large dimensions and lossless formats can increase processing and transfer cost.
- Wait for a real readiness signal. A target selector is more deterministic than a large fixed delay, but a missing selector should fail within a bounded timeout.
- Keep timeouts finite. The API documents wait and action timeout maxima of 120 seconds. Very long waits tie up caller requests and make user-facing failures slow.
- Make retries selective. Retry transient network or service failures with exponential backoff and jitter. Avoid retrying authorization errors or malformed requests.
- Cache only when acceptable. If your own application caches captures, include all rendering inputs in the cache key: URL, viewport, full-page flag, format and relevant wait behavior. Apply a TTL based on how fresh the target page must be.
- Stream large bodies. Passing through
upstream.bodyavoids buffering the whole image in Worker JavaScript. For base64 or post-processing, memory usage and payload size increase.
Keep Browser Rendering REST API rates separate from Worker runtime limits. Cloudflare announced that the REST API limit for Workers Paid plans increased on March 4, 2026 from 3 to 10 requests per second (180 to 600 per minute). That is an API rate limit, not a promise of screenshot latency. Cloudflare’s Workers limits page lists separate runtime figures, including 10 ms CPU time on Free and 5 minutes on Paid, with 128 MB memory for both; those limits describe Worker execution and do not replace Browser Rendering limits. See the rate-limit announcement and Workers limits.
Cost depends on your Cloudflare account and current service terms. The cited technical references establish limits and settings, not a per-screenshot price, so check Cloudflare’s current pricing for your account before estimating production spend. Reduce avoidable calls with application-level caching, deduplication and bounded retries.
8. Troubleshooting
| Symptom | Likely cause | Fix |
|---|---|---|
| 401 or 403 from Cloudflare | Missing, invalid or insufficiently scoped token. | Check the secret and account ID; ensure the token has Browser Rendering Write. |
| Worker returns 400 | Missing or malformed URL, unsupported scheme, or local validation rejected it. | Send a complete encoded HTTP(S) URL and check the host allowlist. |
| Image file contains JSON or text | The upstream returned an error response that the caller saved as an image. | Check HTTP status and content type before saving; inspect the error body safely. |
| Image is blank or partly rendered | The page needed more time, a selector wait, or a resource that was blocked. | Wait for a meaningful selector; remove blocking settings during diagnosis. |
| Capture times out | Slow navigation, a selector that never appears, or an excessive wait. | Use a bounded timeout, verify the selector exists on the final page, and retry only transient failures. |
| Worker succeeds locally but fails after deploy | Secret or environment variable was not set for the deployed Worker. | Set the production secret and account ID in the deployed environment, then redeploy if needed. |
| 429 or throttling | Requests exceed the applicable API rate limit. | Queue work, smooth bursts, and back off with jitter; verify the limit for your plan. |
| Redirected site is rejected or reaches an unexpected destination | Validation checked only the initial URL. | Use a policy that constrains redirects and test known redirect paths before exposing the endpoint. |
9. When to use Snapshot instead
If a workflow needs page content alongside the image, Cloudflare’s Snapshot endpoint can return a screenshot and HTML content, and supports Markdown or an accessibility tree. It may avoid making separate calls for related capture and inspection tasks. Its response has a different shape from a direct screenshot, so your Worker should parse and return the fields your client needs. See the Snapshot API documentation.
Or skip the browser setup
If your goal is to get a screenshot rather than operate a rendering proxy, ScreenshotNeo is a website screenshot API and MCP server. One GET request returns an image or PDF. Use the links to the ScreenshotNeo API documentation for the current request options and account setup.
curl -G "https://api.screenshotneo.com/v1/shot" \
  -d access_key=YOUR_API_KEY \
  --data-urlencode url=https://stripe.com \
  -o shot.webp
import requests
r = requests.get(
"https://api.screenshotneo.com/v1/shot",
params={"access_key": "YOUR_API_KEY", "url": "https://stripe.com"},
timeout=90,
)
open("shot.webp", "wb").write(r.content)const q = new URLSearchParams({ access_key: 'YOUR_API_KEY', url: 'https://stripe.com' });
const res = await fetch(`https://api.screenshotneo.com/v1/shot?${q}`);ScreenshotNeo removes cookie banners, popups and chat widgets before the shot. Bot checks, blank pages and failed loads are never billed. Its MCP server lets AI agents take screenshots. The free plan includes 1,000 screenshots a month with no card; paid plans start at $5 for 3,000. Sign up free and get 1,000 screenshots a month with no card.
FAQ
Can a Worker take a screenshot without Browser Rendering?
The Worker code here uses Browser Rendering’s Screenshot API. A Worker itself is not running a local browser in this design; it makes an authenticated API request to Cloudflare’s rendering service.
Can I screenshot HTML that has not been published?
The endpoint accepts supplied HTML as input as well as a URL. Ensure linked stylesheets, images and scripts are reachable by the rendering service, or include what the document needs in the supplied content.
Can I capture a whole page or just a region?
Yes. The documented screenshot options include full-page capture and clipping, in addition to viewport capture. Select the one that matches the output your caller expects.
Should I expose the Worker as a public endpoint?
Only if the endpoint has controls suited to public use. At minimum, consider authentication, destination restrictions and rate controls; otherwise it can become an open screenshot proxy.