How to Provide Screenshots to an AI Agent
Learn how to attach, format, and automate screenshots for AI agents, with runnable API examples and reliable capture guidance.

To provide a screenshot to an AI agent, attach or paste the image, then tell the agent what it shows, what region matters, and what result you want. For automation, send the image as a fully qualified URL, a base64 data URL, or a file identifier supported by the agent’s API. Keep important text readable, preserve enough surrounding context, and check the limits for the specific product and model.
This guide covers manual uploads, API requests, local files, computer-use agents, image quality, limits, troubleshooting, and automated website capture.
1. Choose the screenshot workflow
There are four common ways an image enters an AI workflow:
| Workflow | Best for | How the image enters |
|---|---|---|
| Chat attachment | One-off analysis, debugging, design review | Attach, drag, or paste the image into the chat composer |
| Local agent or CLI | Scripts that inspect files on a workstation | Pass one or more local file paths to the agent integration |
| Vision API | Production applications and batch analysis | Image URL, base64 data URL, or provider file ID |
| Computer-use loop | Agents that operate a browser or desktop | The runtime executes an action and returns a screenshot as a tool result |
Manual upload and computer use are different. In a manual workflow, you give the agent a static reference. In a computer-use workflow, the application performs the requested action, returns a screenshot or another tool result, and the agent decides what to do next.
2. Write a useful task prompt
A screenshot without a task leaves the agent guessing. Use a short structure that identifies the image, the relevant area, the requested operation, and constraints.
This is the checkout page after I selected express shipping.
Inspect the order summary on the right side. Explain why the total changed.
Do not suggest changes to the customer account or payment method.
For a design review, be specific about the comparison:
Image 1 is the current implementation and image 2 is the design reference.
Compare spacing and typography in the navigation and hero sections.
List only differences that are visible in both images, then suggest CSS changes.
For an error report, include the expected result and the observed result:
This screenshot shows the error after submitting the form.
Read the visible error text, identify the likely cause, and give three checks I can run.
Do not assume access to server logs.
If you provide multiple images, label their roles such as “before,” “after,” “desktop,” or “mobile.” Tell the agent what to compare. OpenAI’s image-input guidance likewise recommends explaining what the image shows, pointing to the relevant area, and stating the desired result and constraints (OpenAI image-input instructions).
3. Attach or paste a screenshot in a chat
- Capture the relevant screen or locate the existing image file.
- Attach it with the chat control, drag it into the composer, or paste it from the clipboard. ChatGPT documents all three methods in its image-input FAQ.
- Write the task prompt next to the image. Identify the page or application, the region to inspect, and the output you need.
- Review the response against the screenshot. If a small label is unreadable, provide a higher-resolution image or a second crop that keeps enough context.
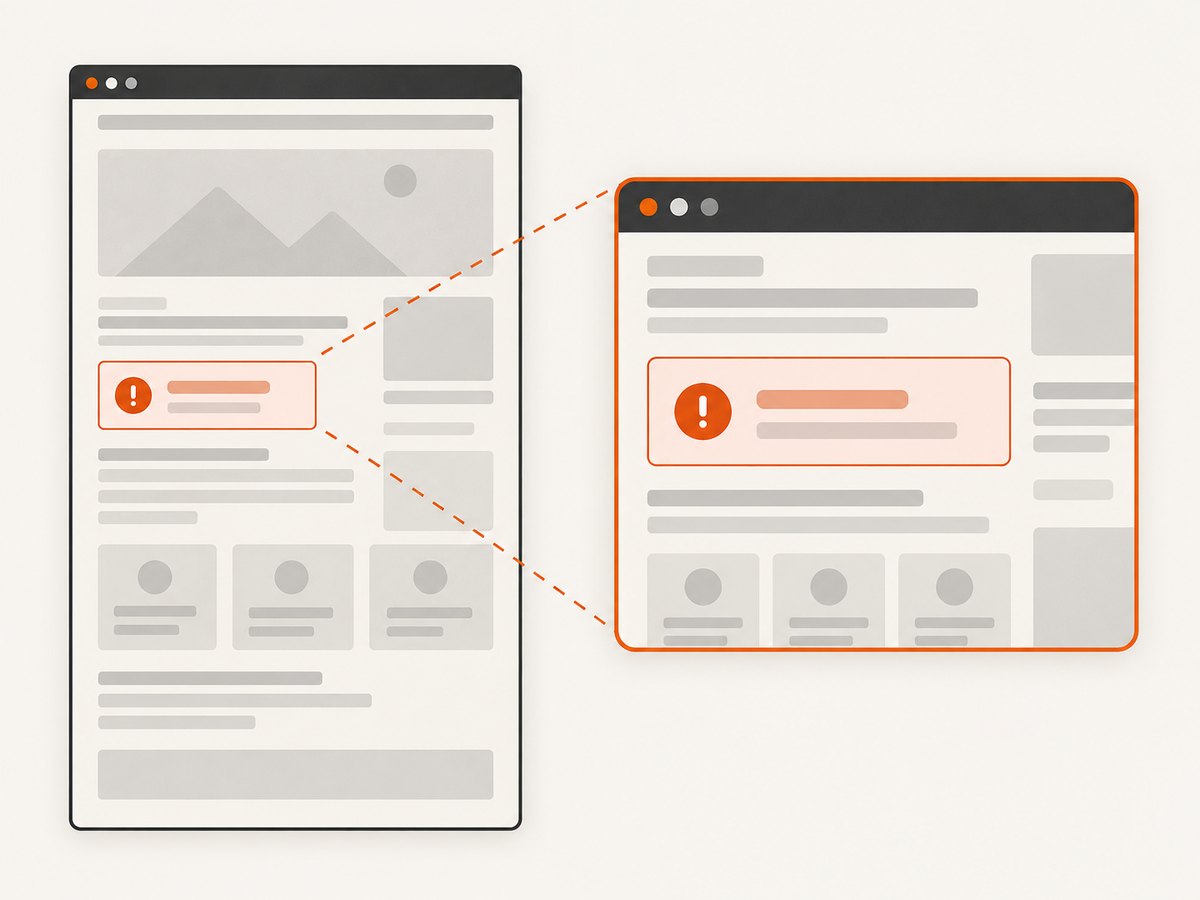
A crop can help the agent read a small error message, but cropping away all context can make it impossible to identify where the message appears. Keep the original screenshot available and use the crop as a supplemental image.
4. Send an image through a vision API
API integrations generally accept one of three representations: a publicly reachable image URL, a base64-encoded data URL, or a file ID uploaded through that provider. The exact request shape, supported formats, image count, and detail settings depend on the API and model. OpenAI documents URL, base64, and file-ID inputs in its Images and vision guide.
Image URL
{
  "type": "input_image",
  "image_url": "https://example.com/screenshot.png"
}
Use an HTTPS URL that the API can fetch. Avoid URLs that require your browser session, local-network access, or an expiring cookie unless the provider explicitly supports that setup.
Base64 data URL
data:image/png;base64,iVBORw0KGgoAAAANSUhEUgAA...Base64 is useful when the image is on the same machine as your application. It increases request size, so enforce a size limit before encoding and handle payload errors explicitly.
File identifier
Some APIs let you upload an image first and reference the resulting file ID in a later request. This is useful when several calls need the same image or when your application already has an upload pipeline. Follow the provider’s current retention and file-lifecycle rules.
5. Complete local-file examples
The following examples show the mechanics of reading an image and preparing it for an API request. Adapt the message schema to the agent provider you use.
cURL with a base64 image
IMAGE_DATA=$(base64 -w 0 screenshot.png)
curl https://api.example.com/v1/responses \
  -H 'Authorization: Bearer YOUR_API_KEY' \
  -H 'Content-Type: application/json' \
  -d "{\"input\":[{\"role\":\"user\",\"content\":[{\"type\":\"input_text\",\"text\":\"Read the error message and explain the likely cause.\"},{\"type\":\"input_image\",\"image_url\":\"data:image/png;base64,$IMAGE_DATA\"}]}]}"
On macOS, the base64 command uses different flags in some shells; verify the output does not contain line breaks before placing it in JSON.
Python
import base64
import mimetypes
import os
import requests

path = "screenshot.png"
mime = mimetypes.guess_type(path)[0] or "image/png"
with open(path, "rb") as image_file:
    encoded = base64.b64encode(image_file.read()).decode("ascii")

payload = {
    "input": [{
        "role": "user",
        "content": [
            {"type": "input_text", "text": "Read the error message and explain the likely cause."},
            {"type": "input_image", "image_url": f"data:{mime};base64,{encoded}"}
        ]
    }]
}
response = requests.post(
    "https://api.example.com/v1/responses",
    headers={"Authorization": f"Bearer {os.environ['API_KEY']}"},
    json=payload,
    timeout=90,
)
response.raise_for_status()
print(response.json())
Node.js
import { readFile } from 'node:fs/promises';

const bytes = await readFile('screenshot.png');
const base64 = bytes.toString('base64');
const payload = {
  input: [{
    role: 'user',
    content: [
      { type: 'input_text', text: 'Read the error message and explain the likely cause.' },
      { type: 'input_image', image_url: `data:image/png;base64,${base64}` }
    ]
  }]
};

const response = await fetch('https://api.example.com/v1/responses', {
  method: 'POST',
  headers: {
    Authorization: `Bearer ${process.env.API_KEY}`,
    'Content-Type': 'application/json'
  },
  body: JSON.stringify(payload)
});
if (!response.ok) throw new Error(`${response.status}: ${await response.text()}`);
console.log(await response.json());
6. Computer-use agents and screenshot loops
A computer-use agent does not normally receive a screenshot only once. Your application exposes tools such as click, type, scroll, or open URL. The model requests an action, your runtime executes it, and the runtime returns a screenshot or another tool result. OpenAI describes this execution cycle in its computer-use documentation; Anthropic documents a similar tool-result loop for screenshot and zoom actions in its computer-use tool guide.
Design the loop with explicit safeguards:
- Return the screenshot after each action that changes the visible state.
- Preserve the viewport dimensions so coordinates remain meaningful.
- Resize oversized images before returning them if the tool requires a maximum dimension.
- Stop after a bounded number of actions and report the last visible state on failure.
- Keep coordinate mapping consistent if an image is resized between capture and action.
7. Make screenshots readable
- Use lossless or high-quality output. PNG is useful for text and interface screenshots; JPEG can be smaller for photographic content.
- Keep important text large enough. Blurry, pixelated, rotated, or tiny text reduces extraction accuracy.
- Preserve context. Include the surrounding panel, navigation, or state indicator needed to interpret the target.
- Use a supplemental crop. Provide a full screenshot plus a close-up when a small label needs inspection.
- Check orientation. Rotated screenshots and unusual aspect ratios can make reading harder.
- Do not assume coordinate precision. If an agent must click a location, account for any resizing between the original screenshot and the model input.
OpenAI notes that image understanding can be limited for ambiguous images, rotated text, small text, some graphs, and precise spatial localization. Anthropic similarly advises sending images that are clear and not blurry or pixelated (Anthropic vision documentation).
8. Limits, formats, and request sizes
Limits are product- and model-specific. ChatGPT’s current FAQ lists a 20 MB limit per image and supports PNG, JPEG, and non-animated GIF. OpenAI’s API guide documents request and image limits that can vary by model and detail level. Anthropic documents JPEG, PNG, GIF, and WebP, with separate limits for its direct API, Amazon Bedrock, and Google Cloud integrations.
Do not treat one platform’s limit as universal. Before shipping, verify:
- maximum bytes per image and total request size;
- maximum pixel dimensions or long-edge limits;
- supported MIME types and animation behavior;
- maximum number of images per request;
- how resizing affects visual detail and coordinate mapping;
- which models support high-resolution or original-detail inputs.
For example, Anthropic documents a 10 MB per-image limit for its direct API and lower limits on some cloud integrations, while its high-resolution tier has model-specific pixel and token constraints. These values can change; consult the live documentation before enforcing them in code.
9. Automate website screenshots before sending them
If the source is a web page, your pipeline has two jobs: capture a stable image and provide a precise task prompt. A browser-based implementation should wait for the page state you need, load lazy images, set the intended viewport and device scale, and remove transient elements that obscure the content. For repeated captures, add retries with a bounded timeout and store the capture metadata beside the image.

Useful capture decisions include full page versus one element, light versus dark mode, a desktop versus mobile viewport, and whether to wait for a selector, a delay, or network idle. For coordinate-based agents, keep the same viewport and scale between capture and action.
10. Or skip the browser setup
ScreenshotNeo returns a website screenshot or PDF from one GET request. It accepts 63 capture options, including full-page screenshots with lazy images loaded, CSS-element capture, dark mode, device presets and custom viewports, retina scale, custom CSS and JavaScript, clicks before capture, selector hiding, selector or network-idle waits, request blocking, headers, cookies, user agents, authorization, timezone, geolocation, transparent backgrounds, resizing, caching, signed links, asynchronous jobs, bulk capture, and a usage API. Its MCP server provides take_screenshot, get_page_info, and capture_pdf tools for Claude, Cursor, and other MCP clients.
Cookie and consent banners are accepted and removed before capture, along with more than 60 known consent platforms, newsletter popups, and chat widgets; each cleanup step can be turned off. Bot checks or CAPTCHAs, blank pages, timeouts, failed loads, and cache hits are not billed. Response headers report the page verdict and whether the request was billed.
See the ScreenshotNeo API documentation for authentication and options.
cURL
curl -G "https://api.screenshotneo.com/v1/shot" -d access_key=YOUR_API_KEY --data-urlencode url=https://stripe.com -o shot.webpPython
import requests
r = requests.get("https://api.screenshotneo.com/v1/shot", params={"access_key": "YOUR_API_KEY", "url": "https://stripe.com"}, timeout=90)
r.raise_for_status()
open("shot.webp", "wb").write(r.content)
Node.js
const q = new URLSearchParams({ access_key: 'YOUR_API_KEY', url: 'https://stripe.com' });
const res = await fetch(`https://api.screenshotneo.com/v1/shot?${q}`);
if (!res.ok) throw new Error(`${res.status}: ${await res.text()}`);
ScreenshotNeo has a free plan with 1,000 screenshots per month and no card required. Paid plans start at $5 for 3,000 screenshots; yearly billing provides two months free. Create a free ScreenshotNeo account and use the returned image as the attachment or API image input for your agent.
11. Troubleshooting
| Symptom | Likely cause | Fix |
|---|---|---|
| The agent says text is unreadable | Small, compressed, or resized text | Capture at a larger viewport, use PNG, and add a close-up while retaining the full image. |
| The API rejects the image | Unsupported format, dimensions, or payload size | Convert to a documented format, check byte and pixel limits, and reduce the image before encoding. |
| The image URL cannot be fetched | Private URL, expired signature, or local address | Use a reachable HTTPS URL, a provider file ID, or a base64 data URL. |
| The agent answers the wrong question | No region, role, or desired output in the prompt | Describe the screen, identify the relevant area, and state constraints and expected output. |
| Computer-use clicks miss | Screenshot resized or viewport changed | Keep capture dimensions stable and map model coordinates back to the original image. |
| Web capture contains a popup | Transient UI appeared before capture | Wait for the page state, hide the selector, or use ScreenshotNeo’s consent and popup cleanup. |
| Page capture is blank or times out | Slow load, bot check, or script-dependent content | Increase the bounded wait, inspect the page verdict, and retry with appropriate headers or a different capture state. |
12. Performance, reliability, and cost practices
- Resize intentionally. Smaller images reduce transfer and token use, but never resize text below legible dimensions.
- Send only needed images. Use one full-context image and one focused crop when necessary.
- Cache deterministic captures. Keep the URL, viewport, device scale, and page-state parameters with the cached object.
- Use bounded retries. Retry transient network failures, but stop on authentication or unsupported-format errors.
- Record verdicts. For automated captures, store HTTP status, image size, timing, and any provider-specific page verdict.
- Control spend. Enforce per-job image and token budgets, and check the provider’s current pricing and limits before production rollout.
13. FAQ
Should I send a full screenshot or a crop?
Send the full screenshot when layout or context matters. Add a crop when a small message or control needs close inspection.
Can an AI agent read text from a screenshot?
Usually, if the text is large, sharp, upright, and not obscured. Verify critical values against the original interface.
Can I send several screenshots at once?
Yes when the product and model support multiple images. Label each image and state the comparison you want.
Is a screenshot the same as a computer-use tool result?
No. A screenshot attachment is a static input; a computer-use result is produced during an action-and-observation loop.
What is the simplest way to capture pages for an agent?
Use a screenshot API such as ScreenshotNeo, then pass the returned image URL, bytes, or file to your agent with a task-specific prompt.
When the agent can see the right pixels and has a precise task, screenshot analysis becomes repeatable: capture the needed state, preserve legibility and context, describe the goal, and enforce the limits of the platform you are calling.


