How to Attach NUnit Screenshots to Test Attachments in Azure Pipelines
Capture screenshots in NUnit, register them in test results, and publish them correctly in Azure Pipelines with troubleshooting and YAML examples.

Direct answer: capture the screenshot as a file during the NUnit test, register that file with NUnit, write NUnit 3 XML, and publish that XML with PublishTestResults@2 using testResultsFormat: NUnit. Saving a PNG somewhere in the build agent workspace is not enough: the test result must reference the file as an attachment.
Microsoft documents TestContext.AddTestAttachment() for NUnit 3.7 and later. If the Visual Studio Test task is producing the result, Microsoft also documents adding the image with TestContext.AddResultFile(fileName). The publishing task then uploads attachments when the generated NUnit XML contains the expected attachment path.
1. Understand the attachment flow
There are four separate operations. Keeping them separate makes failures easier to diagnose:
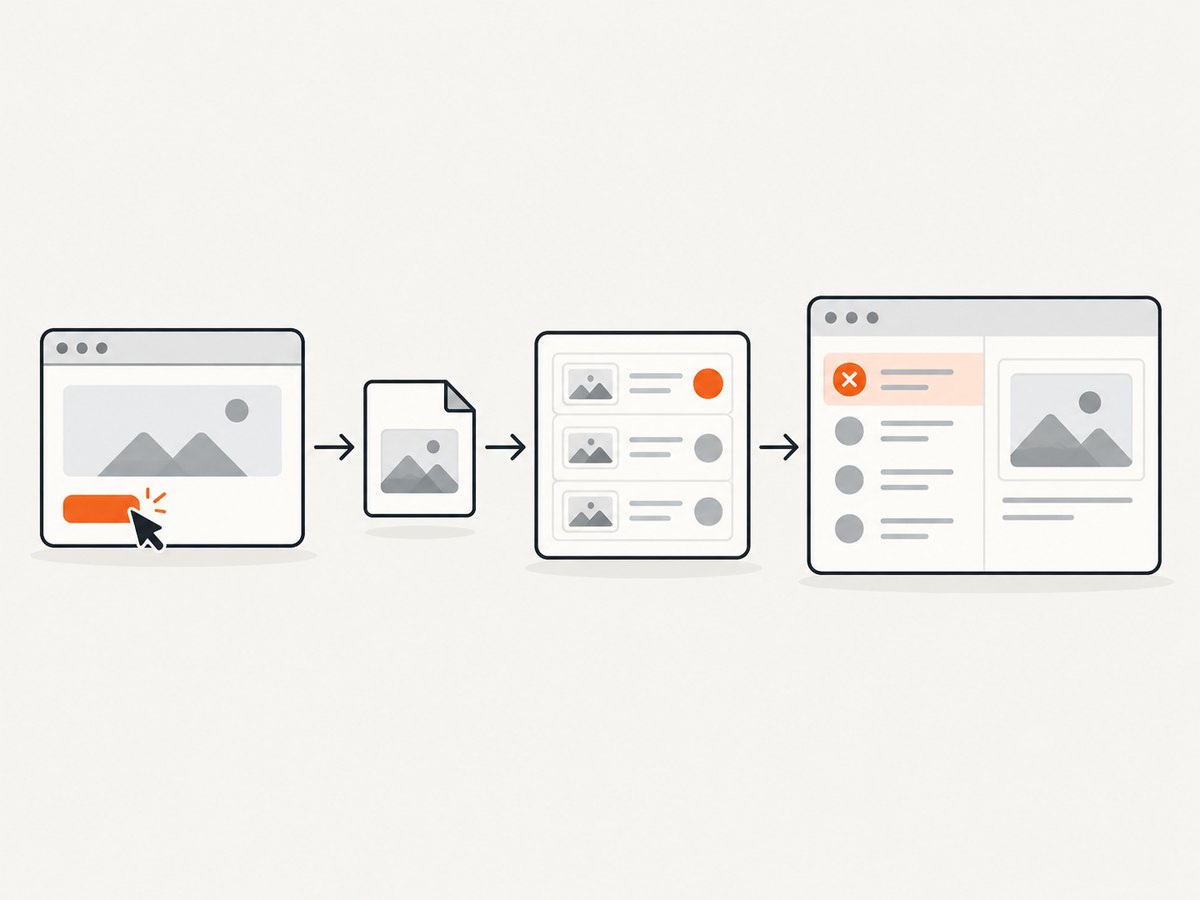
- Capture: your browser or desktop automation framework writes a PNG, JPEG or other file.
- Register: NUnit records the file against the test result.
- Emit: the test runner writes NUnit 3 XML containing the attachment path.
- Publish: Azure Pipelines reads that XML and uploads the attachment to the test run.
A test can pass while any later step fails. For example, a screenshot may exist on disk but never appear in Azure DevOps because it was not registered or because the pipeline interpreted NUnit XML as JUnit.
At the XML level, Azure Pipelines supports NUnit 3 attachment paths at both scopes:
/test-suite/attachments/attachment/filePathfor a test-run attachment./test-suite[@type='Assembly']/test-case/attachments/attachment/filePathfor an attachment belonging to an individual test result.
A failure screenshot normally belongs to the test-case attachment collection so that it is visible with the failed test.
2. Capture and register a screenshot in NUnit
The capture API depends on your UI framework. Selenium, Playwright, Appium and desktop automation libraries each expose different screenshot methods. The important contract for Azure Pipelines is a readable file path that exists before the test result is finalized.
Use NUnit 3.7 or newer
Install or update NUnit to a version that provides TestContext.AddTestAttachment(). Microsoft’s UI-testing guidance explicitly says to use this method when attaching screenshots with NUnit 3.7 or higher: Configure for UI testing – Azure Pipelines.
using System;
using System.IO;
using NUnit.Framework;

[TestFixture]
public class CheckoutTests
{
    [Test]
    public void Checkout_page_loads()
    {
        // Replace this with your browser or desktop driver's screenshot call.
        var screenshotPath = Path.Combine(
            TestContext.CurrentContext.WorkDirectory,
            "checkout.png");

        CaptureScreenshotWithYourDriver(screenshotPath);

        // NUnit 3.7+ registers the file in the test result.
        TestContext.AddTestAttachment(screenshotPath, "Checkout page");

        Assert.That(File.Exists(screenshotPath), Is.True);
    }

    private static void CaptureScreenshotWithYourDriver(string path)
    {
        // Example placeholder. Your framework must write the file at path.
        // driver.TakeScreenshot().SaveAsFile(path);
        File.WriteAllBytes(path, Array.Empty<byte>());
    }
}
The placeholder capture method above is intentionally framework-neutral. Replace it with the method from your driver and keep the registration call after the file has been written. Do not register a path before the capture completes.
Register a failure screenshot
For screenshots taken only when a test fails, use a teardown hook. Ensure the path is unique when tests run in parallel; otherwise concurrent tests can overwrite one another.
using System;
using System.IO;
using NUnit.Framework;

[SetUpFixture]
public class FailureCaptureHooks
{
    [TearDown]
    public void CaptureAfterTest()
    {
        var outcome = TestContext.CurrentContext.Result.Outcome.Status;
        if (outcome != NUnit.Framework.Interfaces.TestStatus.Failed)
            return;

        var name = Sanitize(TestContext.CurrentContext.Test.Name);
        var file = $"{name}-{Guid.NewGuid():N}.png";
        var path = Path.Combine(TestContext.CurrentContext.WorkDirectory, file);

        CaptureScreenshotWithYourDriver(path);
        if (File.Exists(path))
            TestContext.AddTestAttachment(path, "Failure screenshot");
    }

    private static string Sanitize(string value)
    {
        foreach (var c in Path.GetInvalidFileNameChars())
            value = value.Replace(c, '_');
        return value;
    }

    private static void CaptureScreenshotWithYourDriver(string path)
    {
        // Call the active browser/desktop driver's screenshot method here.
    }
}
If your runner uses the Visual Studio Test task and its result-file model, Microsoft documents TestContext.AddResultFile(fileName). That is a separate registration route from NUnit XML attachments, so confirm which task actually runs your tests before choosing the API.
3. Produce NUnit 3 XML in the agent workspace
Configure the NUnit console runner, dotnet test adapter or your build tool to emit a known XML path. The exact command depends on your project, but the pipeline must later match the file that is actually created.
dotnet test tests/UiTests/UiTests.csproj \
  --logger "nunit;LogFilePath=$(Build.SourcesDirectory)/TestResults/TestResult.xml"
Some adapters use a different logger or output option. Inspect the agent directory after the test step and confirm that the XML is NUnit 3 output, not TRX, JUnit or NUnit 2. If the runner writes one XML file per assembly, use a wildcard in the publish task.
4. Publish the results with PublishTestResults@2
The task defaults to JUnit. Always set the format explicitly for NUnit and set a pattern that matches your real files.
- task: PublishTestResults@2
  displayName: Publish NUnit results
  condition: succeededOrFailed()
  inputs:
    testResultsFormat: NUnit
    testResultsFiles: '$(Build.SourcesDirectory)/TestResults/TestResult.xml'
    publishRunAttachments: true
    failTaskOnFailedTests: false
publishRunAttachments defaults to true, but setting it explicitly documents the intent. The task reference supports recursive patterns such as **/TEST-*.xml; use the pattern that matches your runner’s output. If your runner produces TRX, use a .trx pattern and the VSTest format instead.
Wildcard example for parallel assemblies
- task: PublishTestResults@2
  inputs:
    testResultsFormat: NUnit
    testResultsFiles: '**/TestResults/*.xml'
    searchFolder: '$(Build.SourcesDirectory)'
    mergeTestResults: true
    publishRunAttachments: true
Use mergeTestResults only when combining the files produces the report structure you want. A broad wildcard can accidentally publish stale XML from a previous step, so keep test output in a clean directory.
5. Verify the XML before publishing
Before investigating Azure DevOps, inspect the generated XML on the agent. Search for the screenshot filename and confirm it appears under the expected attachments element.
# Linux agent
rg -n "attachments|checkout|png|jpg" "$(Build.SourcesDirectory)/TestResults"

# Show files that the XML paths should resolve to
find "$(Build.SourcesDirectory)" -type f \( -name '*.png' -o -name '*.jpg' \) -print
Check all of these conditions:
- The image exists and is readable by the publishing task.
- The XML contains the exact path or a path resolvable from the agent workspace.
- The screenshot is under the test-case attachment collection when it should appear with one test.
- The result format is NUnit 3.
- The YAML pattern selects the XML produced by this run.
6. Complete Azure Pipelines example
This example installs dependencies, runs UI tests even when tests fail, and publishes the resulting NUnit XML.
trigger:
- main

pool:
  vmImage: ubuntu-latest

steps:
- task: UseDotNet@2
  inputs:
    packageType: sdk
    version: '8.x'

- script: dotnet restore
  displayName: Restore packages

- script: |
    mkdir -p "$(Build.SourcesDirectory)/TestResults"
    dotnet test tests/UiTests/UiTests.csproj \
      --logger "nunit;LogFilePath=$(Build.SourcesDirectory)/TestResults/TestResult.xml"
  displayName: Run NUnit UI tests
  continueOnError: true

- task: PublishTestResults@2
  condition: succeededOrFailed()
  inputs:
    testResultsFormat: NUnit
    testResultsFiles: '$(Build.SourcesDirectory)/TestResults/TestResult.xml'
    publishRunAttachments: true
    failTaskOnFailedTests: true
Set continueOnError according to your quality gate. The important detail is that the publish step runs after a failing test, otherwise the job can stop before screenshots are uploaded. condition: succeededOrFailed() allows the publishing step to run for either outcome.
7. Troubleshooting missing attachments
No screenshot appears in the test result
Cause: the file was saved but never registered, or the test runner did not emit the registration in its XML.
Fix: verify the capture path, call TestContext.AddTestAttachment() after the file is closed, and search the XML for the filename. A workspace file alone is not a test-result attachment.
The publish task says no files were found
Cause: the testResultsFiles pattern does not match the runner’s output, or searchFolder points at the wrong directory.
Fix: list the result directory in a script step, copy the exact path into the YAML, and use a recursive wildcard only when files are intentionally distributed across directories.
Results are interpreted as JUnit
Cause: PublishTestResults@2 defaults to JUnit.
Fix: add testResultsFormat: NUnit. Do not rely on the filename extension to infer the format.
TestContext.AddTestAttachment does not compile
Cause: the project uses an NUnit version older than 3.7, or references a conflicting NUnit package.
Fix: update to NUnit 3.7 or later as required by Microsoft’s documented method, then restore packages and rebuild. If an older runner cannot be upgraded, use the attachment mechanism supported by that runner and validate the emitted XML.
The image is attached to the run but not to the failed test
Cause: the XML places the file under the test-suite attachment collection instead of the test-case collection.
Fix: inspect the XML hierarchy. A test-specific image should be emitted under test-case/attachments/attachment/filePath.
Visual Studio Test task does not show the image
Cause: the test is being run through the Visual Studio Test task, which uses result files in this scenario.
Fix: follow Microsoft’s guidance to add the screenshot with TestContext.AddResultFile(fileName), then publish the task’s supported result format. Do not assume NUnit XML attachment registration and TRX result-file registration are interchangeable.
JUnit or xUnit attachments are unreliable
The older Microsoft UI-testing guide recommends artifacts or REST APIs for formats whose attachment route is not supported there. The current task reference documents JUnit attachment support added in Azure DevOps sprint 229, but says it is unavailable in Azure DevOps Server 2022.1 and lower. The reference does not list xUnit in its attachment-support section. Check your Azure DevOps product and version before depending on these formats; use build artifacts or REST APIs when you need a separate-file fallback.
8. Artifacts versus test-result attachments
Use a test-result attachment when a developer should open the image directly from a test’s details. Use a build artifact when you need to preserve a directory of screenshots, videos, logs or files that the result format cannot represent.
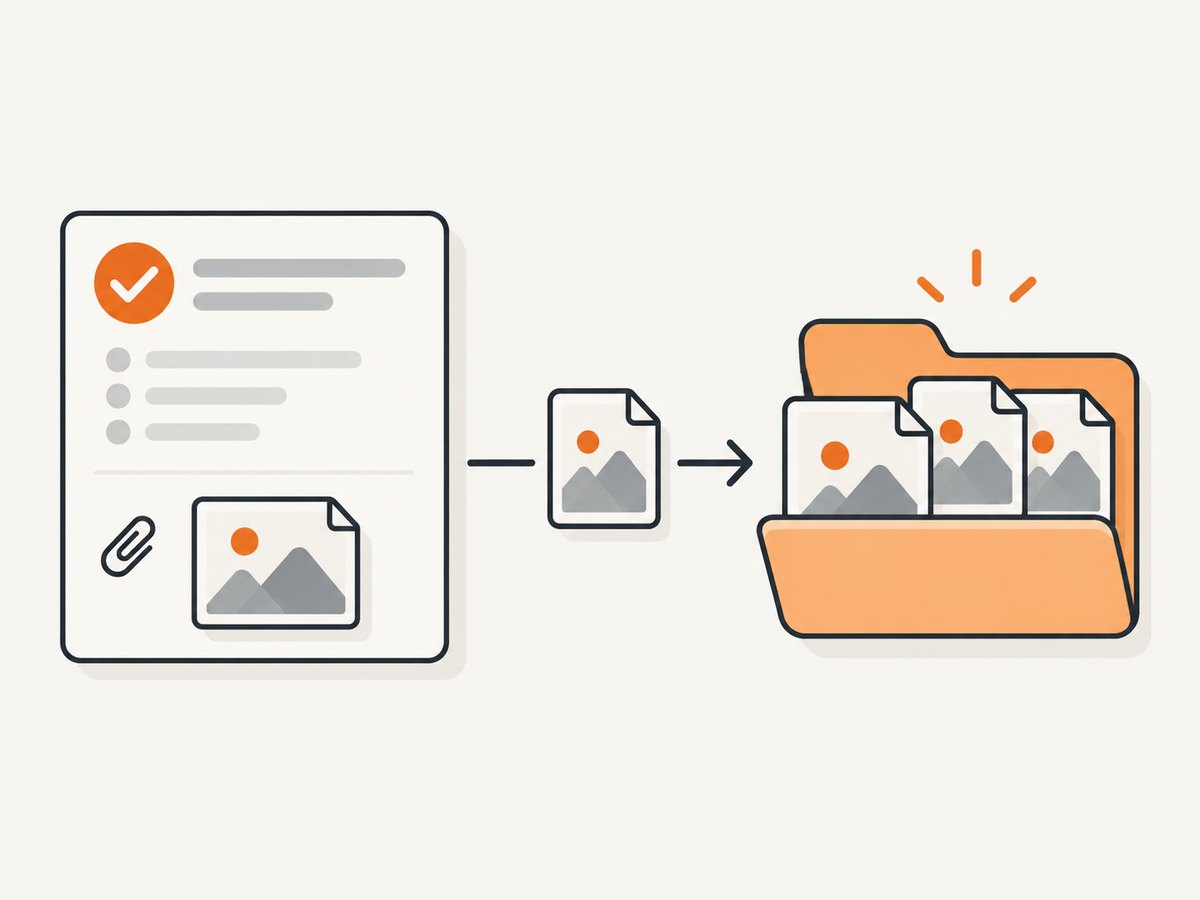
| Requirement | Recommended route |
|---|---|
| One failure image beside one NUnit test | NUnit test-case attachment |
| Several files for a whole run | Test-run attachments or a build artifact |
| Unsupported result format | Build artifact or Azure DevOps REST API |
| Visual Studio Test task output | Register a result file as documented for that task |
Microsoft’s guidance points to build artifacts or REST APIs when a screenshot cannot be carried through the supported test-attachment path. The task documentation also states a 2GB total-attachments figure for public projects; do not generalize that limit to every project type or Azure DevOps deployment without checking the current documentation.
9. Performance, reliability and cost considerations
- Capture only when useful: taking a screenshot after every successful step increases I/O and storage. Failure-only capture usually gives the best signal-to-cost ratio.
- Use unique names: include the test name, run identifier or a GUID so parallel workers cannot overwrite files.
- Keep paths local until publishing: write to the agent workspace, register the absolute or resolvable path, and publish before cleanup.
- Clean result directories: stale XML can cause duplicate tests or references to files from an earlier run.
- Preserve evidence on failures: run the publish task with
succeededOrFailed()so a failing test does not prevent upload. - Control image size: resize or compress screenshots in the capture framework when high-resolution images are unnecessary, while retaining enough detail to diagnose the failure.
- Validate browser readiness: wait for the page or target element before capture; otherwise an attachment can exist but show a loading or blank state.
10. Or skip the browser setup
If the goal is to capture a website for a test report rather than exercise your own browser driver, ScreenshotNeo can return the image from one HTTP request. Its API accepts options for full-page capture, element selectors, device and viewport settings, dark mode, custom CSS and JavaScript, waits, headers, cookies, user agents, request blocking, caching and more. See the ScreenshotNeo API documentation for parameter names and response details.
curl -G "https://api.screenshotneo.com/v1/shot" -d access_key=YOUR_API_KEY --data-urlencode url=https://stripe.com -o shot.webpimport requests
r = requests.get(
"https://api.screenshotneo.com/v1/shot",
params={"access_key": "YOUR_API_KEY", "url": "https://stripe.com"},
timeout=90,
)
r.raise_for_status()
open("shot.webp", "wb").write(r.content)const q = new URLSearchParams({ access_key: 'YOUR_API_KEY', url: 'https://stripe.com' });
const res = await fetch(`https://api.screenshotneo.com/v1/shot?${q}`);
if (!res.ok) throw new Error(`Screenshot failed: ${res.status}`);
const fs = await import('node:fs/promises');
await fs.writeFile('shot.webp', Buffer.from(await res.arrayBuffer()));Save the returned file in the same workspace used by the NUnit test, then register that path with TestContext.AddTestAttachment(). ScreenshotNeo removes cookie and consent banners, newsletter popups and chat widgets before capture. Bot checks, blank pages, timeouts, failed loads and cache hits are not billed, and each response identifies the page verdict and billing status with X-Page-Verdict and X-Billed headers. Its MCP server provides take_screenshot, get_page_info and capture_pdf tools for Claude, Cursor and other MCP clients. The free plan includes 1,000 screenshots per month with no card; paid plans start at $5 for 3,000 screenshots. Create a free ScreenshotNeo account.
11. FAQ
Does NUnit automatically upload screenshots?
No. NUnit must register the file, the XML must contain the attachment path, and PublishTestResults@2 must publish that XML with the NUnit format selected.
Can I attach a screenshot after the assertion fails?
Yes. A teardown hook can capture and register a failure image, provided the driver is still usable and the file is written before the result is finalized.
Which NUnit version provides the documented API?
Microsoft documents TestContext.AddTestAttachment() for NUnit 3.7 and later.
Should screenshots be artifacts or test attachments?
Use test attachments for images tied to a test result. Use artifacts for collections of files or formats that cannot carry supported result attachments.
What if my pipeline runs on Azure DevOps Server?
Check the task reference for your server version. In particular, the current documentation says JUnit attachment support is unavailable on Azure DevOps Server 2022.1 and lower; NUnit 3 XML remains the route described in this guide.
12. Final checklist
- Screenshot capture writes a non-empty file.
- NUnit is 3.7 or newer when using
AddTestAttachment. - Each path is unique and readable by the agent.
- NUnit 3 XML contains the attachment path at the intended scope.
PublishTestResults@2specifiestestResultsFormat: NUnit.testResultsFilesmatches the actual XML location.- The publish step runs after failures.
- You have an artifact or REST API fallback for unsupported formats.
With those checks in place, a failed NUnit UI test can expose its screenshot directly in the Azure Pipelines test result instead of leaving evidence hidden on a build agent.


