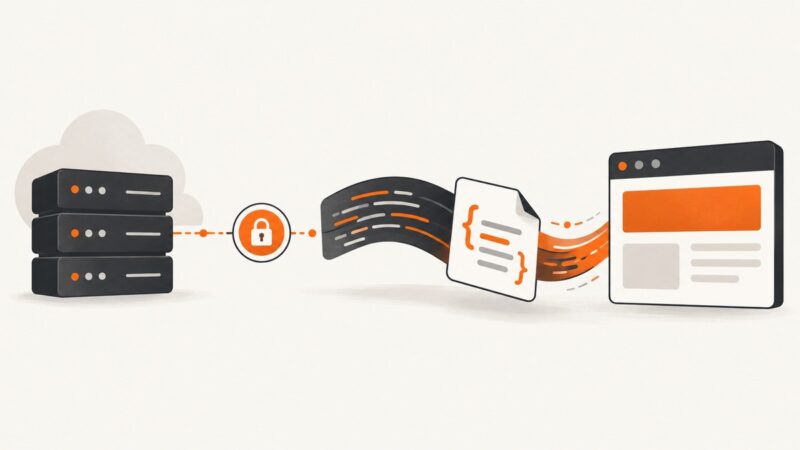
How to Take Website Screenshots Automatically in Bubble
Capture Bubble pages, elements, and external URLs automatically with plugins, workflows, or an API, then store and process the resulting image.

Short answer: In Bubble, use a screenshot plugin when you need to capture a page, group, or element inside your app. Use a URL-focused plugin when the target is an external website. Configure the action in a workflow, decide whether the result should be downloaded, saved to Bubble storage, or written to a database record, and test the exact page state and viewport you need. For more control over arbitrary URLs, rendering options, retries, and automation outside Bubble, call a browser screenshot API from Bubble’s API Connector.
1. Decide what you are capturing
The correct implementation depends on the capture target. A Bubble page, a group, and an element are rendered in the context of your app. An arbitrary URL may be a separate website with different authentication, loading behavior, and browser requirements.
| Target | Typical route | Output and workflow considerations |
|---|---|---|
| Bubble page | PDF & Screenshot Pro · BEP or a similar page-capable plugin | Capture a complete app page, download the file, save it to Bubble storage, or continue a workflow when the file is ready. |
| Group or element | PDF & Screenshot Pro · BEP or Advanced Screenshot Element | Useful for invoices, certificates, cards, dashboards, and other components rendered in your app. |
| Visible page or full page | Advanced Screenshot Element | Choose whether the viewport only or the complete scrollable document is required. |
| External URL | Crazy Screenshot by URL or an external browser API | Pass the URL, then handle the returned PNG URL or binary file in a workflow. |
Before installing anything, answer four questions:
- Is the target inside the current Bubble app or a separate URL?
- Do you need the visible viewport, one element, or the entire page?
- Should the result be a PNG, JPG, PDF, a Bubble file, or a URL?
- What should happen after capture: download, database record, email, or another workflow?
2. Capture a Bubble page, group, or element with a plugin
Prepare the target
Some plugins identify an element by its HTML ID. In Bubble, open Settings → General and enable ID attributes if the plugin instructions require them. Give the target group or element a stable ID such as invoice-card. Avoid changing that ID between deployments if workflows or saved records depend on it.

Install and configure the action
- Open the Bubble plugin marketplace and install a screenshot plugin that supports your target scope. PDF & Screenshot Pro · BEP lists page, group, and element screenshots and describes downloading or saving files to Bubble storage.
- Place the plugin element on the page if its documentation requires one. Keep it on the page that contains the target.
- Create a workflow event, such as a button click, a custom event, or a scheduled backend workflow.
- Add the plugin’s screenshot action and select the page, group, or element. Supply the target ID when requested.
- Set dimensions, format, and any wait or delay options offered by the plugin. If the target loads data asynchronously, trigger the capture only after the data is available.
- Handle the completion event. Save the returned file to a Bubble file field, display it in an image element, or send it to the next workflow action.
For an invoice workflow, a typical sequence is: create the invoice data, display a read-only invoice group, wait until customer and line-item data are visible, capture the group, save the file URL on the invoice record, and email the URL or file.
Make the workflow repeatable
- Use a custom state such as
capture_statuswith valuesidle,running,complete, andfailed. - Disable the capture button while a job is running so users do not create duplicate files.
- Store the target record’s unique ID with the file URL. This prevents a late completion event from attaching an image to the wrong record.
- Set a privacy rule that allows only the intended users to view generated files.
- Delete or replace old files when records are regenerated so storage does not grow without bound.
3. Capture an external website URL
A URL plugin is a different tool from an in-app element plugin. Crazy Screenshot by URL is listed as an action that accepts a URL and returns a PNG file URL. Its listing says callback functionality requires a paid plan and is unavailable in demo mode, so confirm the current plan before designing a callback-driven workflow.
- Install the URL screenshot plugin and add its action to a workflow.
- Pass a complete absolute URL, including
https://. Store the URL in a field or input rather than concatenating unchecked user input into other parameters. - Choose when the action runs. A backend workflow is usually better for batch jobs because the user does not need to keep a browser tab open.
- Read the returned image URL or file value and save it to a Bubble file field, display it, or forward it to another service.
- Log the source URL, request time, status, and resulting file URL so failed captures can be retried.
External pages may require authentication, wait for client-side rendering, or reject automated browsers. A plugin may expose only a subset of those controls. If you need custom headers, cookies, user-agent selection, resource blocking, a specific device, or full-page lazy-image loading, use an API route instead.
4. Call a screenshot API from Bubble’s API Connector
Bubble’s API Connector can call an external browser-rendering service. This gives you an explicit request and response contract, but you must configure authentication, response handling, timeouts, and storage yourself.
Configure the API Connector
- Install Bubble’s API Connector and create a new API.
- Add a GET call. Use the provider’s documented endpoint and parameters.
- Keep the API key private. Put it in a private header or parameter setting and mark it as sensitive where Bubble provides that option.
- Initialize the call with a known public URL. Inspect the response and set the return type to file, image, JSON, or text according to the provider.
- Expose only the inputs your workflow needs, such as URL, width, height, format, and full-page mode.
- Run the call from a backend workflow for scheduled or bulk captures. Save the returned binary or URL to a Bubble file field.
If you use ScreenshotNeo’s API documentation, the endpoint is a GET request to https://api.screenshotneo.com/v1/shot. The simplest Bubble API Connector setup passes access_key and url as parameters and treats the response as an image file.
5. Complete runnable request examples
The following calls capture Stripe’s home page. Replace the URL and API key with your values. See the ScreenshotNeo docs for the complete option list and response behavior.
cURL
curl -G "https://api.screenshotneo.com/v1/shot" -d access_key=YOUR_API_KEY --data-urlencode url=https://stripe.com -o shot.webpPython
import requests

r = requests.get(
    "https://api.screenshotneo.com/v1/shot",
    params={"access_key": "YOUR_API_KEY", "url": "https://stripe.com"},
    timeout=90,
)
r.raise_for_status()
open("shot.webp", "wb").write(r.content)
Node.js
const q = new URLSearchParams({ access_key: 'YOUR_API_KEY', url: 'https://stripe.com' });
const res = await fetch(`https://api.screenshotneo.com/v1/shot?${q}`);
if (!res.ok) throw new Error(`Screenshot failed: ${res.status}`);
const data = Buffer.from(await res.arrayBuffer());
await import('node:fs/promises').then(fs => fs.writeFile('shot.webp', data));
In Bubble, the equivalent request is configured in the API Connector rather than written as JavaScript. Bind the URL input to the call, run it as an action, and save the resulting file in the workflow.
6. ScreenshotNeo options that matter in Bubble
ScreenshotNeo supports full-page capture with lazy images loaded, CSS-selector element capture, dark mode, 12 device presets and custom viewports, retina scale, PDF paper sizes and margins, custom CSS and JavaScript, clicks before capture, selector or network-idle waits, ad and tracker blocking, custom headers and cookies, user agents, Authorization, timezone, geolocation, transparent backgrounds, image resizing, configurable cache TTL, signed links, asynchronous jobs with signed webhooks, bulk capture of up to 100 URLs per call, a usage API, and an OpenAPI specification. Existing parameter names used by other screenshot APIs also work, which can simplify migration.
For Bubble, the most useful combinations are:
- Invoice or card: capture one selector, set a fixed viewport, apply custom CSS, and save the resulting file.
- Marketing page: enable full-page capture, wait for network idle, and use a desktop device preset.
- Mobile QA: choose a device preset, set dark mode when needed, and store the viewport metadata with the image.
- Private page: pass custom cookies or Authorization headers. Keep those values in backend workflows and never expose them in a client-side element.
- Large batch: submit bulk capture or asynchronous jobs, then use signed webhooks to update Bubble records as each result completes.
7. “Clean” screenshots and billing behavior
ScreenshotNeo accepts cookie and consent banners like a visitor and removes more than 60 known consent platforms, newsletter popups, and chat widgets before capture. Each cleanup step can be turned off. Bot checks or CAPTCHAs, blank pages, timeouts, failed loads, and cache hits are not billed; the response identifies the result with X-Page-Verdict and X-Billed headers. This is useful when a Bubble workflow should distinguish a usable image from a page that needs review.

8. Troubleshooting checklist
| Symptom | Likely cause | Fix |
|---|---|---|
| Blank or incomplete image | Capture ran before dynamic data rendered. | Trigger after data is visible; add a selector wait, delay, or network-idle wait where supported. |
| Element cannot be found | Missing or changing HTML ID. | Enable ID attributes, assign a stable ID, and confirm the element is rendered in the current responsive state. |
| Only the viewport is captured | Viewport mode is enabled. | Select full-page mode or use a page-capable plugin. |
| External URL returns an error | Invalid URL, blocked bot, authentication requirement, or timeout. | Test the URL directly, provide required headers or cookies, increase the wait, and inspect the provider’s status and verdict. |
| Callback never runs | The plugin callback is paid-plan-only or demo mode does not support it. | Verify the current marketplace plan or use a provider with webhooks. |
| File URL works briefly, then fails | Temporary URL or storage privacy rule. | Copy the result into Bubble storage and apply the intended privacy rules. |
| Duplicate records or files | Users clicked repeatedly or a webhook was retried. | Use an idempotency key based on the source record and capture version, and disable the button while running. |
| API key appears in page source | Call was made from the browser with a visible key. | Move the call to a backend workflow and keep credentials private. |
9. Performance, reliability, and cost planning
Rendering time is affected by page size, JavaScript, fonts, third-party requests, viewport dimensions, and whether the page must scroll to load lazy images. Use a selector capture for small components, block ads and trackers when they are irrelevant, and cache stable URLs with a deliberate TTL. For many URLs, queue asynchronous jobs or use bulk capture instead of making hundreds of browser requests in one user-facing workflow.
Make retries explicit. Record the original URL, options, attempt count, verdict, billed status, and resulting file. Retry transient timeouts with backoff, but do not retry a deterministic CAPTCHA or invalid URL indefinitely. For Bubble UI actions, show a pending state and provide a retry action; for backend workflows, schedule a later retry and alert only after the configured limit.
Plugin pricing, quotas, browser support, and compatibility can change, so confirm the marketplace listing before committing to a plan. ScreenshotNeo’s current plans are Free with 1,000 shots per month and no card, Starter at $5 for 3,000, Growth at $15 for 15,000, Pro at $39 for 60,000, Scale at $99 for 250,000, and Business at $249 for 1,000,000. Yearly billing gives two months free, and every feature is available on every plan.
10. Or skip the browser setup
Use ScreenshotNeo when you want Bubble to make one authenticated request instead of maintaining browser-capture setup:
curl -G "https://api.screenshotneo.com/v1/shot" -d access_key=YOUR_API_KEY --data-urlencode url=https://stripe.com -o shot.webpCookie banners, newsletter popups, and chat widgets are removed before the shot. Bot checks, blank pages, timeouts, failed loads, and cache hits are never billed, and response headers identify the page verdict and billing result. An MCP server provides take_screenshot, get_page_info, and capture_pdf tools for Claude, Cursor, and other MCP clients. You get 1,000 screenshots a month free with no card; paid plans start at $5 for 3,000 shots.
Create a free ScreenshotNeo account and connect the API call to your Bubble workflow.
11. FAQ
Can I capture a Bubble reusable element?
Yes, if the selected plugin supports element or group capture. Give the rendered element a stable ID and capture it after its data is loaded.
Can Bubble generate an SVG screenshot?
The researched listings describe PNG and JPG output, and one URL plugin returns a PNG file URL. Do not assume SVG output unless the selected provider explicitly documents it.
Should the capture run in the browser or backend?
Use the browser for an immediate user download. Use a backend workflow for scheduled jobs, sensitive credentials, retries, and batch processing.
How do I capture a page that requires login?
Use a plugin or API that supports the required session. For an API, pass documented cookies or Authorization headers from a private backend workflow and verify that the resulting image does not expose private data.
How do I choose between a plugin and an API?
Choose a plugin for a quick in-app page or element workflow. Choose an API when the target is an arbitrary URL or you need repeatable controls for waiting, headers, devices, blocking, caching, webhooks, and bulk jobs.