How to Automatically Crop Images with Smart Cropping
Learn how smart cropping chooses focal points, fits any aspect ratio, handles faces and objects, and ships reliable image variants.
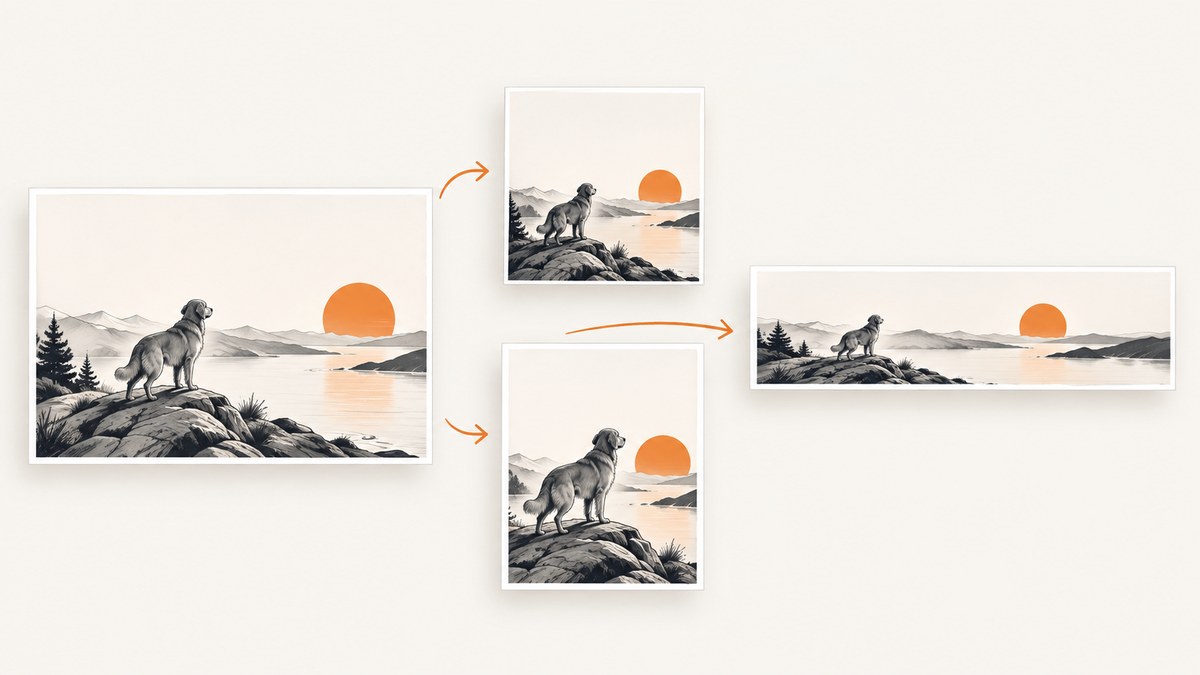
Automatic cropping creates multiple image shapes from one source while keeping the important content in frame. The reliable process is: define the destination dimensions, choose how the focal area is identified, select a crop mode, generate the variant, and inspect important outputs. Smart cropping can detect faces, objects, or visually salient regions, but it cannot know every editorial requirement. For product details, text, or a specific composition, provide a focal point or adjust the crop manually.
What smart cropping actually does
Resizing and cropping solve different problems. Resizing changes an image’s dimensions. Cropping removes or reframes part of the source so it can fit a target width, height, or aspect ratio. If you only set dimensions, a service may scale the whole image and produce the wrong composition. A crop mode and a focal rule are separate decisions. Cloudinary documents this distinction in its resizing and cropping guide (documentation).
A smart-crop request normally contains four pieces:
- Target geometry: exact width and height, or an aspect ratio such as 1:1, 4:5, 16:9, or 9:16.
- Focal policy: automatic visual importance, faces, a named object, a supplied coordinate, or a region.
- Crop mode: how aggressively the source is framed and whether padding is allowed.
- Output format and size: for example, WebP at 800 × 450 pixels.
Cloudinary calls the focal policy gravity. Center gravity is the default, but a subject may sit near an edge. Its automatic gravity (g_auto) uses AI to identify visually important areas and keep them in frame; documented options also include faces, object positions, compass positions, and custom coordinates (automatic gravity). Adobe uses similar ideas in Smart Crop and its AutoCrop API, including smart, priority-object, and full-subject modes (Smart Crop, AutoCrop API).
A repeatable smart-cropping workflow
1. Start with every destination shape
Write down the placements before choosing a crop. A profile avatar, a card thumbnail, a hero banner, and a mobile story all need different compositions. Record the required pixel dimensions and whether the result must contain the entire subject.
| Placement | Typical geometry | Review first |
|---|---|---|
| Avatar | 1:1 square | Face and headroom |
| Card image | 4:3 or 3:2 | Subject and readable context |
| Hero banner | 16:9 or wider | Subject placement and empty space for overlay text |
| Mobile story | 9:16 | Full person or product silhouette |
2. State what “important” means
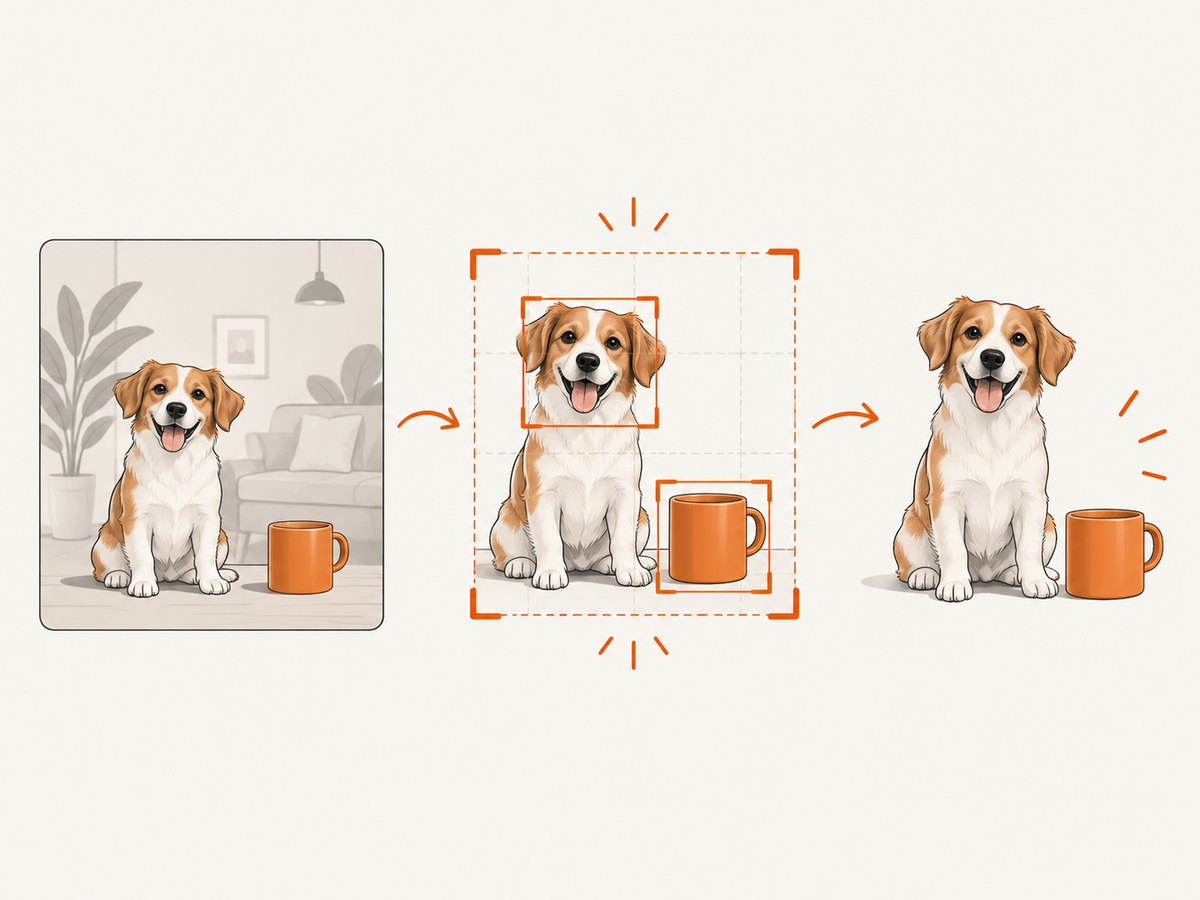
Automatic systems interpret visual salience. That is useful when the goal is “keep the main person visible,” but it is not a guarantee that the crop matches an editor’s intent. Decide whether the crop should preserve one face, all faces, a product, a logo, a known region, or the entire subject. If a required object is not visually dominant, use an explicit focal region or a priority-object mode.
3. Pick a crop mode
Cloudinary documents three useful modes:
c_autochooses a crop using the requested dimensions and gravity.c_thumbis intended for thumbnails and requires gravity.c_auto_padperforms automatic cropping and adds padding when retaining more of the source is preferable. Cloudinary notes that this mode is not supported for animated images.
The auto mode is described as less aggressive than thumb and more focused than a basic fill operation. Treat that as a behavior description, not a promise that every result is aesthetically correct (crop modes).
4. Add focal guidance
Try automatic gravity first for general editorial images. Use face-related gravity when faces must remain visible, and custom coordinates or regions when consistency matters. Cloudinary’s custom-focus documentation explains that defined coordinates or regions can override automatic gravity (custom focus areas).
5. Generate variants and inspect them
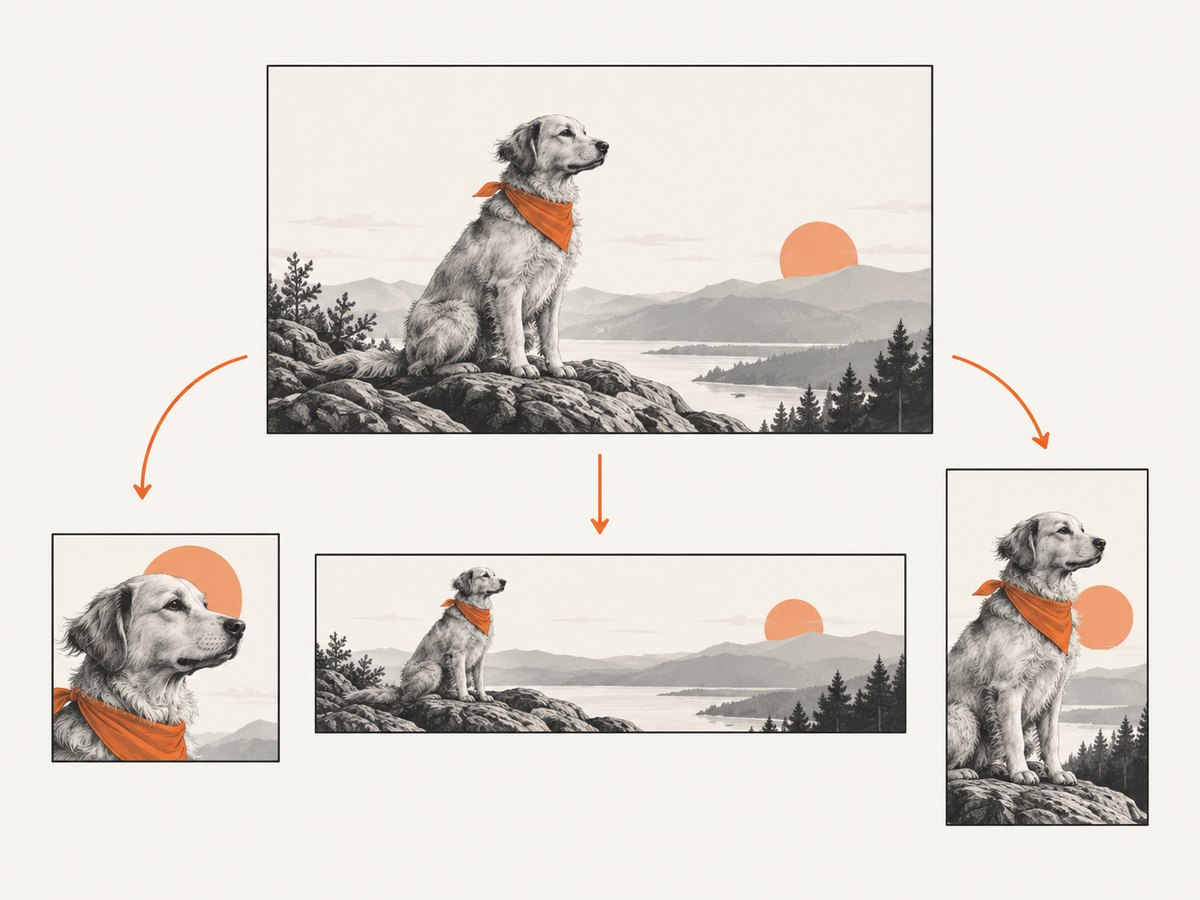
Review every target shape at its actual display size. Check faces, hands, product edges, text inside the image, and scene context. A crop that looks good at 16:9 can cut off a face at 9:16. Adobe’s Smart Crop workflow supports responsive breakpoints and manual alignment or crop-window adjustment, which is useful when an automatic result needs correction.
Cloudinary URL examples
Cloudinary transformations are commonly expressed as URL components. Replace the delivery URL and public identifier with your own asset. The examples below show the transformation decisions; your account’s delivery configuration determines the complete URL.
https://res.cloudinary.com/ACCOUNT/image/upload/
c_fill,g_auto,w_1200,h_675/
photos/mountain.jpg
This requests a 16:9 crop using automatic gravity. A thumbnail variant can use thumbnail mode:
https://res.cloudinary.com/ACCOUNT/image/upload/
c_thumb,g_auto,w_320,h_320/
photos/mountain.jpg
When preserving more of the source is more important than filling every pixel, use automatic padding:
https://res.cloudinary.com/ACCOUNT/image/upload/
c_auto_pad,g_auto,w_800,h_800/
photos/mountain.jpg
For a known focal coordinate or region, supply custom focus data according to the coordinate format documented for your Cloudinary transformation setup. Keep that metadata with the asset so later variants use the same editorial decision.
Runnable Python variant generator
This small script builds Cloudinary transformation URLs for several placements. It does not download or re-encode the source; the image service performs the crop and delivers the requested dimensions.
from urllib.parse import quote

CLOUD_NAME = "ACCOUNT"
PUBLIC_ID = "photos/mountain.jpg"
BASE = f"https://res.cloudinary.com/{CLOUD_NAME}/image/upload"

variants = {
    "avatar": "c_thumb,g_auto,w_320,h_320",
    "card": "c_auto,g_auto,w_800,h_600",
    "hero": "c_auto,g_auto,w_1600,h_900",
    "story": "c_auto,g_auto,w_1080,h_1920",
}

for name, transform in variants.items():
    # PUBLIC_ID may contain folders; quote each path segment only if needed
    url = f"{BASE}/{transform}/{PUBLIC_ID}"
    print(f"{name}: {url}")
If your source is private, use the authenticated delivery or signed URL mechanism provided by your image platform. Do not put API secrets in browser-visible code.
Using Adobe AutoCrop in an application
Adobe Firefly Services documents an AutoCrop API with target resolution and different crop intents, including smart, priority-object, and full-subject. Choose smart when the focal area can be inferred, priority-object when a specified object must win, and full-subject when the complete subject should remain visible. The documentation also describes a limitation: a portrait can be selected instead of a salient object such as a shirt or artwork. Treat the API result as a candidate and keep a correction path for important assets.
Handling faces, products, text, and known regions
Faces
Face gravity can preserve a face better than center cropping, but group photos need a multi-face policy and enough headroom. Generate a wide and a tall variant, then verify that no face is clipped.
Products and packages
Object detection may identify the product, but packaging text and small parts can still be lost. Use a priority-object mode where available, or store a manually defined region around the product. Add padding when the complete silhouette matters more than edge-to-edge fill.
Images containing text
Do not assume visual salience preserves every word. If text is legally or operationally required, define a safe region and review each output. Consider placing copy outside the image in the page layout.
Known coordinates
Coordinate-based focus is deterministic and repeatable. It is useful for catalogs, templates, and recurring photography where the subject location is known. Keep coordinates normalized or tied to the source dimensions so the metadata remains portable.
Edge cases and fallbacks
- Subject touches an edge: use a focal region with extra margin or automatic padding.
- Several equally important subjects: use multi-face or full-subject behavior, then inspect narrow ratios.
- Very wide panorama to square: expect substantial removal; create a dedicated square composition if context is essential.
- Transparent source: decide whether the output should retain transparency or use a background color before cropping.
- Animated image: verify mode support; Cloudinary documents that
auto_padis not supported for animated images. - Small source image: cropping cannot create missing detail. Avoid enlarging a tiny source for a large placement.
- Important editorial exception: store a manual crop or focal region and bypass automatic selection for that asset.
Batching responsive variants
For a recurring pipeline, keep a variant manifest instead of scattering transformation strings through templates.
const variants = [
  { name: "card", width: 800, height: 600, mode: "c_auto", gravity: "g_auto" },
  { name: "hero", width: 1600, height: 900, mode: "c_auto", gravity: "g_auto" },
  { name: "avatar", width: 320, height: 320, mode: "c_thumb", gravity: "g_auto" }
];

function transformation(v) {
  return `${v.mode},${v.gravity},w_${v.width},h_${v.height}`;
}

for (const variant of variants) {
  console.log(variant.name, transformation(variant));
}
Generate only the sizes you actually serve. Cache the resulting URLs or files, and invalidate them when the source or focal metadata changes. Server-side delivery avoids making the browser download a full-size image merely to resize it client-side, as Cloudinary explains in its transformation documentation.
Performance, reliability, and cost considerations
- Performance: request final display dimensions and an efficient output format. Smaller variants reduce transfer work compared with shipping the original to the browser.
- Caching: use stable transformation URLs. A changed focal region should produce a new cache key.
- Reliability: keep the original source and crop metadata. If automatic detection changes, you can regenerate or restore a known-good crop.
- Review cost: automation reduces repetitive work, but high-value assets still need human review. The research sources document capabilities, not accuracy percentages or time savings.
- Platform fit: Cloudinary fits URL or SDK transformation workflows; Experience Manager Smart Crop fits teams already managing assets in Adobe; Firefly AutoCrop fits an application-integrated API workflow. Choose based on your existing asset system and correction process.
Troubleshooting smart crops
| Symptom | Likely cause | Fix |
|---|---|---|
| The image is scaled but not reframed | No crop mode was supplied | Add an explicit mode such as c_auto or c_thumb with width and height. |
| The subject is cut off | Center gravity or an incorrect focal area | Use automatic, face, object, or custom-region gravity; inspect the target ratio. |
| A product loses its label | The model selected a face or another salient area | Use priority-object or a manual region and add padding if needed. |
| One person in a group is missing | The crop favors one face | Use multi-face/full-subject behavior or a wider output, then review manually. |
| Padding appears unexpectedly | auto_pad was selected |
Use a fill-style mode when edge-to-edge output is required, or set the intended background. |
| Animated output fails | The selected mode does not support animated images | Use a supported mode or extract and process a still frame. |
| Results differ between placements | Each aspect ratio changes the available crop window | Define focal metadata once, generate all variants, and inspect each shape separately. |
Or skip the browser setup
If the source image is displayed on a web page and you need a clean capture of that page, ScreenshotNeo provides a single-call website screenshot API. It is not an image-content crop model; it removes the browser automation and page-cleanup work before capture.
Cookie banners, newsletter popups, and chat widgets are removed before the shot. Bot checks, blank pages, failed loads, timeouts, and cache hits are never billed, and response headers identify the page verdict and billing status. Its MCP server lets Claude, Cursor, and other MCP clients call take_screenshot, get_page_info, and capture_pdf. One thousand screenshots per month are free with no card; paid plans start at $5 for 3,000 shots.
See the ScreenshotNeo API documentation for all options.
curl -G "https://api.screenshotneo.com/v1/shot" -d access_key=YOUR_API_KEY --data-urlencode url=https://stripe.com -o shot.webpimport requests
r = requests.get("https://api.screenshotneo.com/v1/shot", params={"access_key": "YOUR_API_KEY", "url": "https://stripe.com"}, timeout=90)
open("shot.webp", "wb").write(r.content)const q = new URLSearchParams({ access_key: 'YOUR_API_KEY', url: 'https://stripe.com' });
const res = await fetch(`https://api.screenshotneo.com/v1/shot?${q}`);Create a free ScreenshotNeo account with 1,000 screenshots per month and no card.
Short FAQ
Is smart cropping the same as resizing?
No. Resizing changes dimensions; cropping removes or reframes pixels to satisfy a composition.
Should automatic crops be trusted without review?
Use them as a starting point. Review faces, products, text, and other consequential content, and save manual focal data for exceptions.
When is padding better than cropping?
Use padding when preserving the complete source matters more than filling every output pixel, such as a full product silhouette or subject.
What is the most portable crop metadata?
A target ratio plus a normalized focal point or region. It can be reused when generating several output sizes.
Which service should an enterprise choose?
Match the workflow: Cloudinary for URL or SDK transformations, Experience Manager Smart Crop for existing Adobe asset operations, and Firefly AutoCrop for an application-integrated API. The cited sources do not provide a head-to-head quality or cost benchmark.
Final checklist
- List every target size and ratio.
- Define whether the goal is a face, object, full subject, or region.
- Select an explicit crop mode.
- Use automatic gravity as a starting point, then add focal guidance where needed.
- Generate all responsive variants and inspect each one.
- Store source files and focal metadata for reproducibility.
- Use padding or a manual crop when automatic framing removes required context.


