How to Automatically Generate Social Media Graphics for Shopify Products
Build accurate, repeatable Shopify product graphics with native tools, templates, catalog apps, review checks, and an automated screenshot workflow.

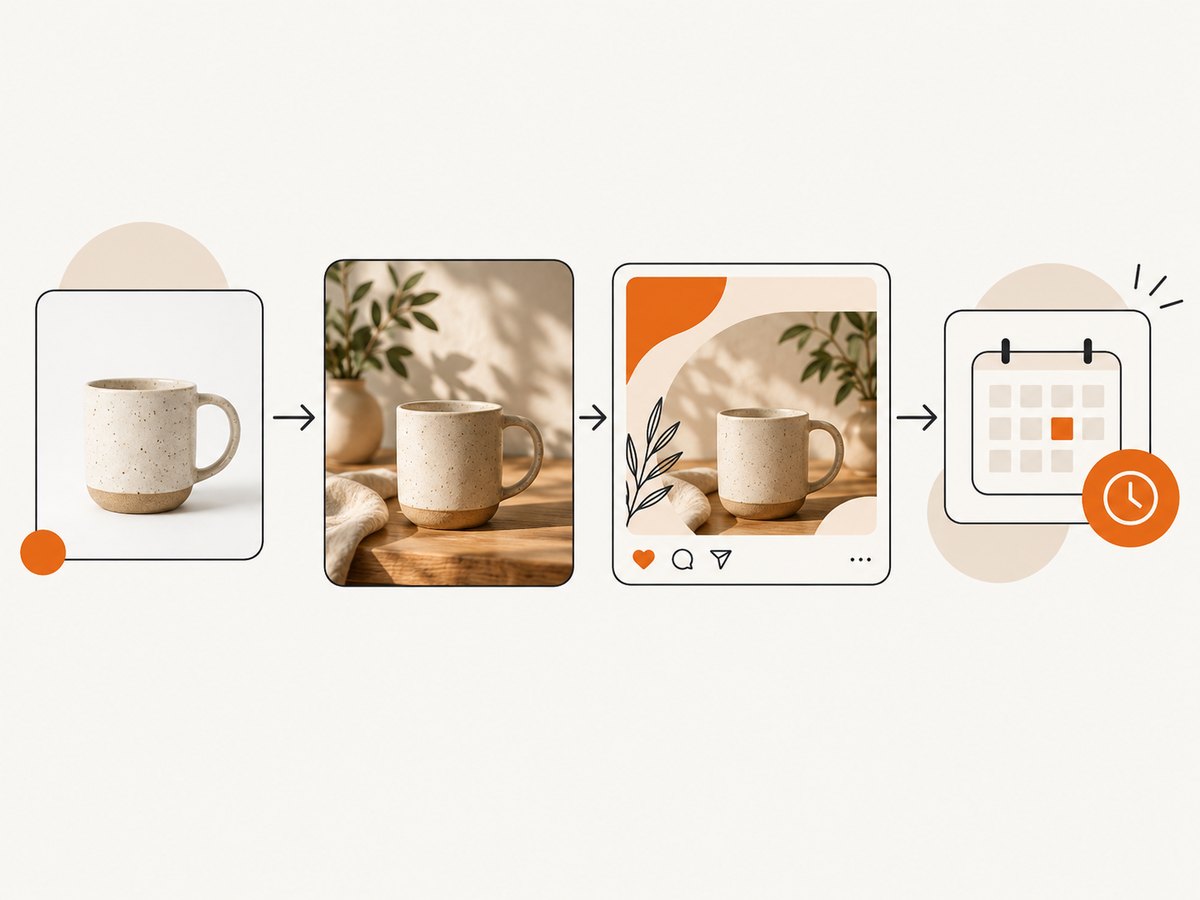
Direct answer: create a reliable Shopify graphics workflow in four stages: prepare an accurate product image, generate or edit a scene, apply a reusable channel-specific layout, then review the product and publish or schedule it. Shopify’s file editor can replace backgrounds, generate a scene from a prompt, and extend an image. A Shopify-connected app can automate catalog-to-post creation and scheduling, while a template tool such as Adobe Express gives teams more control over branded layouts. Keep product details and social previews under human review.
This guide explains the complete workflow, including native Shopify steps, catalog automation, image dimensions, review checks, troubleshooting, performance and cost considerations, and an option to capture product pages automatically with ScreenshotNeo.
1. Choose the right automation route
The best route depends on how many products you handle and how much creative control your team needs.
| Route | Best fit | What it handles | Review before choosing |
|---|---|---|---|
| Shopify file editor | One product or a small batch | Background replacement, prompted scenes, and background extension | Output fidelity, image dimensions, scene saving, plan eligibility |
| Shopify-connected social app | Recurring catalog campaigns | Product data, generated images and captions, previews, and scheduling | Permissions, supported accounts, channel coverage, limits, image quality, current terms |
| Adobe Express | Branded templates and team review | Editable layouts, AI-assisted remixing, collaboration, resizing, and scheduling | Current plan features, Shopify data workflow, approvals, channel support |
| Custom pipeline | Engineering teams with internal systems | Product feeds, image rendering, validation, storage, and publishing jobs | Asset governance, retries, rate limits, accessibility, and ongoing maintenance |
For most merchants, start with Shopify’s editor to make a clean source image. Add a template workflow when every channel needs consistent branding. Move to a catalog-connected app or custom pipeline when manual work becomes the bottleneck.
2. Prepare a trustworthy product source image
Automation cannot correct an inaccurate source. Select a photo that shows the complete product, has clear edges, and separates the subject from its background. A simple composition gives the editor more useful information for subject detection and scene generation.
- Use the current product version, color, packaging, and accessories.
- Remove dust, glare, and accidental props before generating a scene.
- Keep a high-resolution original so channel crops do not soften important details.
- Use PNG when you need a transparent background; preserve the original before making edits.
- Record the product handle, variant, image filename, and intended campaign so generated files remain traceable.
Shopify’s media-generation documentation says generated output defaults to 1 megapixel based on the source aspect ratio. Larger sources may be scaled down and smaller sources scaled up. Treat that as a starting point: inspect the final dimensions required by each channel before publishing.
3. Generate a product scene in Shopify
Shopify’s file editor includes three useful operations. Color background detects the subject and replaces the background, with a manual correction option when the mask is imperfect. Generate transforms the supplied image according to a natural-language prompt. Extend adds background beyond the original edges, which is useful when a vertical or square crop needs more breathing room.
- In Shopify admin, open the product media file in the file editor.
- Choose the background, generate, or extend operation.
- Write a short prompt describing the setting, lighting, style, color, and grounding cue.
- Inspect every generated result at full size.
- Save wanted versions as new files when you need to preserve the source.
Shopify recommends short prompts of roughly three to seven words instead of long instruction lists. Examples include “bottle on a stone table,” “soft studio light, warm beige,” or “blue sneaker on a running track.” Add a physical grounding cue when appropriate so the product does not appear to float.
The editor creates one AI-generated scene at a time. Save the versions you want before closing the editor; Shopify says unsaved generated scenes are deleted. Generated images include an invisible watermark that Shopify says does not restrict commercial use. Shopify also advises reviewing AI output before applying it because generated content can contain errors.
4. Build reusable layouts for each social channel
A generated scene is raw creative material. A repeatable layout turns it into a campaign asset. Create one template per channel or aspect ratio and keep the variable fields limited: product image, product name, price, short benefit, campaign color, and destination URL.
Recommended layout rules
- Keep the product large enough to recognize on a phone.
- Reserve a safe area around edges so platform crops do not remove the product or price.
- Use one headline and one supporting detail instead of placing the entire product description on the image.
- Keep logos, labels, and packaging readable; never redraw them with generated text.
- Use a consistent color and type system across products.
- Export a separate asset for each aspect ratio instead of relying on an automatic crop.
Adobe says Express supports templates, AI-assisted creation and remixing, team collaboration and review, and scheduling for TikTok, Instagram, Facebook, LinkedIn, X, and Pinterest. Treat those as product capabilities to verify against the current plan and account terms. The benefit of a template-led workflow is that a reviewer can change copy or spacing without rebuilding the scene.
5. Automate catalog-to-post creation
If your goal is to generate graphics for many products on a schedule, a Shopify-connected app can read product data and create a queue of posts. The AI Auto Post Shopify App Store listing describes generating images and captions from catalog data, previewing posts, and scheduling publication to Instagram, Facebook, Pinterest, and X. Confirm current permissions, supported account types, pricing, and limits in the listing before committing a production workflow.
A robust catalog pipeline should follow this sequence:
- Read products that are active, in stock, and assigned to the campaign.
- Choose the approved source image and variant.
- Generate or select a scene using a fixed prompt pattern.
- Apply the channel template and produce the required dimensions.
- Run automated checks for missing image, missing price, low resolution, and forbidden claims.
- Place the asset and caption in a review queue.
- Publish or schedule only after approval.
- Store the source product ID, asset URL, prompt, reviewer, and publication status.
Do not let an image generator invent product specifications, discounts, ingredients, certifications, or performance claims. Keep those fields connected to Shopify data and require a human to approve the final creative.
6. Check the product and its social preview
There are two separate outcomes: uploading a graphic to a social network and sharing a product-page link. A polished graphic does not guarantee that a shared link displays the same image.
Shopify’s help documentation says free themes generally use a product’s featured image for product, collection, and blog links. Other pages can use the store’s social-sharing image. Theme code, theme settings, and the Online Store Preferences fallback can affect which image is selected; some themes only display an image configured in theme settings.
Shopify’s Liquid page_image object supplies the featured image for products, collections, and blog posts, or the social-sharing image for other pages. Shopify can generate Open Graph image tags from that object when a theme does not already provide og:image.
Pre-publish checklist
- Product shape, color, label, packaging, and proportions match the source.
- Text is spelled correctly and remains readable on a phone.
- Price, currency, sale dates, and availability match Shopify.
- No unsupported health, environmental, comparison, or performance claim appears.
- Transparent backgrounds are exported as PNG when required.
- The intended featured image and social-sharing image are configured in the theme.
- The destination URL resolves to the correct product and variant.
- The graphic is checked in the actual network composer or preview.
7. Or skip the browser setup
If you need a clean image of a Shopify product page, collection page, or campaign landing page, ScreenshotNeo’s API documentation provides a one-request capture workflow. It can return PNG, JPEG, WebP, or PDF and supports full-page capture, element capture by CSS selector, custom CSS and JavaScript, device presets, dark mode, retina scale, waits, cookies, headers, user agents, geolocation, request blocking, resizing, caching, signed links, asynchronous jobs, bulk capture, and usage reporting.

curl -G "https://api.screenshotneo.com/v1/shot" -d access_key=YOUR_API_KEY --data-urlencode url=https://your-store.com/products/example -o product.webpimport requests
r = requests.get("https://api.screenshotneo.com/v1/shot", params={"access_key": "YOUR_API_KEY", "url": "https://your-store.com/products/example"}, timeout=90)
r.raise_for_status()
open("product.webp", "wb").write(r.content)const q = new URLSearchParams({ access_key: 'YOUR_API_KEY', url: 'https://your-store.com/products/example' });
const res = await fetch(`https://api.screenshotneo.com/v1/shot?${q}`);
if (!res.ok) throw new Error(`HTTP ${res.status}`);
const fs = await import('node:fs/promises');
await fs.writeFile('product.webp', Buffer.from(await res.arrayBuffer()));Cookie banners, newsletter popups, and chat widgets can obscure a product page. ScreenshotNeo accepts the consent banner like a visitor and removes more than 60 known consent platforms, newsletter popups, and chat widgets before capture; each cleanup step can be disabled. Bot checks, blank pages, timeouts, failed loads, and cache hits are not billed, and the response identifies the result with X-Page-Verdict and X-Billed headers. An MCP server provides take_screenshot, get_page_info, and capture_pdf tools for Claude, Cursor, and other MCP clients. The Free plan includes 1,000 screenshots per month with no card; paid plans start at $5 for 3,000 shots. Create a free ScreenshotNeo account.
8. Reliability, performance, and cost planning
Reliability
- Keep the original product image and generated asset as separate files.
- Use deterministic filenames containing product ID, channel, ratio, and revision.
- Record prompts and template versions so an asset can be reproduced.
- Use a review queue instead of publishing immediately after generation.
- Retry transient image or API failures, but stop retrying invalid URLs or missing permissions.
- Validate the final URL and image dimensions before scheduling.
Performance
Generate only the ratios and resolutions you will use. Reuse approved scenes across campaigns and vary the layout or copy. For page captures, wait for a specific product selector, a short delay, or network idle rather than using an unnecessarily long global wait. Block analytics, ads, or unrelated resource types when they are not part of the visual result. Cache stable pages with a TTL when the same product image is requested repeatedly.
Cost
Native Shopify and third-party app pricing, plan eligibility, channel limits, and AI availability can change, so verify current terms before budgeting. Separate generation cost from review time and publication cost. For ScreenshotNeo, every plan includes every feature: Free 1,000 shots/month, Starter $5 for 3,000, Growth $15 for 15,000, Pro $39 for 60,000, Scale $99 for 250,000, and Business $249 for 1,000,000. Yearly billing provides two months free.
9. Troubleshooting common failures
| Symptom | Likely cause | Fix |
|---|---|---|
| The generated product has the wrong shape or label | Source image or generated scene changed product details | Use a clearer source, shorten the prompt, save the original, and require human approval. |
| The subject is clipped | Canvas extension or channel crop removed edges | Extend the background first, then export a channel-specific ratio with a safe margin. |
| Transparent output has a solid background | Wrong export format | Save as PNG and confirm transparency in an editor before upload. |
| Social link shows an old image | Theme priority, fallback settings, or cached preview | Check featured and social-sharing image settings, inspect og:image, and refresh the network preview. |
| Catalog post has the wrong price | Stale product data or variant mismatch | Read the active variant at generation time and validate price immediately before scheduling. |
| Screenshot contains a consent banner | Consent handling is disabled or the banner is unsupported | Enable consent handling, wait for the banner selector, or hide the selector with custom CSS. |
| Screenshot is blank or times out | Page requires more wait time, blocks automation, or failed to load | Wait for a selector or network idle, set required headers or cookies, and inspect X-Page-Verdict. |
| API response is an error | Invalid access key, URL, or request encoding | URL-encode the target, verify the key, check the HTTP status, and retry only transient failures. |
10. FAQ
Can Shopify generate an entire social campaign by itself?
Shopify’s documented file editor prepares and edits imagery. A catalog-connected app or separate design and scheduling workflow is needed for repeatable multi-product publishing.
Should I generate text inside the image?
Keep important copy in your template or social caption. Generated lettering can be inaccurate, and product claims require review.
How do I preserve the original product photo?
Save generated work as a new file and keep the source asset unchanged. Record the product and variant ID with each derivative.
Why does a product link preview differ from my uploaded post?
A link preview uses theme and Open Graph image settings, while an uploaded post uses the asset you selected. Configure and inspect both paths.
When should I use a screenshot API?
Use one when the page itself is the source graphic, when you need repeatable captures across many URLs, or when browser setup and cleanup would consume more time than the design work.
Conclusion
A dependable Shopify graphics system starts with accurate product media, uses short prompts and reusable templates, keeps catalog data authoritative, and places human review before publication. Shopify’s editor is practical for preparing scenes; a connected app or design platform can scale creation and scheduling. When the product page itself must become a clean, repeatable asset, ScreenshotNeo supplies the capture layer without requiring you to maintain browser automation.


