Best Code Screenshot Extensions for VS Code
Compare the best VS Code code screenshot extensions, learn how to create polished images, highlight lines, copy to the clipboard, and automate captures.
CodeSnap is the best default choice for most VS Code users. It captures a selected range, lets you save an image or copy it to the clipboard, and exposes the styling controls developers usually need: backgrounds, shadows, padding, rounded corners, window controls, titles, transparency, line numbers, and container or window targeting.
Choose CodeSnap-Extended when line-level emphasis is central to your tutorial, code review, or debugging explanation. Choose VSCodeSnap when gradient backgrounds and Ray.so or Carbon-inspired styling matter more than the broadest baseline workflow. Code Screenshot is another option if you need PNG, SVG, or GIF output, but review its current telemetry disclosures before installing.
1. Quick comparison
| Extension | Best for | Capture and output | Distinctive controls | Things to check |
|---|---|---|---|---|
| CodeSnap | Most developers and polished everyday screenshots | Select code, run from the context menu or Command Palette, then save an image or copy it | Background color, shadow, padding, rounded corners, window controls, title, transparency, line numbers, real line numbers, container/window target, save-versus-copy shutter action | Linux clipboard prerequisites; current publisher, version, changelog, and permissions |
| CodeSnap-Extended | Tutorials, reviews, and debugging where one or two lines must stand out | CodeSnap-style selection workflow | Click a line number to cycle through focus, git-add, git-remove, and no-highlight states | Whether its additional annotation controls fit your visual style |
| VSCodeSnap | Style-first images with gradients | Selection-based capture with file or clipboard workflows | Configurable CSS backgrounds, gradients, shadows, padding, window border radius, controls, titles, line numbers, transparency, and container/window targets | Current maintenance and publisher activity before standardizing on it |
| Code Screenshot | PNG, SVG, or GIF export | Marketplace listing advertises PNG, SVG, and GIF saving | Carbon and Ray.so-style presentation | The listing discloses a random install ID, hashed machine ID, active-use seconds, and two anonymous usage events for trial and telemetry purposes; review current privacy terms |
Microsoft describes extensions as tools that add languages, debuggers, and other development capabilities to VS Code. Before installing any third-party extension, inspect its Marketplace publisher, downloads, rating, README, feature contributions, changelog, and dependencies in the official Extension Marketplace documentation.
2. Install and verify an extension safely
- Open Extensions in VS Code with
Ctrl+Shift+X(Windows/Linux) orCmd+Shift+X(macOS). - Search for the exact extension name and publisher:
CodeSnapbyadpyke,CodeSnap-ExtendedbyRobertOstermann,VSCodeSnapbyluisllamas, orCode Screenshotbyutiltools. - Read the README, feature contributions, dependencies, changelog, and privacy information. Third-party extensions have the same permissions as VS Code itself, and recent VS Code releases ask you to confirm trust in a third-party publisher.
- Install, then reload VS Code if prompted.
- For reproducible documentation builds, disable automatic updates for the extension, install a specific version, or install a reviewed VSIX. Record the extension version with your project documentation.
3. Capture your first code screenshot with CodeSnap
- Open the file and select the exact lines you want in the image. Selection-based captures keep screenshots focused and reduce cropping work.
- Right-click the selection and choose the CodeSnap command, or open the Command Palette with
Ctrl+Shift+P/Cmd+Shift+Pand search for CodeSnap. - Review the preview. Adjust the background, padding, shadow, rounded corners, window controls, title, transparency, line-number mode, and target (container or window) in the extension settings.
- Use the configured shutter action to save the image. If you want the clipboard instead, click the image and use the copy keyboard shortcut; this workflow is documented in the CodeSnap Marketplace README.
- Paste the result into your documentation, issue, pull request, presentation, or chat and verify that the code remains readable at the final display size.
Settings that have the biggest visual impact
- Background: Pick a solid color for maximum contrast or transparency when the destination supplies its own background.
- Padding: Increase it enough to separate code from the frame; excessive padding makes a long snippet harder to scan.
- Rounded corners and shadow: Use a restrained radius and shadow so the code remains the visual focus.
- Window controls and title: Add them when the image should resemble an editor window; remove them for compact documentation diagrams.
- Line numbers: Use normal or real line numbers when readers need to reference the source. Turn them off for a short standalone example.
- Container versus window target: Container targeting is useful for a clean code card; window targeting can preserve more of the editor context.
- Save versus copy: Saving gives you a durable asset for version control. Copying is faster for a review comment or chat message.
4. Highlight a line or mark a change
Install CodeSnap-Extended when emphasis is a primary requirement. After capturing a selection, click a line number to cycle through its states: focus, git-add, git-remove, and no highlight. Use one or two emphasized lines so the reader can immediately see the point being discussed.
A practical tutorial pattern is:
- Capture the complete function or command sequence.
- Mark the line that introduces the behavior with the focus state.
- Use git-add or git-remove only when explaining a patch or migration.
- Leave surrounding lines unhighlighted so the emphasis has contrast.
5. Choose VSCodeSnap for gradient-led styling
VSCodeSnap is the style-oriented alternative. Its listing documents configurable CSS backgrounds, including gradients, plus shadows, padding, window border radius, controls, titles, line numbers, real line numbers, transparency, and container or window targets. It acknowledges CodeSnap, Polacode, Ray.so, and Carbon as inspirations.
Use it when your documentation has an established gradient palette or when you want a Ray.so-like presentation directly inside VS Code. Check the current Marketplace version, changelog, publisher activity, and issue history before making it the standard tool for a team.
6. When Code Screenshot is the better fit
The Code Screenshot Marketplace result advertises PNG, SVG, and GIF saving. SVG is useful when an image must stay sharp at different sizes or be edited in Figma or Illustrator. GIF can help demonstrate a short sequence, while PNG remains the simplest choice for ordinary documentation.
The same listing discloses collection of a random install ID, a hashed machine ID, active-use seconds, and two anonymous usage events for trial and telemetry purposes. Treat that as an installation decision: read the current listing and privacy terms, then use your organization’s extension policy before enabling it on a work machine.
7. Clipboard workflows and Linux prerequisites
On macOS and Windows, the clipboard action normally works through the operating system integration provided by VS Code and the extension. On Linux, CodeSnap documents extra requirements: install xclip when running X11, or wl-clipboard when running Wayland.
# Debian or Ubuntu, X11
sudo apt install xclip

# Debian or Ubuntu, Wayland
sudo apt install wl-clipboard
If copying does nothing, confirm which display protocol your session uses, install the matching utility, restart VS Code, and try the copy shortcut again. Saving directly to a file is a useful fallback while diagnosing clipboard integration.
8. Make screenshots readable and consistent
- Select only the code needed to explain the point. A shorter image is easier to read on mobile and in issue trackers.
- Keep a consistent font size, padding, corner radius, and background across a documentation set.
- Show real line numbers when a reader must connect the image to a file; hide them when the snippet is self-contained.
- Use a title or window controls only when they add context. Decorative chrome consumes space.
- Prefer high-contrast code and backgrounds. Check the final image at the width where readers will see it.
- Save source snippets separately. A screenshot is a presentation asset, not a substitute for copyable code.
9. Troubleshooting
| Symptom | Likely cause | Fix |
|---|---|---|
| No capture command appears | Extension is disabled, not installed in the active profile, or the editor has no selection | Check the Extensions view, enable it, reload VS Code, select code, and run the command from the Command Palette |
| Clipboard copy fails on Linux | Missing xclip under X11 or wl-clipboard under Wayland |
Install the utility for your session, restart VS Code, and retry; save to a file if you need an immediate result |
| Line numbers do not match the file | The capture is showing relative or display line numbers rather than real source line numbers | Enable the real-line-number setting when the screenshot must map back to the file |
| Highlighting is too distracting | Several lines are emphasized or the background contrast is too strong | Cycle nonessential lines back to no-highlight and keep one or two focused lines |
| Image is clipped | Selection is too wide or the target mode does not include the intended container | Capture a narrower selection or switch between container and window targeting |
| Output looks different after an update | Extension auto-updated and changed rendering or defaults | Pin a known version or install a reviewed VSIX, then record that version for the team |
| Team policy blocks installation | Publisher trust or telemetry review is required | Provide the Marketplace publisher, permissions, changelog, dependencies, and privacy details for approval |
10. Performance, reliability, and cost
Local extensions render the selected code inside your editor, so capture time is usually dominated by rendering and file or clipboard operations rather than a remote page load. Large selections, elaborate shadows, and animated output can increase processing and file size. For repeatable results, keep the extension version and settings consistent across contributors.
There is no web-page loading, browser session, or external screenshot API in this workflow. That makes it appropriate for source code that should stay on the developer’s machine. It also means the result is tied to the local editor theme, fonts, extension version, and operating-system clipboard behavior unless you standardize those inputs.
11. Or skip the browser setup
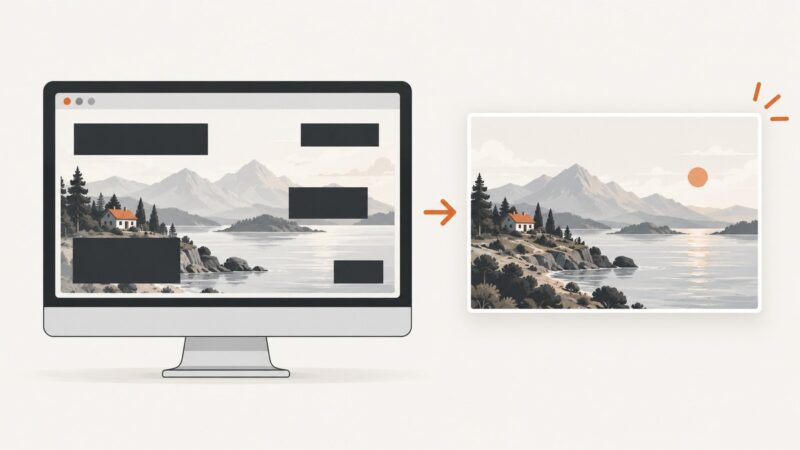
When the subject is a web page rather than source code, ScreenshotNeo provides a single screenshot API request. It accepts the cookie or consent banner like a visitor and removes more than 60 known consent platforms, newsletter popups, and chat widgets before capture; each step can be turned off. Bot checks or CAPTCHAs, blank pages, timeouts, failed loads, and cache hits cost nothing, and the response identifies the result with X-Page-Verdict and X-Billed headers. Its MCP server provides take_screenshot, get_page_info, and capture_pdf tools for Claude, Cursor, and other MCP clients.
See the ScreenshotNeo API documentation for the complete option list, including full-page capture with lazy images loaded, CSS-selector element capture, dark mode, device presets and custom viewports, retina scale, PDF settings, custom CSS and JavaScript, clicks, waits, request blocking, headers, cookies, user agents, authorization, timezone, geolocation, transparent backgrounds, resizing, cache TTLs, signed links, asynchronous jobs, bulk capture, usage data, and the OpenAPI specification.
cURL
curl -G "https://api.screenshotneo.com/v1/shot" \
  -d access_key=YOUR_API_KEY \
  --data-urlencode url=https://stripe.com \
  -o shot.webp
Python
import requests

r = requests.get(
    "https://api.screenshotneo.com/v1/shot",
    params={"access_key": "YOUR_API_KEY", "url": "https://stripe.com"},
    timeout=90,
)
r.raise_for_status()
open("shot.webp", "wb").write(r.content)
Node.js
const q = new URLSearchParams({ access_key: 'YOUR_API_KEY', url: 'https://stripe.com' });
const res = await fetch(`https://api.screenshotneo.com/v1/shot?${q}`);
if (!res.ok) throw new Error(`Screenshot failed: ${res.status}`);
const image = Buffer.from(await res.arrayBuffer());
await import('node:fs/promises').then(fs => fs.writeFile('shot.webp', image));
ScreenshotNeo includes 1,000 shots per month free with no card. Paid plans start at $5 for 3,000 shots, and every feature is available on every plan. Create a free ScreenshotNeo account.
12. FAQ
Which extension should I install first?
Start with CodeSnap. It covers selection capture, file saving, clipboard copying, line numbers, transparency, window or container targeting, and the main styling controls.
Which extension highlights a single line?
CodeSnap-Extended. Click a line number to cycle through focus, git-add, git-remove, and no-highlight states.
Can I copy a CodeSnap image directly?
Yes. In the preview, click the image and use the copy keyboard shortcut. Linux users may need xclip or wl-clipboard.
Should I use SVG for documentation?
Use SVG when you need resolution independence or plan to edit the image in a vector tool. Confirm that your destination accepts SVG; otherwise use PNG.
How do I keep a team’s screenshots consistent?
Choose one extension, pin its version when reproducibility matters, and document the shared settings for background, padding, line numbers, title, controls, and output format.
Are these extensions suitable for capturing web pages?
They are designed for code inside VS Code. For clean web-page screenshots, use ScreenshotNeo’s API or MCP server so consent banners, popups, chat widgets, failed loads, and bot checks are handled before billing.