Best Node.js Libraries for Converting HTML to an Image
Compare Node.js options for converting HTML to images, with runnable examples, setup guidance, troubleshooting, and practical trade-offs.
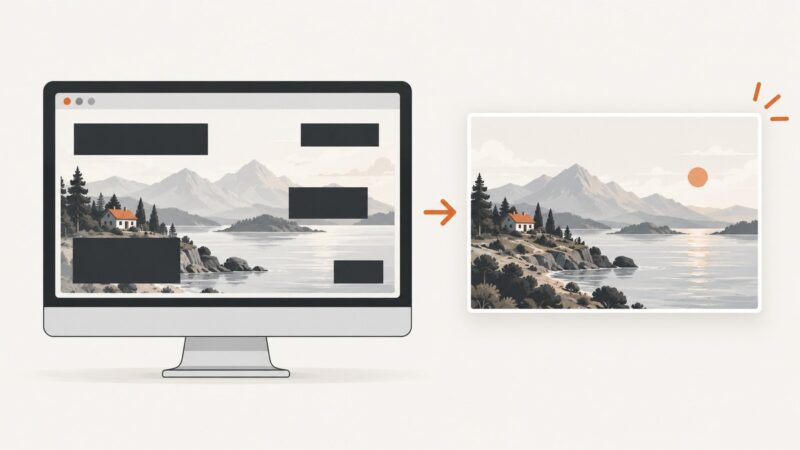
Short answer: For a focused HTML-to-image workflow in Node.js, start with node-html-to-image. It accepts HTML and Handlebars templates, renders with headless Puppeteer, and supports PNG and JPEG output. Choose Puppeteer directly when you want to control the browser workflow yourself; choose Playwright when its browser automation and screenshot capture options fit your application. The reviewed documentation does not establish that one option is universally faster or more visually faithful.
This guide compares the three approaches, shows runnable examples, and covers browser setup, output choices, concurrency, troubleshooting, and deployment decisions. Library behavior and defaults can change, so check the documentation for the version you install.
1. How to choose
| Option | Best fit | What it offers | Trade-off |
|---|---|---|---|
node-html-to-image |
HTML templates rendered from data | Handlbars content, PNG or JPEG, selector targeting, buffers, batches, hooks, and a concurrency option. | A purpose-built wrapper around Puppeteer; browser installation and runtime still matter. |
| Puppeteer | Direct control over a Chrome or Firefox capture flow | Page and selected-element screenshots using browser APIs. | You assemble navigation, waiting, and capture steps yourself. |
| Playwright | Browser automation with screenshot capture choices | Page, element, and full-page capture; its screenshot tooling documents PNG, JPEG, and WebP. | Choose and validate the browser engine and runtime you intend to deploy. |
Use node-html-to-image when the input is a template plus content and the wrapper’s options cover your needs. Use a direct browser library when you need a more explicit browser workflow, or when capture scope and browser choices are central. Compare them using your own HTML, CSS, fonts, remote assets, and deployment environment; the sources consulted do not provide a fair cross-library speed or fidelity benchmark.
2. Convert a template with node-html-to-image
Install the package:
npm install node-html-to-imageSave this as render.js and run node render.js. This example uses a Handlebars variable and writes a PNG file:
const nodeHtmlToImage = require('node-html-to-image');

async function main() {
  await nodeHtmlToImage({
    output: './card.png',
    html: `
      <!doctype html>
      <html>
        <head>
          <meta charset="utf-8">
          <style>
            * { box-sizing: border-box; }
            body {
              margin: 0;
              width: 1200px;
              height: 630px;
              display: grid;
              place-items: center;
              background: #f4f6fb;
              color: #182033;
              font: 700 52px system-ui, sans-serif;
            }
            main { padding: 64px; }
          </style>
        </head>
        <body><main>{{title}}</main></body>
      </html>`,
    content: { title: 'HTML to image in Node.js' }
  });
}

main().catch((error) => {
  console.error(error);
  process.exitCode = 1;
});
The package documents PNG as the default output and JPEG as another output type. It also documents CSS dimensions as a way to set image resolution. In the example, the body dimensions establish a 1200 by 630 pixel canvas.
JPEG, quality, and buffers
Set type: 'jpeg' for JPEG output and use the package’s quality option when you need to tune JPEG quality. To use the result in an HTTP response or another API instead of writing a file, request a returned buffer using the package’s buffer option. Check the installed version’s README for the precise option names and accepted values.
const imageBuffer = await nodeHtmlToImage({
  html: '<html><body><h1>A rendered image</h1></body></html>',
  type: 'jpeg',
  quality: 85,
  encoding: 'buffer'
});

// For example, in an HTTP handler:
// response.type('image/jpeg').send(imageBuffer);
Use a buffer when the next step consumes bytes directly. Use output when a file artifact is the desired result. Confirm option spelling for the version in your lockfile before adopting a snippet in production.
Render a specific element
The wrapper documents a selector option, with body as its default. Target a component when the HTML contains surrounding layout that should not appear in the output:
const nodeHtmlToImage = require('node-html-to-image');

async function main() {
  await nodeHtmlToImage({
    output: './summary.png',
    selector: '#summary',
    html: `
      <html><head><style>
        #summary { width: 800px; padding: 32px; background: white; }
      </style></head>
      <body>
        <aside>Not part of the capture</aside>
        <section id="summary"><h1>Monthly summary</h1></section>
      </body></html>`
  });
}

main().catch((error) => {
  console.error(error);
  process.exitCode = 1;
});
Give the target an explicit width and height or otherwise ensure its layout is settled before capture. A missing selector or a selector that matches an unintended element can produce an error or the wrong output.
Render multiple images from data
The package documents an array of content objects for generating multiple images. This is useful for a set of cards with the same markup and different values:
const nodeHtmlToImage = require('node-html-to-image');

async function main() {
  await nodeHtmlToImage({
    output: './card-%s.png',
    html: '<html><body><h1>{{name}}</h1><p>{{plan}}</p></body></html>',
    content: [
      { name: 'Avery', plan: 'Starter' },
      { name: 'Jordan', plan: 'Growth' }
    ]
  });
}

main().catch((error) => {
  console.error(error);
  process.exitCode = 1;
});
Confirm the output naming pattern supported by your installed release. For large batches, limit concurrency and process work in bounded groups rather than creating an unbounded number of browser renders.
Local and remote assets
The package documentation recommends supplying local images as base64 data URIs in template content. That avoids relying on a browser process to resolve a machine-specific file path:
const fs = require('node:fs');
const nodeHtmlToImage = require('node-html-to-image');

async function main() {
  const imageData = fs.readFileSync('./logo.png').toString('base64');
  const logo = `data:image/png;base64,${imageData}`;

  await nodeHtmlToImage({
    output: './with-logo.png',
    html: '<html><body><img src="{{logo}}" alt=""></body></html>',
    content: { logo }
  });
}

main().catch((error) => {
  console.error(error);
  process.exitCode = 1;
});
For remote fonts and images, verify that the rendering environment can reach the asset host and that capture happens after the assets load. For reproducible output, bundle or embed assets where practical, and use explicit font declarations and dimensions.
3. Use Puppeteer directly
Puppeteer is a browser automation library with page and element screenshot APIs. Its project distinguishes puppeteer, which installs a compatible Chrome, from puppeteer-core, which does not download a browser. Start with the full package for a straightforward local setup:
npm install puppeteerSave as capture.js, then run node capture.js:
const puppeteer = require('puppeteer');

async function main() {
  const browser = await puppeteer.launch({ headless: true });
  try {
    const page = await browser.newPage({
      viewport: { width: 1200, height: 800 },
      deviceScaleFactor: 1
    });
    await page.setContent(`
      <!doctype html>
      <html><head><style>
        body { margin: 0; padding: 48px; font: 24px system-ui; }
        article { width: 900px; min-height: 400px; background: #eef2ff; }
      </style></head>
      <body><article><h1>Rendered with Puppeteer</h1></article></body></html>`);

    await page.screenshot({ path: './page.png', fullPage: true });
    await page.locator('article').screenshot({ path: './article.png' });
  } finally {
    await browser.close();
  }
}

main().catch((error) => {
  console.error(error);
  process.exitCode = 1;
});
When rendering an existing URL, navigate to it before capturing, and choose an appropriate load condition for that page. The official API supports page and selected-element capture; full-page capture is also exposed by browser screenshot APIs. Browser launch configuration and API details can vary with Puppeteer releases.
Choosing the Puppeteer package
- Use
puppeteerwhen its compatible browser download fits your build and deployment process. - Use
puppeteer-corewhen your environment supplies a browser and you will configure its executable path and launch requirements. - The wrapper also documents a way to supply a different Puppeteer implementation and custom launch arguments. This can help align the wrapper with an existing browser setup.
Browser binaries are a deployment dependency. Account for installation, compatible system libraries, startup, and the environment’s memory and process limits. The exact browser setup depends on the package and host you choose.
4. Use Playwright for screenshot capture
Playwright documents page screenshots and capture of viewport, element, and full-page content. Its screenshot tooling documents PNG, JPEG, and WebP output. Install Playwright and its browser using the documented setup for the version you select:
npm init -y
npm install -D playwright
npx playwright install chromium
Save as playwright-capture.js and run with node playwright-capture.js:
const { chromium } = require('playwright');

async function main() {
  const browser = await chromium.launch({ headless: true });
  try {
    const page = await browser.newPage({ viewport: { width: 1200, height: 800 } });
    await page.setContent(`
      <html><head><style>
        body { margin: 0; padding: 40px; font: 24px sans-serif; }
        main { min-height: 600px; background: #f1f5f9; }
      </style></head><body>
        <main><h1>Playwright screenshot</h1></main>
      </body></html>`);

    await page.screenshot({ path: 'viewport.png', type: 'png' });
    await page.screenshot({ path: 'full-page.webp', type: 'webp', fullPage: true });
    await page.locator('main').screenshot({ path: 'main.jpg', type: 'jpeg', quality: 85 });
  } finally {
    await browser.close();
  }
}

main().catch((error) => {
  console.error(error);
  process.exitCode = 1;
});
Use the same browser engine, fonts, assets, dimensions, and runtime settings in development and production when output consistency matters. The documentation cited here describes features, not comparative rendering benchmarks.
5. Practical options and configuration
| Need | Approach | Check |
|---|---|---|
| Template data | node-html-to-image content with Handlebars placeholders |
Escape or validate data for the template context; test special characters. |
| Canvas dimensions | Set CSS width and height on the rendered page or target | Check pixel dimensions and clipping with long content. |
| Element capture | Wrapper selector or browser locator screenshot | Ensure the selector exists and the element has layout dimensions. |
| Page capture | Direct page screenshot; full-page option where supported | Long pages can use significant memory and create very tall images. |
| Output format | Wrapper PNG/JPEG; Playwright screenshot tooling also documents WebP | Choose format based on transparency, compatibility, and file size. |
| Before-render customization | Wrapper’s documented beforeRendering and beforeScreenshot hooks |
Use hooks for setup and readiness tasks supported by the installed version. |
| Timeout and concurrency | Wrapper documents timeout and maxConcurrency; documented default concurrency is 2 |
Defaults are version-sensitive. Increase concurrency only after observing resource use. |
| Browser installation | Puppeteer package choice or Playwright browser installation | Install the matching browser as part of the runtime build or deployment process. |
For the wrapper’s hook arguments, custom Puppeteer library option, and exact output and timeout settings, consult the package documentation linked below. Confirm defaults against the installed version instead of relying on an old example.
6. ScreenshotNeo for URL-based captures
If your input is a public website URL and you do not need to build a custom browser process, ScreenshotNeo offers a screenshot API and MCP server. One GET request returns an image or PDF. Its clean-capture flow accepts cookie and consent banners as a visitor and removes more than 60 known consent platforms, newsletter popups, and chat widgets; each cleanup step can be turned off. Bot checks, blank pages, timeouts, failed loads, and cache hits cost nothing, and the response identifies the page verdict and billing status in headers.
Or skip the browser setup:
curl -G "https://api.screenshotneo.com/v1/shot" -d access_key=YOUR_API_KEY --data-urlencode url=https://stripe.com -o shot.webpimport requests
r = requests.get(
"https://api.screenshotneo.com/v1/shot",
params={"access_key": "YOUR_API_KEY", "url": "https://stripe.com"},
timeout=90,
)
r.raise_for_status()
open("shot.webp", "wb").write(r.content)const q = new URLSearchParams({ access_key: 'YOUR_API_KEY', url: 'https://stripe.com' });
const res = await fetch(`https://api.screenshotneo.com/v1/shot?${q}`);
if (!res.ok) throw new Error(`Screenshot request failed: ${res.status}`);
const image = Buffer.from(await res.arrayBuffer());
require('node:fs').writeFileSync('shot.webp', image);Replace YOUR_API_KEY with your key and change the target URL. See the ScreenshotNeo API documentation for request options. The API supports full-page capture, element selectors, dark mode, device and viewport settings, retina scale, PDF settings, HTML/CSS rendering, custom CSS and JavaScript, click and wait actions, request blocking, headers, cookies, user agent, timezone, geolocation, transparent backgrounds, resizing, caching, signed image links, async jobs with signed webhooks, bulk capture of up to 100 URLs per call, usage reporting, and an OpenAPI spec. Parameter names used by other screenshot APIs also work. An MCP server exposes take_screenshot, get_page_info, and capture_pdf for Claude, Cursor, and other MCP clients.
There are 1,000 screenshots a month free with no card; paid plans start at $5 for 3,000 screenshots. Every feature is on every plan. Create a free ScreenshotNeo account to get started.
7. Reliability, performance, and cost
For self-hosted rendering, total work includes browser startup, page rendering, asset loading, and encoding the output. The cited documentation does not provide comparable performance figures, so measure the workload you expect instead of selecting by an assumed speed advantage.
- Reuse and bound work: avoid launching an unbounded number of browser processes. For the wrapper, its documented concurrency setting can help bound parallel work; the documented default is version-sensitive.
- Control input size: large pages, full-page captures, high device scale factors, and image-heavy content can raise memory use and output size.
- Make rendering repeatable: pin package versions, browser versions, fonts, and assets where practical. Use explicit dimensions and a consistent runtime.
- Set time limits: pages with slow or never-ending network activity need a timeout and a deliberate readiness condition. The wrapper documents a timeout option.
- Plan browser deployment: a browser binary and its runtime dependencies affect build size, startup, and operations.
puppeteer-coreavoids downloading a browser, but requires a browser supplied by your environment. - Include operational cost: self-hosting uses compute, memory, storage, and engineering time. A managed API replaces browser operations with per-plan usage; ScreenshotNeo’s stated plans range from 1,000 free monthly shots to paid tiers listed on its site.
If your service accepts arbitrary user HTML or URLs, treat that content as untrusted input and assess isolation and network access for your deployment. The library references used for this comparison do not establish that arbitrary content is safely isolated by default.
8. Troubleshooting
| Symptom | Likely cause | Fix |
|---|---|---|
| Browser executable missing | The browser was not installed in the runtime, or puppeteer-core is being used without a configured browser. |
Install the compatible browser during build/deploy, or configure the executable path and launch options for the supplied browser. |
| Works locally, fails in deployment | Different browser binaries, missing system dependencies, or inaccessible assets. | Align package/browser versions, install runtime dependencies, and verify network access from the deployed process. |
| Image is blank or incomplete | Capture ran before content, fonts, or images were ready. | Wait for a concrete selector or application-ready signal; verify asset URLs and font loading before capture. |
| Target element not found | Selector does not match the generated markup or rendering completed too early. | Check the final HTML and selector, then wait for the target to appear. |
| Text or layout differs across machines | Font availability, browser version, viewport, or device scale differs. | Use consistent fonts and browser versions, and set dimensions and scale explicitly. |
| Local image is missing | The browser cannot resolve a local path in its own context. | Embed the image as a base64 data URI in template content, as the wrapper documentation recommends. |
| Output is clipped | Canvas or target dimensions are too small, or dynamic content changed the layout. | Set appropriate CSS dimensions and inspect long-content and responsive-layout cases. |
| Batch processing overwhelms the process | Too many renders are in flight or pages consume substantial memory. | Bound concurrency, process smaller batches, and monitor the worker’s memory and browser lifecycle. |
| JPEG has no transparency | JPEG does not preserve an alpha channel. | Use PNG when transparency is required; use JPEG when its output characteristics fit the image. |
9. FAQ
Which library should I try first?
Try node-html-to-image if the job is template plus data to PNG or JPEG. Use direct Puppeteer or Playwright when you need to compose a browser workflow.
Can I convert a remote webpage rather than an HTML string?
Yes. A browser automation flow can navigate to a URL and capture its page. If you want a single managed URL-to-image request, ScreenshotNeo is another option.
Which choice has the smallest setup?
The wrapper offers a focused interface, while a direct browser library exposes more of the workflow. Actual setup effort depends on the target environment and whether a browser is already available.
Are there published speed results comparing these choices?
The sources used here document features and setup, not a fair comparative benchmark. Test representative pages in your target runtime.
Sources and further reading
- node-html-to-image package documentation for template input, formats, selectors, hooks, buffers, and concurrency.
- Puppeteer documentation for browser setup and screenshot APIs.
- Playwright screenshot documentation for page and element capture options.