How to Capture a Screenshot of a Twitter Post
Capture an X (formerly Twitter) post on iPhone, Android, Mac, or the web while keeping its author, text, and context visible.

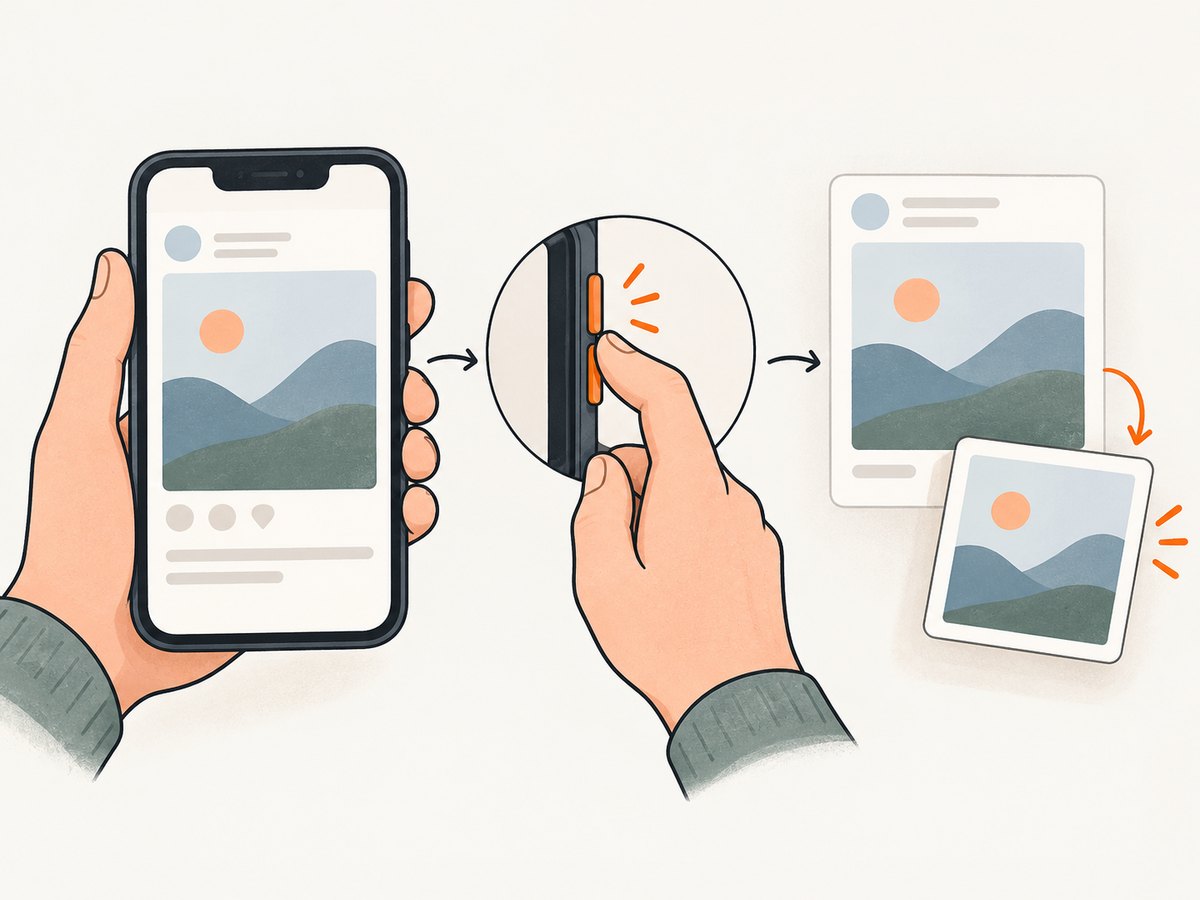
Open the post so the text, author handle, timestamp, and surrounding context are visible, then use your device’s built-in screenshot controls. On iPhone, press the Side and Volume Up buttons together. On Android, press Power and Volume Down together. On a Mac, press Shift-Command-5 and select the screen or area to capture.
This creates a static image of the post. If you want to share the post while keeping a link back to the original, use X’s Repost or Quote Post feature instead. X explains that these actions reference the post being shared. A screenshot is useful for a document, presentation, archive, or message, but it does not prove that a post is authentic or that the post will remain online.
1. Before you capture the post
Open the post’s detail page rather than capturing it from a fast-moving timeline. X says that clicking a post opens its details page and shows source information at the bottom. This gives you a better record for later checking.
- Open the post in the X app or at x.com.
- Tap or click the post so the full text is visible.
- Scroll until the author’s display name, handle, post text, date, and useful surrounding context are on screen.
- Close menus, notifications, keyboard overlays, and other unrelated panels.
- Check the frame for private information, direct messages, email addresses, phone numbers, or private media before saving or sharing it.
When the image is evidence for a report or internal record, save the original post URL alongside the image. A screenshot can be cropped, edited, or taken out of context, so the URL and the visible handle make later review easier.
2. Take a screenshot on iPhone
iPhones with Face ID
- Open the post and position it as you want it captured.
- Quickly press and release the Side button and Volume Up button at the same time.
- A thumbnail appears in the lower-left corner. Tap it to mark up, crop, or share the image, or swipe it away to save it immediately.
iPhones with a Home button
Press and release Home and Side together. Use the preview to crop or annotate the image, then tap Done and choose where to save it. Apple documents both button combinations and the editing options in its screenshot instructions: Apple Support: Take a screenshot on your iPhone.
If the buttons do not work
- Press and release quickly; holding the buttons can open the power-off screen or trigger another action.
- Make sure you are pressing Side and Volume Up, not Volume Down.
- Use AssistiveTouch if a physical button is damaged. Enable it in Settings, Accessibility, Touch, AssistiveTouch, then add Screenshot to the custom menu.
- If the screenshot thumbnail is missing, open Photos and check Albums, Screenshots.
3. Take a screenshot on Android
- Open the post and put the complete text and attribution on screen.
- Press Power and Volume Down together.
- Release immediately when the screen flashes or the screenshot preview appears.
- Tap the preview to crop, draw, or share. The image is normally stored in Photos or Gallery under Screenshots.
Android controls vary by manufacturer. On some phones, you can hold the Power button and choose Screenshot from the power menu. Google’s instructions note that steps differ by device and recommend checking the manufacturer’s support page if neither method works: Google Android Help: Take a screenshot.
Scrolling screenshots
Some Android versions show a Capture more, Scroll, or similar option after the first screenshot. Use it only when the post itself is longer than one screen. Review the result carefully: a scrolling capture can include replies, navigation controls, or unrelated posts. If the option is unavailable, capture two or more frames with overlapping context and keep them in order.
4. Take a screenshot on Mac
- Open the post in your browser and arrange the window.
- Press Shift-Command-5 to open macOS Screenshot controls.
- Choose Capture Entire Screen, Capture Selected Window, or Capture Selected Portion.
- For a post, Capture Selected Portion is usually the clearest choice because it excludes browser tabs and unrelated content.
- Click Capture. macOS saves the image according to your Screenshot options, usually on the desktop.
Use the Options menu in the Screenshot toolbar to change the save location, include or exclude the pointer, add a timer, or show the floating thumbnail. Apple’s digital-safety guidance describes the same Shift-Command-5 controls: Apple Support: Take screenshots on Mac.
5. Windows and other computers
Keyboard shortcuts and screenshot tools differ across Windows computers, browser extensions, Linux desktop environments, and managed workstations. Use the operating system’s built-in Snipping or screenshot utility, then select only the post area. Because shortcut behavior varies by Windows version, keyboard layout, and manufacturer, check the Microsoft support page for your exact version instead of relying on an unverified key combination.
Whichever tool you use, capture the post detail page, keep the handle visible, and save the source URL separately. Browser extensions can add their own toolbar buttons or upload images automatically, so review their destination and permissions before using them for confidential material.
6. Screenshot versus Repost or Quote Post
| Goal | Better choice | What you keep |
|---|---|---|
| Save a visual record in a document | Screenshot | Pixels visible at capture time |
| Share while preserving a reference | Repost | A link and X’s connection to the original post |
| Add your explanation to someone else’s post | Quote Post | Your comment plus a reference to the source |
| Document a post for later review | Screenshot plus original URL | Static image and a path back to the post |
X’s help materials describe Repost and Quote Post as sharing actions that reference the source. A screenshot does not update when the original changes, is deleted, or becomes unavailable. For a durable record, preserve the image, URL, capture date, and any relevant context together.
7. Privacy and authenticity checks
Review every screenshot before sharing it publicly. X’s private-information policy says: “You may not … publish or post other people’s private information without their express authorization and permission.” The policy also addresses sharing private media without consent: X Private Information Policy.
- Crop or blur private phone numbers, addresses, email addresses, account IDs, and direct-message content.
- Do not assume a screenshot proves who created the post. Text, handles, timestamps, and images can be altered.
- Keep the original URL and check the live post where possible.
- Preserve enough context to avoid making a reply look like a standalone statement.
- Obtain permission before publishing private media of another person.
An academic study describes methods for extracting text, timestamps, and handles from screenshots and notes that people often share screenshots without verifying authenticity. Treat the image as a record of what appeared on a screen, not as independent proof.
8. Capturing a post automatically for a website or workflow
For one post, built-in controls are simplest. For repeated captures, a browser automation script or screenshot API can load the URL, wait for content, set a viewport, and save an image. Automation needs to handle dynamic rendering, cookie banners, login walls, rate limits, and posts that are unavailable.
Browser automation checklist
- Use the post’s canonical URL and a fixed viewport.
- Wait for the post text or an identifiable selector before capturing.
- Hide consent banners, chat widgets, and unrelated overlays when your use case allows it.
- Capture the post element when you need a compact image; capture the full page when replies or context matter.
- Save the URL, timestamp, viewport, and image together.
- Retry transient navigation failures with a bounded timeout.
When a post is behind a login wall, automation may need an authenticated browser context. Do not place account cookies or authorization headers in client-side code. Keep them on a server, restrict access, and follow X’s terms and the permissions for the content you capture.
9. Or skip the browser setup
ScreenshotNeo provides a website screenshot API and MCP server. A single GET request returns a PNG, JPEG, WebP, or PDF. The API can wait for a selector, delay, or network idle; use a CSS selector to capture one element; load lazy images for full-page captures; set a device preset or custom viewport; apply dark mode, retina scale, custom CSS, JavaScript, headers, cookies, user agent, timezone, geolocation, and more. See the ScreenshotNeo API documentation for the full option list.

cURL
curl -G "https://api.screenshotneo.com/v1/shot" \
  -d access_key=YOUR_API_KEY \
  --data-urlencode url=https://x.com/your_handle/status/123 \
  -o post.webp
Python
import requests

r = requests.get(
    "https://api.screenshotneo.com/v1/shot",
    params={
        "access_key": "YOUR_API_KEY",
        "url": "https://x.com/your_handle/status/123",
    },
    timeout=90,
)
r.raise_for_status()
open("post.webp", "wb").write(r.content)
Node.js
const q = new URLSearchParams({
  access_key: 'YOUR_API_KEY',
  url: 'https://x.com/your_handle/status/123'
});

const res = await fetch(`https://api.screenshotneo.com/v1/shot?${q}`);
if (!res.ok) throw new Error(`Screenshot failed: ${res.status}`);
const bytes = new Uint8Array(await res.arrayBuffer());
await Bun.write('post.webp', bytes);
ScreenshotNeo removes cookie and consent banners, newsletter popups, and chat widgets before capture. Bot checks, blank pages, timeouts, failed loads, and cache hits are not billed, and each response reports the result with X-Page-Verdict and X-Billed headers. Its MCP server includes take_screenshot, get_page_info, and capture_pdf tools for Claude, Cursor, and other MCP clients.
For repeated work, use a cache TTL, bulk capture (up to 100 URLs per call), async jobs with signed webhooks, or signed links for public image tags. You can also block ads, trackers, selected requests, or resource types. These controls reduce page noise and help keep output consistent.
There is a free plan with 1,000 screenshots per month and no card. Paid plans start at $5 for 3,000 shots; every feature is available on every plan. Create a free ScreenshotNeo account.
10. Troubleshooting
| Symptom | Likely cause | Fix |
|---|---|---|
| The screenshot contains only a loading spinner | The post or embedded media has not finished rendering | Wait for the post detail page, then capture again. For automation, wait for a post selector or network idle. |
| The author handle is missing | The post was captured from a cropped timeline card | Open the post detail page and widen the window before capturing. |
| A cookie banner covers the text | The site displayed a consent dialog | Accept or dismiss it before capture, or use a tool that removes known consent overlays. |
| The image includes unrelated posts | A scrolling capture or full-page selection was too broad | Capture the post element or select a tighter region. Keep one reply only when it supplies necessary context. |
| The phone opens the power menu | Buttons were held too long or pressed out of sync | Press and release the required buttons quickly and together. |
| The API returns an error or blank image | Invalid URL, blocked navigation, timeout, or authentication requirement | Check the URL, inspect verdict headers, increase the wait condition, and provide permitted headers or cookies server-side. |
| Text is too small to read | The viewport is too wide or the screenshot was downscaled | Use a tighter crop, a larger retina scale, or a device-sized viewport. |
11. Quality, reliability, and cost notes
For a human-readable record, prioritize legibility over maximum page area. A compact post capture is easier to inspect and share; a full-page capture preserves replies and context but can create a very tall image. Keep a consistent viewport and color mode when comparing posts over time.
Dynamic pages can change between loads. Record the capture time, URL, viewport, and whether the post was loaded while signed in. For automated jobs, use bounded retries, cache repeated URLs, and store response metadata with the image. If a page is unavailable, preserve the failure result rather than silently replacing it with an unrelated frame.
With ScreenshotNeo, only clean shots are billed. Cache hits, failed loads, blank pages, bot checks, and timeouts are free, and the response headers identify billing and page verdicts. The usage API, async jobs, webhooks, and bulk endpoint help you plan larger capture workflows without adding browser infrastructure.
12. FAQ
Does X notify someone when I screenshot their post?
A device screenshot is controlled by your operating system, not by an X sharing action. If you need a visible reference back to the source, use Repost or Quote Post and follow the privacy rules for the content.
Can I screenshot a deleted post?
Only if you already saved an image or another record. A screenshot does not let you reopen a deleted post or establish that the image is authentic.
Should I capture the whole thread?
Capture the single post when attribution is the priority. Capture additional replies only when they change the meaning, provide necessary context, or document a conversation.
What format should I use?
PNG is useful for sharp text and annotations. JPEG is smaller for photographs. WebP is compact for web delivery. PDF is useful when the capture belongs in a printable report.
How can I make an automated capture repeatable?
Use the canonical URL, fixed viewport, explicit wait condition, consistent color mode, and stored metadata. Handle login, consent, transient failures, and unavailable posts as separate states.


