How to Capture Screenshots with Zapier
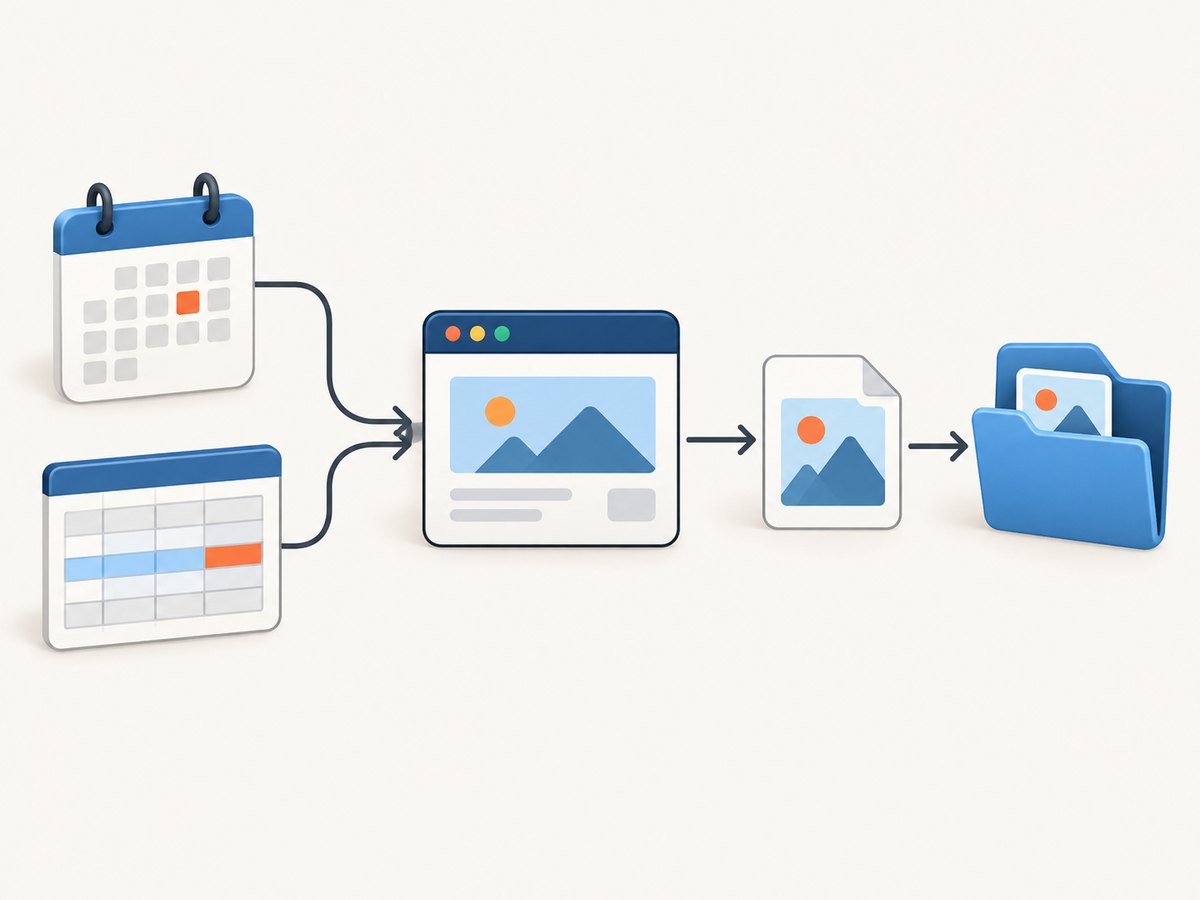
Set up a Zap that captures a webpage from a schedule or event, then sends the image or PDF to storage or another app.

To capture a webpage with Zapier, create a Zap with a trigger (such as a schedule or a new spreadsheet row), add a screenshot service action, map the page URL into that action, and pass its output to a later step such as file storage or email. The exact action fields and output format depend on the selected integration, so check the action’s current setup screen and map its returned file or URL explicitly.
This guide walks through the setup, explains the screenshot actions documented in Zapier’s listings, and covers testing, file handling, troubleshooting, and a direct API alternative. Zapier’s available integrations and field names can change; verify them in your account before relying on a workflow.
1. Choose a trigger and destination
First decide what should cause the capture and where the result should go. Two common patterns are a scheduled capture and an event-driven capture.
| Pattern | Trigger example | Useful when |
|---|---|---|
| Scheduled | A daily schedule | You want recurring snapshots of a known set of pages. |
| Event-driven | A new Google Sheets row containing a URL | People or another system add pages to a queue as needed. |
Zapier documents a daily GetScreenshot-to-Dropbox workflow and a Google Sheets example that captures a URL from a newly added row. These show the two basic patterns; they do not guarantee that every site or destination will behave identically. See the [daily screenshot workflow](https://zapier.com/apps/dropbox/integrations/schedule/409705/take-daily-website-screenshots-with-getscreenshot-and-upload-them-to-dropbox) and [Sheets-to-HTML-to-Image example](https://zapier.com/apps/google-sheets/integrations/html-to-image/1722534/capture-website-screenshots-via-html-to-image-from-new-google-sheets-rows).
Prepare a URL queue for event-driven captures
For a spreadsheet-triggered Zap, use a column for the page URL and, if helpful, columns for a label, desired output type, or processing status. Use a complete URL such as https://example.com/pricing, not a page title or a relative path. If each row represents one capture, ensure the trigger watches the intended worksheet and that the URL cell is populated before the Zap runs.
Decide how the result will be used
Pick the next action before configuring the screenshot step. A screenshot may be passed to file storage, an email, or another action. Some integrations expose a file directly, while others may return a hosted image URL, base64 image data, or rendered HTML. Confirm the available output fields in the selected action, then map the field that matches the destination’s expected input. Zapier’s GetScreenshot listing says its result can be used by following actions, and its Dropbox template demonstrates a capture followed by upload.
2. Add a screenshot action to the Zap
- Create a Zap and configure the trigger. Test it with a representative schedule or spreadsheet row so the URL field is available to later steps.
- Add an action and search Zapier’s app directory for the screenshot service you intend to use. Select the appropriate capture action.
- Connect the service account if Zapier requests it. The required connection details depend on the integration.
- Map the trigger’s URL value into the screenshot action’s URL field. If the action expects a fixed URL, enter it directly.
- Choose capture settings that the action offers, such as full-page capture, dimensions, delay, file type, or an element selector.
- Test the action with a page you can inspect. Check that the output shows the intended part of the page and note which output field contains the image, PDF, or URL.
- Add the destination action. Map the screenshot output to its file or content field and set a useful filename if the destination supports one.
- Test the complete Zap, including the destination, before turning it on.
Zapier’s listings describe several options, but they have different fields and capabilities. Do not assume a setting from one service exists in another.
3. Choose a Zapier screenshot integration
The following capabilities are described on the respective Zapier listings. This is a field guide, not a performance ranking or an independent comparison.

| Integration | Documented options | Consider it for |
|---|---|---|
| GetScreenshot | Live website capture, full-page option, width, PDF output, extra wait, and an advanced element action requiring a selector. Its listing says a Starter plan is needed for Zaps with three or more steps. | Full-page or element capture, PDF output, or workflows with multiple actions. |
| HTML to Image | URL-to-image action and a full-page screenshot option. Zapier also lists a Google Sheets row trigger example. | A straightforward URL-to-image flow, including a spreadsheet queue. |
| Screenshot API | Output format, file type, full-page option, delay, width, height, and other capture controls. | Workflows where the listed format or dimension settings matter. |
| Screenshots by Snapshot Site | Capture output can include hosted image URL, base64 image, or rendered HTML; the listing also describes a visual-change trigger and page analysis. | Workflows that use one of those output forms or its documented monitoring actions. |
Before choosing, open the current action setup in Zapier and verify availability, required inputs, output fields, and any account-plan restrictions. Capabilities on integration pages may change. In particular, account for the GetScreenshot listing’s stated Starter requirement for Zaps with three or more steps if that is the action you select.
4. Set capture options carefully
Full page, viewport, or element
A viewport capture shows the visible browser area at the chosen dimensions. A full-page option is intended to include content beyond the initial viewport, while an element capture targets a particular page component. The listings document full-page capture for multiple integrations and element capture for GetScreenshot’s advanced action. For element capture, use the CSS selector required by that action, such as a selector for a specific content container. If the selector matches nothing on the target page, the action may fail or return an unexpected result; verify the selector on the live page and account for pages where the element loads late.
Dimensions, format, and PDF
Set dimensions based on the downstream use. A narrow viewport may cause responsive layouts to wrap differently from a desktop page. Where offered, select the output type the next step accepts. GetScreenshot lists PDF output; Screenshot API lists format and file type controls. Check the returned content type or output field rather than inferring the file format from a filename alone.
Wait or delay
Some actions list an extra wait or delay. This can help when a page renders content after initial navigation, but long waits increase completion time. Start with the default or a modest delay, test on the actual page, and increase it only if the needed content appears late. A fixed delay cannot make an inaccessible page load successfully.
Dynamic and protected pages
Pages that require sign-in, user interaction, consent, or an anti-bot check may not present the same content to an automated capture as they do in your browser. A site can also render different content by location, session, or time. Test using URLs and conditions representative of the workflow, and avoid assuming that a successful capture of a public landing page proves private or protected pages will work.
5. Map and store the output
After the screenshot action test succeeds, inspect its output fields. Choose the image or PDF field that the next action supports. If it returns a URL, use a destination field that accepts a URL or fetches the file. If it returns base64 data, confirm the destination accepts that representation or add an appropriate conversion step. If the destination expects a file object, a plain text URL may not be interchangeable with a file.
Use descriptive filenames where possible, for example a page label and capture date. Avoid using an untrusted URL directly as a filename without sanitizing it. If the trigger processes many pages, include enough context in the name or destination path to distinguish captures and make later review easier.
6. Test the workflow before turning it on
- Use a public page whose expected appearance you can inspect.
- Run the trigger test and confirm that the intended URL is present and correctly mapped.
- Run the screenshot action and inspect the captured area, dimensions, and file or URL output.
- Run the destination action and open the saved item. Confirm that it is a usable image or PDF rather than an empty file or a text field containing a link.
- Test an edge case relevant to your workflow, such as a long page, a page with delayed content, or a URL containing query parameters.
- Review task history after enabling the Zap so you can identify which step failed if a later run has a problem.
A test run verifies the specific configuration and sample URL at that time. It does not establish that every target website will always render successfully.
7. Troubleshooting common problems
| Symptom | Likely cause | What to check or change |
|---|---|---|
| The capture action receives a blank or incorrect URL | The trigger field was not mapped, the test row was empty, or the URL is incomplete. | Re-test the trigger with a populated row and map the full URL field into the action. |
| The screenshot is blank or shows a loading state | The page did not finish rendering, the URL is inaccessible to the capture service, or the content loads after the action’s wait. | Open the URL without a session, confirm it is publicly reachable, and adjust the available wait setting. Test a representative page again. |
| The screenshot cuts off page content | The action is capturing only the viewport, or the page content is lazy-loaded. | Enable the full-page option if available. Confirm whether that action handles content below the fold as needed. |
| An element capture returns no useful image | The selector is invalid, matches no element, or the element is rendered later. | Check the selector against the live page, use a stable selector, and use an available wait option if the element appears after load. |
| The output cannot be uploaded or emailed | The downstream step expects a file but received a URL, base64 data, or another output type. | Inspect the screenshot step’s test output and map the representation the destination accepts. Add a conversion or download step only if the workflow requires it. |
| The file has the wrong extension or cannot be opened | The filename extension does not match the actual output type, or the wrong output field was selected. | Choose the desired format in the capture action if available, inspect the output, and align the destination filename with the actual file type. |
| A multi-step Zap cannot be created or run | The selected service or Zapier account may have a plan requirement. | Check the current integration and Zapier plan details. GetScreenshot’s listing states that a Starter plan is needed for Zaps with three or more steps. |
| The Zap works in a test but a later run fails | The target page, trigger data, or service response may have changed since the test. | Review the failed run’s step data, retry with that exact URL, and check whether the page requires a session or now presents a challenge. |
8. Performance, reliability, and cost considerations
Each Zap run adds the screenshot service and any destination steps to the workflow. Longer pages, larger output files, extra waits, and multi-step routing can add processing time. Capture only the pages and frequency you need, use a sensible viewport and format, and avoid setting an unnecessarily long fixed delay.
For recurring captures, consider how duplicate runs should be handled. A schedule may create a new file each time; an event trigger may run again if the source event is repeated or retried. Choose a naming pattern and destination strategy that makes duplicates identifiable. For a spreadsheet queue, a status column can help you track which rows have been processed if the surrounding workflow supports updating it.
There is no universal cost figure for the integrations in this guide: the research sources do not establish their current prices, usage limits, or reliability guarantees. Check current provider and Zapier plan details for your trigger cadence, number of steps, and expected volume. Estimate the number of captures per period from the trigger frequency and number of URLs, then confirm how both the Zap and selected screenshot service meter usage.
Or skip the browser setup
ScreenshotNeo is a website screenshot API and MCP server. If you want a direct request instead of configuring a browser workflow, one GET request can return a screenshot or PDF. See the ScreenshotNeo API documentation for request options.
curl -G "https://api.screenshotneo.com/v1/shot" -d access_key=YOUR_API_KEY --data-urlencode url=https://stripe.com -o shot.webpimport requests
r = requests.get(
"https://api.screenshotneo.com/v1/shot",
params={"access_key": "YOUR_API_KEY", "url": "https://stripe.com"},
timeout=90,
)
open("shot.webp", "wb").write(r.content)const q = new URLSearchParams({ access_key: 'YOUR_API_KEY', url: 'https://stripe.com' });
const res = await fetch(`https://api.screenshotneo.com/v1/shot?${q}`);
ScreenshotNeo accepts cookie and consent banners like a visitor and removes more than 60 known consent platforms, newsletter popups, and chat widgets before capture; each step can be turned off. Bot checks, blank pages, timeouts, failed loads, and cache hits are not billed, and the response identifies the page verdict and billing status in headers. Its MCP server offers take_screenshot, get_page_info, and capture_pdf for AI agents using Claude, Cursor, or another MCP client. The free plan includes 1,000 screenshots a month with no card; paid plans start at $5 for 3,000.
Start with 1,000 free screenshots a month, with no card required.
Frequently asked questions
Can Zapier automatically screenshot a webpage?
Yes. A Zap can start from a schedule or an event, pass a URL to a screenshot-service action, and send its result to a later action. The exact fields and output mapping depend on the integration.
Can I capture a specific part of a page?
GetScreenshot’s Zapier listing documents an advanced element action that takes a selector. Other integrations may offer different controls, so confirm the action’s current fields before building around element capture.
Can the workflow produce a PDF?
GetScreenshot’s listing documents PDF output. Check the selected action’s options and confirm that the next Zap step accepts the resulting PDF representation.
Can I capture pages behind a login?
The listings in the research do not establish a universal authenticated-page workflow. Whether it works depends on the selected service’s supported authentication and the site’s access controls. Verify those requirements with the provider before depending on private-page captures.
How do I choose between the screenshot integrations?
Compare the fields you need—such as full-page capture, element selection, dimensions, output format, or output representation—against the current Zapier action screens. The listings describe different capabilities and do not provide a performance ranking.


