How to Capture a Tweet as a Screenshot with an API
Learn three reliable ways to turn an X post into PNG, SVG, HTML, or a stored image, with runnable API code and production troubleshooting.
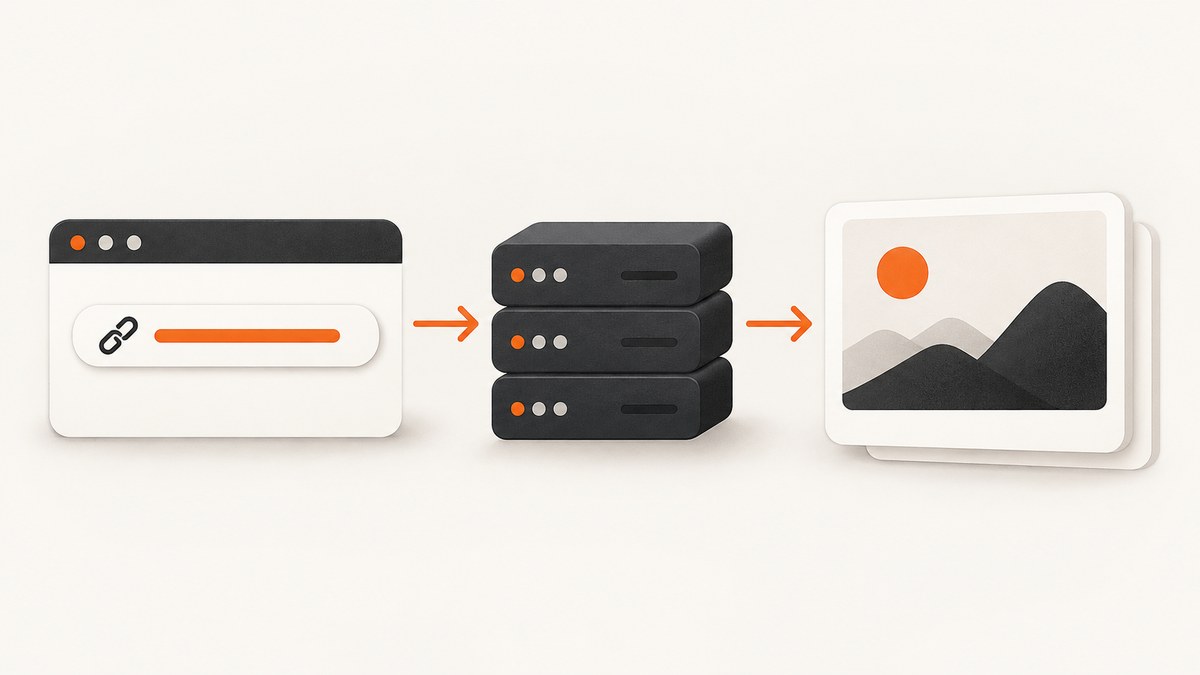
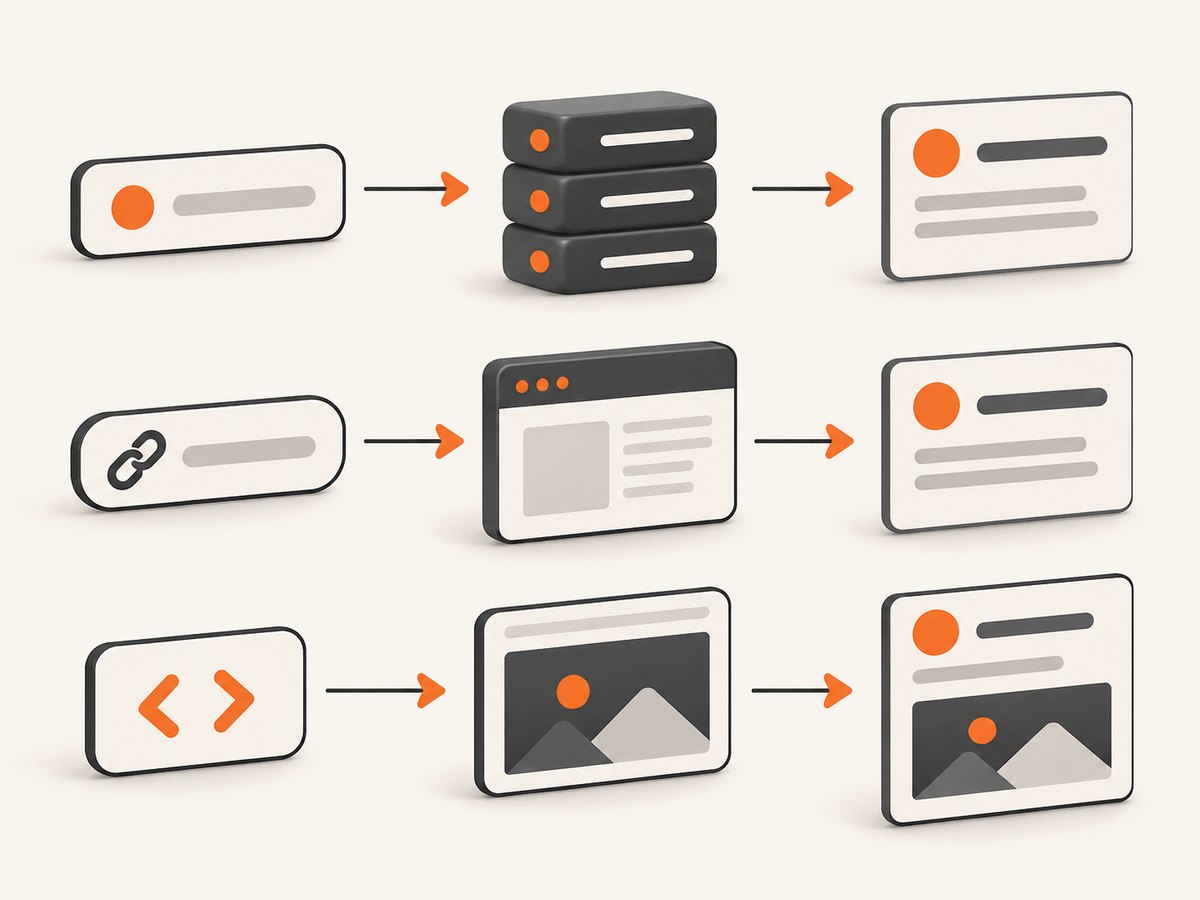
Direct answer: To capture a tweet (now an X post) as an image, choose one of three API workflows. A dedicated endpoint such as TwitterShots accepts a numeric status ID and returns SVG, PNG, or HTML. A URL rendering API loads the canonical x.com page and captures the tweet card, often by selecting the article element. An embed workflow renders X’s official widget and then screenshots the resulting HTML. For a production system, normalize the post URL, keep the source ID and capture time, save binary output yourself, and expect failures when a post is deleted, protected, suspended, or unavailable.
If you want to avoid browser orchestration, ScreenshotNeo provides a one-request screenshot API with PNG, JPEG, WebP, and PDF output.
1. Pick the right capture method
| Method | Input | Best for | Trade-offs |
|---|---|---|---|
| Dedicated screenshot endpoint | Numeric status ID | Predictable formats, themes, aspect ratios, and one-request capture | Usually reflects the provider’s card renderer rather than every detail of live x.com |
| URL rendering | Canonical post URL | Appearance close to the live page, including visible engagement information | Requires JavaScript wait time and can change when X changes its page |
| Official embed rendering | Embed HTML and widgets.js | Official X card treatment, branding, Follow button, and replies link | Needs a browser-capable renderer and enough delay for the widget to load |
X’s own documentation describes APIs for public content and embeds. Applications must be registered, and protected or private data requires appropriate authorization. A Tweet object includes an author, message, unique ID, timestamp, and sometimes geographic metadata; use the official API when you need structured fields in addition to a picture. X API documentation explains the access model, while the Tweet data dictionary describes Tweet fields.
2. Extract and validate the status ID
A canonical post URL normally looks like https://x.com/username/status/1617979122625712128 or the older https://twitter.com/username/status/1617979122625712128. The final numeric path segment is the status ID. Do not trust arbitrary user input: allow only http or https, require the host to be x.com, twitter.com, or a subdomain you explicitly support, and reject non-numeric status segments.
function extractStatusId(input) {
  const url = new URL(input);
  const host = url.hostname.toLowerCase();
  if (!['x.com', 'www.x.com', 'twitter.com', 'www.twitter.com'].includes(host)) {
    throw new Error('Unsupported X/Twitter host');
  }
  const parts = url.pathname.split('/').filter(Boolean);
  const statusIndex = parts.findIndex((part) => part.toLowerCase() === 'status');
  if (statusIndex === -1 || !/^\d+$/.test(parts[statusIndex + 1] || '')) {
    throw new Error('URL does not contain a numeric status ID');
  }
  return parts[statusIndex + 1];
}

console.log(extractStatusId('https://x.com/example/status/1617979122625712128'));
Store the original URL as well as the extracted ID. Redirects from twitter.com to x.com are common, and retaining the original input makes audits and reprocessing easier.
3. Fastest path: a dedicated tweet screenshot endpoint
TwitterShots documents GET https://api.twittershots.com/api/v1/screenshot/:statusId. Send the key in X-API-KEY and choose options such as format=png, theme=light|dark, aspectRatio, showFullText, showTimestamp, and showStats. The default returnType=buffer returns image bytes directly. A URL response is temporary, so save buffer output on your own server when the image must remain available. See the TwitterShots API documentation for the endpoint and current parameter details.
curl --location 'https://api.twittershots.com/api/v1/screenshot/1617979122625712128?format=png&theme=light&returnType=buffer' \
  --header 'Accept: image/png' \
  --header 'X-API-KEY: YOUR_X_API_KEY' \
  --output tweet.png
import requests
status_id = '1617979122625712128'
url = f'https://api.twittershots.com/api/v1/screenshot/{status_id}'
params = {
'format': 'png',
'theme': 'dark',
'returnType': 'buffer',
'showFullText': 'true',
'showTimestamp': 'true',
'showStats': 'true',
}
r = requests.get(url, params=params, headers={'X-API-KEY': 'YOUR_X_API_KEY'}, timeout=90)
r.raise_for_status()
with open('tweet.png', 'wb') as file:
file.write(r.content)const statusId = '1617979122625712128';
const query = new URLSearchParams({
format: 'png',
theme: 'light',
returnType: 'buffer',
showFullText: 'true',
showTimestamp: 'true',
showStats: 'true'
});
const response = await fetch(`https://api.twittershots.com/api/v1/screenshot/${statusId}?${query}`, {
headers: {
'Accept': 'image/png',
'X-API-KEY': process.env.TWITTERSHOTS_API_KEY
}
});
if (!response.ok) throw new Error(`HTTP ${response.status}`);
const bytes = new Uint8Array(await response.arrayBuffer());
await Bun.write('tweet.png', bytes);Dedicated endpoint options
format: request PNG, SVG, or HTML according to the provider’s supported formats.theme: choose light or dark presentation.aspectRatio: request a card proportion that fits your destination.showFullText: preserve the complete post text when supported.showTimestampandshowStats: include the timestamp and engagement statistics.returnType=buffer: receive bytes and store them yourself; hosted URL responses are temporary.
Keep the API key server-side. Never place it in browser JavaScript, a mobile app bundle, or a public repository.
4. Render the live X page with an HTML-to-image API
A URL renderer is useful when the screenshot should resemble the live page. HTML/CSS to Image documents passing the full post URL, selecting article, waiting about 3,000 milliseconds for JavaScript, and optionally setting device_scale to 2 for a denser image. The service follows redirects from twitter.com to x.com. Its URL-to-image guide shows this request:
curl -X POST https://hcti.io/v1/image -u 'UserID:APIKey' \
  -H 'Content-Type: application/json' \
  -d '{
    "url": "https://x.com/username/status/123456789",
    "selector": "article",
    "ms_delay": 3000,
    "device_scale": 2
  }'
The selector matters. Without it, the renderer may capture navigation, recommendations, or an empty shell. If the post contains an image or video, wait for the relevant content to load and use a viewport wide enough to avoid unintended wrapping. Treat the result as a rendering of the current public page, so layout, counters, and labels can change over time.
5. Render the official X embed
X’s Help Center instructs users to open a post menu, choose Embed post, customize it at publish.x.com, and paste the generated code into a page. Embedded posts can display photos and videos. The official embed instructions cover that flow.
For automation, create the standard blockquote, load https://platform.twitter.com/widgets.js, wait for the widget to replace the blockquote, then capture the .twitter-tweet element. HTML/CSS to Image documents a 3,000 ms delay for this approach.
<blockquote class='twitter-tweet'>
  <a href='https://x.com/username/status/123456789'></a>
</blockquote>
<script async src='https://platform.twitter.com/widgets.js' charset='utf-8'></script>
A browser renderer may need to scroll the widget into view, wait for network idle, and allow an additional delay. The embed gives you official X styling, a Follow button, and a replies link; it is different from a plain screenshot of the live page.
6. DIY browser capture with Playwright
When you need custom authentication, CSS, request blocking, or a private rendering environment, run a headless browser yourself. The following Node.js example captures the first article after waiting for the page to settle.
import { chromium } from 'playwright';

const postUrl = process.argv[2];
if (!postUrl) throw new Error('Usage: node capture.mjs https://x.com/user/status/123');

const browser = await chromium.launch({ headless: true });
const page = await browser.newPage({
  viewport: { width: 1280, height: 1000 },
  deviceScaleFactor: 2
});
try {
  await page.goto(postUrl, { waitUntil: 'domcontentloaded', timeout: 60000 });
  await page.waitForTimeout(3000);
  const tweet = page.locator('article').first();
  await tweet.waitFor({ state: 'visible', timeout: 30000 });
  await tweet.screenshot({ path: 'tweet.png' });
} finally {
  await browser.close();
}
Install with npm install playwright and npx playwright install chromium. For a full-page record, replace the element screenshot with page.screenshot({ path: 'page.png', fullPage: true }). Avoid logging cookies, authorization headers, or post content that your application is not allowed to retain.
7. Or skip the browser setup
ScreenshotNeo turns a URL into a clean PNG, JPEG, WebP, or PDF with one GET request. Before capture it accepts the cookie or consent banner like a visitor and removes more than 60 known consent platforms, newsletter popups, and chat widgets; each step can be turned off. Bot checks, CAPTCHAs, blank pages, timeouts, failed loads, and cache hits are not billed, and the response identifies the result with X-Page-Verdict and X-Billed headers. Its MCP server exposes take_screenshot, get_page_info, and capture_pdf for Claude, Cursor, and other MCP clients.

For a tweet URL, use the same API with the canonical post address. Full options and parameter names are in the ScreenshotNeo documentation.
curl -G 'https://api.screenshotneo.com/v1/shot' \
  -d access_key=YOUR_API_KEY \
  --data-urlencode url=https://x.com/username/status/123456789 \
  -o tweet.webp
import requests
r = requests.get(
'https://api.screenshotneo.com/v1/shot',
params={'access_key': 'YOUR_API_KEY', 'url': 'https://x.com/username/status/123456789'},
timeout=90,
)
r.raise_for_status()
open('tweet.webp', 'wb').write(r.content)
print('verdict:', r.headers.get('X-Page-Verdict'))
print('billed:', r.headers.get('X-Billed'))const q = new URLSearchParams({
access_key: 'YOUR_API_KEY',
url: 'https://x.com/username/status/123456789'
});
const res = await fetch(`https://api.screenshotneo.com/v1/shot?${q}`);
if (!res.ok) throw new Error(`HTTP ${res.status}`);
const buffer = Buffer.from(await res.arrayBuffer());
require('node:fs').writeFileSync('tweet.webp', buffer);
console.log({ verdict: res.headers.get('X-Page-Verdict'), billed: res.headers.get('X-Billed') });ScreenshotNeo also supports element capture by CSS selector, dark mode, device presets and custom viewports, retina scale, custom CSS and JavaScript, click actions, hide selectors, waits for selectors or network idle, blocked ads and resource types, custom headers, cookies, user agents and authorization, timezone and geolocation, transparent backgrounds, resizing, caching with a chosen TTL, signed links, asynchronous jobs with signed webhooks, bulk capture of up to 100 URLs per call, a usage API, and an OpenAPI specification. Parameter names used by other screenshot APIs also work, which can simplify migration.
The Free plan includes 1,000 shots each month with no card. Paid plans start at $5 for 3,000 shots; higher plans are Growth $15 for 15,000, Pro $39 for 60,000, Scale $99 for 250,000, and Business $249 for 1,000,000. Yearly billing gives two months free, and every feature is available on every plan. Create a free ScreenshotNeo account.
8. Production checklist
- Normalize the URL and extract a numeric status ID when using a dedicated endpoint.
- Keep API keys on your server and rotate them if exposed.
- Choose buffer output and store the bytes yourself when a provider’s hosted URL is temporary.
- Set an explicit JavaScript wait for URL and embed rendering; 3,000 ms is the documented starting point for the examples above.
- Record source URL, post ID, capture timestamp, renderer version, and output format beside each image.
- Use deterministic dimensions and device scale so visual comparisons remain meaningful.
- Cache by normalized URL plus rendering options, but invalidate when you intentionally need a current view.
- Handle deleted, protected, suspended, or rate-limited posts as expected outcomes, not infinite retry conditions.
- Re-check X access plans, quotas, pricing, and terms before launch because platform policies change.
9. Troubleshooting
| Symptom | Likely cause | Fix |
|---|---|---|
| 401 or 403 from a dedicated API | Missing, invalid, or exposed API key | Send the key in the documented header, rotate it if necessary, and keep it server-side. |
| 404 or “post unavailable” | Deleted, protected, suspended, or incorrect status ID | Open the URL manually, verify the ID, and record the failure without endless retries. |
| Blank image | Capture occurred before JavaScript rendered | Wait for the article or embed selector, then add the documented delay or network-idle wait. |
| Only part of the tweet is visible | Selector matched a nested element or text was collapsed | Capture the complete article or widget container and enable full-text behavior where supported. |
| Images or video missing | Media requests were still loading or blocked | Wait for media, scroll into view, and avoid blocking image requests. |
| Old appearance after a change | Renderer cache or browser cache | Disable or expire the cache, or use a new cache key when you need a fresh capture. |
| Hosted image URL later fails | Provider URLs are temporary | Request binary output and persist it in your own object storage. |
| Rate-limit errors | Too many concurrent requests | Use a queue with bounded concurrency, exponential backoff, and idempotent job IDs. |
10. Performance, reliability, and cost
There is no reliable cross-provider latency or pixel-accuracy benchmark in the available documentation, so size capacity with your own representative URLs. Browser rendering cost is dominated by page load, JavaScript, media, and wait time. Reuse browser processes, cap concurrency, and block unnecessary third-party resources when your chosen renderer allows it. For embeds, the wait is part of correctness: shortening it can produce an empty or partially styled card.
Use a durable storage key based on the normalized post ID, format, theme, viewport, and renderer options. Store a content hash so retries do not create duplicate records. Retry network failures and 5xx responses with backoff; do not retry a confirmed deleted or protected post continuously. ScreenshotNeo’s verdict and billing headers let you distinguish clean captures from bot checks, blank pages, timeouts, failed loads, and cache hits, which helps reconcile usage and investigate unexpected results.
11. FAQ
Can I capture a protected post?
Only if the rendering or official API request has the authorization required to view it. A public screenshot service cannot make private content public.
Should I store the URL or the image?
Store both. The URL and status ID identify the source, while the image preserves the exact point-in-time appearance.
Which format is best?
PNG is a safe default for text and UI details. WebP is useful when smaller files are more important. SVG or HTML can be preferable when a dedicated provider supports editable or structured output.
Why use the official API as well as a screenshot API?
The official API provides structured author, text, timestamp, media, and metric fields. A screenshot preserves visual presentation. Combining both gives searchable metadata and a visual record.
What is the simplest managed option?
Use ScreenshotNeo when you want a single URL request, clean shots with consent banners and widgets removed, and billing visibility for failed or non-clean pages. Start with 1,000 free screenshots per month and no card.


