How to Capture a Screenshot and Upload It With JavaScript
Capture an HTML element with html2canvas, convert it to a Blob, upload it with FormData, and fix blank images, CORS, and large-canvas errors.

The reliable browser workflow is:
- Render an element with
html2canvas. - Convert the resulting canvas to an image
BlobwithtoBlob(). - Append the Blob to
FormData. - POST the FormData with
fetch().
The browser creates the multipart boundary for you, so do not set the Content-Type header manually.
Complete browser example
Install the package:
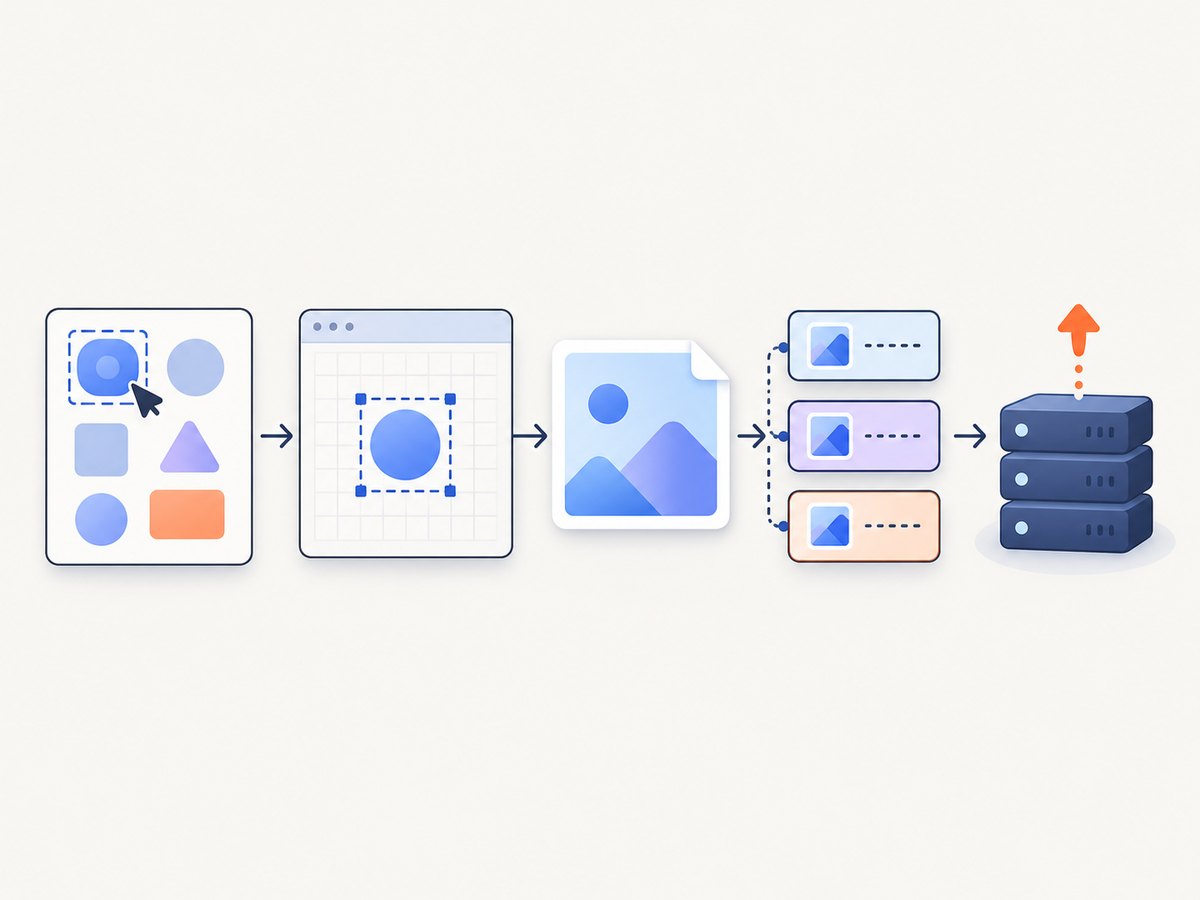
npm install @html2canvas/html2canvasThis module captures a selected element, converts it to PNG, and uploads it to an application endpoint.
import html2canvas from '@html2canvas/html2canvas';

function canvasToBlob(canvas, type = 'image/png', quality) {
  return new Promise((resolve, reject) => {
    canvas.toBlob(blob => {
      if (blob) resolve(blob);
      else reject(new Error('Canvas conversion failed'));
    }, type, quality);
  });
}

export async function captureAndUpload(element, endpoint) {
  const canvas = await html2canvas(element, {
    scale: window.devicePixelRatio,
    useCORS: true
  });

  const blob = await canvasToBlob(canvas, 'image/png');
  const formData = new FormData();
  formData.append('screenshot', blob, 'screenshot.png');

  const response = await fetch(endpoint, {
    method: 'POST',
    body: formData
  });

  if (!response.ok) {
    throw new Error(`Upload failed: ${response.status}`);
  }

  return response;
}

const element = document.querySelector('#invoice');
captureAndUpload(element, '/upload')
  .then(() => console.log('Uploaded'))
  .catch(console.error);
html2canvas documentation explains that the library reconstructs an image from DOM information; it does not take a native pixel screenshot. Therefore, the result can differ from what the browser displays.
Build the capture page
<button id="capture">Capture invoice</button>
<section id="invoice">
  <h1>Invoice 1042</h1>
  <p>Total: $128.00</p>
</section>
<output id="status"></output>
<script type="module">
  import { captureAndUpload } from './capture.js';

  const status = document.querySelector('#status');
  document.querySelector('#capture').addEventListener('click', async () => {
    status.textContent = 'Capturing…';
    try {
      await captureAndUpload(document.querySelector('#invoice'), '/upload');
      status.textContent = 'Uploaded';
    } catch (error) {
      status.textContent = error.message;
    }
  });
</script>
Convert a canvas to a Blob
HTMLCanvasElement.toBlob() is asynchronous. PNG is the default when no supported type is supplied and is a good choice for text, diagrams, and screenshots.
const pngBlob = await new Promise((resolve, reject) => {
  canvas.toBlob(blob => {
    if (blob) resolve(blob);
    else reject(new Error('Could not create image Blob'));
  }, 'image/png');
});
For smaller photographic images, use JPEG and a quality between 0 and 1:
const jpegBlob = await new Promise((resolve, reject) => {
  canvas.toBlob(blob => blob ? resolve(blob) : reject(new Error('Conversion failed')), 'image/jpeg', 0.85);
});
WebP can reduce size when the browser supports it:
canvas.toBlob(callback, 'image/webp', 0.85);A null Blob indicates conversion failure. A canvas that contains disallowed cross-origin pixels can also cause a SecurityError; handle both cases.
Upload with FormData and fetch
const formData = new FormData();
formData.append('screenshot', blob, 'screenshot.png');
formData.append('pageId', 'invoice-1042');

const response = await fetch('/upload', {
  method: 'POST',
  body: formData
});

if (!response.ok) {
  throw new Error(`Upload failed with HTTP ${response.status}`);
}

const result = await response.json();
console.log(result);
MDN’s FormData guide warns against explicitly setting Content-Type: multipart/form-data. Fetch adds the boundary that separates fields and file bytes.
Server contract
Your /upload endpoint must parse multipart form data. It should authenticate the caller, enforce a maximum request size, allow only expected image types, generate a safe storage name, and apply retention and access policies. Those policies belong to your application.
For example, an Express endpoint can use a multipart parser such as Multer:
import express from 'express';
import multer from 'multer';

const app = express();
const upload = multer({
  dest: 'uploads/',
  limits: { fileSize: 10 * 1024 * 1024 }
});

app.post('/upload', upload.single('screenshot'), (req, res) => {
  if (!req.file) return res.status(400).json({ error: 'Missing screenshot' });
  res.json({ filename: req.file.filename, bytes: req.file.size });
});

app.listen(3000);
Never trust the original filename or MIME type by itself. Inspect the file, apply authorization, and store uploads outside publicly executable paths.
Capture a selected region
Pass the element you want. For a child region, query it directly:
const chart = document.querySelector('#sales-chart');
const canvas = await html2canvas(chart, {
  scale: window.devicePixelRatio,
  useCORS: true
});
If you need coordinates from a larger page, crop the canvas after capture or capture a wrapper element. Browser extension APIs use a different model; an extension can call chrome.tabs.captureVisibleTab() or browser.tabs.captureVisibleTab() for a native visible-tab image, subject to extension permissions and deployment requirements.
Full-page and high-DPI captures
For a tall document, capture a wrapper whose dimensions include its content. html2canvas also accepts windowWidth and windowHeight; use the document’s scroll dimensions when appropriate:
const width = document.documentElement.scrollWidth;
const height = document.documentElement.scrollHeight;
const canvas = await html2canvas(document.body, {
  windowWidth: width,
  windowHeight: height,
  scale: Math.min(window.devicePixelRatio, 2),
  useCORS: true
});
Very large width, height, or area can exceed browser canvas limits and produce blank or partially rendered output. Reduce the area, capture sections separately, or lower scale. Retina output multiplies memory: doubling scale makes roughly four times as many pixels.
Useful html2canvas options
| Option | Use | Trade-off |
|---|---|---|
scale |
Increase output density; window.devicePixelRatio is common. |
More memory, CPU, and upload bytes. |
useCORS |
Attempt to load images with CORS. | Works only when the image server sends a suitable Access-Control-Allow-Origin header. |
windowWidth/windowHeight |
Control the virtual viewport, useful for full-page captures. | Incorrect dimensions can clip content. |
backgroundColor |
Set a solid background. | Use null when transparent output is required and supported. |
ignoreElements |
Skip a node during reconstruction. | Skipped content will not appear in the image. |
onclone |
Adjust the cloned document before rendering. | Changes affect only the capture clone. |
Exact CSS support depends on what html2canvas can reconstruct from the DOM. CSS effects or browser-rendered content that the library does not support may be missing.
Cross-origin images and iframes
Images from another origin can taint the canvas. Set useCORS: true only when the image server permits your origin with CORS headers. Otherwise, serve the image through a same-origin proxy that you control.

const canvas = await html2canvas(element, {
  useCORS: true,
  allowTaint: false
});
Cross-origin iframes cannot be rendered because their contentDocument is inaccessible to the page. Ask the iframe provider for an export endpoint, proxy permitted content, or capture the iframe separately from a context that has access.
Do-it-yourself checklist
- Wait until fonts, images, and dynamic data have loaded.
- Capture the smallest element that contains the required content.
- Use
useCORSonly with correctly configured image servers. - Cap
scalefor mobile devices and large pages. - Convert with
toBlob()and reject a null result. - Send FormData without a manually supplied multipart header.
- Check
response.okand show a useful error. - Validate and authorize uploads on the server.
Or skip the browser setup
ScreenshotNeo captures a URL through one API request and returns PNG, JPEG, WebP, or PDF. Its capture flow accepts cookie and consent banners like a visitor, then removes more than 60 known consent platforms, newsletter popups, and chat widgets before the shot. Bot checks, blank pages, timeouts, failed loads, and cache hits are not billed; response headers identify the page verdict and whether the request was billed.
See the ScreenshotNeo API documentation for all options. A direct call looks like this:
curl -G "https://api.screenshotneo.com/v1/shot" \
  -d access_key=YOUR_API_KEY \
  --data-urlencode url=https://stripe.com \
  -o shot.webp
import requests
r = requests.get(
"https://api.screenshotneo.com/v1/shot",
params={"access_key": "YOUR_API_KEY", "url": "https://stripe.com"},
timeout=90
)
r.raise_for_status()
open("shot.webp", "wb").write(r.content)const q = new URLSearchParams({
access_key: 'YOUR_API_KEY',
url: 'https://stripe.com'
});
const res = await fetch(`https://api.screenshotneo.com/v1/shot?${q}`);
if (!res.ok) throw new Error(`Screenshot failed: ${res.status}`);
const bytes = Buffer.from(await res.arrayBuffer());
await import('node:fs/promises').then(fs => fs.writeFile('shot.webp', bytes));ScreenshotNeo also supports element selectors, full-page lazy-image loading, device presets and custom viewports, dark mode, retina scale, custom CSS and JavaScript, clicks, waits, request blocking, headers, cookies, user agents, authorization, timezone, geolocation, transparent backgrounds, resizing, chosen cache TTLs, signed image links, asynchronous jobs with signed webhooks, bulk capture for up to 100 URLs, usage reporting, PDFs, HTML/CSS rendering, and an MCP server with take_screenshot, get_page_info, and capture_pdf for AI clients.
Every feature is on every plan: 1,000 screenshots per month are free with no card; paid plans start at $5 for 3,000 shots. Create a free ScreenshotNeo account.
cURL, Python, and Node.js upload alternatives
If your server already has an image file, these examples upload it to an endpoint that accepts the screenshot field.
curl -X POST https://example.com/upload \
  -F "screenshot=@shot.png"
from pathlib import Path
import requests
with Path('shot.png').open('rb') as image:
response = requests.post(
'https://example.com/upload',
files={'screenshot': ('shot.png', image, 'image/png')},
timeout=90,
)
response.raise_for_status()import fs from 'node:fs';
import FormData from 'form-data';
const form = new FormData();
form.append('screenshot', fs.createReadStream('shot.png'));
const response = await fetch('https://example.com/upload', {
method: 'POST',
body: form,
headers: form.getHeaders()
});
if (!response.ok) throw new Error(`Upload failed: ${response.status}`);Troubleshooting
The screenshot is blank
Check that the element has dimensions and is visible, wait for asynchronous content, and reduce the capture size or scale. Oversized canvases can exceed browser limits.
Images are missing
The images are probably cross-origin without an allowed CORS response. Configure Access-Control-Allow-Origin, use a same-origin proxy, or replace the assets.
toBlob() returns null or throws SecurityError
The canvas may be tainted by cross-origin pixels, or the browser may have failed conversion. Fix image CORS and treat null as an error.
An iframe is empty
Cross-origin iframe documents are inaccessible. Use a provider export, a permitted proxy, or a capture performed in the iframe’s own origin.
The upload returns 400 or 415
Confirm that the server expects the field name screenshot, parses multipart data, accepts the selected image type, and that the request includes a Blob. Do not set the multipart Content-Type yourself.
The upload returns 413
The request is larger than the server limit. Lower scale, use JPEG/WebP where suitable, capture a smaller region, or raise the authenticated upload limit.
The result differs from the visible page
html2canvas rebuilds the page from DOM and CSS rather than taking a native browser screenshot. Unsupported CSS, animations, fonts, videos, and browser UI can differ. Freeze animations, wait for fonts, and use a real headless browser when pixel fidelity is required.
Performance, reliability, and cost
- Pixels drive cost: high scale and full-page captures consume more memory and produce larger uploads.
- Capture after layout settles: wait for data, images, and fonts; otherwise the canvas can contain placeholders.
- Keep the main thread responsive: capture on demand, split very tall pages, and avoid repeated captures during rapid input.
- Retry uploads safely: use request IDs or deduplication on the server so a network retry does not create duplicate records.
- Protect storage: authenticate uploads, enforce type and size limits, scan or inspect files as appropriate, and expire old objects.
- Choose the right runtime: browser capture is convenient for same-origin UI regions; Puppeteer or Playwright is better for server-side real-browser rendering; ScreenshotNeo avoids maintaining that browser setup.
- Budget provider captures: ScreenshotNeo bills only clean shots. Bot checks, blank pages, timeouts, failed loads, and cache hits are free, and the response exposes verdict and billing headers.
FAQ
Can I capture an element without capturing the whole page?
Yes. Pass that element to html2canvas(element); selecting a smaller node also reduces memory and upload size.
Does html2canvas create a real browser screenshot?
No. It reconstructs an image from DOM information, so pixel identity is not guaranteed.
Should screenshots be PNG or JPEG?
Use PNG for text and sharp UI. Use JPEG or WebP when smaller files matter and slight loss is acceptable.
Can JavaScript upload the screenshot without a server?
The browser can create the Blob locally, but permanent storage or sharing requires an upload service or application backend.
When should I use a headless browser?
Use Puppeteer or Playwright when you need server-side rendering by a real browser, cross-page automation, or fidelity beyond DOM reconstruction.


