How to Capture Websites in WordPress
“Capture” can mean a screenshot, a content export, a theme export, or a complete backup. Choose the right WordPress workflow for what you need to keep.

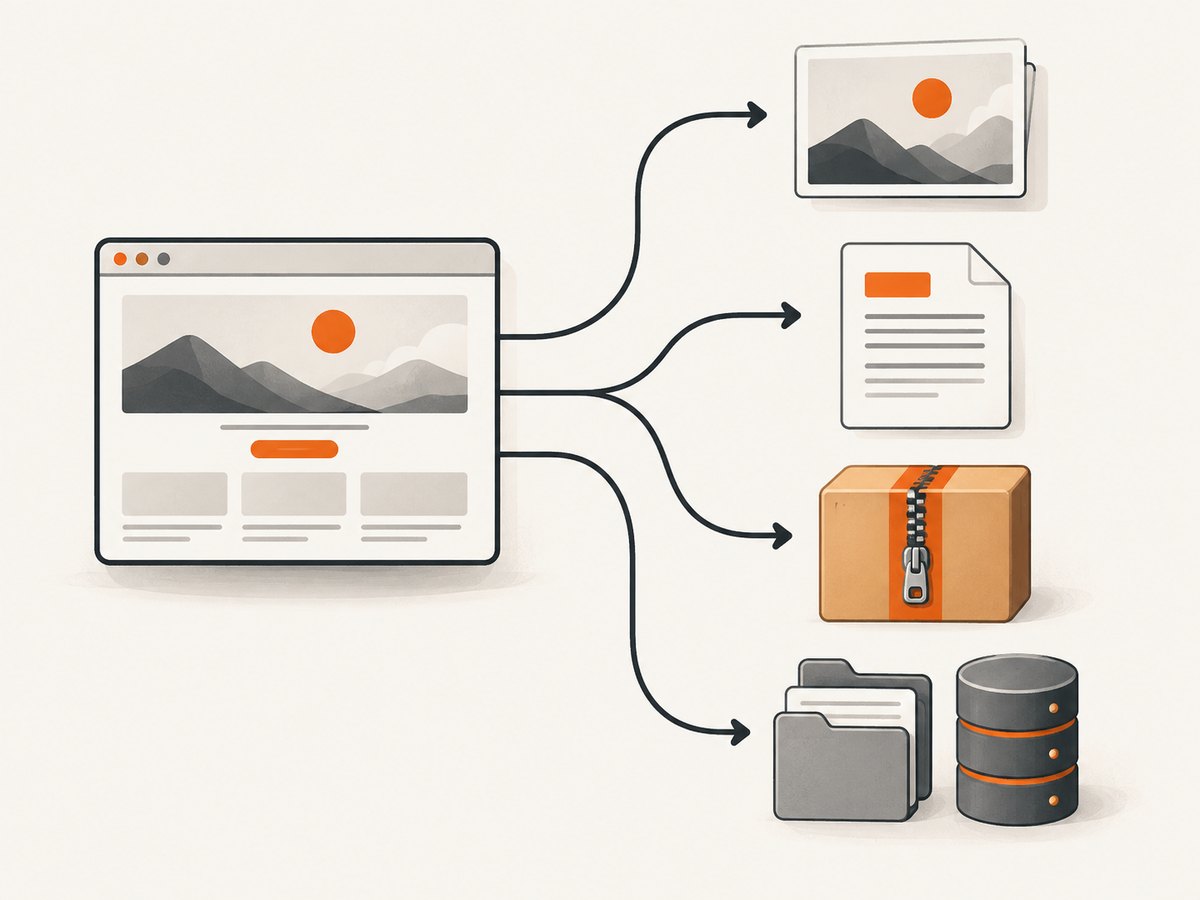
First decide what you need to keep. A screenshot preserves how a page looks at a moment in time. A WordPress content export preserves posts and related data. A Site Editor export packages theme design work. A complete backup preserves the files and database needed to restore a self-hosted site. These outputs are different; downloading one does not create the others.
Use the guide below to choose a method, then follow its steps. If by “capture” you mean a screenshot, skip to Take a visual screenshot. If you need a copy you can import or restore, use the matching export or backup workflow.
1. Choose what you want to capture
| What you need | Use this method | What you get | What it does not provide |
|---|---|---|---|
| A visual record of a page | Browser screenshot or screenshot software | PNG or another image of a rendered page | Editable WordPress content or a restorable installation |
| Posts, pages, and related content | Dashboard → Tools → Export | WXR/XML content file | Theme and plugin files or a full-site backup |
| Site Editor templates and styles | Appearance → Editor → Tools → Export | ZIP of the theme with updated design work | All site content, plugins, and the database |
| A complete self-hosted site copy | Back up both files and database | Files plus database for a restore or migration workflow | A single screenshot or content-only export |
| Technical details for support | Tools → Site Health → Info → export control | Technical information copied for sharing | Site content or a restorable backup |
WordPress’s built-in content export creates an XML file in WordPress eXtended RSS (WXR) format. It includes content such as posts, pages, custom post types, comments, custom fields, taxonomies, and users. A standard content export is not a complete copy of the site: it does not include the design, themes, or plugins. WordPress documents the export screen and its filters; Learn WordPress explains the difference between exporting content and backing up a site.
2. Export posts, pages, and other WordPress content
Use this workflow when you want to move or keep content that can be imported into another WordPress site. You need access to the dashboard and permission to use its export tools.
- Sign in to the WordPress dashboard.
- Open Tools → Export.
- Choose All content for a broad export, or select a content type such as posts or pages.
- If you selected posts or pages, narrow the export with the filters WordPress provides. Depending on the content type, these can include category, author, date range, and status.
- Select Download Export File and save the generated XML file somewhere you can find it.
- To import the content elsewhere, open Tools → Import → WordPress on the destination site and follow the importer prompts.
- Check the destination site after import. Confirm the intended posts, pages, media references, and related content are present; an XML content file does not recreate the full design or plugin setup.
The export is useful for moving content between WordPress sites, but do not treat it as the only disaster-recovery copy. WordPress describes the download as an XML file, and the import workflow is intended to bring exported data into another site. It does not package your installation’s theme and plugins. If you need the site to look and behave like the original after a failure, make a complete backup as well.
When the export is missing content
- Check whether you chose a specific type instead of All content.
- Review category, author, date, and status filters. A filter can intentionally exclude items.
- Check whether the content lives in a custom post type and whether that type appears as an export option.
- Do not expect theme settings, plugin configuration, or uploaded site files to appear as a complete restorable copy in the WXR file.
3. Export Site Editor templates and styles
If your goal is to preserve design work made in the WordPress Site Editor, use its theme export. This is especially relevant to block themes and changes to templates, template parts, and global style settings. WordPress says the export downloads a ZIP containing the theme and updated Site Editor work. See the official Site Editor instructions.
- In the dashboard, open Appearance → Editor.
- Open the three-dot menu beside the Styles option.
- Under Tools, choose Export.
- Save the downloaded theme ZIP.
- Keep the ZIP with your project records and verify it contains the expected theme work before relying on it.
This export serves a different purpose from Tools → Export. The WXR file is for content data; the Site Editor ZIP is for the theme and exported templates, template parts, and style settings. The Site Editor’s available controls can vary with WordPress version and theme. If you cannot find the export route, confirm that you are in Appearance → Editor and consult the current WordPress documentation for your interface.
4. Make a complete backup of a self-hosted site
A complete backup needs both the site files and the database. Files alone can omit content and settings stored in the database; a database export alone does not include the full set of files. The Learn WordPress backup lesson covers manual database and file backups, and recommends SFTP rather than FTP for manual file transfer because SFTP protects credentials during transfer. Read the WordPress backup lesson.
Manual backup checklist
- Identify the WordPress files. Use your host’s file access or an SFTP client to copy the site files. Commonly, the complete WordPress installation directory is the practical unit to preserve; coordinate with your host if it stores uploads or configuration elsewhere.
- Export the database. Use the database tool provided by your host, such as phpMyAdmin where available, and save the database export alongside the files.
- Keep the parts together. Label the file archive and database export with the site and capture date so you know they form one backup set.
- Store a separate copy. Keep backup files somewhere other than the site’s own hosting account, following your organization’s storage and access rules.
- Check that both components exist. Confirm the file archive is readable and the database export was created. A successful download alone does not prove that a restore will work.
- Verify the restore process. Before relying on a backup, follow your host’s or backup workflow’s restoration steps in an appropriate environment and check that the resulting site works.
Back up before major WordPress core, theme, or plugin updates and before installing plugins, as advised in the WordPress lesson. Hosts and backup or migration plugins may provide their own workflows. Whichever you choose, verify that the resulting backup covers both files and database and that you understand how to restore it. A WXR export can be an additional content copy, but it is not a substitute for these two backup components.
5. Take a visual screenshot of a WordPress page
To preserve appearance, load the public page in a browser and take a screenshot. A normal browser or operating-system capture records the visible viewport. For a very long page, use a full-page or scrolling capture feature in a browser or screenshot tool. Screenshots show what rendered in that session; they do not preserve the WordPress installation, source content, or a restorable site.

One-off browser capture
- Open the exact public URL you want to document.
- Set the browser window to the target size. For a responsive comparison, capture desktop and mobile layouts separately.
- Wait for fonts, images, and page content to settle. Dismiss overlays if the purpose is to show the page beneath them.
- Use the browser’s screenshot command or your operating system’s screenshot tool. Choose the full-page option if your browser provides one; otherwise capture the visible viewport.
- Save the image in a descriptive location and include the URL, viewport, and date in its filename or accompanying notes if those details matter to your record.
Repeatable full-page capture with Node.js
For scripted work, the open-source capture-website project supports URL or local HTML input, full-page capture, device emulation, and scrolling through a page to trigger lazy-loaded content. Its documentation notes that screenshots taller than 16,384 pixels can repeat content because of a Chromium limitation; capture sections separately with its clipping option when that applies. Install it in a Node.js project:
npm install capture-websiteSave this as capture.mjs and run node capture.mjs. It writes a full-page PNG, first scrolling the page to trigger content that loads as it enters view.
import captureWebsite from 'capture-website';

await captureWebsite.file(
  'https://example.com',
  'wordpress-homepage.png',
  {
    fullPage: true,
    preloadLazyContent: true,
    delay: 1,
    timeout: 60
  }
);
Change the URL and output filename for your site. The project documents fullPage, preloadLazyContent, delay, timeout, and device emulation in its README and option reference. Set a suitable delay for content that renders after page load; avoid long waits unless the page needs them. If the page is very tall, capture smaller sections rather than relying on one extremely long image.
Other screenshot options
For a manual scrolling capture with annotations, Snagit documents whole-page scrolling capture and editing tools. Its workflow opens the page, scrolls through the content to capture it, and then lets you save or annotate the result. See TechSmith’s scrolling screenshot instructions. For repeatable automation, a browser automation library can provide control over viewport and page behavior; choose one that fits your environment and consult its own current documentation.
- Viewport or full page: viewport is quicker and limits output size; full page records below-the-fold content but can create very tall images.
- Desktop or mobile: choose the viewport that answers the question. Device emulation can alter responsive layout, so record the dimensions or preset.
- Lazy-loaded images: scroll the page before capture or enable the tool’s lazy-content preloading option. A page can appear complete at the top while images lower down have not loaded yet.
- Dynamic content: use a deliberate delay or wait for a known selector when a page adds content after its initial load.
- Sticky headers and nested scrolling: fixed elements or inner scroll containers can make stitched screenshots repeat or omit content. Capture the relevant region or take separate viewport images when the full-page result is not faithful.
- Access-controlled pages: capture from a browser session that is authorized to view the page. Do not assume a public URL screenshot tool can access your logged-in session.
Or skip the browser setup
If your goal is a clean image of a public WordPress page, ScreenshotNeo is a website screenshot API and MCP server. One GET request returns a screenshot or PDF. The examples below use the API’s documented endpoint; see the ScreenshotNeo documentation for request parameters and options.
curl -G "https://api.screenshotneo.com/v1/shot" \
  -d access_key=YOUR_API_KEY \
  --data-urlencode url=https://example.com \
  -o shot.webp
import requests
r = requests.get(
"https://api.screenshotneo.com/v1/shot",
params={"access_key": "YOUR_API_KEY", "url": "https://example.com"},
timeout=90,
)
open("shot.webp", "wb").write(r.content)const q = new URLSearchParams({
access_key: 'YOUR_API_KEY',
url: 'https://example.com'
});
const res = await fetch(`https://api.screenshotneo.com/v1/shot?${q}`);
if (!res.ok) throw new Error(`Screenshot request failed: ${res.status}`);
await Bun.write('shot.webp', res);Replace YOUR_API_KEY with your key and https://example.com with the public WordPress URL. The API can return PNG, JPEG, WebP, or PDF. ScreenshotNeo accepts cookie or consent banners like a visitor and removes more than 60 known consent platforms, newsletter popups, and chat widgets before capture; each cleanup step can be turned off. Bot checks and CAPTCHAs, blank pages, timeouts, failed loads, and cache hits cost nothing, and response headers report the page verdict and billing status. Its MCP server provides take_screenshot, get_page_info, and capture_pdf tools for Claude, Cursor, and other MCP clients.
The API also supports full-page capture with lazy images loaded, CSS selector element capture, dark mode, device presets and custom viewports, retina scale, PDF paper size and page settings, HTML/CSS input, custom CSS and JavaScript, clicks, selector or network-idle waits, request blocking, headers, cookies, user agent, authorization, timezone, geolocation, transparency, resizing, cache TTL, signed image links, async jobs with signed webhooks, bulk capture of up to 100 URLs per call, a usage API, and an OpenAPI spec. Parameter names used by other screenshot APIs also work, which can make switching easier. Check the docs for exact parameters and constraints.
Plans include 1,000 screenshots per month free with no card; Starter is $5 for 3,000, Growth $15 for 15,000, Pro $39 for 60,000, Scale $99 for 250,000, and Business $249 for 1,000,000. Yearly billing gives two months free, and every feature is available on every plan. For scheduled jobs, bulk runs, or repeated captures, set sensible waits and caching, check the response headers, and monitor usage with the usage API. A screenshot records the rendered page at capture time; keep a separate WordPress export or full backup if you need content or restoration data.
Create a free ScreenshotNeo account for 1,000 screenshots a month with no card.
6. Troubleshooting WordPress captures
| Problem | Likely cause | What to do |
|---|---|---|
| The XML file is missing posts or pages | A content type or filter limited the export | Reopen Tools → Export, choose All content or adjust category, author, date, and status filters, then download again. |
| The imported site looks different | WXR contains content, not a complete theme and plugin setup | Export the Site Editor theme where applicable; preserve files and database for a complete backup. |
| The theme ZIP does not include content | Site Editor export packages theme design work | Use Tools → Export for content, and back up files and database if you need the complete site. |
| A screenshot only shows the top of the page | The capture was viewport-only | Use the browser’s full-page feature, a scrolling capture tool, or scripted full-page capture. |
| Images or sections are blank lower down | Lazy loading or delayed scripts have not completed | Scroll through the page before capture, enable lazy-content preloading, or wait for the relevant content. |
| A very tall screenshot repeats a section | Capture engines can hit page-height limitations | Reduce the captured area or split the page into sections; the capture-website docs describe the 16,384-pixel Chromium limitation. |
| Scrolling capture misses a panel or repeats a header | The page uses nested scrolling, sticky elements, or parallax | Capture the intended scroll container or use separate viewport captures. For Snagit, TechSmith also suggests its manual scrolling mode when automatic detection fails. |
| Backup files exist but restoration fails | One component is missing, the pair is mismatched, or restore steps are unverified | Confirm both database and files came from the intended backup point and follow the host’s restore process. Test the restore workflow before depending on it. |
7. Performance, reliability, and cost
Dashboard exports are usually the simplest route for content or theme work, but they only create the artifact that feature is designed to export. A full backup takes more storage and coordination because it includes both files and database; the benefit is that these components are available for a restoration workflow. Keep exports and backups organized by date, and validate that files are readable.
For visual capture, image dimensions drive practical file size: a full-page image can be much larger than a viewport screenshot. Use the smallest viewport and output format that meet your need, avoid unnecessary long waits, and split unusually long pages into sections. Lazy content, animations, third-party widgets, and network conditions can affect what appears at the moment of capture. For recurring work, standardize the URL, viewport, wait condition, and capture timing so results are comparable.
Local browser and desktop tools use your active environment and are suitable for ad hoc records. Scripted or API capture makes repeat jobs easier to reproduce, but it does not replace a content export or a backup. For paid API usage, consider output needs, capture frequency, cache policy, and any bulk work before choosing a plan. ScreenshotNeo’s stated monthly plan limits and prices are listed above; inspect each response’s verdict and billing headers and review usage for your workload.
FAQ
Does WordPress export include my theme and plugins?
No. Tools → Export creates a WXR content export. Use the Site Editor export for relevant theme design changes, and make a files-plus-database backup when you need a complete self-hosted site copy.
How do I save a full-page screenshot of my WordPress site?
Use a browser full-page screenshot feature or a scrolling screenshot tool. For repeatable captures, use a script or screenshot API with full-page capture; scroll or wait for lazy-loaded content.
Can a screenshot restore my WordPress website?
No. A screenshot is a visual record. It does not contain the underlying posts, database, theme files, or plugins needed to restore the site.
Should I use a migration plugin?
A migration workflow can be useful when moving a site, but check what it includes and how its restore process works. Verify it covers both files and database; use the built-in WXR export when you only need content data.
What should I give support when they ask me to capture WordPress information?
For technical configuration, use Tools → Site Health → Info and its export control. For a visual issue, provide a screenshot of the page and describe the browser and viewport. Neither item replaces a full backup.