Chrome Headless vs Puppeteer for Full-Page Screenshots
Puppeteer offers an explicit full-page screenshot option; Chrome Headless CLI is simpler for viewport captures. Compare both workflows and choose the right setup.
Short answer: Use Puppeteer when you need a repeatable full-page screenshot workflow. Its page.screenshot() method has an explicit fullPage: true option. Use Chrome Headless’s command-line --screenshot when a simple command-line viewport capture is enough. The CLI reference documents screenshot and window-size flags, but not a matching full-page option. This recommendation follows the documented controls; it is not based on a performance benchmark. Puppeteer screenshot options, Chrome Headless CLI reference.
Both approaches run Chrome without a visible browser window. The practical difference is how much control you need over navigation, readiness, page interaction, and capture scope. This guide shows a runnable command-line capture and a Puppeteer full-page capture, then covers viewport, output, readiness, failure cases, and operational tradeoffs.
1. Choose the capture workflow
| Need | Better starting point | Reason |
|---|---|---|
| Capture a page from a shell or script with few moving parts | Chrome Headless CLI | --screenshot and --window-size cover a straightforward viewport screenshot. |
| Capture the entire document | Puppeteer | fullPage: true explicitly requests a full-page screenshot. |
| Wait for a selector, click controls, or capture a specific element | Puppeteer | The page API supports navigation and interaction before capture, and element handles have a screenshot method. |
| Configure virtual display properties for headless Chrome | Chrome Headless screen configuration | Virtual screen settings control display properties; they do not substitute for Puppeteer’s document-capture setting. |
| Use a browser mode optimized for automation without needing all regular Chrome features | Evaluate chrome-headless-shell |
Puppeteer documents that shell differs from regular Chrome and may be more performant for some automation. Validate your own pages and fidelity needs. |
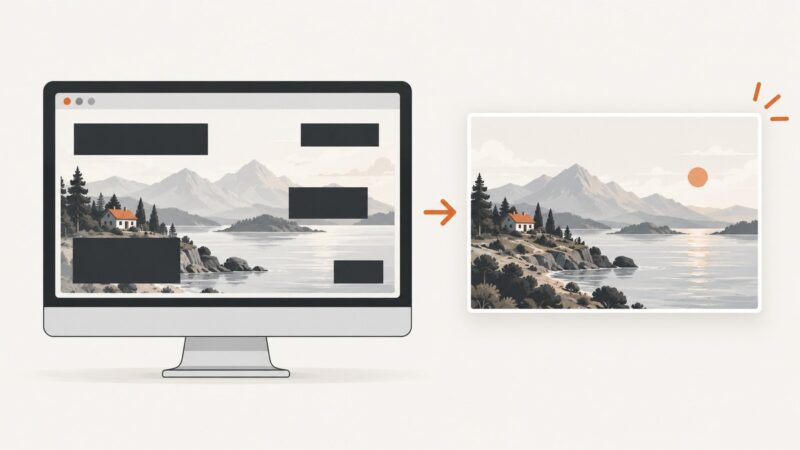
The main distinction is capture scope versus display setup. Puppeteer’s fullPage controls whether the screenshot covers the document. A viewport or virtual-screen dimension controls the browser’s display area. Chrome’s virtual screen guide.
2. Capture a full page with Puppeteer
Install Puppeteer in a Node.js project. The package downloads a compatible Chrome for Testing browser by default. If your environment manages Chrome separately, consult the Puppeteer installation guide and configure the executable path for your setup.
npm install puppeteerSave this as screenshot.mjs. It accepts a URL and output path, waits for navigation to reach domcontentloaded, and captures the full document as PNG:
import puppeteer from 'puppeteer';

const url = process.argv[2];
const output = process.argv[3] ?? 'page.png';

if (!url) {
  console.error('Usage: node screenshot.mjs <url> [output.png]');
  process.exit(1);
}

const browser = await puppeteer.launch({ headless: true });
try {
  const page = await browser.newPage();
  await page.goto(url, {
    waitUntil: 'domcontentloaded',
    timeout: 60_000,
  });
  await page.screenshot({ path: output, fullPage: true });
  console.log(`Saved ${output}`);
} finally {
  await browser.close();
}
Run it with:
node screenshot.mjs https://example.com page.pngfullPage is optional and defaults to false. Set it to true to capture beyond the current viewport. Puppeteer also supports output encoding and type, clipping, transparent backgrounds, and capture beyond the viewport. The default for captureBeyondViewport depends on whether a clip is supplied; check the API reference when combining those options. ScreenshotOptions interface.
Wait for the page state you actually need
domcontentloaded means the initial document has been parsed; it does not guarantee that client-rendered content, images, or API-driven widgets have finished. Puppeteer’s screenshot guide demonstrates waiting on navigation with a waitUntil condition. Choose a condition based on the target site, then wait for an app-specific selector if that is a better signal of readiness. Puppeteer screenshots guide.
await page.goto(url, { waitUntil: 'networkidle0', timeout: 60_000 });
await page.waitForSelector('main article', { timeout: 15_000 });
await page.screenshot({ path: 'article.png', fullPage: true });
Network-idle conditions can be a poor fit for pages with continuous polling, analytics, or long-lived requests. In that case, use a page-specific selector or a deliberate short delay after the relevant content appears. Avoid treating a timeout alone as proof that a dynamic page is ready.
Capture only one element
If the goal is a chart, card, or article rather than the whole document, Puppeteer can capture an element handle:
const article = await page.waitForSelector('main article', { timeout: 15_000 });
if (!article) throw new Error('Article element was not found');
await article.screenshot({ path: 'article.png' });
This is a different capture scope from fullPage. See the official screenshot guide for the documented page and element screenshot examples.
3. Capture a viewport with Chrome Headless CLI
Chrome Headless’s CLI is useful when the task is a single command and a viewport image is sufficient. The documented flags include --screenshot, --window-size, and --timeout. The timeout sets a maximum wait before capture even if the page is still loading; it does not establish that a specific dynamic component is ready. Chrome Headless command-line reference.
chrome --headless --no-sandbox --window-size=1440,1000 --timeout=10000 --screenshot=page.png https://example.comReplace chrome with the executable name or full path installed in your environment. The --no-sandbox flag is commonly needed in constrained container environments, but it changes Chrome’s security isolation; use an appropriately isolated environment and follow your deployment’s security policy. Where Chrome’s sandbox is available and configured, omit that flag.
The CLI example sets the viewport dimensions and a maximum wait, then writes a screenshot. It is a viewport capture workflow. For a document-length capture with explicit page readiness and interaction controls, use Puppeteer or another documented browser automation API. The CLI reference does not describe a fullPage flag equivalent to Puppeteer’s.
4. Configure output, viewport, and fidelity
Puppeteer screenshot options
fullPage: boolean, defaults tofalse; set totrueto capture the full page.path: output file path in Node.js examples; omit it when you want screenshot bytes returned to the caller.typeand format-specific options: select an output encoding such as PNG or JPEG and use supported quality settings where applicable. Consult the API reference for the exact supported combinations.clip: restrict capture to a specified rectangle. Be mindful that clipping andcaptureBeyondViewportinteract.omitBackground: capture with a transparent background when supported by the chosen format.captureBeyondViewport: controls capture outside the viewport in relevant configurations; its documented default depends on whether a clip is provided.
Use only the options your output needs. A clip is not the same as full-page capture, and a wider viewport does not automatically mean the entire document is captured.
Chrome Headless display settings
--window-size=WIDTH,HEIGHT sets the window dimensions for the CLI example. Chrome also documents virtual screen configuration for headless mode. These settings affect the display environment; they do not give the CLI a Puppeteer-style fullPage option. See Configure virtual screens in Headless mode.
Rendering differences to record
For repeatable comparisons, record Chrome and Puppeteer versions, headless mode, viewport dimensions, virtual display settings, and the readiness condition. Puppeteer distinguishes regular Headless from chrome-headless-shell. The shell does not fully match regular Chrome, though it may be more performant for automation that does not require the complete Chrome feature set. This is not a universal screenshot speed result; verify visual output in the mode you will use. Puppeteer headless modes.
5. Common errors and fixes
| Symptom | Likely cause | What to do |
|---|---|---|
| The screenshot stops at the visible viewport | Puppeteer’s fullPage option was omitted, so it uses the default false. |
Set fullPage: true. A larger window size changes viewport dimensions, not this option. |
| Content or images are missing | The page had not rendered that content when capture began, or content is loaded lazily. | Wait for a meaningful selector, an appropriate navigation condition, or a site-specific readiness signal before capture. |
| The CLI captures while the page is still changing | --timeout is a maximum wait, not a check for application readiness. |
Use a Puppeteer workflow when readiness must depend on a selector or an interaction; otherwise choose a suitable CLI timeout and inspect results. |
| Puppeteer navigation times out | The page did not satisfy the selected navigation condition before the configured timeout, often because it remains active. | Choose a condition suited to the site, raise the timeout only when justified, and follow navigation with an app-specific selector if needed. |
| Chrome does not launch in a container | The executable may be missing or inaccessible, or the environment’s sandbox configuration may not work. | Install/configure Chrome as required by Puppeteer or your CLI environment. Review container isolation and sandbox policy before changing sandbox flags. |
| Screenshot differs between environments | Browser version, headless mode, display dimensions, fonts, or readiness timing differs. | Pin or record the browser and automation versions, display settings, and wait condition; compare using the same headless mode. |
| Element screenshot fails or the element is absent | The selector did not match or the element was not ready. | Wait for the selector with a bounded timeout, verify the selector against the page, and handle the missing-element case. |
6. Performance, reliability, and cost
The official references describe controls and browser modes, not comparative benchmark results. Do not assume a fixed speed advantage for either workflow. Chrome Headless CLI has less orchestration for a basic one-off command; Puppeteer adds a browser automation layer and gives you more control over readiness and interaction. chrome-headless-shell may be more performant for automation where the full Chrome feature set is not needed, but validate both fidelity and resource use for your workload. Puppeteer headless modes.
For reliability, use a bounded timeout, close the browser in a finally block, and wait for the page condition that matches the content you need. Reuse a browser process for batches when appropriate, while keeping each page’s state isolated and ensuring failed captures do not leave processes running. For visual regression or archival work, keep browser mode and display settings consistent. These are operational practices; the cited references do not prescribe specific timing or resource limits.
Local capture has no per-screenshot API fee, but it uses your compute, browser installation, maintenance time, and infrastructure. If you need a managed endpoint, ScreenshotNeo pricing is Free for 1,000 shots per month with no card; Starter is $5 for 3,000, Growth $15 for 15,000, Pro $39 for 60,000, Scale $99 for 250,000, and Business $249 for 1,000,000. Yearly billing gives two months free, and every feature is on every plan.
7. Or skip the browser setup
ScreenshotNeo is a website screenshot API and MCP server. One GET request returns a PNG, JPEG, WebP, or PDF. Its capture can accept cookie or consent banners and remove more than 60 known consent platforms, newsletter popups, and chat widgets before the shot; each step can be turned off. Bot checks and CAPTCHAs, blank pages, timeouts, failed loads, and cache hits cost nothing, and response headers identify the page verdict and billing status. AI agents can use its MCP server tools: take_screenshot, get_page_info, and capture_pdf.
For a full-page shot, add full_page=true to the request. See the ScreenshotNeo API documentation for the supported parameters and options.
cURL
curl -G "https://api.screenshotneo.com/v1/shot" -d access_key=YOUR_API_KEY --data-urlencode url=https://stripe.com -d full_page=true -o shot.webpPython
import requests

r = requests.get(
    "https://api.screenshotneo.com/v1/shot",
    params={
        "access_key": "YOUR_API_KEY",
        "url": "https://stripe.com",
        "full_page": "true",
    },
    timeout=90,
)
r.raise_for_status()
open("shot.webp", "wb").write(r.content)
Node.js
const q = new URLSearchParams({
  access_key: 'YOUR_API_KEY',
  url: 'https://stripe.com',
  full_page: 'true',
});
const res = await fetch(`https://api.screenshotneo.com/v1/shot?${q}`);
if (!res.ok) throw new Error(`Screenshot request failed: ${res.status}`);
await Bun.write('shot.webp', res);
The code uses full_page for full-page capture. ScreenshotNeo also supports element capture by CSS selector, dark mode, device presets and custom viewports, retina scale, PDF settings, custom CSS and JavaScript, clicks, hiding selectors, selector/delay/network-idle waits, request and resource blocking, custom headers, cookies, user agent and Authorization, timezone, geolocation, transparency, resizing, configurable cache TTL, signed public image links, asynchronous jobs with signed webhooks, bulk capture of 100 URLs per call, a usage API, and an OpenAPI spec. It accepts parameter names used by other screenshot APIs to make migration easier. Consult the docs for exact parameter names and combinations.
Cookie banners, popups, and chat widgets are removed before the shot; bot checks, blank pages, and failed loads are never billed; an MCP server lets AI agents take screenshots; 1,000 screenshots a month are free with no card and paid plans start at $5 for 3,000. Create a free ScreenshotNeo account.
8. Frequently asked questions
Do I need Puppeteer to take a screenshot with Chrome Headless?
No. Chrome’s CLI supports screenshot capture. Puppeteer is the direct fit when your workflow needs its explicit full-page option and browser automation controls.
Does Puppeteer’s full-page option wait for every image?
The option controls capture scope; readiness is a separate concern. Wait for the page state or content your use case requires before taking the screenshot.
Is chrome-headless-shell always faster?
No such universal result is established by the cited documentation. Puppeteer says it may be more performant for automation that does not require the full Chrome feature set; measure and validate your own workload.
Can I use Chrome’s virtual screen settings instead of fullPage?
No. Display configuration and document capture scope solve different problems. Use the capture API’s full-page setting when you need the whole document.