How to Compare Puppeteer Screenshots Consistently Across macOS and Linux
Build reliable visual regression tests by pinning environments, capture settings, fonts, page state and platform-specific baselines.
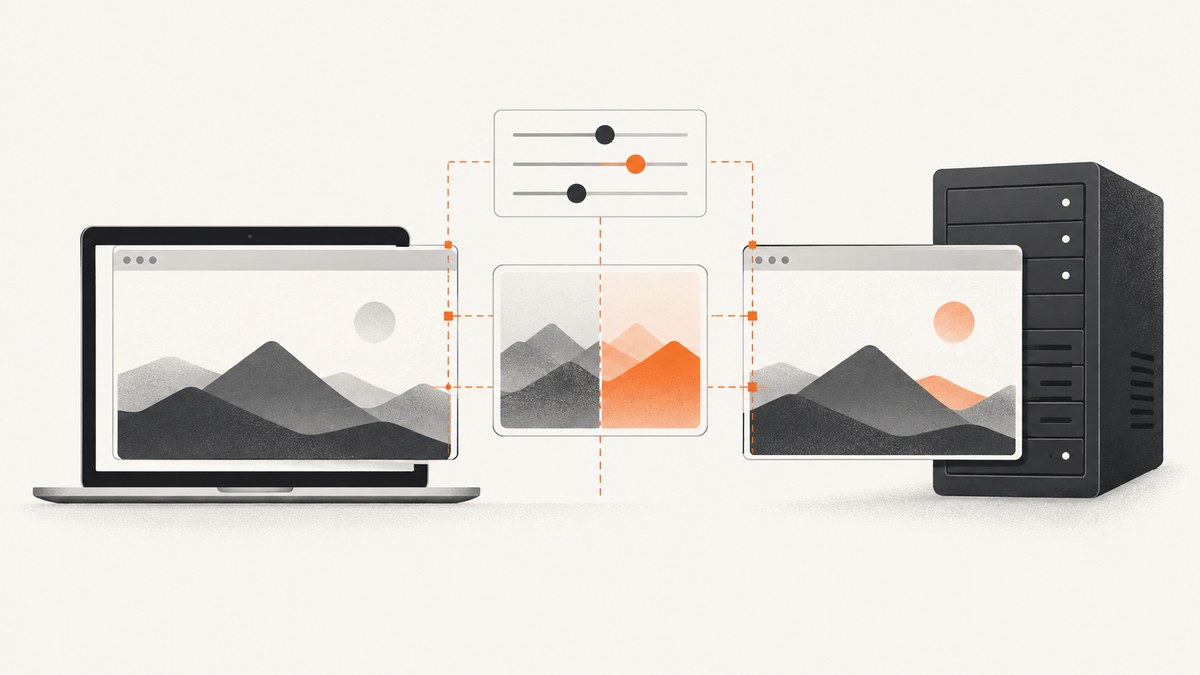
Direct answer: compare Puppeteer screenshots only after making the rendering environment part of the test contract. Keep the operating system image, Chromium build, Puppeteer version, viewport, device scale factor, fonts, page data, network behavior and capture scope fixed. If Linux CI is your deployment target, generate and approve the canonical baseline in that same pinned Linux environment. If macOS and Linux are both supported rendering targets, maintain one baseline per operating system and compare each run with the baseline for its own platform. A cross-platform diff is useful as a diagnostic, but it answers a different question from “did this renderer regress?”
macOS and Linux can produce different pixels for the same page even when the CSS and browser code are identical. Host operating system, browser version, runtime settings, hardware, power source and headless mode can affect output. Microsoft’s Playwright guidance summarizes the practical rule: “For consistent screenshots, run tests in the same environment where the baseline screenshots were generated.” See the Playwright visual comparison guidance, Puppeteer screenshot guide and Puppeteer ScreenshotOptions API.
Choose the comparison model first
Decide what your test is supposed to prove before writing capture code.
| Goal | Recommended baseline layout | What a failure means |
|---|---|---|
| Regression detection in Linux CI | One pinned Linux baseline | The Linux renderer changed or the page changed |
| Regression detection on both platforms | Separate macOS and Linux baselines | The current platform differs from its approved output |
| Cross-platform parity | Run macOS and Linux captures, then create a separate diff | The platforms render differently; investigate without weakening normal gates |
Do not use a macOS image as the authoritative baseline if production screenshots are generated in Linux. Likewise, do not force one shared baseline when platform-specific output is an intentional product requirement. Keep the platform identity in the snapshot name, such as checkout-linux-chromium-1280x800-dsf1.png and checkout-macos-chromium-1280x800-dsf1.png.
Lock the rendering environment
Operating system and browser
- Pin the CI container or runner image, including its Linux distribution and installed libraries.
- Pin the Chromium version and Puppeteer version in your lockfile. A browser update can alter layout, text shaping or antialiasing.
- Use the same headless mode and launch arguments for baseline generation and comparison.
- Keep hardware and power conditions stable where practical. Avoid generating a baseline on one machine and comparing it to a different GPU or display stack unless that difference is intentional.
The Playwright documentation lists host OS, browser version, settings, hardware, power source and headless mode as sources of screenshot variation. The same principle applies when Puppeteer provides the capture API.
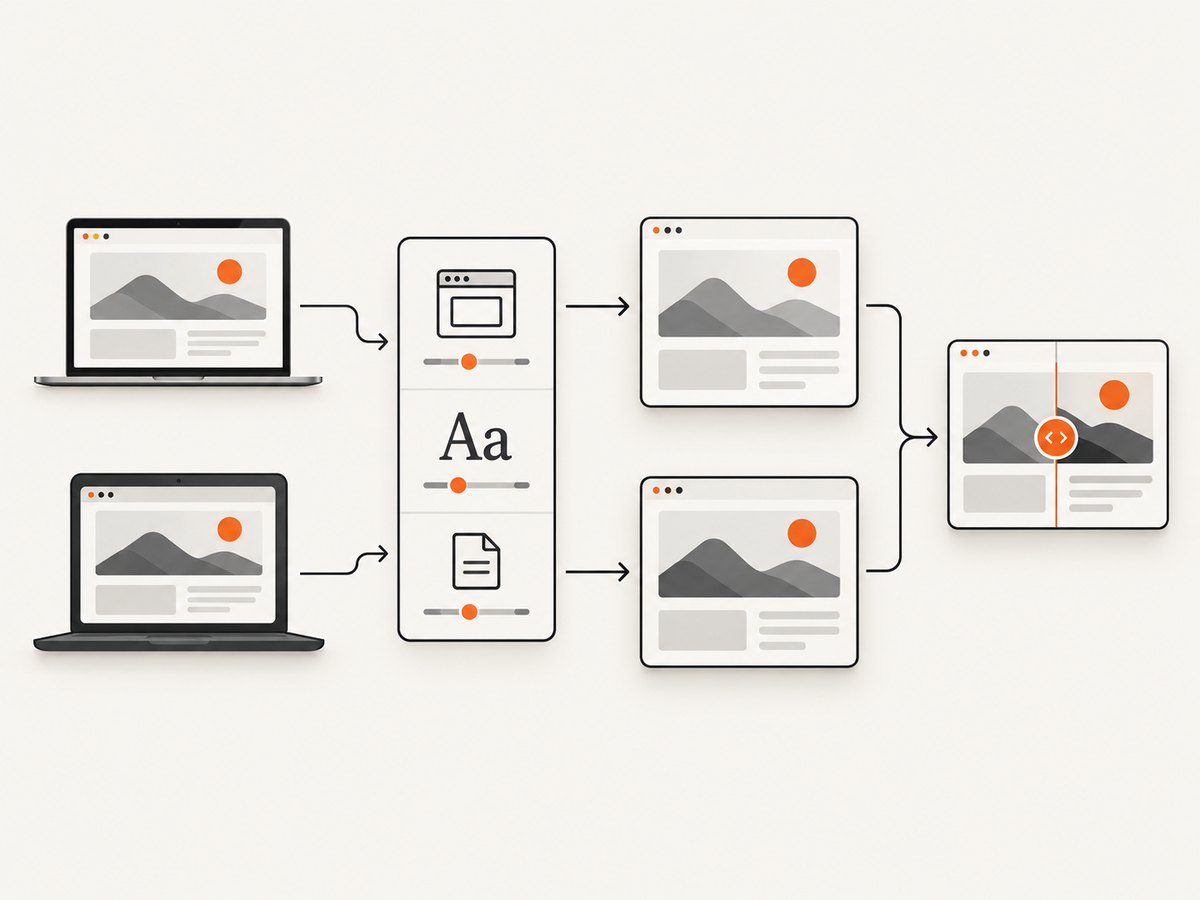
Viewport and device scale factor
Set width, height and deviceScaleFactor explicitly. Puppeteer defines viewport dimensions in CSS pixels and documents deviceScaleFactor as the device scale setting, with a default of 1. A retina-style capture at scale 2 is a different image contract from scale 1, even when the CSS viewport is unchanged.
const browser = await puppeteer.launch({
  headless: true,
  args: ['--disable-gpu']
});

const page = await browser.newPage();
await page.setViewport({
  width: 1280,
  height: 800,
  deviceScaleFactor: 1
});
Use the same values for the baseline and actual capture. Record them beside each snapshot so a failed comparison can be reproduced.
Fonts and assets
Install the same fonts in both environments or bundle web fonts with the application. Wait until the fonts are loaded before capturing. A fallback font can change line wrapping, element height and every pixel below a text block. Also make sure images, icon fonts and other static assets come from deterministic URLs and are available in CI.
await page.goto(url, { waitUntil: 'networkidle2' });
await page.evaluate(async () => {
  if (document.fonts) await document.fonts.ready;
});
networkidle2 only indicates that network activity has become quiet; it does not prove that the application has finished rendering or that animations have stopped. Add an application-specific readiness check.
Make page state deterministic
Visual tests fail when the page changes for reasons unrelated to your code. Control:
- Data: seed the database or mock API responses so names, counts and prices do not change between runs.
- Time: freeze the clock or inject a fixed date for timestamps, calendars and relative-time labels.
- Randomness: seed random values used for avatars, IDs, charts or experiments.
- Animations: disable CSS transitions and animations, or wait for a known animation endpoint.
- Personalization: use a fixed locale, timezone, user account, cookies and feature flags.
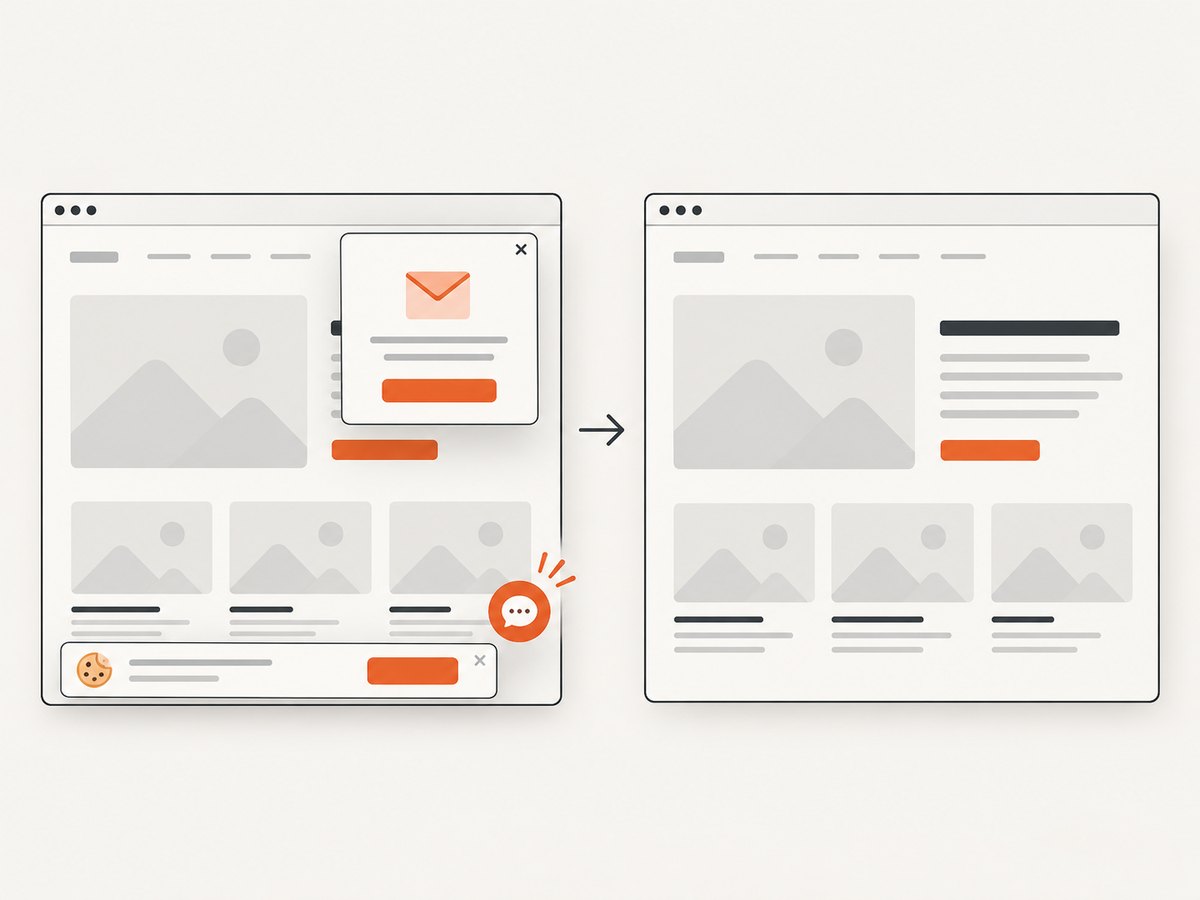
- External content: block or stub ads, analytics, chat widgets and third-party embeds that can load at different times.
For a test-only stylesheet, inject rules that pause motion and caret blinking. The idea is equivalent to the volatile-element filtering described in Playwright’s visual testing guidance; Puppeteer requires you to apply the setup yourself.
await page.addStyleTag({ content: `
  *, *::before, *::after {
    animation: none !important;
    transition: none !important;
    caret-color: transparent !important;
  }
` });
Prefer waiting for a meaningful application signal over an arbitrary sleep:
await page.waitForSelector('[data-testid="dashboard-ready"]', {
  visible: true,
  timeout: 30000
});
Capture the same scope every time
Puppeteer supports viewport screenshots, full-page screenshots, clips and selected-element screenshots. Pick one scope for a baseline and keep it unchanged. The screenshots guide and ScreenshotOptions reference document these controls.
await page.screenshot({
  path: 'actual.png',
  type: 'png',
  fullPage: false
});
For a full page:
await page.screenshot({
  path: 'actual-full.png',
  type: 'png',
  fullPage: true
});
For one component, use an element handle:
const card = await page.$('[data-testid="invoice-card"]');
if (!card) throw new Error('invoice card not found');
await card.screenshot({ path: 'invoice-card.png', type: 'png' });
Full-page captures can expose lazy-loading and layout-shift problems. Scroll through the page or use an application hook to load lazy content before the screenshot, then wait for images to complete.
await page.evaluate(async () => {
  const images = Array.from(document.images);
  await Promise.all(images.map(img => {
    if (img.complete) return Promise.resolve();
    return new Promise(resolve => {
      img.addEventListener('load', resolve, { once: true });
      img.addEventListener('error', resolve, { once: true });
    });
  }));
});
A complete Puppeteer capture script
This script fixes the viewport, waits for application readiness and fonts, disables motion, and writes a PNG. Replace the URL and readiness selector with values from your application.
import puppeteer from 'puppeteer';

const url = process.argv[2] || 'http://localhost:3000/dashboard';
const browser = await puppeteer.launch({
  headless: true,
  args: ['--disable-gpu']
});

try {
  const page = await browser.newPage();
  await page.setViewport({ width: 1280, height: 800, deviceScaleFactor: 1 });
  await page.emulateTimezone('UTC');
  await page.setExtraHTTPHeaders({ 'Accept-Language': 'en-US' });
  await page.goto(url, { waitUntil: 'networkidle2', timeout: 60000 });
  await page.addStyleTag({ content: `
    *, *::before, *::after {
      animation: none !important;
      transition: none !important;
      caret-color: transparent !important;
    }
  ` });
  await page.waitForSelector('[data-testid="dashboard-ready"]', {
    visible: true,
    timeout: 30000
  });
  await page.evaluate(async () => {
    if (document.fonts) await document.fonts.ready;
    await Promise.all(Array.from(document.images).map(img => {
      if (img.complete) return Promise.resolve();
      return new Promise(resolve => {
        img.addEventListener('load', resolve, { once: true });
        img.addEventListener('error', resolve, { once: true });
      });
    }));
  });
  await page.screenshot({ path: 'actual.png', type: 'png', fullPage: false });
} finally {
  await browser.close();
}
Compare images with a separate comparator
Puppeteer captures image data; it does not provide Playwright’s built-in screenshot assertion workflow. Choose and configure a separate comparator, then store its version and settings with your test code. A pixel comparator should produce an inspectable diff and a numeric mismatch count. Do not choose a permissive threshold simply to make failures disappear.
One practical Node.js setup uses pngjs and pixelmatch:
import fs from 'node:fs';
import { PNG } from 'pngjs';
import pixelmatch from 'pixelmatch';

const baseline = PNG.sync.read(fs.readFileSync('baseline.png'));
const actual = PNG.sync.read(fs.readFileSync('actual.png'));
if (baseline.width !== actual.width || baseline.height !== actual.height) {
  throw new Error(`size mismatch: baseline ${baseline.width}x${baseline.height}, actual ${actual.width}x${actual.height}`);
}
const diff = new PNG({ width: baseline.width, height: baseline.height });
const mismatched = pixelmatch(
  baseline.data,
  actual.data,
  diff.data,
  baseline.width,
  baseline.height,
  { threshold: 0.1 }
);
fs.writeFileSync('diff.png', PNG.sync.write(diff));
console.log({ mismatchedPixels: mismatched });
if (mismatched !== 0) process.exitCode = 1;
Treat the threshold as a documented policy, not a universal constant. Review the diff, determine whether the change is intentional, and approve a new baseline only through code review. Chromium’s pixel testing documentation describes this approved-image workflow.
Run macOS and Linux correctly
One canonical Linux target
- Build or select a pinned Linux CI image with the required fonts and Chromium.
- Run baseline generation inside that image.
- Run pull-request captures in the same image and compare to the checked-in Linux baseline.
- Require a reviewed diff before replacing a baseline.
A developer can use the same container locally when reproducing a failure. This avoids comparing a native macOS rendering to a Linux-approved image.
Two supported targets
- Run an explicit macOS job and an explicit Linux job.
- Give each job its own snapshot directory or platform suffix.
- Keep browser, viewport, scale and page-state settings identical unless the platform contract intentionally differs.
- Review each platform’s diff independently.
Comparing macOS output directly with Linux output can be useful for finding platform drift, but it should be a separate diagnostic report. Do not silently relax the normal regression gate to accommodate every cross-platform difference.
Or skip the browser setup
For generated screenshots where you do not need to manage Chromium yourself, ScreenshotNeo provides a GET-based screenshot API and an MCP server for AI agents. The API accepts capture options such as full-page or element capture, dark mode, device presets, custom viewport and retina scale, waits, custom CSS and JavaScript, headers, cookies, user agents, timezone, geolocation, blocking rules, caching, signed links, async jobs and bulk capture. See the ScreenshotNeo API documentation.
curl -G "https://api.screenshotneo.com/v1/shot" -d access_key=YOUR_API_KEY --data-urlencode url=https://stripe.com -o shot.webpimport requests
r = requests.get("https://api.screenshotneo.com/v1/shot", params={"access_key": "YOUR_API_KEY", "url": "https://stripe.com"}, timeout=90)
open("shot.webp", "wb").write(r.content)const q = new URLSearchParams({ access_key: 'YOUR_API_KEY', url: 'https://stripe.com' });
const res = await fetch(`https://api.screenshotneo.com/v1/shot?${q}`);Cookie banners, newsletter popups and chat widgets are removed before the shot. Bot checks, blank pages, timeouts, failed loads and cache hits are not billed, and response headers report the page verdict and whether the shot was billed. Its MCP server exposes take_screenshot, get_page_info and capture_pdf for Claude, Cursor and other MCP clients. The Free plan includes 1,000 screenshots each month with no card; paid plans start at $5 for 3,000 shots. Create a free ScreenshotNeo account.
Troubleshooting
| Symptom | Likely cause | Fix |
|---|---|---|
| Every pixel differs after a browser update | Chromium or Puppeteer changed rendering | Pin versions; regenerate baselines deliberately after review |
| Text wraps differently | Missing or late-loading font | Install or bundle the same fonts and await document.fonts.ready |
| Only timestamps or counters differ | Uncontrolled data or clock | Seed fixtures and freeze time |
| Intermittent layout shifts | Lazy images or late API responses | Wait for an application readiness signal and image completion |
| Screenshot has the wrong dimensions | Implicit viewport or device scale | Set width, height and deviceScaleFactor explicitly |
| Full page is taller on one run | Expanded content, fonts or lazy loading | Stabilize data, wait for assets and capture the same scope |
| CI times out | Slow page, blocked request or missing dependency | Capture a trace/log, raise timeout only when justified, and fix readiness or network setup |
| Small antialiasing halos create noise | Platform or graphics-stack rasterization | Use the correct platform baseline and a narrowly documented comparator tolerance |
Performance, reliability and cost
- Performance: Reuse a browser process when capturing many pages, but create a fresh page per test and close pages promptly. Avoid unnecessary full-page captures when an element clip proves the behavior.
- Reliability: Retry navigation only for transient infrastructure failures, not for deterministic assertion failures. Save the URL, platform, browser version, viewport, scale, readiness state and comparator settings with artifacts.
- Parallelism: Parallel workers can reduce wall time but may contend for CPU, memory, fonts or shared test data. Scale gradually and keep page fixtures isolated.
- Cost: Self-hosted Puppeteer cost is driven by CI or browser infrastructure. Hosted capture can simplify operations; ScreenshotNeo bills only clean shots and provides free monthly usage, while failed loads and cache hits are not billed.
Checklist before accepting a baseline
- OS image and Chromium version are pinned.
- Puppeteer and comparator versions are locked.
- Viewport, device scale and capture scope are explicit.
- Fonts and image assets are available and loaded.
- Data, time, locale, timezone, animations and third-party content are deterministic.
- The page has reached an application-specific readiness state.
- The diff has been reviewed by a person and the reason for the change is recorded.
- The snapshot name identifies the platform and geometry.
FAQ
Can one baseline work for both macOS and Linux?
Only if your acceptance rule intentionally treats platform rendering differences as irrelevant and your comparator policy supports that. For normal regression testing, use a baseline per supported platform or make pinned Linux the sole canonical environment.
Should I compare PNG, JPEG or WebP?
Use a lossless format such as PNG for pixel regression. Lossy encoding adds differences that are unrelated to the page.
Is networkidle2 enough?
No. It does not guarantee that application data, fonts, animations or lazy content are stable. Pair it with a readiness selector or application-specific signal.
Does Puppeteer include visual assertions?
Puppeteer supplies screenshot capture APIs. Select and configure a separate image comparator and baseline workflow.
When should I use a cross-platform diff?
Use it to diagnose renderer differences or measure parity between supported targets. Keep it separate from each platform’s regression gate.