How to Convert an Image to HTML Code with JavaScript
Learn when to embed an image and when to rebuild a screenshot as HTML, with runnable JavaScript for file previews, canvas exports, and common errors.
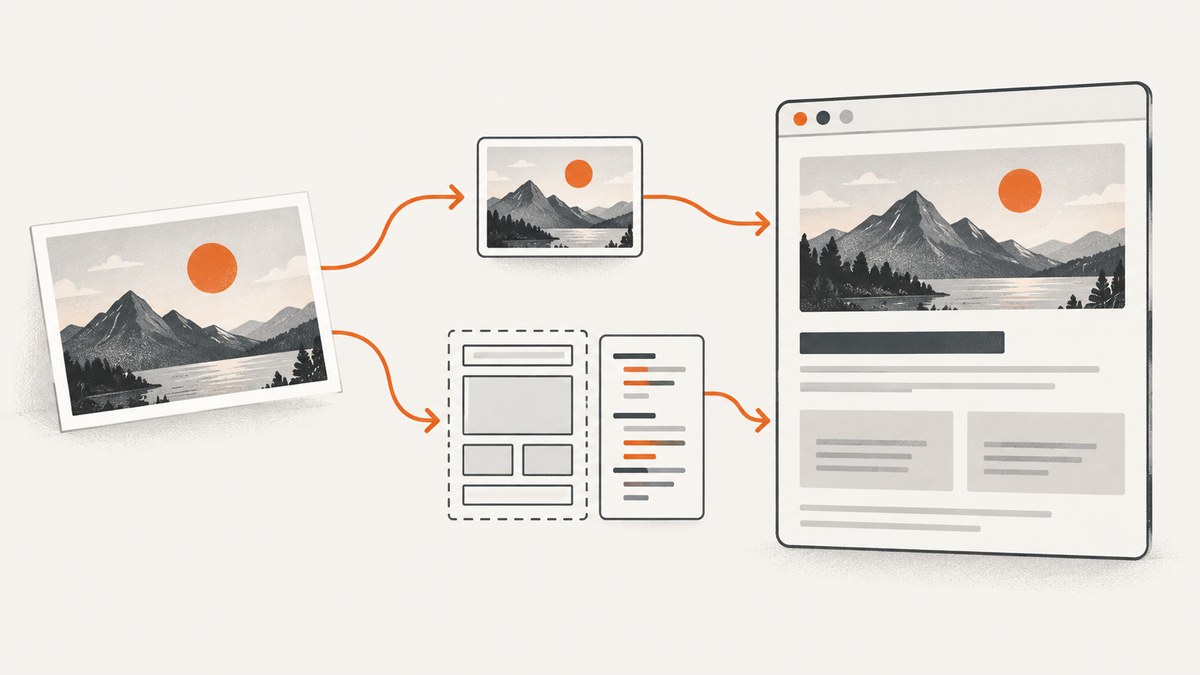
There are two different things developers mean by “convert an image to HTML code”:
- Embed an existing image in a web page. HTML already supports this with
<img>. JavaScript helps when the image comes from a file picker, needs a preview, or is being exported from a canvas. - Rebuild what an image or screenshot depicts as editable HTML and CSS. That requires recognizing its visual structure and generating markup; embedding the bitmap alone does not do that.
This guide covers both meanings, starting with practical JavaScript for embedding image data. If your goal is a screenshot-to-layout reconstruction, skip to Rebuilding a screenshot as HTML.
1. Embed an image in HTML
If the image is already available at a URL, the simplest solution needs no JavaScript:
<img src="/images/example.jpg" alt="A description of the image">Use a URL your page can access. A relative URL such as /images/example.jpg is resolved against your site; a full HTTPS URL can point to another server. Include meaningful alt text for informative images, and use an empty alt="" for purely decorative images. CSS controls display size and fit:
<img class="product-shot" src="/images/product.jpg" alt="Product on a desk">

<style>
.product-shot {
  display: block;
  max-width: 100%;
  height: auto;
}
</style>
For responsive source selection, use <picture> or srcset and provide appropriately sized image files. HTML references the image; it does not automatically turn the pictured words, buttons, or layout into page elements.
2. Preview a local image file with JavaScript
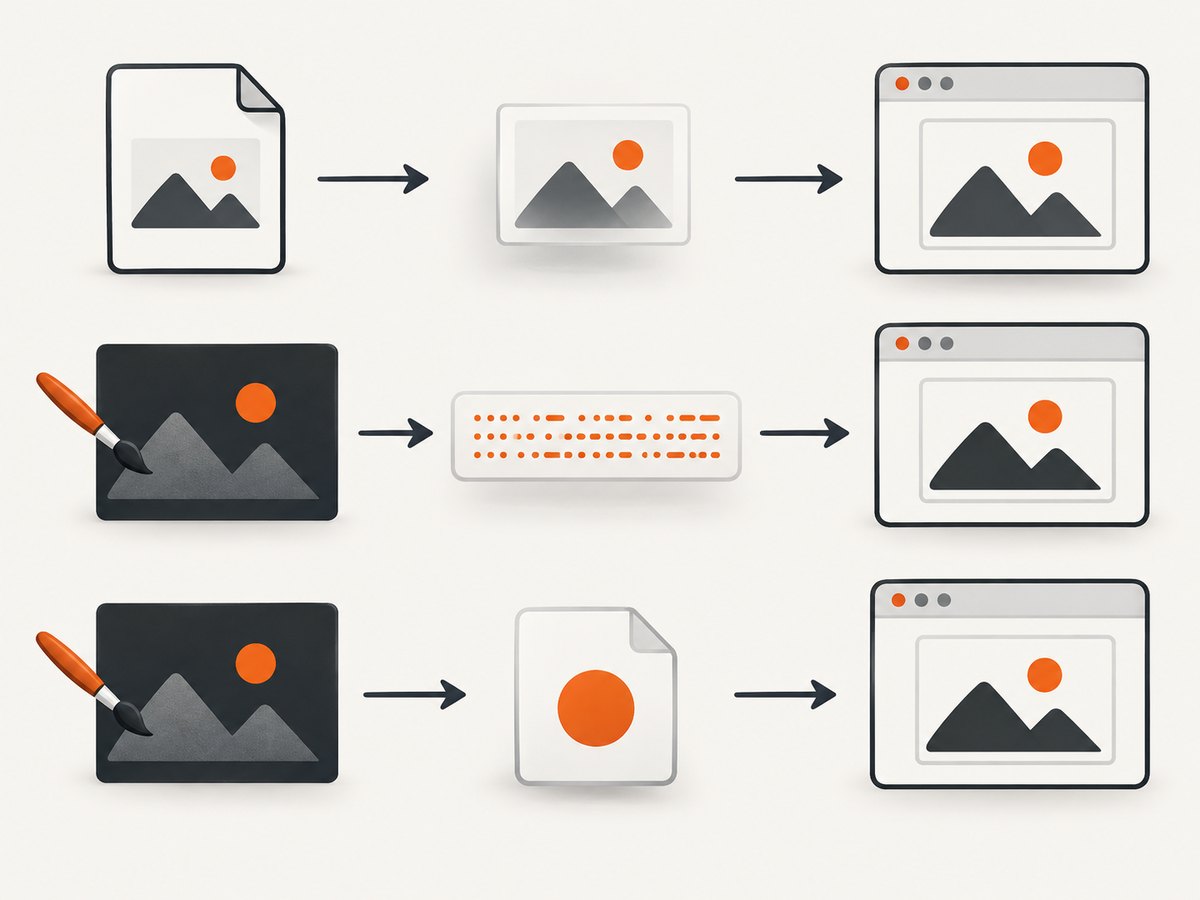
A file input gives the page a File object after the visitor chooses a file. FileReader.readAsDataURL() reads that file into a data URL, which can be assigned to an image element for preview. The code below is a complete page; save it as an HTML file and open it in a browser.
<!doctype html>
<html lang="en">
<meta charset="utf-8">
<meta name="viewport" content="width=device-width, initial-scale=1">
<title>Image preview</title>
<label>Choose an image <input id="file" type="file" accept="image/*"></label>
<p id="status" role="status"></p>
<img id="preview" alt="Selected image preview" hidden style="max-width:100%;height:auto">
<script>
const input = document.querySelector('#file');
const preview = document.querySelector('#preview');
const status = document.querySelector('#status');

input.addEventListener('change', () => {
  const file = input.files?.[0];
  preview.hidden = true;
  preview.removeAttribute('src');
  if (!file) {
    status.textContent = 'Choose an image to preview.';
    return;
  }
  if (!file.type.startsWith('image/')) {
    status.textContent = 'The selected file is not an image.';
    input.value = '';
    return;
  }
  const reader = new FileReader();
  reader.addEventListener('load', () => {
    if (typeof reader.result !== 'string') {
      status.textContent = 'Could not read this image.';
      return;
    }
    preview.src = reader.result;
    preview.hidden = false;
    status.textContent = file.name;
  });
  reader.addEventListener('error', () => {
    status.textContent = 'Could not read this file. Choose it again or try another image.';
  });
  reader.readAsDataURL(file);
});
</script>
</html>
The code checks that a file was selected, does a basic image MIME-type check, and handles read errors. The accept attribute is a picker hint, not a security boundary; if files are uploaded to a server, validate them there too. Browser memory and user experience also matter: large images can take time to read and decode. MDN documents readAsDataURL() and its use for image previews. MDN: FileReader.readAsDataURL()
3. Put an image into HTML as a data URL
A data URL contains the image bytes encoded into a string. It can make an HTML fragment self-contained, but expands the data and keeps the encoded content in memory. This is handy for a small generated image or a deliberately self-contained document, not usually the best default for large assets.
For example, the earlier file-preview code can be extended to create an image element containing the data URL:
reader.addEventListener('load', () => {
  if (typeof reader.result !== 'string') return;
  const img = document.createElement('img');
  img.src = reader.result;
  img.alt = 'Selected image';
  document.querySelector('#output').replaceChildren(img);
});
Include <div id="output"></div> in the page before the script. To generate markup as a string for a small image, escape attribute values correctly; safer still, use DOM properties as above rather than concatenating untrusted input into HTML.
A data URL can also be copied into a static HTML file:
<img src="data:image/png;base64,BASE64_IMAGE_DATA" alt="Chart showing monthly totals">Replace the placeholder with actual encoded bytes. Do not put a local filesystem path such as C:\Users\me\image.png in an img tag and expect it to work for site visitors: their browser cannot access your computer. Use a deployed URL, an uploaded asset, or inline data where appropriate.
4. Export a canvas image into HTML
If JavaScript drew or modified an image on a canvas, toDataURL() returns an encoded image representation. PNG is the default; you can request a supported MIME type such as JPEG and pass JPEG quality from 0 to 1.
const canvas = document.querySelector('canvas');
const dataUrl = canvas.toDataURL('image/png');
const img = document.querySelector('#result');
img.src = dataUrl;
For a complete small page, add <canvas width="320" height="180"></canvas> and <img id="result" alt="Canvas export">, then run the snippet after the elements exist. You can draw onto the canvas before calling toDataURL().
MDN notes that toDataURL() encodes the complete image into an in-memory string and may run into memory or URL-length limits. For larger output, prefer a Blob and an object URL. MDN: HTMLCanvasElement.toDataURL()
5. Use a Blob URL for larger canvas images
toBlob() creates a Blob instead of a long base64 string. The browser can expose it through a temporary object URL:
const canvas = document.querySelector('canvas');
const img = document.querySelector('#result');

canvas.toBlob((blob) => {
  if (!blob) {
    console.error('Canvas export failed.');
    return;
  }
  const url = URL.createObjectURL(blob);
  img.addEventListener('load', () => URL.revokeObjectURL(url), { once: true });
  img.addEventListener('error', () => URL.revokeObjectURL(url), { once: true });
  img.src = url;
}, 'image/png');
The example revokes the URL when the image has loaded or failed, releasing the browser’s reference to the Blob. If the URL must remain usable longer, revoke it only after the last consumer is done. Calling URL.revokeObjectURL() too early can break later display or download actions. MDN recommends toBlob() with URL.createObjectURL() in typical cases where a data URL would be large. MDN: HTMLCanvasElement.toBlob()
Choose the output format deliberately: PNG is lossless and supports transparency; JPEG is often suitable for photographs but does not preserve transparency. If the browser does not support the requested canvas MIME type, canvas export falls back to PNG. Check the resulting Blob’s type if downstream code depends on a particular format.
6. Load a remote image into canvas safely
A remote image can appear in an <img> element while still being unavailable for canvas export. When pixels from another origin are drawn without the required CORS permission, the canvas becomes tainted. Reading or exporting it is blocked by the browser.
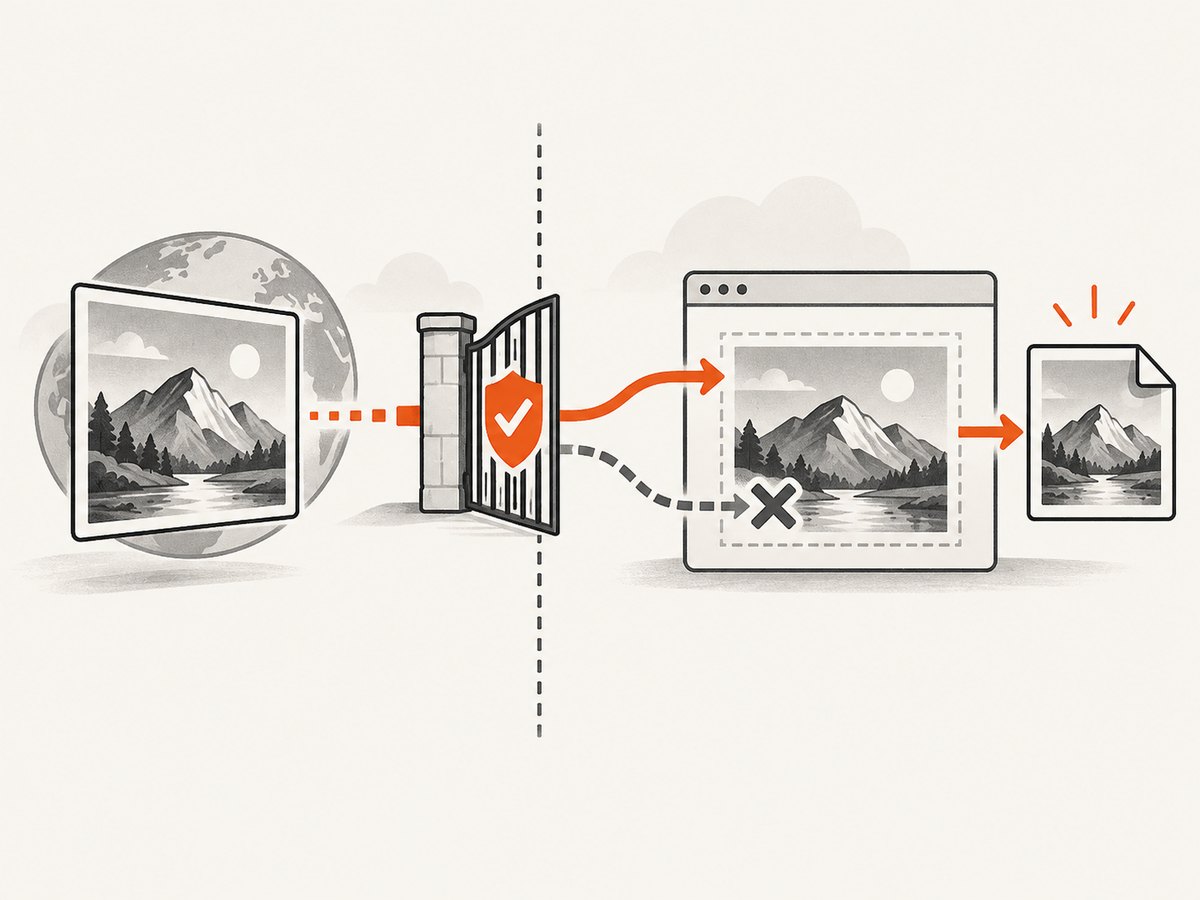
If the image host allows cross-origin access, set the image’s CORS mode before assigning its URL, and ensure the server sends an appropriate CORS response:
const image = new Image();
image.crossOrigin = 'anonymous'; // Set before src.
image.onload = () => {
  const canvas = document.querySelector('canvas');
  canvas.width = image.naturalWidth;
  canvas.height = image.naturalHeight;
  canvas.getContext('2d').drawImage(image, 0, 0);
  const blob = await new Promise(resolve => canvas.toBlob(resolve, 'image/png'));
  if (!blob) throw new Error('Canvas export failed');
  const url = URL.createObjectURL(blob);
  document.querySelector('#result').src = url;
};
image.onerror = () => console.error('Image load failed or CORS was denied.');
image.src = 'https://images.example.org/photo.jpg';
The handler above uses await inside a non-async callback as written only if marked async; the runnable corrected version is:
image.onload = async () => {
  const canvas = document.querySelector('canvas');
  canvas.width = image.naturalWidth;
  canvas.height = image.naturalHeight;
  canvas.getContext('2d').drawImage(image, 0, 0);
  const blob = await new Promise(resolve => canvas.toBlob(resolve, 'image/png'));
  if (!blob) throw new Error('Canvas export failed');
  const url = URL.createObjectURL(blob);
  const result = document.querySelector('#result');
  result.addEventListener('load', () => URL.revokeObjectURL(url), { once: true });
  result.src = url;
};
In a real page, combine this with explicit error handling and ensure a <canvas> and <img id="result"> exist. CORS permission must come from the image server; setting crossOrigin in your code cannot grant it. If you control neither server nor its CORS headers, use a same-origin copy you are permitted to serve or avoid pixel-reading the remote asset. MDN: CORS enabled images
7. Rebuilding a screenshot as HTML
Embedding preserves pixels. It does not extract semantic content, create editable text, identify buttons, or make a fixed bitmap responsive. To recreate a screenshot, you need a separate visual reconstruction process: identify regions, infer typography, spacing, colors and assets, then write and refine HTML/CSS. Vision-language systems can generate HTML from screenshots or sketches, but the generated structure still needs review. The WebSight paper describes this screenshot-to-HTML research direction. WebSight paper
- Inspect the screenshot. Note the viewport size, major sections, alignment, repeated patterns, and visible text.
- Find or recreate assets. Use image files for photographs and logos where available; do not treat a screenshot crop as a substitute for interactive controls or accessible text.
- Build semantic structure. Use headings, navigation, links, buttons, and form elements according to their role.
- Match layout with CSS. Start with broad columns and spacing, then tune type, color, borders and responsive behavior.
- Compare renders. Capture the page at the same viewport as the reference, inspect differences, and refine. Test smaller screens separately.
Generated markup may misread text, omit hidden states, use incorrect assets, or approximate dimensions. Treat it as a starting point and check keyboard access, contrast, responsive behavior, and semantic HTML. A visual match alone does not guarantee a usable page.
8. Troubleshooting
| Symptom | Likely cause | Fix |
|---|---|---|
| Preview stays empty | No file selected, a read error, or code ran before the elements existed. | Check input.files[0], handle the reader’s error event, and run the script after the markup or defer it. |
| Image icon is broken | Wrong URL, inaccessible local path, missing file, or unsupported response. | Inspect the browser Network panel; use a deployed URL or a file selected through the input. |
| “Tainted canvases may not be exported” | Pixels came from a cross-origin image without CORS permission. | Set crossOrigin before src and configure the server’s CORS headers, or process a same-origin image. |
| Exported image is unexpectedly PNG | Requested canvas format is unsupported. | Use a supported type and inspect the returned data URL prefix or Blob type; unsupported types fall back to PNG. |
| Large page becomes slow or memory-heavy | A large data URL duplicates image data in a string and requires decoding. | Prefer toBlob() and an object URL; resize the canvas before export when a smaller output is sufficient. |
| Blob image stops working | Object URL was revoked before its last use. | Revoke after load or after download/use completes, not immediately after setting src. |
| Text in screenshot is not editable | The browser is displaying a bitmap, not reconstructed content. | Build the text as HTML and use the screenshot only as a visual reference. |
9. Performance, reliability, and choosing an output
Use an external image URL for ordinary site assets: it keeps HTML compact and lets the browser fetch the resource separately. Use a data URL when portability as a single small HTML document matters and the image is modest in size. Use a Blob URL for larger client-side generated output; it avoids constructing a base64 string, but is temporary to that browser session and must eventually be revoked.
For repeated file selections, clear or replace the previous preview and release any object URLs created for prior files. For canvas, set dimensions to the actual needed pixel size before drawing; a needlessly huge canvas consumes memory. When exporting JPEG, choose an appropriate quality parameter rather than assuming the default is optimal. For production, handle load, reader and export failures, and do not assume a remote image can be read just because it displays.
10. Or skip the browser setup
If what you need is a screenshot image of a web page, [ScreenshotNeo](https://screenshotneo.com) can return one with a single GET request. The browser-based examples above are for embedding and converting images already in your app; ScreenshotNeo handles capturing a website.
cURL:
curl -G "https://api.screenshotneo.com/v1/shot" -d access_key=YOUR_API_KEY --data-urlencode url=https://stripe.com -o shot.webpPython:
import requests
r = requests.get("https://api.screenshotneo.com/v1/shot", params={"access_key": "YOUR_API_KEY", "url": "https://stripe.com"}, timeout=90)
open("shot.webp", "wb").write(r.content)
Node.js:
const q = new URLSearchParams({ access_key: 'YOUR_API_KEY', url: 'https://stripe.com' });
const res = await fetch(`https://api.screenshotneo.com/v1/shot?${q}`);
See the ScreenshotNeo API documentation for request options. Cookie banners, popups and chat widgets are removed before the shot. Bot checks, blank pages and failed loads are never billed. An MCP server lets AI agents take screenshots. The Free plan includes 1,000 screenshots a month with no card; paid plans start at $5 for 3,000. Sign up for 1,000 free screenshots a month, no card required.
Frequently asked questions
Can JavaScript turn any picture into editable HTML?
No. Showing the picture as an image is straightforward; recovering its content and layout as semantic, responsive elements is a distinct reconstruction task.
Should I use a data URL or a Blob URL?
Use a data URL for small content that needs to travel inside HTML. For larger browser-generated images, use a Blob URL and revoke it when finished.
Why does a remote image display but fail to export?
Displaying an image does not grant canvas access to its pixels. Cross-origin export requires the image server to permit CORS.
Can I put a local image path in HTML?
A path on your computer is not a public web address. Select the file in the browser, serve it from your site, or embed its bytes when a self-contained document is suitable.


