Create Your First PDF Template
Create a reusable PDF form from an existing document or a blank page. Add interactive fields, check how recipients will use it, and prepare it for distribution.

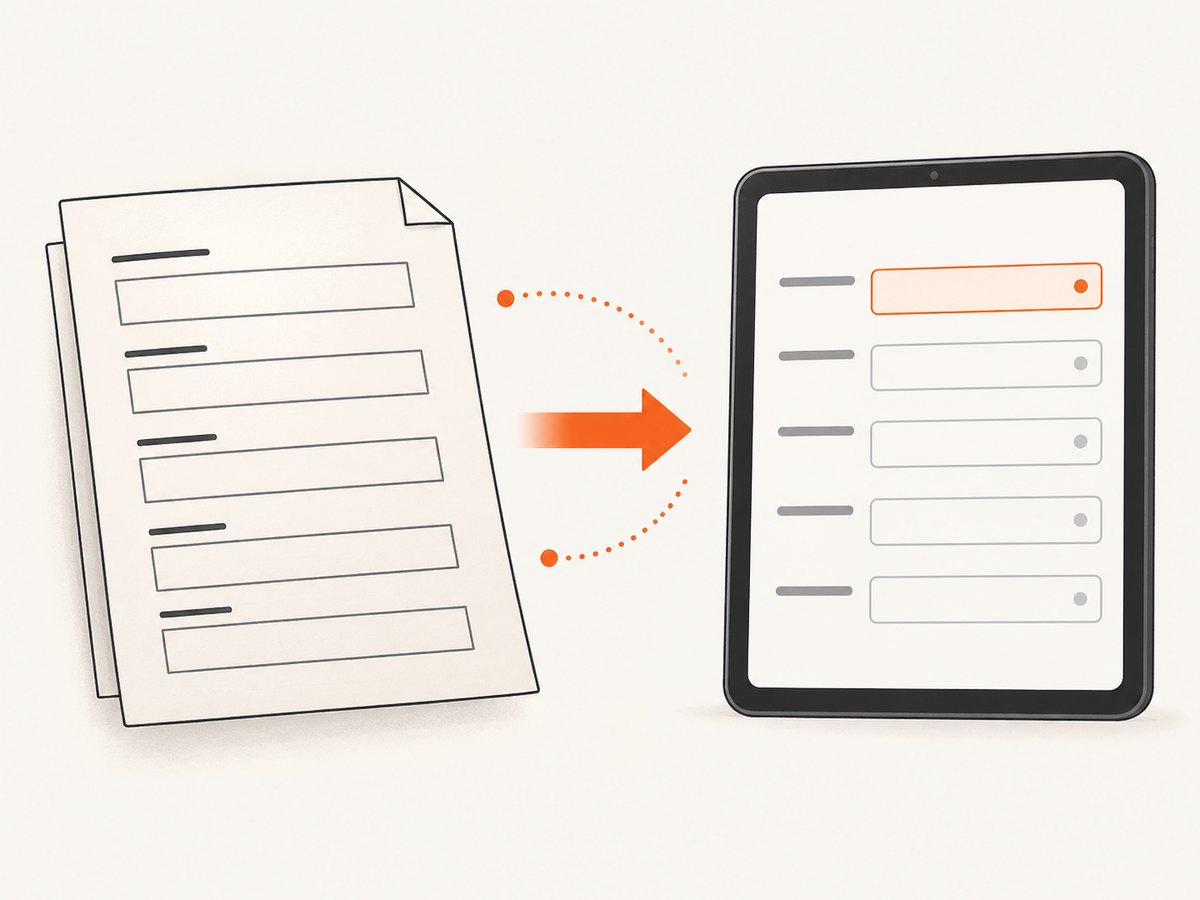
A PDF template can be a static document people print, or an interactive form they fill in on screen. If recipients need to type, select options, or check boxes, blank lines in the design are not enough: add actual form fields, preview the recipient view, and test a completed copy in the software your audience will use.
There are two useful starting points: turn an existing document or scan into a form, or create the form on a blank page. Acrobat documents both workflows. An existing layout can preserve your design, while a blank page gives you a form canvas to build up with text and controls. This guide walks through both routes and the decisions that make a template easier to complete and maintain.
1. Decide what kind of PDF template you need
Before opening a form editor, write down what the recipient should do with the file. A printable checklist may need no interactive fields. A request form may need text boxes, checkboxes, or a dropdown. A document that must be signed has a different requirement from one that only collects basic details.
| Need | Template approach |
|---|---|
| Recipients print and write by hand | Design a static PDF with clear labels and enough space. |
| Recipients type answers | Add interactive text fields; use multiline fields for longer responses. |
| Recipients choose one or more options | Use radio buttons for a single choice or checkboxes when multiple choices are allowed. |
| Recipients select from a fixed set | Use a dropdown or list box, and make the available choices clear. |
| Recipients must sign | Use the authoring workflow’s signature requirement or appropriate signature field, then verify the intended signing process. |
Keep the first version focused. Every field should have a purpose, a visible label, and enough room for a realistic answer. If a field is optional, make that clear; if it is required, configure and communicate that deliberately.
2. Prepare your content and layout
Draft the questions and section headings before placing controls. Group related questions, put instructions next to the field they explain, and use consistent labels. Decide which answers are short, which may span multiple lines, and which are selected from a set of options.
- Set the page structure. Plan the title, introductory instructions, sections, and any closing information.
- Choose answer formats. Mark each response as free text, a single choice, multiple choices, or a signature requirement.
- Allow realistic space. A name field can be short; a description field may need multiple lines. Do not rely on a tiny field for long answers.
- Clarify requirements. Decide which answers are mandatory, optional, or read-only. Avoid making a field required unless the recipient can reasonably provide the answer.
- Keep a source copy. Save the editable source document separately from the final PDF so you can revise the layout later.
You can draft the visual layout in a document editor such as Writer and export or convert it to a PDF before adding interactive controls in a form-authoring tool. A printed line or shaded box in that source is only visual decoration until an actual form field is added.
3. Route A: turn an existing document into a fillable PDF
This route works well when you already have a Word document, spreadsheet, or scan with a settled layout. Acrobat says it can use existing documents or scanned material and recognize static blanks as candidate fields. Recognition is a starting point; review each detected field rather than assuming it interpreted the document correctly.

- Finish the source layout. Check spelling, labels, page breaks, and the amount of space provided for answers. A scan should be legible and aligned enough to review.
- Open the source in a PDF form authoring tool. In Acrobat, use the form preparation workflow to convert the document or scan. The exact menu may vary as Acrobat updates its experience.
- Review detected fields. Check whether each blank became an interactive field, whether the field type is appropriate, and whether its position matches the printed label.
- Add missing controls and remove mistaken ones. A line may be mistaken for a field, or a real response area may be missed. Correct the field set manually.
- Set useful properties. Choose required or optional status, read-only behavior, multiline text where needed, and a tooltip when it helps explain what to enter.
- Preview and save. Switch to the recipient view, move through the form, then save the fillable PDF as a distinct output file.
Preserving the original visual layout can make a conversion easier, but it can also leave limited room for longer answers. If the design is crowded, revise the source layout before distributing the form.
4. Route B: create a form from a blank page in Acrobat
Choose a blank page when there is no existing document worth preserving or when you want to design the form around the fields from the start. Adobe’s current documented workflow is to open Prepare a form from the Menu on Windows or File on macOS, choose Start from blank page, optionally select the signature requirement, and create the form. Menu labels can change; look for the equivalent form-authoring or Prepare a form control if your interface differs.
- Start a blank form. Choose the blank-page option in the form preparation workflow. Consider the signature requirement at this stage if it applies.
- Add the static content. Use the Text control for the title, instructions, section labels, and field prompts. Make the prompt understandable even without relying on nearby decoration.
- Add interactive components. Place text fields, image fields, checkboxes, or radio buttons where recipients need them. Use dropdowns or list boxes when a controlled set of choices is appropriate.
- Align fields with labels. Ensure a field is close enough to its prompt that the relationship is obvious. Keep controls from overlapping text or page edges.
- Set field properties. Mark fields required or optional, set read-only status where appropriate, enable multiline entry for longer responses, and add a tooltip if the prompt alone is not sufficient.
- Preview and save. Use the recipient preview, try each control, and save the completed form.
Adobe’s documented blank-page workflow includes previewing the recipient view and saving the form. These are essential checks: an editor view can hide problems that only become apparent when interacting with the final form.
5. Choose and label fields carefully
Interactive controls should match the answer. A text field is flexible but can produce inconsistent answers when a fixed set of choices would work better. Checkboxes allow multiple selections; radio buttons communicate a single selection. A dropdown or list box is useful when the list is controlled and the choices are clear.
| Control | Use it when | Review before release |
|---|---|---|
| Text field | The recipient enters a short answer. | Label, field width, and whether multiline entry is needed. |
| Checkbox | One or more independent options may be selected. | Each option has an understandable label. |
| Radio button | The recipient selects one option from a group. | The choices are mutually exclusive and the group is clear. |
| Dropdown or list box | The answer must come from a defined list. | Choices cover expected cases and are not ambiguous. |
| Image field | The form needs an image input. | Instructions explain what kind of image is expected. |
Use field properties to make behavior explicit. Required status can help prevent omissions, but it can also block completion when a recipient does not have the requested information. A read-only field should be visibly distinguishable if recipients could otherwise assume they can edit it. Tooltips can provide extra context, but do not use them to hide essential instructions that should be visible on the page.
6. Preview, test, and distribute the template
Before sending the PDF, review it as a recipient and test a filled copy. The intended application matters: Adobe documents filling and saving PDF forms in Acrobat or Reader, but behavior can vary in third-party viewers, so verify in the software your audience is expected to use.
- Can a recipient identify every field and understand what to enter?
- Do required fields reflect genuine requirements?
- Can longer answers fit, and do they remain readable?
- Do checkboxes, radio groups, dropdowns, and any signature requirement behave as intended?
- Does the form remain legible when printed?
- Can a recipient save a filled copy in the intended viewer?
Keep the untouched template separate from completed submissions. Decide how recipients should return the form and how completed copies should be collected and managed. Acrobat documents distribution and response collection through Acrobat, but do not assume every PDF viewer or distribution method handles responses in the same way.
7. Accessibility and maintainability
Accessibility deserves a review before release, especially when a form will be used by a broad audience. Adobe provides a specific accessible-forms tutorial and notes that some accessibility features are limited to certain Acrobat plans. Its tutorial describes a seven-step process, but the source summary does not establish a detailed checklist for each step, so use the tutorial directly for the current product workflow.
At a minimum, make the visible labels clear, keep instructions close to their controls, use a logical reading order in your chosen authoring tool, and check the form with the accessibility guidance applicable to that tool. These are practical review points, not a guarantee of conformance. For a form with legal, public-service, or high-impact use, arrange an appropriate accessibility review.
Maintain the source document and a brief field inventory. When you change a question, check the label, field type, required status, and any recipient instructions together. Save revised templates with clear version names so old and new copies are not confused.
8. Troubleshooting common PDF form problems
| Problem | Likely cause | What to do |
|---|---|---|
| A blank line cannot be clicked or typed into | It is static page content, not an interactive field. | Open the PDF in a form-authoring tool and add a field over the intended answer area. |
| Fields appear in the wrong places after conversion | Automatic recognition misread the layout or scan. | Inspect the converted form, reposition or remove incorrect fields, and add any missing ones. |
| A long answer is cut off or hard to read | The field is too small or is configured for one line. | Provide more space and set multiline behavior when the answer can span lines. |
| A recipient cannot change a field | The field may be read-only, or the recipient is using a viewer with different form support. | Check the field properties and test a copy in the recipient’s intended software. |
| A recipient cannot save a completed form | Saving behavior can differ by viewer, permissions, and workflow. | Test the distribution and save path in the intended application; Acrobat/Reader support filling and saving PDF forms. |
| The form is confusing despite working | Labels may be unclear, required fields may be unexpected, or controls may be poorly grouped. | Revise prompts and grouping, then ask someone unfamiliar with the form to complete a test copy. |
9. Or skip the browser setup
ScreenshotNeo is a website screenshot API and MCP server from Yorker Media. It does not create an interactive PDF form; use it when the task is capturing a web page as an image or PDF. A single GET request returns a screenshot or PDF. See the ScreenshotNeo API documentation for the request options.
curl -G "https://api.screenshotneo.com/v1/shot" -d access_key=YOUR_API_KEY --data-urlencode url=https://stripe.com -o shot.webpimport requests
r = requests.get(
"https://api.screenshotneo.com/v1/shot",
params={"access_key": "YOUR_API_KEY", "url": "https://stripe.com"},
timeout=90,
)
open("shot.webp", "wb").write(r.content)const q = new URLSearchParams({ access_key: 'YOUR_API_KEY', url: 'https://stripe.com' });
const res = await fetch(`https://api.screenshotneo.com/v1/shot?${q}`);Cookie banners, newsletter popups, and chat widgets are removed before capture, and each step can be turned off. Bot checks, blank pages, timeouts, failed loads, and cache hits are not billed; response headers report the page verdict and billing status. Its MCP server gives AI agents tools to take screenshots, get page information, and capture PDFs. The free plan includes 1,000 screenshots a month with no card; paid plans start at $5 for 3,000.
Create a free ScreenshotNeo account for 1,000 screenshots a month with no card.
10. Frequently asked questions
Can a PDF template be printable and fillable?
Yes. A form can have a designed page layout and interactive fields. Test both typing and printing so the controls and labels remain useful in each mode.
Can I make a fillable form from a scan?
Acrobat’s PDF forms guidance describes using scanned material and recognizing static fields. Review all recognized controls because the conversion still needs a human check.
Do all PDF viewers support every field the same way?
Do not assume so. Test in the software your recipients are expected to use, particularly the save and return workflow.
Is a blank line enough for an electronic form?
No. A blank line is visual content. Recipients need an actual interactive field if they are expected to type or select an answer on screen.