How to Create a Thumbnail for a Website Article
Create an article thumbnail that fits its destination, stays sharp, and works in WordPress and search previews. Follow this practical crop, publish, and check workflow.
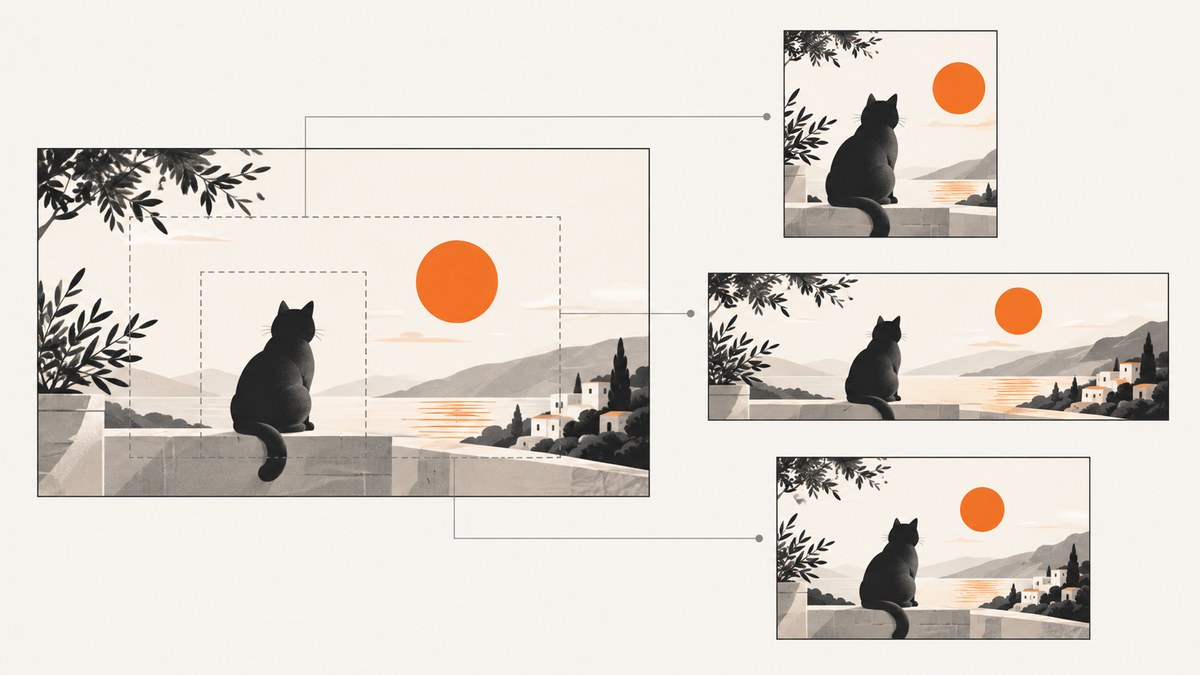
A website article thumbnail is an image prepared for a particular place: a listing card, a featured-image slot, or a preview when someone shares a link. Those slots can use different dimensions and crops, so there is no single pixel size that works everywhere. First identify where the image will appear, then prepare a crop for that shape, publish it through your site, and check the result in the actual layout.
If you use WordPress, assign the image as the post’s featured image after confirming that your theme supports featured images. If you need a visual of the article page itself, you can capture it with a browser tool or use ScreenshotNeo, a website screenshot API that can return an image from one GET request.
1. Identify the thumbnail’s destination
Before exporting an image, list the places it needs to work. A blog index might show a square card; the article template might show a wide hero; a social share preview might use a separate crop. The theme or template determines how a featured image is displayed, and different templates may use different sizes or ratios. WordPress themes can register custom featured-image sizes and crop behavior.
| Destination | What to check |
|---|---|
| Article listing or category card | Rendered width and height, crop shape, and whether the subject remains recognizable at small size. |
| Article page | Hero dimensions, content width, and whether the theme crops the featured image differently from the card. |
| Share preview | Whether your publishing or sharing setup uses the featured image or a separate social image. Inspect the actual preview; assigning a featured image does not guarantee every platform will display it. |
| Google Article structured data | Whether image URLs are crawlable and indexable, and whether the images represent the marked-up article. |
Write down each slot’s expected dimensions or aspect ratio. Check the theme documentation, the block settings, or the image dimensions of an existing card that displays correctly. Avoid assuming the largest image is always the right one: a template may crop it, and an oversized file can add unnecessary weight.
2. Choose an image and prepare the crop
Pick an image that represents the article clearly. Keep the main subject and important context inside the crop, especially near the center if the theme uses several crops. Crop to the destination’s aspect ratio; resize while preserving proportions. Do not stretch an image to force it into a slot, because that distorts people and objects.

WordPress’s image editor includes crop-ratio choices such as 1:1, 4:3, and 16:9, as well as scaling and cropping controls. Its guidance treats image quality as a balance between display size, file size, resolution, and file type. Export at a size suitable for the actual display and retain enough resolution for a clear result. See WordPress: Edit Media and Image size and quality.
Make separate variants when the crops differ
One source image can produce multiple files: for example, a square card crop and a landscape hero crop. Make a separate version when the subject would be cut off or become unclear in one of the slots. Google recommends multiple high-resolution image ratios for Article structured data: 16:9, 4:3, and 1:1, with at least 50,000 pixels total. This is Google’s recommendation for best results with Article structured-data images; it does not mean every site needs three uploads or that these are universal thumbnail dimensions. Read Google’s Article structured data guidance.
WordPress’s 150 × 150 pixel thumbnail is a default that can be changed in media settings. It is not a general web standard. Your theme may generate or request other sizes. Check WordPress’s Edit Media documentation and your theme’s image settings rather than exporting every article image at 150 × 150.
3. Publish the image as a featured image in WordPress
- Check theme support. Open the post editor and confirm the featured-image control is available. The theme must support featured images for that control to appear. Theme developers can add support and define image sizes; see WordPress Developer Resources: Featured Images & Post Thumbnails.
- Upload or select the prepared image. In the post editor, use the Featured image panel to choose the image from the media library or upload it.
- Set display options if available. The Featured Image block can expose aspect-ratio and dimension controls, subject to theme settings. Check whether the theme crops the image or preserves its original ratio. See the Post Featured Image block documentation.
- Preview the real template. Check the article, listing card, and a narrower screen. Verify the focal subject survives each crop and the image is not distorted.
If you are creating a static HTML article rather than using WordPress, the same principle applies: use an image whose proportions match the slot, and set the rendered width to the container. For a simple responsive image, preserve its aspect ratio:
<img src="/images/article-thumbnail.webp"
     alt="A clear description of the meaningful image content"
     width="1200" height="675"
     style="max-width:100%; height:auto">
Replace the path and dimensions with those of your exported file. For a decorative image that adds no information, use an empty alt attribute (alt="") instead of describing it as meaningful content. The appropriate alternative text depends on the image’s context.
4. Add useful alternative text and check previews
Write alt text that conveys the meaningful content or purpose of the image in context. If the image only decorates the page, an empty alternative may be appropriate; if it communicates information, describe that information concisely. Avoid placing important words inside the image itself. W3C’s Images Tutorial advises: “If the image is not a logo, avoid text in images.” See W3C Images Tutorial.
Then inspect the published result, not just the source file. Check the card at its actual display size, the article hero, and the page on a narrow screen. If the image is intended for Article structured data, confirm the image URL is publicly crawlable and indexable, as Google requires. If the goal is a social preview, inspect that preview separately: featured-image behavior varies across publishing and sharing setups.
5. Capture the article page itself when a screenshot is the right thumbnail
Sometimes the representative image should be the page itself, such as a product article, a design critique, or a visual changelog. A browser screenshot can create that asset. For a one-off capture, open the article in a browser, set the viewport to the desired shape, wait for the page to finish rendering, capture the page or a specific element, then crop or resize the exported image for the target slot. Review the result for cookie dialogs, blank areas, and content cut off by the viewport.
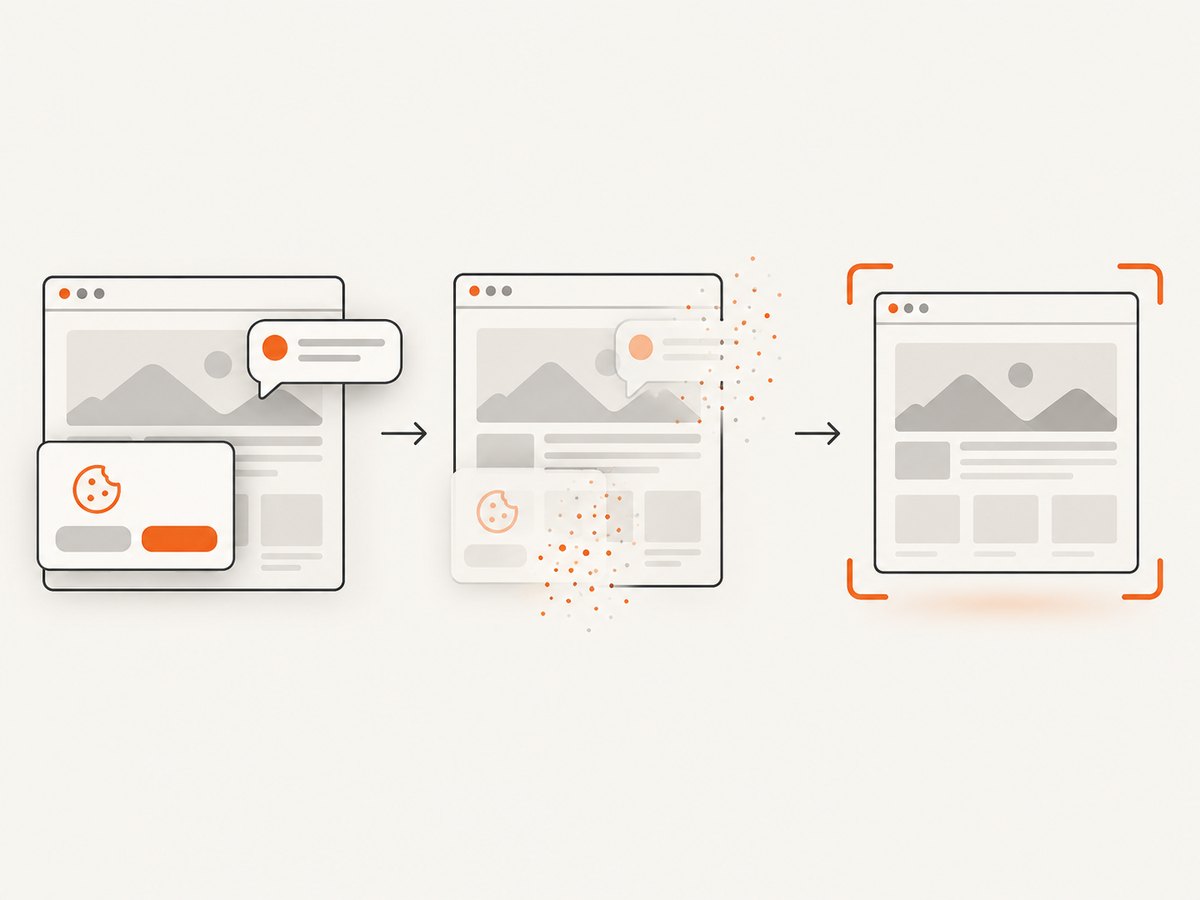
For repeatable captures, automate a browser. Here is a runnable Playwright example in JavaScript that saves a full-page PNG; install Playwright with npm install playwright and install its browser with npx playwright install chromium first:
const { chromium } = require('playwright');

(async () => {
  const browser = await chromium.launch({ headless: true });
  const page = await browser.newPage({
    viewport: { width: 1200, height: 675 },
    deviceScaleFactor: 1
  });
  await page.goto('https://example.com/article', {
    waitUntil: 'networkidle',
    timeout: 60000
  });
  await page.screenshot({ path: 'article.png', fullPage: true });
  await browser.close();
})();
Use the actual public article URL in place of the example. A full-page capture can be much taller than a thumbnail slot, so crop it to the target ratio afterward. For a card that should show only the page’s top section, omit fullPage: true and choose a viewport that matches the intended composition. If the site keeps network connections open, a network-idle wait can hang; use a bounded delay or wait for a specific visible selector instead.
Or skip the browser setup
Use the ScreenshotNeo API for a one-call screenshot of a page. See the ScreenshotNeo documentation for API options. This example saves a WebP response for a page screenshot; replace the target URL and provide your API key:
curl -G "https://api.screenshotneo.com/v1/shot" \
  -d access_key=YOUR_API_KEY \
  --data-urlencode url=https://example.com/article \
  -o article.webp
Equivalent Python:
import requests

r = requests.get(
    "https://api.screenshotneo.com/v1/shot",
    params={"access_key": "YOUR_API_KEY", "url": "https://example.com/article"},
    timeout=90,
)
r.raise_for_status()
with open("article.webp", "wb") as image:
    image.write(r.content)
Equivalent Node.js:
const q = new URLSearchParams({
  access_key: 'YOUR_API_KEY',
  url: 'https://example.com/article'
});
const res = await fetch(`https://api.screenshotneo.com/v1/shot?${q}`);
if (!res.ok) throw new Error(`Screenshot request failed: ${res.status}`);
await import('node:fs/promises').then(fs =>
  fs.writeFile('article.webp', Buffer.from(await res.arrayBuffer()))
);
Cookie banners, newsletter popups, and chat widgets are removed before the shot, and each of those steps can be turned off. Bot checks, blank pages, timeouts, failed loads, and cache hits cost nothing; response headers report the page verdict and billing status. An MCP server lets AI agents use take_screenshot, get_page_info, and capture_pdf. The free plan includes 1,000 screenshots a month with no card; paid plans start at $5 for 3,000. Sign up for ScreenshotNeo and get 1,000 free screenshots a month, no card required.
6. Troubleshoot common thumbnail problems
| Problem | Likely cause | What to do |
|---|---|---|
| The featured-image control is missing | The active theme may not support featured images, or the editor panel may be hidden. | Check theme support and editor preferences. WordPress documents theme support and featured-image setup in its developer guide. |
| The card cuts off the subject | The card uses a fixed crop or a different ratio from the source. | Check the theme’s crop and image-size settings. Create a separate crop with the important subject inside the safe area. |
| The image looks stretched | Width and height were forced to different proportions. | Export a correctly cropped version and preserve its aspect ratio in the page layout. |
| The thumbnail looks blurry | The source is too small for the displayed size, or the image was enlarged. | Start from a higher-resolution source and export at a size appropriate for the slot. Avoid repeated resampling. |
| The file is unnecessarily large | The export dimensions or encoding exceed what the display requires. | Resize for the actual rendered area and choose a suitable image format and quality. Check that the result still looks clear. |
| The social preview shows a different image | The sharing setup may select a separate image or may not use the featured image. | Inspect the page’s sharing configuration and the resulting preview. Do not assume the featured image controls every external platform. |
| Google cannot use the structured-data image | The image URL may not be crawlable or indexable, or it may not represent the article. | Make the image publicly accessible to crawlers and use an image that represents the marked-up content; check Google’s Article guidance. |
| An automated screenshot is blank or incomplete | The page may need more time, a specific element to load, or a different wait condition. | Increase the timeout, wait for a selector that indicates the content is ready, and check for a bot check or page error before treating the capture as an image asset. |
7. Performance and reliability checklist
- Keep a high-quality source file, then export destination-specific crops so you can adjust the card without degrading the original.
- Size files for their rendered area. A page-wide hero and a small listing card do not necessarily need the same output dimensions.
- Test the theme’s generated crop after changing image settings; the uploaded original may not be what the card renders.
- Keep the subject visible at small sizes and narrow viewport widths. A detail that works in a full-width hero may disappear in a card.
- For automated screenshots, use explicit timeouts and a stable readiness condition. Retry transient failures deliberately rather than saving an error page as the thumbnail.
- For structured data, verify the image URL remains reachable and indexable after publishing.
There is no source-backed universal click-through benefit or performance target for a particular thumbnail size. Choose dimensions based on the destination, keep the image legible and representative, and check the published result.
FAQ
How do I make a thumbnail for a blog post?
Choose the destination slot, crop an image to its shape without stretching, upload it, and preview it in the real post and listing template. In WordPress, set it as the featured image if your theme supports that feature.
How do I change the image that appears when I share my article?
Check your site’s sharing settings to see whether they use the featured image or a separate social image. Preview the shared link after publishing; the featured image alone does not guarantee what every platform displays.
Do I need three image files for Google?
Google recommends 16:9, 4:3, and 1:1 images for best results with Article structured data. That guidance does not require every website to upload three separate files.
What alt text should I use?
Describe the meaningful image content in the context of the article. For purely decorative images, an empty alt attribute may be appropriate; avoid putting essential copy in an image.


