How to Create a Website Preview Thumbnail
Create a 1200×630 preview image, add Open Graph tags to your page, and check how platforms fetch and cache the result.

A website preview thumbnail is usually an Open Graph image: a wide image that a social network or messaging app fetches when someone shares your page. Start with a 1200 × 630 pixel image, host it at a public HTTPS URL, and put that URL in an og:image tag in the page’s initial HTML <head>. Add the page’s title, description, canonical URL, and type there too. For X’s large image card, include twitter:card set to summary_large_image.
The image alone does not create a reliable preview. Crawlers need to reach both the page and image, metadata needs to describe the specific page, and a platform may keep showing a cached preview after you change it. This guide walks through the image, tags, framework and CMS considerations, checks, and fixes.
1. Create the image
Use a 1200 × 630 pixel canvas, about a 1.91:1 ratio. That is a broadly compatible starting point for the Open Graph consumers covered here. Facebook and LinkedIn use Open Graph fields; X can use Twitter Card fields and fall back to Open Graph. Other clients, including Discord and Slack, commonly read the same Open Graph metadata. Rendering and cropping can still vary by platform, so treat the dimensions as a baseline, not a guarantee of identical previews. The Open Graph protocol defines the metadata; the platform guidance summarized in the research dossier identifies 1200 × 630 as a compatible baseline.

- Make the image recognizable at a small size. Use one main subject, strong contrast, and a title or brand mark only when it remains legible when reduced.
- Keep essential text and logos away from the edges. Some preview layouts crop or resize images.
- Export a web-optimized JPEG, PNG, or WebP. Check the platform you care about for its current file-size and format limits; a smaller file is faster to fetch, but do not reduce quality until text and details become difficult to read.
- Give the image a descriptive alternative text value in metadata where applicable. The Open Graph protocol defines
og:image:altas a description of the image.
If different pages deserve different previews, create a separate image for each page rather than using one global image for every URL. A page-specific image helps keep the preview relevant when the link is shared.
2. Host the image where crawlers can fetch it
Upload the finished asset to a stable, publicly reachable HTTPS URL. The URL should be absolute, such as https://example.com/images/preview-1200x630.jpg, rather than a relative path that only makes sense from a particular page. Do not put it behind a login, a short-lived signed URL, or a browser-only route. The platform’s crawler needs to fetch the image directly.
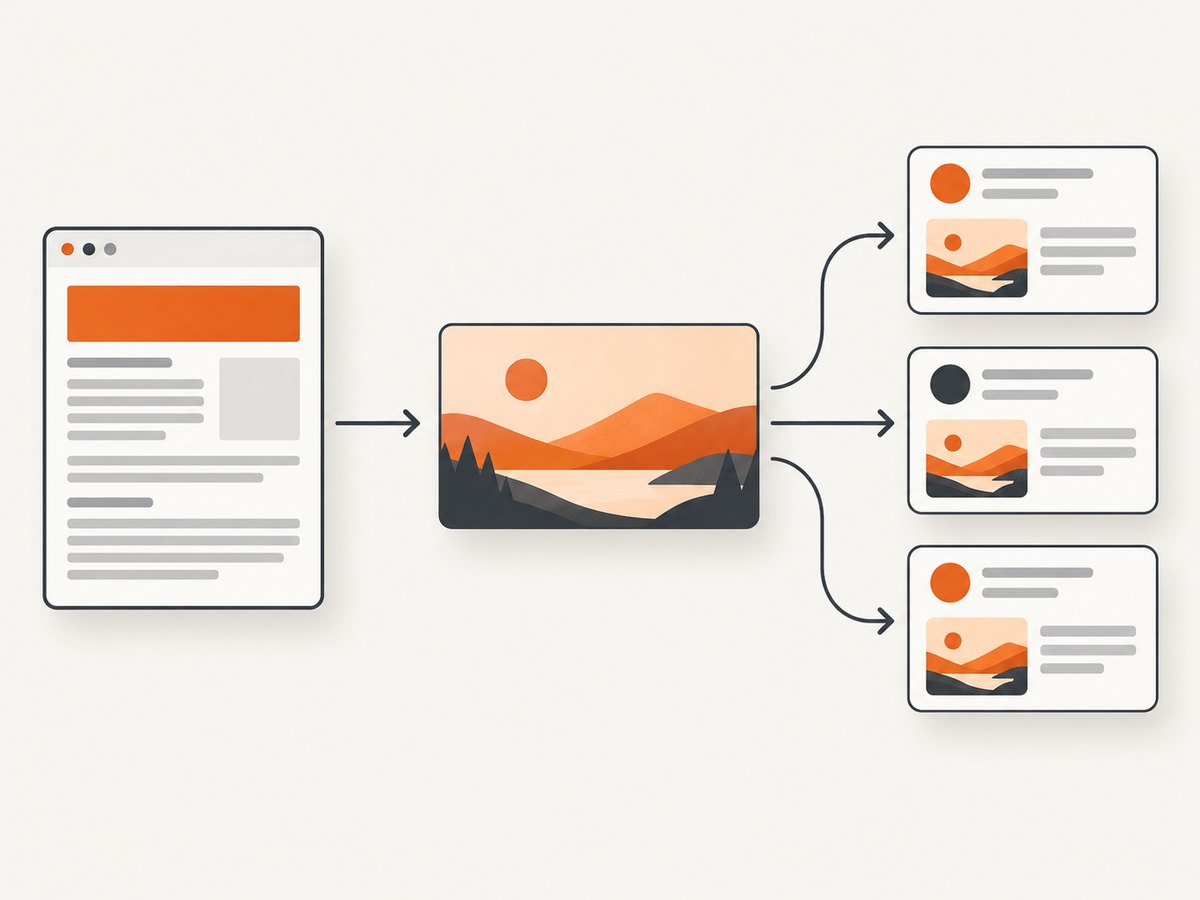
Check the image URL itself in a private browser window or with a command-line request. Confirm that it returns the image rather than a login page, an error, or a redirect to an inaccessible destination. If you serve assets from a CDN, make sure its cache contains the intended version. When replacing an image at the same URL, a versioned filename such as preview-v2.jpg can help distinguish the new asset from cached copies.
3. Add Open Graph and X card tags
Place the tags in the page’s initial server-rendered HTML head. Open Graph specifies basic properties including og:title, og:type, og:image, and og:url; optional structured image properties can specify dimensions, MIME type, and alternative text. See the protocol’s metadata definition and examples.
<!doctype html>
<html lang="en">
<head>
  <meta charset="utf-8">
  <title>Pricing | Example</title>
  <meta name="description" content="Compare plans for Example.">

  <meta property="og:title" content="Pricing | Example">
  <meta property="og:description" content="Compare plans for Example.">
  <meta property="og:image" content="https://example.com/images/pricing-preview.jpg">
  <meta property="og:image:width" content="1200">
  <meta property="og:image:height" content="630">
  <meta property="og:image:type" content="image/jpeg">
  <meta property="og:image:alt" content="Example pricing plans on a blue background">
  <meta property="og:url" content="https://example.com/pricing">
  <meta property="og:type" content="website">

  <meta name="twitter:card" content="summary_large_image">
  <meta name="twitter:title" content="Pricing | Example">
  <meta name="twitter:description" content="Compare plans for Example.">
  <meta name="twitter:image" content="https://example.com/images/pricing-preview.jpg">
</head>
<body>...</body>
</html>
Replace the example content with the actual page’s information. Keep og:url pointed at that page’s canonical URL, not the homepage. Set og:type to the appropriate object type; website is a sensible value for a normal site page. The Open Graph protocol’s examples use property attributes; Twitter Card metadata uses name.
The Open Graph fields form the core for many consumers. The Twitter-specific title, description, and image tags make X’s intended values explicit; at minimum, use twitter:card=summary_large_image when you want the large card layout. Avoid contradictory values across the two sets. If the title or image differs, one platform may show a different preview from another.
4. Render the tags in the initial HTML
Many social preview crawlers fetch a URL and parse its HTML without behaving like a full interactive browser. If your application adds metadata only after client-side JavaScript runs, a crawler may never see it. Put the tags in server-rendered HTML or use your framework’s server-side metadata mechanism, and verify the response source rather than relying only on what appears in browser developer tools after hydration.
For a server-rendered route, values should be derived from that route’s page data. Escape attribute values correctly, emit one intended og:image value for the page, and avoid duplicate or stale tags from a layout plus a page component. Ensure the page responds successfully to an unauthenticated request. A crawler should not need a session cookie, execute a login flow, or solve a challenge to read the tags.
5. Publish and inspect the live page
- Deploy the page and image, then open the public page source. Confirm the expected tags appear in the initial
<head>. - Open the
og:imageURL directly. Confirm it is publicly reachable over HTTPS and serves the intended image. - Inspect the page with the debugger or inspector for the platform where you plan to share it. Review the fetched title, description, image, and any warnings.
- Check the displayed crop at the preview’s actual size. Adjust the composition if important content is clipped or unreadable.
- After changing metadata or an image, request a fresh scrape where the platform provides one. A previous preview may be cached.
Shopify documents that its free themes use Open Graph tags, and that page-specific featured images can take precedence while a social-sharing image can serve as a default. Its guidance also points to platform inspection tools and recommends refreshing Facebook’s saved information after changing an image. If you use a CMS, check both global social-sharing settings and page- or theme-specific image fields: a theme may read a different setting than the one you updated. Shopify’s social media image instructions describe its theme and store settings.
6. Check the HTML and image from the command line
These checks help separate metadata problems from image delivery problems. They do not reproduce every platform’s rendering rules or clear its cache.
# Fetch the HTML response and search it for relevant tags.
curl -fsSL https://example.com/pricing | grep -E 'og:(title|description|image|url)|twitter:card'

# Fetch response headers for the image.
curl -fsSI https://example.com/images/pricing-preview.jpg
Inspect the HTML output to make sure values belong to the URL you requested, not a default route. For the image, check that the response succeeds and the content type is appropriate, for example image/jpeg for a JPEG. A browser showing the image successfully is useful, but does not prove that a platform crawler can access it from outside your session or network.
7. Common problems and fixes
| Symptom | Likely cause | What to check or change |
|---|---|---|
| No thumbnail appears | Missing og:image, a relative or invalid URL, or crawler access is blocked. |
Check the initial HTML for the tag; use an absolute HTTPS URL; fetch the image without authentication and inspect server or CDN access rules. |
| The old image remains | The platform has cached the previous page or image. | Use the platform’s inspector to request a fresh scrape when available. If you changed the asset, use a new versioned image URL and update the tag. |
| The image is cropped badly | The composition puts essential content near the edge, or the target preview uses a different crop. | Keep key details inside a centered safe area, inspect the actual platform preview, and revise the image composition. |
| X shows a small card | The page does not request the large card type. | Add <meta name="twitter:card" content="summary_large_image"> and ensure the image tag is available to the crawler. |
| Tags look correct in the browser but not to the platform | Metadata is injected after JavaScript runs, or crawler requests receive a different response. | Inspect raw response HTML and server logs. Render the tags on the server and allow the platform crawler to retrieve the public page. |
| The wrong page image is used | Metadata is duplicated, inherited from a layout, or mapped to the wrong CMS field. | Search the initial HTML for every og:image; keep one intended value and confirm page-specific settings override defaults as expected. |
| Image URL returns an error | Bad deployment path, access controls, expired URL, or CDN issue. | Request the exact image URL without a browser session. Fix the route or permissions and use a stable public asset URL. |
| Preview differs between platforms | Platforms may consume different metadata, apply different layouts, or have different cached copies. | Set consistent Open Graph and Twitter Card values, inspect each target, and refresh each platform’s cached scrape where supported. |
8. Performance, reliability, and cost
For the link preview itself, you do not need to render a screenshot of your website. The normal approach is to prepare an image, serve it as a static asset, and declare it in metadata. Static image hosting avoids starting a browser for every crawler request. Optimize the file sensibly, keep the URL stable, and monitor that deployments do not remove or rename assets while metadata still points to them.
If you need to inspect what a page looks like at a particular viewport, or capture a page for a visual review, a browser screenshot is a separate task from setting its social thumbnail. Browser rendering can be affected by page load time, third-party resources, consent banners, lazy-loaded images, and dynamic content. A screenshot can help you inspect the visible page, but it does not replace setting and validating Open Graph tags. Cost for a DIY setup depends on the image design and hosting workflow; there is no need to run a screenshot service just to expose an already-created OG image.
Or skip the browser setup
If you also need a rendered screenshot to inspect a page, ScreenshotNeo is a website screenshot API and MCP server. One GET request returns an image or PDF. This example captures a page as WebP; it does not write Open Graph tags or create your social-sharing image.
curl -G "https://api.screenshotneo.com/v1/shot" -d access_key=YOUR_API_KEY --data-urlencode url=https://example.com/pricing -o shot.webpPython:
import requests

r = requests.get(
    "https://api.screenshotneo.com/v1/shot",
    params={"access_key": "YOUR_API_KEY", "url": "https://example.com/pricing"},
    timeout=90,
)
open("shot.webp", "wb").write(r.content)
Node.js:
const q = new URLSearchParams({
  access_key: 'YOUR_API_KEY',
  url: 'https://example.com/pricing'
});
const res = await fetch(`https://api.screenshotneo.com/v1/shot?${q}`);
if (!res.ok) throw new Error(`Screenshot request failed: ${res.status}`);
await Bun.write('shot.webp', new Uint8Array(await res.arrayBuffer()));
See the ScreenshotNeo API documentation for parameters and configuration. Cookie banners, popups, and chat widgets are removed before the shot; each cleanup step can be turned off. Bot checks, blank pages, timeouts, and failed loads are never billed, and cache hits cost nothing; response headers say which outcome occurred. An MCP server gives AI agents tools to take screenshots, get page information, and capture PDFs. The free plan includes 1,000 screenshots per month with no card; paid plans start at $5 for 3,000. Sign up for 1,000 free screenshots a month, with no card.
FAQ
Is a website preview thumbnail the same as a favicon?
No. A favicon is a small site icon used in browser tabs and other contexts. A link preview thumbnail is usually the page-level image declared by og:image.
Do I need a separate image for every page?
No, but a page-specific image is useful when the page has a distinct topic. A shared default is reasonable for pages without their own artwork, provided your CMS or framework emits the intended image for each URL.
Will changing the tags update links already shared?
Not necessarily. Platforms may retain previously fetched metadata, and an existing post may keep its original preview. Re-scrape the URL where the platform offers that control, then check a new share.
Does taking a screenshot set the social preview?
No. A screenshot is an image captured from a rendered page. Social previews are selected from metadata such as og:image; add those tags to the page whether or not you use a screenshot for visual inspection.
Implementation checklist
- Prepare a clear 1200 × 630 image and host it at a stable, public HTTPS URL.
- Add page-specific Open Graph title, description, image, URL, and type to the initial HTML head.
- Include image dimensions and alternative text, and add
twitter:card=summary_large_imagefor a large X card. - Check raw HTML, fetch the image directly, and inspect the live page with the target platform’s tool.
- After edits, refresh the platform’s scrape and allow for previously cached copies.
References: Open Graph protocol; Shopify social-sharing image guidance; OpenGraph Studio for cropping, compression, tag generation, and previewing.


