How to Embed Screenshots in Cypress 10 Mochawesome Reports
Configure Cypress 10 and Mochawesome to attach screenshots, embed them in HTML, create portable reports, and troubleshoot CI failures.

Direct answer: In Cypress 10, use the cypress-mochawesome-reporter integration. Set embeddedScreenshots: true to place screenshot bytes inside the generated HTML, and add inlineAssets: true when the report must be one self-contained file. Cypress can create screenshots explicitly with cy.screenshot() and automatically when a test fails during a run.
These are separate outcomes:
| Requirement | Configuration or behavior |
|---|---|
| Attach a screenshot to a test result | Create the screenshot with Cypress and use the reporter integration. |
| Embed image bytes in report HTML | embeddedScreenshots: true |
| Produce one portable HTML file | Use inlineAssets: true together with embeddedScreenshots: true. |
| Keep separate image files | Leave embedding disabled and publish the report with its asset directory. |
1. Check versions and install the reporter
The reporter’s setup tutorial is for Cypress 10 and later. Its supported Cypress and Node versions vary by reporter release, so check the repository compatibility table before pinning a version. The Cypress plugin directory classifies this package as a community extension, not an official Cypress product.

npm install --save-dev cypress-mochawesome-reporterConfirm that the project has a Cypress 10-or-later configuration file such as cypress.config.js or cypress.config.ts. Do not copy a Cypress 9 plugin file into a Cypress 10 project without translating it to the current setupNodeEvents format.
2. Configure Cypress 10
Use the reporter’s Cypress 10 setup from its README. A CommonJS configuration looks like this:
const { defineConfig } = require('cypress')
const mochawesome = require('cypress-mochawesome-reporter/plugin')

module.exports = defineConfig({
  reporter: 'cypress-mochawesome-reporter',
  reporterOptions: {
    embeddedScreenshots: true,
    inlineAssets: true
  },
  e2e: {
    setupNodeEvents(on, config) {
      mochawesome(on)
      return config
    }
  }
})
The reporter also uses a support registration file. In a standard Cypress project, add the registration required by the reporter to cypress/support/e2e.js:
import 'cypress-mochawesome-reporter/register'If your project uses CommonJS support files, use:
require('cypress-mochawesome-reporter/register')Follow the installed reporter release’s README for the exact plugin and support-file setup. The important options for this article are:
embeddedScreenshots: trueembeds external screenshot files as base64 data in the report HTML.inlineAssets: trueinlines report assets so the output can be opened as one standalone HTML file.
3. Capture screenshots in Cypress
Cypress stores screenshots in the configured screenshotsFolder, which defaults to cypress/screenshots. You can capture a page or an individual element explicitly:
describe('checkout', () => {
  it('shows the payment form', () => {
    cy.visit('/checkout')
    cy.get('[data-cy=payment-form]').should('be.visible')
    cy.screenshot('checkout/payment-form')
  })
})
To capture a particular element, call screenshot() on the subject:
cy.get('[data-cy=order-summary]').screenshot('checkout/order-summary')During a Cypress run, Cypress also captures screenshots automatically when a test fails unless screenshot-on-failure behavior has been disabled. Those failure images are placed under the screenshots folder and can be associated with the failed test by the reporter integration. Cypress documents screenshot configuration and CI artifact handling in its screenshot API and screenshots and videos guide.
4. Run the suite and generate the report
Run Cypress in headless mode so the reporter creates its HTML output in CI or on a local command line:
npx cypress runOpen the generated Mochawesome HTML file in a browser. With both embedding options enabled, the report should contain the screenshot data and its supporting assets without requiring the original screenshot directory. If you deliberately leave inlineAssets disabled, publish the HTML together with every referenced asset directory.
A useful package script is:
{
  "scripts": {
    "e2e": "cypress run",
    "e2e:open": "cypress open"
  }
}
5. Choose the right embedding mode
| Mode | When to use it | Trade-off |
|---|---|---|
| Embedded screenshots only | You want screenshots inside the report HTML but can distribute other report assets separately. | Images increase HTML size; other assets may still be external. |
| Embedded screenshots plus inline assets | You need one file to upload, email, archive, or open offline. | The file can become large for long suites or high-resolution images. |
| External screenshots | Your CI system stores artifacts separately or you want smaller HTML. | The report breaks if its asset paths are not preserved. |
Do not assume that generating ordinary Mochawesome JSON and HTML automatically attaches Cypress screenshots. Screenshot attachment comes from the Cypress reporter integration and its screenshot options.
6. Make reports usable in CI
- Run Cypress and the reporter in the same workspace so the reporter can find the screenshots folder.
- Upload the generated HTML and any non-inlined assets as CI artifacts.
- If you need a single downloadable file, enable both
embeddedScreenshotsandinlineAssets. - Keep the screenshots folder available until report generation finishes.
- Open the artifact after a failed build and verify that the failed test contains its image.
Cypress also documents CI screenshot artifacts as an alternative when you want images available in the CI provider interface rather than inside the report.
7. Alternative: merge Mochawesome JSON yourself
If the project already owns a multi-spec reporting pipeline, Cypress documents a JSON-first workflow using mochawesome, mochawesome-merge, and mochawesome-report-generator:
npm install mochawesome mochawesome-merge mochawesome-report-generator --save-dev
npx cypress run --reporter mochawesome --reporter-options reportDir="cypress/results",overwrite=false,html=false,json=true
npx mochawesome-merge cypress/results/*.json -o mochawesome.json
npx marge mochawesome.json
This merges per-spec JSON files and generates HTML. It does not, by itself, guarantee that Cypress screenshots are attached. Use a reporter integration that adds screenshots to the report data when image attachments are required.
8. Troubleshooting
The report has no screenshots
Cause: The test did not create a screenshot, automatic failure capture is disabled, or the reporter support/plugin registration is missing.
Fix: Add an explicit cy.screenshot(), check that the test actually fails when you expect automatic capture, verify the setupNodeEvents registration, and confirm the support-file registration matches the reporter README.
The report shows broken image links
Cause: The HTML references external files that were not uploaded with the report.
Fix: Publish the complete asset directory, or set both embeddedScreenshots: true and inlineAssets: true for a self-contained file.
The HTML file is unexpectedly large
Cause: Base64-encoded screenshots and inlined assets increase the report size.
Fix: Use external artifacts for large suites, capture only diagnostic screenshots, avoid redundant full-page captures, or reserve single-file output for reports that need offline portability.
The plugin fails during Cypress startup
Cause: A Cypress 9 configuration was copied into Cypress 10, or the installed reporter release does not support the project’s Node or Cypress version.
Fix: Recheck the reporter compatibility table and use the Cypress 10 setupNodeEvents instructions for that release.
Screenshots exist on disk but are not associated with tests
Cause: The screenshot naming or reporter integration does not match the test lifecycle, or report generation ran before screenshots were available.
Fix: Keep screenshots under the configured folder, run the reporter after Cypress finishes, use stable names, and verify the installed reporter’s documented registration steps.
Only some specs appear in the final report
Cause: Per-spec files were overwritten or the merge glob did not match every result.
Fix: For a manual JSON pipeline, use overwrite=false, write every spec to the same results directory, inspect the generated filenames, and merge the complete glob.
9. Performance, reliability, and cost considerations
- Performance: Screenshot capture adds browser work, and embedding converts image files into larger HTML. Full-page and failure screenshots generally cost more time and storage than a small element capture.
- Reliability: Keep report generation in the same job as the Cypress run, preserve the screenshots directory until generation completes, and archive the final report as a CI artifact.
- Portability: Inline assets make a report easier to move between machines, while external assets make large reports smaller and easier to cache.
- Debuggability: Use explicit names such as
checkout/payment-formso a failed test’s image is easy to find. - Cost: The open-source packages do not remove CI storage or runtime costs. Estimate artifact retention and storage separately from test execution.
10. Or skip the browser setup
If you need screenshots of deployed pages rather than screenshots produced inside a Cypress run, ScreenshotNeo provides a website screenshot API and MCP server. It removes cookie and consent banners, newsletter popups, and chat widgets before capture; bot checks, blank pages, failed loads, timeouts, and cache hits are not billed; and an MCP server lets Claude, Cursor, and other MCP clients take screenshots.
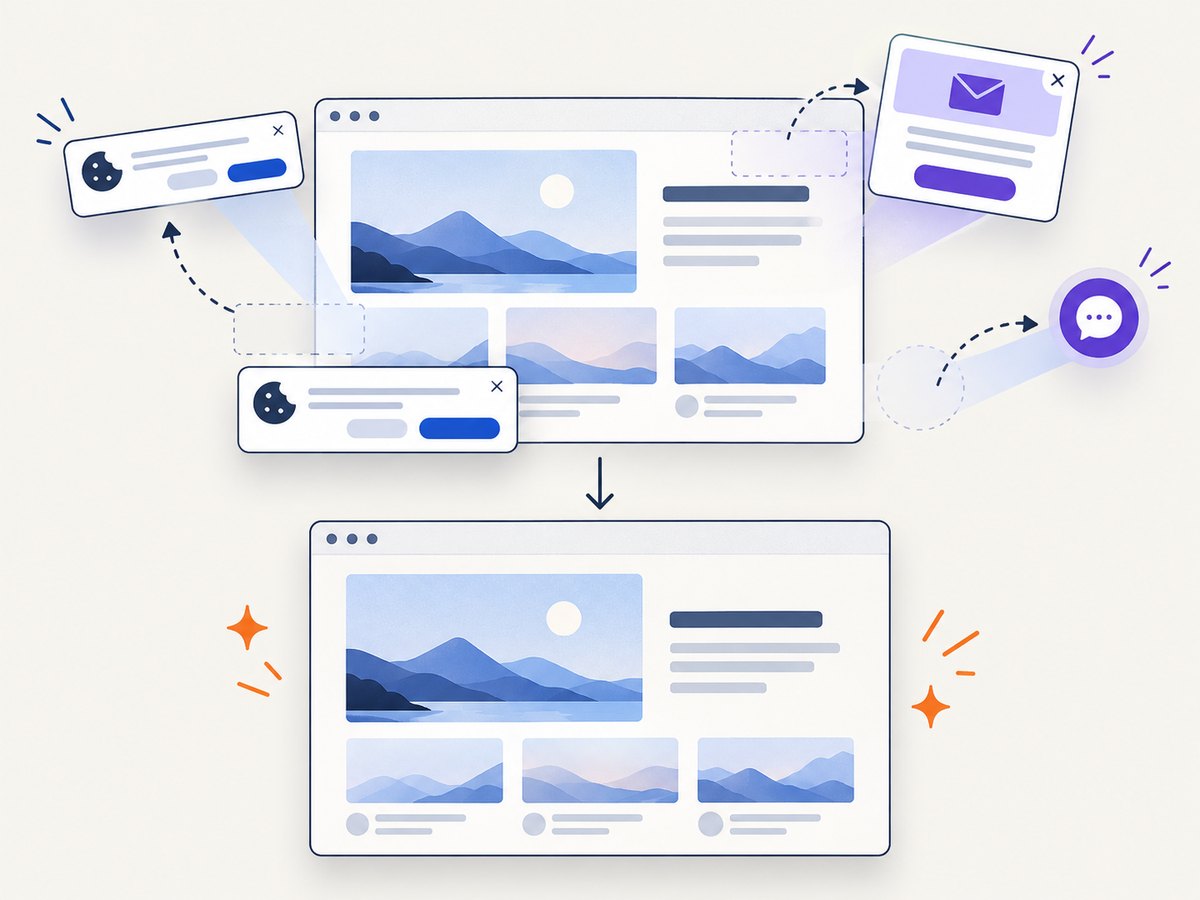
See the ScreenshotNeo API documentation for all options. A one-call WebP capture is:
curl -G "https://api.screenshotneo.com/v1/shot" -d access_key=YOUR_API_KEY --data-urlencode url=https://stripe.com -o shot.webpThe same request in Python:
import requests

r = requests.get(
    "https://api.screenshotneo.com/v1/shot",
    params={"access_key": "YOUR_API_KEY", "url": "https://stripe.com"},
    timeout=90,
)
r.raise_for_status()
open("shot.webp", "wb").write(r.content)
And Node.js:
const q = new URLSearchParams({ access_key: 'YOUR_API_KEY', url: 'https://stripe.com' });
const res = await fetch(`https://api.screenshotneo.com/v1/shot?${q}`);
if (!res.ok) throw new Error(`Screenshot request failed: ${res.status}`);
const fs = await import('node:fs/promises');
await fs.writeFile('shot.webp', Buffer.from(await res.arrayBuffer()));
ScreenshotNeo includes full-page and element capture, custom CSS and JavaScript, device presets, waiting and blocking controls, PDFs, signed links, async jobs, bulk capture, and usage reporting. Every plan includes every feature. The Free plan includes 1,000 screenshots per month with no card; paid plans start at $5 for 3,000 screenshots. Create a free ScreenshotNeo account.
11. FAQ
Does embeddedScreenshots create a single-file report?
It embeds screenshot data. Add inlineAssets: true when all report assets must be in one standalone HTML file.
Where does Cypress save screenshots?
By default, under cypress/screenshots. The configured screenshotsFolder can change that location.
Can I use the manual Mochawesome merge workflow?
Yes, for multi-spec JSON merging. Add a screenshot-aware reporter integration separately if images must appear in the report.
Is cypress-mochawesome-reporter maintained by Cypress?
No. Cypress lists it as a community extension, so verify compatibility against the reporter project’s current documentation.
Should CI publish the HTML or the images?
Publish the HTML plus its assets when using external files. With both embedding options enabled, publishing the standalone HTML is usually sufficient.


