How to Fix the Cookiebot Banner Not Showing Up
Cookiebot’s banner may be hidden by consent state, region rules, domain settings, caching, or script optimization. Use this diagnostic sequence to find the cause.
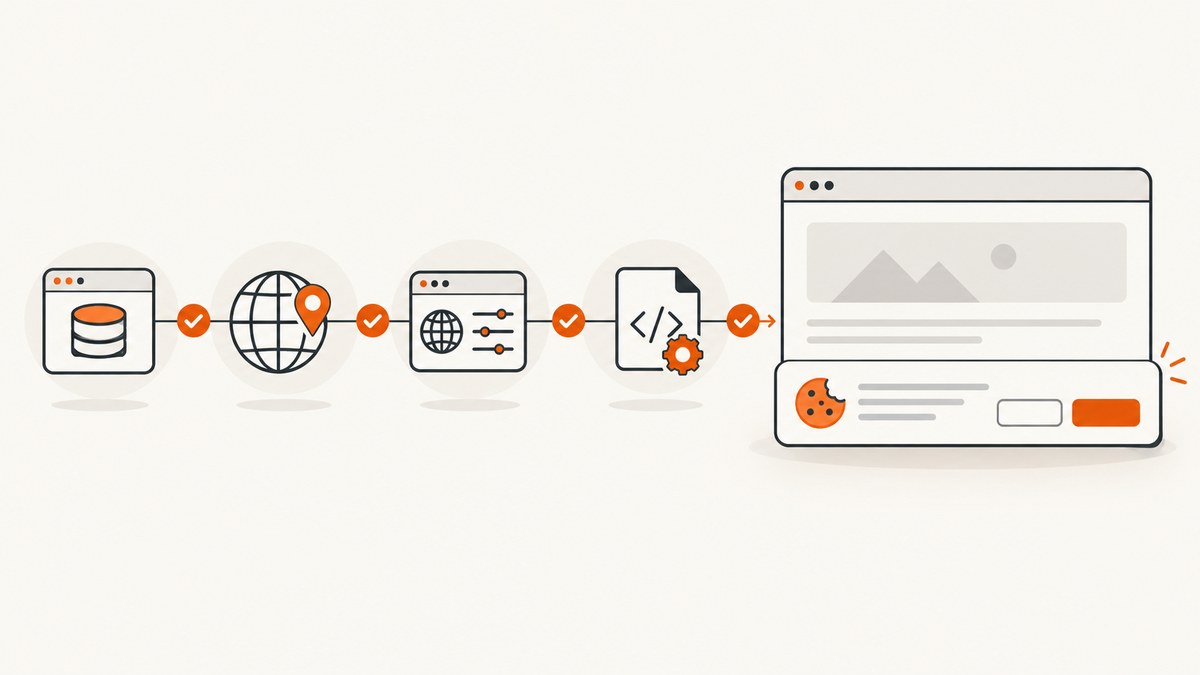
If the Cookiebot banner is not showing, check the causes in this order: test a private browser session, confirm the Cookiebot account is active, verify the visitor’s region is included in Distribution, check the registered domain and matching CBID, confirm the CMP script is loaded from Cookiebot in the correct place, then check browser extensions, caches, and JavaScript optimization. On WordPress, exclude Cookiebot’s uc.js file from minification, deferment, and delayed execution.
An absent banner does not automatically mean the integration is broken. Cookiebot stores a visitor’s choice in the CookieConsent cookie, and regional settings can intentionally suppress the banner. Follow the steps below from a clean test session before changing production code.
1. Test in a private window first
Open the affected page in an incognito or private window. This gives you a new browser session without the consent cookie that may already exist in your normal profile.
- Open a private window in the same browser and visit the page.
- Use a different browser or device if the banner still does not appear.
- Open developer tools and inspect Application or Storage > Cookies.
- Look for a cookie named
CookieConsent.
For a controlled test, remove that cookie in the test browser and reload. Do not delete consent cookies for real visitors as a production fix. If the banner appears in a private window, the site is probably working and your original browser is remembering an earlier choice.
2. Confirm the Cookiebot account is active
Sign in to Cookiebot Admin and check the service and payment status. Cookiebot lists an expired trial and a subscription in arrears as possible reasons the banner can stop appearing. Verify the account state before changing the script or buying a new plan; the support guidance does not say that a new purchase is always required.
After correcting an account issue, clear the relevant site cache and test again in a private window. Account changes may not be visible in a browser that still has an old consent state or cached page.
3. Check regional Distribution settings
Cookiebot can show the banner only to selected visitors. The documented default targets the EU and EEA, but the setting can target all visitors, specific regions, or individual countries. A visitor outside the configured area may correctly see no banner.
- Open the domain group in Cookiebot Admin.
- Open the banner’s Distribution or regional settings.
- Check whether the test visitor’s country is included.
- For a diagnostic test, temporarily use a setting that includes all visitors, then retest from a private window.
Keep the setting that matches your legal and product requirements after testing. Do not interpret a banner that is absent in one country as proof that the script is broken everywhere.
4. Verify the domain and CBID match
The live script’s data-cbid value must match the serial for the domain group that contains the site. Check the following values together:
| Check | What must be true |
|---|---|
| Domain | The exact hostname is registered in Cookiebot Admin. |
| Domain group | The hostname belongs to the domain group identified by the script. |
| CBID | The data-cbid in the page source matches that domain group’s serial. |
| Subdomain | Each subdomain that needs coverage is added separately when required by your setup. |
| Script host | The script loads from Cookiebot’s supported hosts, such as consent.cookiebot.com or consent.cookiebot.eu. |
Cookiebot says not to host the CMP script locally. View the rendered page source and search for uc.js, data-cbid, and consent.cookiebot. If the CBID is missing, belongs to another domain group, or the script is served from your own asset host, correct the integration and retest.
5. Check script placement and integration
The CMP script should be present on every page where consent is required and should load first in the <head>. The Cookie Declaration is a separate embed: place that script only where you want the declaration displayed, usually on a privacy or cookie policy page. Loading the declaration script does not replace the CMP script.
Typical script structure
<script id="Cookiebot"
  src="https://consent.cookiebot.com/uc.js"
  data-cbid="YOUR-CBID"
  data-blockingmode="auto"
  type="text/javascript"></script>
Use the exact snippet generated for your Cookiebot domain group. The example shows the important placement and attributes, but your CBID and any account-specific settings must come from Cookiebot Admin.
For a manual WordPress installation, Cookiebot’s example places the CMP script in header.php before wp_head(). If you use a plugin, confirm that the plugin is active and that its configured domain group matches the live hostname. If you use Google Tag Manager, identify that route before debugging; a tag that fires late can produce different behavior from a script placed directly in the document head.
6. Inspect the browser console and network panel
Open developer tools, reload the page, and inspect both the Console and Network tabs.
- Search the console for blocked scripts, Content Security Policy errors, or JavaScript exceptions that occur before Cookiebot loads.
- Filter Network requests for
uc.jsand confirm a successful response from a Cookiebot host. - Check the request URL for the expected
data-cbidconfiguration in the page source. - Look for ad blockers or privacy extensions that cancel the request.
- Check that the page is not replacing or removing the script after the initial HTML is parsed.
Cookiebot notes that browser settings and extensions can suppress banners, and its client-side service cannot override those choices. Test with extensions disabled or in a clean browser profile when the network request never appears.
7. Clear caches after changing settings
A page cache, CDN cache, service worker, or optimization cache can keep serving an older script or HTML document. Purge the cache layers that sit between Cookiebot Admin and the browser, then test again in a private window.
- Purge the page cache in your CMS or hosting panel.
- Purge the CDN or reverse-proxy cache if one is present.
- Clear any JavaScript optimization cache.
- Reload with developer tools open and disable the browser cache for that session.
Do not assume caching is always the cause. Use the Network panel to compare the script and page response before and after a purge.
8. WordPress: exclude Cookiebot from optimization
WordPress plugins that minify, defer, combine, or delay JavaScript can prevent the CMP from loading early enough. Cookiebot’s documented fix is to exclude consent.cookiebot.com/uc.js from optimization and clear the website cache.
Excluded script pattern:
consent.cookiebot.com/uc.js
The exact field name differs between optimization plugins. Look for exclusions under JavaScript minification, delay, defer, combine, or “never delay.” After saving, clear the plugin and page caches, then repeat the private-window test. If disabling optimization makes the banner appear, add the narrowest Cookiebot exclusion that fixes the issue and keep the rest of your optimization settings.
9. Shopify: identify the installation route
Cookiebot describes two Shopify routes: a dedicated app that uses Shopify’s App Embed framework and a manual installation that uses a domain-group CBID and a script in the page head.
App Embed route
- Confirm the Cookiebot app is installed.
- Open the theme editor and verify the Cookiebot app embed is enabled for the published theme.
- Check that the app configuration points to the intended domain group.
Manual route
- Confirm the script is in the live theme’s head, not only in a draft theme.
- Verify the CBID belongs to the Shopify hostname registered in Cookiebot.
- Check the rendered storefront source after publishing.
Debug the route that is actually active. Having both an app embed and a manually inserted CMP script can make it harder to determine which configuration is controlling the page.
10. Common errors and fixes
| Symptom | Likely cause | Fix |
|---|---|---|
| Banner appears only in private mode | CookieConsent stores an earlier choice |
Use the private session for testing; do not remove visitor consent in production. |
| Banner appears in Europe but not elsewhere | Distribution is limited to EU/EEA or selected countries | Review regional settings and test with an included country. |
No uc.js request |
Extension, CSP, optimization plugin, or tag manager issue | Check Console and Network, disable the blocker for testing, and exclude the script from delay/defer. |
| Script returns but no banner appears | Wrong CBID, inactive account, or existing consent state | Match domain, domain group, and CBID; verify account status; retest privately. |
| Cookie Declaration is visible but no banner | Only the declaration script is installed | Add the CMP script to the document head on every required page. |
| Changes do not appear after editing Admin | Cached HTML or JavaScript | Purge site, CDN, and optimization caches, then reload with browser cache disabled. |
11. A repeatable diagnostic checklist
- ☐ Private window tested
- ☐
CookieConsentstate checked - ☐ Cookiebot account and subscription status verified
- ☐ Visitor country included in Distribution
- ☐ Domain registered, including required subdomains
- ☐ CBID matches the correct domain group
- ☐ CMP script loads from a Cookiebot host
- ☐ CMP script is in the document head and present on required pages
- ☐ Cookie Declaration script is kept separate from the CMP script
- ☐ Extensions, CSP, and console errors checked
- ☐ Site, CDN, and optimization caches purged
- ☐ WordPress optimization excludes
uc.js - ☐ Shopify app embed or manual route verified
12. Or skip the browser setup
If your goal is to capture a page image for QA, documentation, or an automated workflow, ScreenshotNeo can return a screenshot without maintaining a headless-browser integration. Read the ScreenshotNeo API documentation for all options.
cURL
curl -G "https://api.screenshotneo.com/v1/shot" \
  -d access_key=YOUR_API_KEY \
  --data-urlencode url=https://example.com \
  -o shot.webp
Python
import requests

r = requests.get(
    "https://api.screenshotneo.com/v1/shot",
    params={"access_key": "YOUR_API_KEY", "url": "https://example.com"},
    timeout=90,
)
r.raise_for_status()
open("shot.webp", "wb").write(r.content)
Node.js
const q = new URLSearchParams({
  access_key: 'YOUR_API_KEY',
  url: 'https://example.com'
});
const res = await fetch(`https://api.screenshotneo.com/v1/shot?${q}`);
if (!res.ok) throw new Error(`HTTP ${res.status}`);
const fs = await import('node:fs/promises');
await fs.writeFile('shot.webp', Buffer.from(await res.arrayBuffer()));
ScreenshotNeo accepts cookie and consent banners before capture and removes more than 60 known consent platforms, newsletter popups, and chat widgets. Each step can be turned off. Bot checks, CAPTCHAs, blank pages, timeouts, failed loads, and cache hits are not billed as clean shots; the response identifies the result with X-Page-Verdict and X-Billed headers. Its MCP server provides take_screenshot, get_page_info, and capture_pdf tools for Claude, Cursor, and other MCP clients.
You can also set full-page capture with lazy-image loading, CSS element capture, dark mode, device presets, custom viewports, retina scale, PDF paper and margin settings, custom CSS or JavaScript, clicks, selector waits, delays, network-idle waits, request blocking, headers, cookies, user agents, authorization, timezone, geolocation, transparent backgrounds, resizing, caching TTLs, signed image links, asynchronous webhooks, bulk capture for up to 100 URLs, and usage reporting. Clean shots are billed only when the response is successful; 1,000 shots per month are free with no card, and paid plans start at $5 for 3,000 shots.
Create a free ScreenshotNeo account to get 1,000 screenshots each month without a card.
13. Performance, reliability, and cost considerations
For a single diagnostic screenshot, the direct API call is simpler than installing Chromium, managing browser binaries, and reproducing consent state. Use a selector or element capture when a full page is unnecessary. Use caching with a TTL when the same URL is requested repeatedly, and use asynchronous jobs with signed webhooks when captures may take longer than your request timeout.
For reliable automation, record the HTTP status and the X-Page-Verdict and X-Billed headers. Treat bot checks, blank pages, failed loads, and timeouts as outcomes to handle rather than as valid images. Set a client timeout that matches the page complexity, and retry only transient transport failures so you do not create duplicate work.
Bulk capture can send up to 100 URLs per call. Keep API keys on the server, use signed links for public image tags, and use custom headers or cookies only when the target application requires authenticated content.
14. FAQ
Why does Cookiebot work for me but not for another visitor?
The visitors may have different regional Distribution rules, browser extensions, or existing consent cookies. Compare both sessions in private windows and check the configured countries.
Can I delete the CookieConsent cookie for everyone?
No. Remove it only in a controlled test browser when diagnosing repeat-visit behavior. Real visitors’ choices should not be erased as a troubleshooting shortcut.
Is the Cookie Declaration enough to show the banner?
No. The declaration and CMP are separate scripts. The CMP belongs in the page head; the declaration belongs where you want the policy list displayed.
Should I disable every WordPress optimization plugin?
Start by excluding Cookiebot’s uc.js from minification, deferment, and delay. Disable broader optimization only if the narrow exclusion does not isolate the problem.
Can ScreenshotNeo capture a page that contains Cookiebot?
Yes. ScreenshotNeo accepts consent banners before capture and removes known consent platforms before returning the image. You can disable individual cleanup steps when you need the original page state.


