How to Take Full-Page Screenshots with dom-to-image
Learn how to capture an entire page with dom-to-image, handle long documents, missing assets and browser limits, and choose a server-side alternative.

Short answer: select the DOM node that contains the page, pass its rendered scrollWidth and scrollHeight to domtoimage.toPng(), then save the returned data URL or Blob. A full-page capture is limited by the page’s actual layout, loaded resources and the browser’s canvas limits, so inspect the output instead of assuming that every long page will render perfectly.
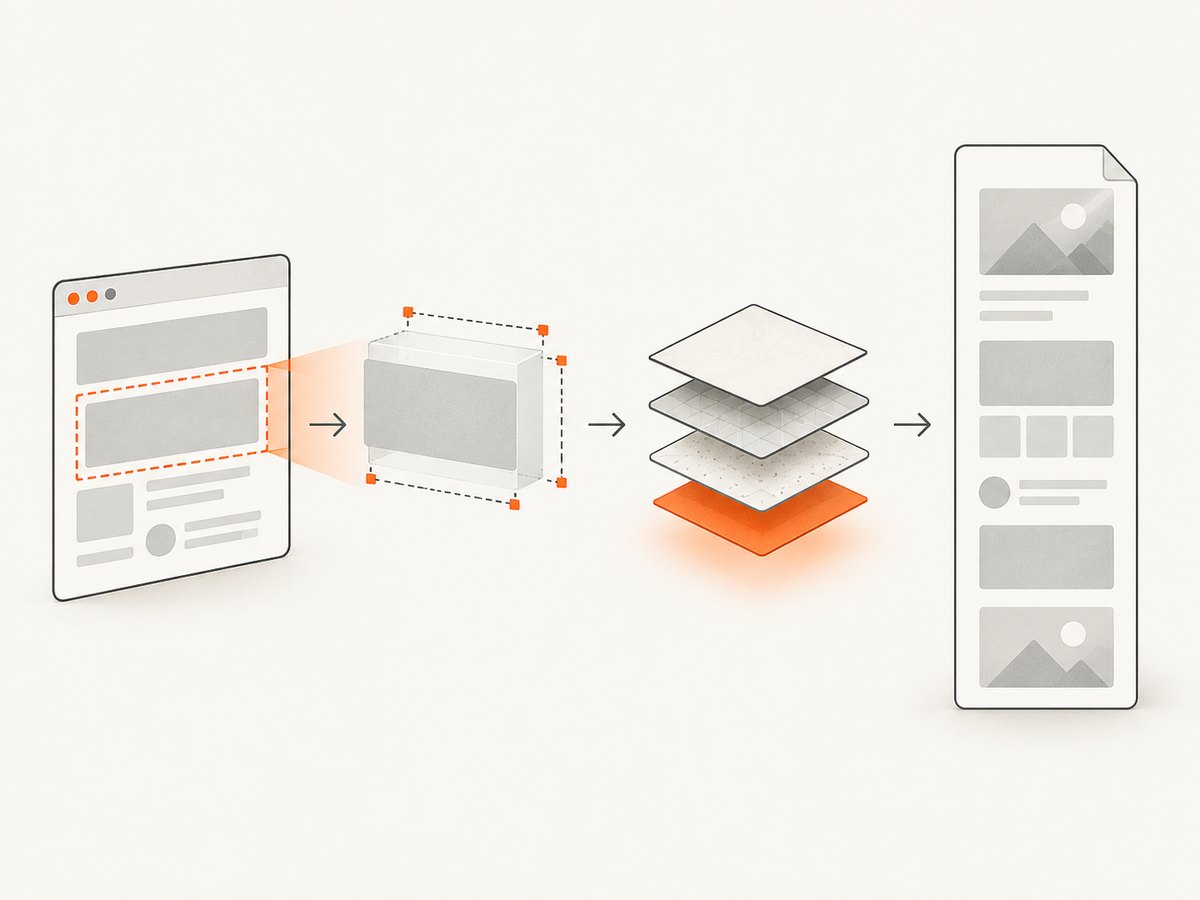
dom-to-image is a client-side JavaScript library that renders an arbitrary DOM node to SVG, PNG or JPEG. It reconstructs the node in the browser; it is not a physical screenshot of the browser window. The official README documents the promise-based API, output methods and rendering options.
1. Install dom-to-image and choose the page node
Install the package in an npm project:
npm install dom-to-imageIn a bundler-based application, import the module and select the element to capture:
import domtoimage from 'dom-to-image';

const node = document.documentElement;

domtoimage.toPng(node)
  .then((dataUrl) => {
    const image = new Image();
    image.src = dataUrl;
    document.body.appendChild(image);
  })
  .catch((error) => {
    console.error('Could not render the page', error);
  });
If you are not using a bundler, include the browser build. The project exposes a global named domtoimage:
<script src="/path/to/dom-to-image.min.js"></script>
<script>
  const node = document.documentElement;
  domtoimage.toPng(node).then((dataUrl) => {
    document.querySelector('#preview').src = dataUrl;
  });
</script>
Choose the narrowest node that represents the content you need. document.documentElement includes the whole document, while a content wrapper avoids capturing navigation, cookie controls or unrelated widgets.
2. Capture the full scrollable page
For a long page, set the render dimensions explicitly. The following complete example measures the document, captures it as PNG and downloads the result:
import domtoimage from 'dom-to-image';

async function downloadFullPage() {
  // Wait until fonts and images that are already in the document have loaded.
  if (document.fonts?.ready) {
    await document.fonts.ready;
  }
  await Promise.all(
    [...document.images]
      .filter((img) => !img.complete)
      .map((img) => new Promise((resolve) => {
        img.addEventListener('load', resolve, { once: true });
        img.addEventListener('error', resolve, { once: true });
      }))
  );

  const node = document.documentElement;
  const width = Math.max(node.scrollWidth, document.body?.scrollWidth || 0);
  const height = Math.max(node.scrollHeight, document.body?.scrollHeight || 0);

  const dataUrl = await domtoimage.toPng(node, {
    width,
    height,
    bgcolor: '#ffffff'
  });

  const link = document.createElement('a');
  link.download = 'full-page.png';
  link.href = dataUrl;
  link.click();
}

downloadFullPage().catch(console.error);
The README documents width and height options, and its pixel-data example reasons about scrollWidth and scrollHeight. Supplying these values causes the node to be rendered at the requested dimensions. The exact full-document pattern above is a practical adaptation, so verify it on the browsers and pages you support.
Save a Blob instead of a data URL
Data URLs are convenient for small images but duplicate the image bytes in memory. For larger captures, use toBlob and an object URL:
const node = document.documentElement;
const blob = await domtoimage.toBlob(node, {
  width: node.scrollWidth,
  height: node.scrollHeight,
  bgcolor: '#fff'
});

const url = URL.createObjectURL(blob);
const link = document.createElement('a');
link.download = 'full-page.png';
link.href = url;
link.click();
URL.revokeObjectURL(url);
3. Select the output format
Use the method that matches your delivery requirement:
| Method | Result | Typical use |
|---|---|---|
toPng(node, options) |
PNG data URL | Lossless diagrams, text and transparency |
toJpeg(node, options) |
JPEG data URL | Smaller photographic output |
toSvg(node, options) |
SVG data URL | Vector-oriented workflows |
toBlob(node, options) |
Blob | Downloads and uploads without a large data URL |
toPixelData(node, options) |
Pixel array | Programmatic image analysis |
JPEG quality is controlled with the quality option. PNG does not use that quality setting. A JPEG example:
const node = document.querySelector('main');
const jpegUrl = await domtoimage.toJpeg(node, {
  width: node.scrollWidth,
  height: node.scrollHeight,
  quality: 0.85,
  bgcolor: '#ffffff'
});
4. Control appearance and content
Background color
Transparent backgrounds can be useful for diagrams, but pages commonly rely on a body background. Set bgcolor to avoid transparent regions:
const png = await domtoimage.toPng(node, { bgcolor: '#f7f7f8' });Temporary styles
The style option applies style properties before rendering. This is useful for forcing a white background, changing overflow or setting a print-like width:
const png = await domtoimage.toPng(node, {
  style: {
    background: '#fff',
    overflow: 'visible'
  }
});
Exclude a subtree
Use filter to omit a node and its children. The callback receives each node considered for rendering:
const png = await domtoimage.toPng(document.documentElement, {
  filter: (element) => !element.matches('.cookie-banner, .chat-widget')
});
Filtering is evaluated during rendering, so hide elements that should not appear in the output rather than deleting application state. You can also clone or temporarily modify the page when a capture must not affect the live interface.
Failed image requests
If an image cannot be fetched, imagePlaceholder supplies fallback content according to the library’s documented option:
const png = await domtoimage.toPng(node, {
  imagePlaceholder: 'data:image/svg+xml,%3Csvg xmlns=%22http://www.w3.org/2000/svg%22 width=%221%22 height=%221%22/%3E'
});
Cross-origin images remain a major source of differences. The adjacent html2canvas FAQ explains that browser origin rules can prevent image data from being read. Do not copy html2canvas-specific options such as useCORS and assume they are supported by dom-to-image; configure the image host, proxy or page so that resources are accessible before capture.
5. Make long pages render predictably
- Measure after layout. Wait for fonts, images and client-side content before reading scroll dimensions. A late-loading image can increase the page height after you measure it.
- Disable viewport-dependent surprises. Fixed-position headers, sticky navigation and elements that react to scrolling may not look like a conventional browser screenshot in a single tall render.
- Expand collapsed content intentionally. Accordions, tabs and virtualized lists only contain their visible content unless your application opens or renders them first.
- Handle lazy loading. Scroll through the page or trigger your application’s lazy-load mechanism before capture. Loading every image can greatly increase memory use.
- Test at target widths. Responsive CSS changes at breakpoints. Set the node or viewport width to the same width used by the intended reader.
Very large canvases can exceed browser or device limits and produce blank or partial output. The html2canvas FAQ gives rough, variable guidance rather than guarantees: Chromium and Firefox are described at around 32,767 pixels for one dimension, with different maximum areas; Safari and iOS Safari vary by device and available memory. Those figures are adjacent browser guidance, not verified dom-to-image thresholds. Split a very tall document into sections when a single canvas fails.
6. A reusable capture helper
This helper accepts a selector, waits for resources, supports PNG or JPEG, and returns a downloadable Blob:
import domtoimage from 'dom-to-image';

export async function captureElement(selector, {
  format = 'png',
  background = '#ffffff',
  quality = 0.92
} = {}) {
  const node = document.querySelector(selector);
  if (!node) throw new Error(`No element matches ${selector}`);

  if (document.fonts?.ready) await document.fonts.ready;
  const pendingImages = [...node.querySelectorAll('img')]
    .filter((img) => !img.complete)
    .map((img) => new Promise((resolve) => {
      img.addEventListener('load', resolve, { once: true });
      img.addEventListener('error', resolve, { once: true });
    }));
  await Promise.all(pendingImages);

  const options = {
    width: node.scrollWidth,
    height: node.scrollHeight,
    bgcolor: background
  };
  if (format === 'jpeg') options.quality = quality;

  return format === 'jpeg'
    ? domtoimage.toJpeg(node, options).then(dataUrl => fetch(dataUrl).then(r => r.blob()))
    : domtoimage.toBlob(node, options);
}

const blob = await captureElement('article', { format: 'jpeg' });
const upload = new FormData();
upload.append('file', blob, 'article.jpg');
7. Troubleshooting
| Symptom | Likely cause | Fix |
|---|---|---|
| Only the visible viewport appears | The node was rendered without its scroll dimensions | Pass scrollWidth and scrollHeight as width and height; confirm the selected node contains the page. |
| Bottom content is missing | Content or images loaded after measurement | Wait for fonts and images, trigger lazy loading, then measure again. |
| Blank image or a partial image | Canvas dimension or memory limit | Capture smaller sections, reduce scale and remove unnecessary high-resolution assets. |
| Images are absent | Cross-origin restrictions or failed requests | Serve images with appropriate access headers, use same-origin assets, or provide imagePlaceholder. |
| Fonts look different | Web fonts were not ready or unavailable | Await document.fonts.ready and verify the font request succeeds. |
| Sticky elements repeat or move | Positioned elements are being reconstructed in a tall layout | Apply a capture-only style, filter the element or capture the main content wrapper. |
| Some CSS effects differ | DOM rendering is not a pixel-level browser compositor capture | Check the library’s supported behavior for the CSS involved; use browser automation for higher fidelity. |
| Promise rejects | A resource, serialization step or browser operation failed | Log the error, identify the failing asset, retry after resources settle and capture a smaller node to isolate it. |
8. Performance, reliability and cost decisions
Client-side capture uses the user’s CPU, memory and browser. Large pages consume memory for the DOM, cloned styles and the resulting canvas. Prefer toBlob, capture only the required subtree, avoid unnecessary image resolution and release object URLs after downloads. If you process many pages, queue captures rather than starting them all at once.
Reliability depends on the current page state: authentication, animations, network requests, browser extensions and responsive breakpoints all affect the result. Freeze animations with a capture-only stylesheet, wait for a known selector and record the width used. For repeatable server jobs, a real browser automation service can control navigation, cookies and viewport state more consistently. The html2canvas FAQ points readers toward browser-native screenshot APIs for extensions and Puppeteer or Playwright for server-side screenshots; those are adjacent recommendations, not dom-to-image compatibility guarantees.
dom-to-image itself is an npm dependency, so your direct software cost is the environment that runs it. A hosted screenshot API adds per-capture pricing but removes browser installation and maintenance. Compare rendering fidelity, cross-origin access, long-page limits, deployment location and control of browser state before choosing.
9. Or skip the browser setup
ScreenshotNeo provides a website screenshot API and MCP server. One GET request returns PNG, JPEG, WebP or PDF. It handles full-page capture with lazy images loaded, element selectors, viewport and device presets, retina scale, custom CSS and JavaScript, waits, headers, cookies, user agents, geolocation, blocking rules, caching and asynchronous jobs. Cookie and consent banners, newsletter popups and chat widgets are removed before the shot. Bot checks, blank pages, timeouts, failed loads and cache hits are not billed, and response headers identify the page verdict and billing result.

See the ScreenshotNeo API documentation for all options. A minimal request:
curl -G "https://api.screenshotneo.com/v1/shot" -d access_key=YOUR_API_KEY --data-urlencode url=https://stripe.com -o shot.webpimport requests
r = requests.get("https://api.screenshotneo.com/v1/shot", params={"access_key": "YOUR_API_KEY", "url": "https://stripe.com"}, timeout=90)
open("shot.webp", "wb").write(r.content)const q = new URLSearchParams({ access_key: 'YOUR_API_KEY', url: 'https://stripe.com' });
const res = await fetch(`https://api.screenshotneo.com/v1/shot?${q}`);An MCP server exposes take_screenshot, get_page_info and capture_pdf to Claude, Cursor and other MCP clients. The Free plan includes 1,000 shots each month without a card; paid plans start at $5 for 3,000 shots, and every feature is available on every plan. Create a free ScreenshotNeo account.
10. FAQ
Can dom-to-image capture the entire document automatically?
It can render a document node, but you should provide its actual scroll dimensions and verify the result. There is no universal guarantee for every page length or browser.
Does dom-to-image take a real browser screenshot?
No. It reconstructs a DOM node into an image. Browser compositor details, unsupported CSS and external resources can produce differences.
Should I use PNG or JPEG?
Use PNG for sharp text, diagrams and transparency. Use JPEG when photographic content and smaller files matter; set its quality deliberately.
How do I capture only one component?
Pass that component to toPng, toJpeg, toSvg or toBlob instead of selecting document.documentElement.
When should I use a hosted screenshot API?
Choose one when you need repeatable server-side captures, browser-state controls, PDFs, webhooks, bulk URLs or a workflow that should not depend on a user’s browser and memory.