How to Generate Images with a URL-Based API
Learn how to send an authenticated image-generation request, handle base64 image data, and save the result—without mistaking an API endpoint for a prompt-in-a-URL interface.

Short answer: a URL-based image API usually means you send an HTTP request to the provider’s endpoint URL. It does not necessarily mean you put the prompt in the URL’s query string, and it does not mean the response will be a public image URL. For the OpenAI image workflow described in the official documentation, authenticate with an API key, follow the current endpoint’s request schema, then handle image data returned in the response. The image streaming reference describes base64-encoded image output, including partial and completed image events. OpenAI quickstart · Image generation reference.
This distinction matters in practice: an endpoint URL tells your client where to send a request; the HTTP method, headers, and body carry the operation and its inputs; the response may contain encoded bytes that your application must decode and save. Treat an image URL as output only if the endpoint documentation explicitly says it returns one.
1. What “URL-based API” means
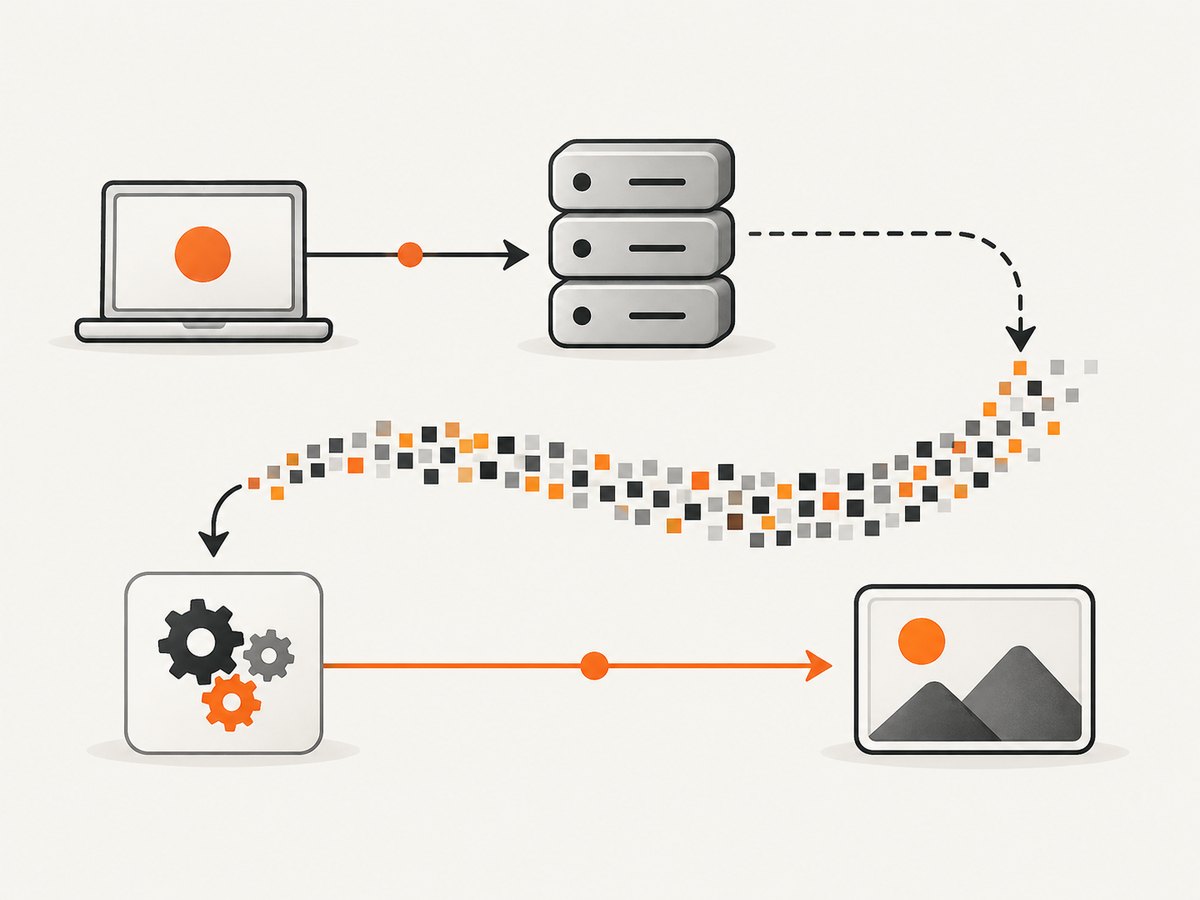
An API request has several parts. The endpoint URL identifies the server and route. Authentication identifies your account. The request body carries the prompt and any supported generation settings. The response carries status, metadata, and image output. The URL alone does not define which prompt fields or options the server accepts.
| Term | What it means |
|---|---|
| Endpoint URL | The address your HTTP client calls. |
| Prompt | Text included in the documented request format, generally in the request body or SDK arguments. |
| Image input URL | A URL supplied as input when a documented endpoint accepts an existing image. That is separate from generated output. |
| Image output | Image data or another documented result. The streaming reference describes base64-encoded image output. |
Do not copy a field named image_url from an image-input example and assume it tells you how generated images are returned. Input and output are different directions in the workflow.
2. Before you write code: confirm the live API contract
Image-generation APIs evolve. The research available for this guide did not establish the complete current request schema, accepted generation parameters, limits, pricing, or rate limits. The official model listing currently surfaced GPT-Image-2 for image generation and editing, but model names and endpoint parameters can change. Check the live reference immediately before implementing or publishing a request.
- Open the current official image-generation guide and identify the endpoint intended for generation.
- Confirm the HTTP method, authentication header, required body fields, and response structure for that endpoint.
- Confirm a currently supported model identifier and whether your account can use it.
- Check accepted settings such as size, quality, background, and output format. Do not assume an option from a different endpoint or model is accepted.
- Decide whether you need a complete response or streaming events, and follow the endpoint’s documented response handling.
The examples below focus on the request and data-handling pattern rather than guessing unverified OpenAI endpoint syntax. Use the exact endpoint and schema shown in the live official reference in the placeholders. An example with invented fields can look runnable while failing against the real API.
3. Get an API key and keep it private
Authenticated API use requires an API key. The official quickstart recommends storing the key safely and exporting it as an environment variable. Never put a live key in browser JavaScript, a mobile app bundle, a public repository, or a published code sample: users can inspect client-side code and extract it.
# Set this in your shell or secret manager. Do not commit the value.
export OPENAI_API_KEY="your-secret-key"
In production, configure the secret through your deployment platform’s secret manager. Give credentials only to the server-side process that needs them, and rotate a key if it is exposed. Avoid printing authorization headers or complete request configurations to logs.
4. Make the HTTP request
A direct HTTP call is useful when you need to see precisely what crosses the wire or when your language does not have an SDK. Use the method, endpoint, header names, content type, and JSON fields from the live endpoint reference. The placeholders below are intentional; replace them with the documented contract rather than treating them as OpenAI field names.
cURL: inspect the response
curl --fail-with-body \
  --request POST "<DOCUMENTED_IMAGE_GENERATION_ENDPOINT>" \
  --header "Authorization: Bearer ${OPENAI_API_KEY}" \
  --header "Content-Type: application/json" \
  --data '{<DOCUMENTED_REQUEST_JSON>}' \
  --output response.json
This saves the HTTP response body for inspection; it does not necessarily save an image file. If the endpoint returns JSON containing base64 data, parse that response and decode the appropriate documented field. If it returns streamed events, consume those events according to the streaming reference.
Python: send a documented JSON body
import json
import os
import requests

api_key = os.environ["OPENAI_API_KEY"]
endpoint = "<DOCUMENTED_IMAGE_GENERATION_ENDPOINT>"
payload = {<DOCUMENTED_REQUEST_FIELDS>}

response = requests.post(
    endpoint,
    headers={
        "Authorization": f"Bearer {api_key}",
        "Content-Type": "application/json",
    },
    json=payload,
    timeout=(10, 180),
)
response.raise_for_status()

# First inspect the documented response structure. Do not assume the body
# is an image URL or that a field name is stable across endpoints.
data = response.json()
print(json.dumps(data, indent=2)[:4000])
Once you have confirmed the documented base64 field, decode it. The following is a generic decoding pattern, not a claim about a particular response property name:
import base64

encoded = data["<DOCUMENTED_BASE64_FIELD>"]
image_bytes = base64.b64decode(encoded, validate=True)
with open("generated-image.png", "wb") as image_file:
    image_file.write(image_bytes)
Node.js: send a documented JSON body
const apiKey = process.env.OPENAI_API_KEY;
if (!apiKey) throw new Error("Set OPENAI_API_KEY in the server environment");

const endpoint = "<DOCUMENTED_IMAGE_GENERATION_ENDPOINT>";
const payload = { <DOCUMENTED_REQUEST_FIELDS> };

const response = await fetch(endpoint, {
  method: "POST",
  headers: {
    Authorization: `Bearer ${apiKey}`,
    "Content-Type": "application/json",
  },
  body: JSON.stringify(payload),
  signal: AbortSignal.timeout(180_000),
});

const responseText = await response.text();
if (!response.ok) {
  throw new Error(`Image API returned HTTP ${response.status}: ${responseText}`);
}
const data = JSON.parse(responseText);
console.log(JSON.stringify(data, null, 2).slice(0, 4000));
For a confirmed base64 field, decode and save it server-side:
import { writeFile } from "node:fs/promises";

const encoded = data["<DOCUMENTED_BASE64_FIELD>"];
const imageBytes = Buffer.from(encoded, "base64");
await writeFile("generated-image.png", imageBytes);
These examples show safe credential handling, request construction, timeouts, status checks, and response inspection. They deliberately do not pretend to be complete provider requests while the current exact schema is unverified in the research dossier. Do not deploy until the placeholders have been replaced with fields copied from the current official endpoint reference.
5. Choose SDK, direct HTTP, or streaming
| Approach | Good fit | Considerations |
|---|---|---|
| Official SDK | You want the provider’s supported client pattern and less low-level HTTP handling. | Follow the current quickstart for installation, method names, and arguments; keep the API key server-side. |
| Direct HTTP | You need explicit control over headers, timeouts, retries, or a language-specific HTTP stack. | You own serialization, error parsing, response decoding, and API-version changes. |
| Streaming | Your application benefits from receiving partial progress or image output events. | Parse the event stream incrementally and distinguish partial events from completed output. The image streaming reference documents base64-encoded output in partial and completed events. |
Streaming is not automatically faster for every user experience. It can make progress visible earlier, but your client must handle incomplete output and connection interruptions. If you only need a final asset, a non-streamed response may be simpler when the endpoint provides one.
6. Handle image data correctly
Base64 is a text encoding for bytes. It is not itself a PNG or JPEG file, and saving the base64 characters directly with a .png extension produces a corrupt file. Decode it first, then write the resulting bytes. Keep the format and filename consistent with the documented output setting.
- Check the HTTP status before parsing the response as a successful generation.
- Read the documented response field and verify it is present and non-empty.
- Decode base64 with validation where available; treat decoding failure as a bad or incomplete response.
- Use the response’s documented format metadata, if provided, instead of guessing the extension.
- For streaming, assemble only the data according to the event protocol; do not treat a partial event as a finished image.
- When displaying output in a web app, serve bytes from your application or use a provider-documented URL if one is explicitly returned. Do not expose the API key to the browser.
Image payloads can be much larger than their encoded representation suggests because base64 adds overhead. Avoid holding many large images in memory at once; process and write each result as soon as practical.
7. Output settings and request options
Image generation can involve settings for size, quality, background, and format. The available research confirms these as categories to check, not a universal set of field names or supported values. Verify each setting against the exact endpoint and model you use.
| Setting category | What to verify | Why it matters |
|---|---|---|
| Size | Accepted dimensions or named sizes, including any model-specific limits. | It affects suitability for the destination and potentially resource use. |
| Quality | Supported quality values and defaults. | Higher settings may affect generation time or cost; check current pricing and model documentation. |
| Background | Whether transparency or other background choices are supported for that model. | Transparency can be important for compositing, but should not be assumed. |
| Format | Accepted output formats and how format is indicated in the response. | Choose a format compatible with your downstream renderer and storage workflow. |
Do not copy options from image-input documentation, another model, or a different API endpoint without checking that the generation endpoint accepts them. Unsupported parameters can cause request validation errors.
8. Reliability, performance, and cost
Timeouts and retries
Set a timeout appropriate for the endpoint’s documented behavior and your application’s latency budget. A client-side timeout does not prove the provider stopped processing. Before retrying after a network failure, consider whether the first request may have completed; otherwise you may create duplicate work. Use a documented idempotency mechanism only if the endpoint supports one.
Retry only transient failures, such as selected network errors or temporary service responses, and use bounded exponential backoff with jitter. Do not retry malformed requests, authentication failures, or unsupported-parameter errors unchanged. Respect any retry guidance returned by the service.
Memory and throughput
Large base64 strings consume more memory than the decoded bytes. Avoid logging full payloads, returning huge responses through unnecessary layers, or decoding a batch of images simultaneously. If streaming is available and suitable, process events incrementally; still validate completion before treating output as final. Limit concurrent requests based on documented rate limits and your own server capacity.
Cost and limits
The supplied sources did not establish current API pricing, rate limits, request limits, or output limits. Check the provider’s current pricing and endpoint documentation before estimating a production bill or choosing a model. Track request counts, outcomes, and output sizes without logging credentials or sensitive prompts. Test with small workloads before increasing concurrency.
9. Troubleshooting
| Symptom | Likely cause | What to do |
|---|---|---|
| 401 or 403 response | Missing, invalid, or unauthorized API key; key was not loaded into the process environment. | Confirm the server process has the intended secret and follow the provider’s authentication instructions. Never paste the key into client code. |
| 400 response or field validation error | Wrong endpoint, method, model, field name, or unsupported option. | Compare the request against the current reference for that exact endpoint and model. Remove unverified fields. |
| 404 response | Endpoint path is wrong, outdated, or intended for another operation. | Copy the endpoint from the current official generation guide; do not infer it from an unrelated API example. |
| 429 response | Rate or account limit reached. | Check account status and current limit guidance; reduce concurrency and apply bounded backoff where appropriate. |
| Timeout | Generation or network transfer exceeded the client’s deadline. | Set a suitable timeout, inspect service guidance, and avoid immediate repeated requests that could duplicate work. |
| JSON parse error | The response is an error body, an event stream, or not JSON in the way the client expects. | Check status and content type first. Use the documented parsing path, especially for streaming. |
| Saved image will not open | Base64 text was written directly, data was truncated, or the wrong format/extension was used. | Decode the documented field to bytes, confirm completion, and use the documented output format. |
| Browser call exposes a secret | The API key was embedded in frontend code or sent to an untrusted client. | Move the request to a server-side route, rotate any exposed key, and return only the necessary image result to the browser. |
10. Website screenshots are a different job
If by “generate images with a URL” you mean “turn a web page URL into an image,” that is website screenshot capture rather than generative image creation. ScreenshotNeo is a website screenshot API and MCP server from Yorker Media: a GET request with a URL returns a PNG, JPEG, WebP, or PDF. It does not generate a new scene from a text prompt.

Or skip the browser setup
For page capture, one API request can return the screenshot. See the ScreenshotNeo API documentation for the request options and response behavior.
curl -G "https://api.screenshotneo.com/v1/shot" \
  -d access_key=YOUR_API_KEY \
  --data-urlencode url=https://stripe.com \
  -o shot.webp
ScreenshotNeo accepts cookie and consent banners like a visitor and removes more than 60 known consent platforms, newsletter popups, and chat widgets before capture; each cleanup step can be turned off. Bot checks, CAPTCHAs, blank pages, timeouts, failed loads, and cache hits are not billed, and response headers report the page verdict and billing status. Its MCP server gives AI agents tools named take_screenshot, get_page_info, and capture_pdf. The free plan includes 1,000 screenshots a month with no card; paid plans start at $5 for 3,000 screenshots.
Create a free ScreenshotNeo account to get 1,000 screenshots a month with no card.
11. Implementation checklist
- Use the current official generation endpoint and schema.
- Keep the API key in a server-side environment or secret manager.
- Confirm a supported model and each requested output setting.
- Set timeouts and handle non-success responses before decoding.
- Decode base64 into bytes when that is the documented response form.
- For streaming, parse events incrementally and wait for a completed result.
- Keep concurrency within documented limits and monitor actual usage.
- Never assume the result is a public URL unless the endpoint explicitly documents one.
Frequently asked questions
Can I put my image prompt directly in the endpoint URL?
Do not assume that. The URL identifies the endpoint; use the documented request format for the prompt. The sources here support authenticated API/SDK requests, not a prompt-in-query-string interface.
Does the image API always return a URL?
No such behavior is established by the cited material. The image streaming reference documents base64-encoded output, so be ready to decode image data. Rely on a hosted URL only when the exact endpoint documents one.
Can I use an image URL as the generated output?
An input image URL and generated output are separate concepts. Do not infer output behavior from documentation about image inputs.
Which model and settings should I use?
Check the live model and endpoint references. The available research surfaced GPT-Image-2 for generation and editing, but did not establish the complete current schema, supported values, or limits.
Can ScreenshotNeo generate an image from a prompt?
No. ScreenshotNeo captures a web page at a URL as an image or PDF. For prompt-based image synthesis, use an image-generation API; for turning a page into a screenshot, ScreenshotNeo is the relevant tool.


