How to Capture Screenshots of Multiple Pages with One Button Using html2canvas
Capture several sections with one click using html2canvas, export each image, and understand the limits around separate URLs, CORS, fidelity, and canvas size.
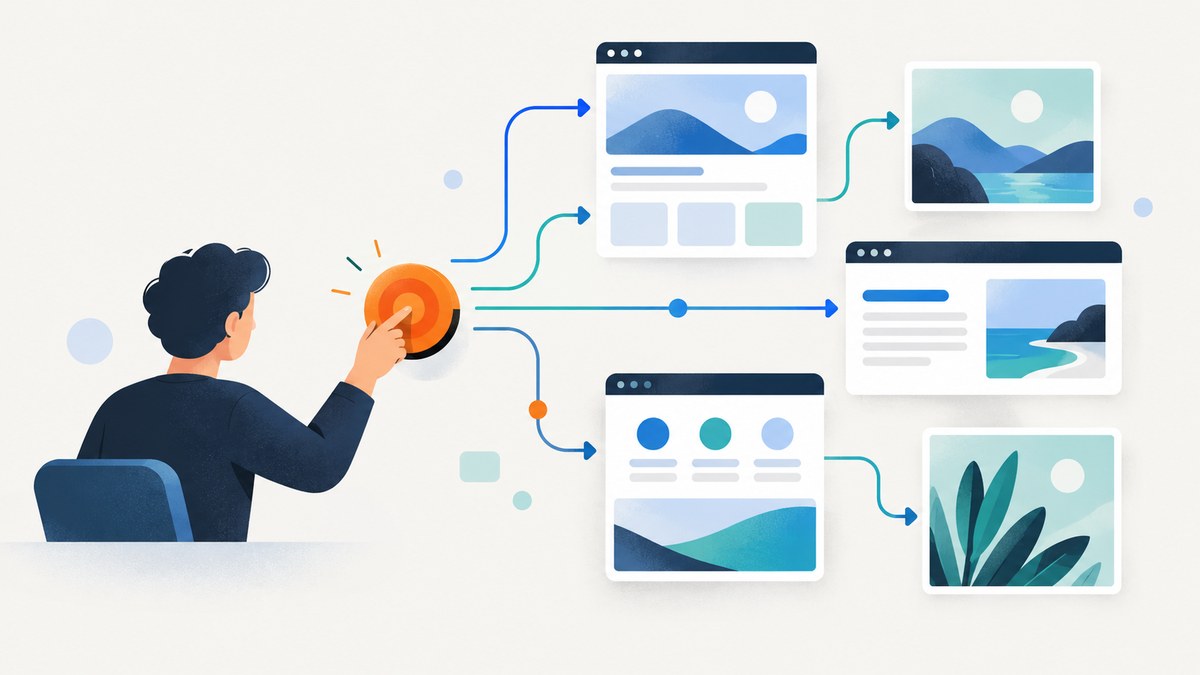
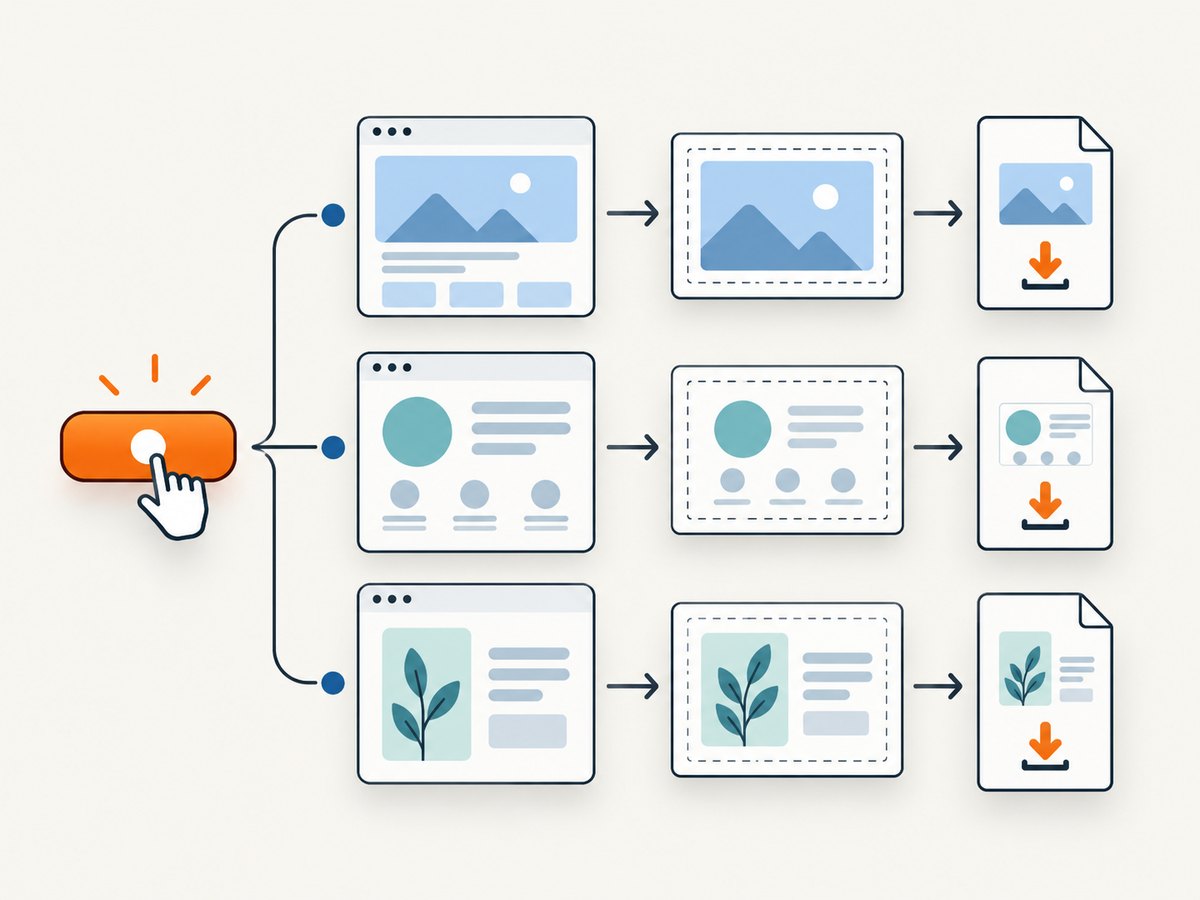
To capture several sections of the current page with one click, select the target DOM elements, call html2canvas() for each, and download the returned canvases. html2canvas does not navigate among separate URLs: it reconstructs accessible DOM content and styles, and it cannot bypass cross-origin restrictions. If you mean distinct URL pages, use server-side browser automation or a screenshot API instead.
This guide builds the in-page, one-button workflow, explains its limits, and shows when to use a different capture method.
1. Clarify what “multiple pages” means
In this client-side pattern, “pages” means multiple elements or sections in one document, such as report panels, invoices, or cards. The library accepts a DOM element and returns a Promise for a canvas. There is no built-in multi-page capture command; the button handler invokes the documented API repeatedly. [html2canvas documentation]
Separate website URLs are different. Browser JavaScript on one site cannot freely read another site’s DOM, and a cross-origin iframe’s document is inaccessible. To capture URLs, a process must navigate to each page in an environment authorized to load it, such as a server-side browser controlled by Puppeteer or Playwright, or a screenshot API.
| Need | Suitable approach | Key constraint |
|---|---|---|
| Several sections in the current app | html2canvas, called once per selected element | DOM/CSS reconstruction and browser canvas limits |
| Visible tab in a browser extension | Native extension screenshot API | Extension permissions and visible-tab behavior |
| Separate URLs on a server | Puppeteer, Playwright, or screenshot API | Browser setup, navigation, and operational handling |
2. Install and load html2canvas
Use the package in a bundled app:
npm install html2canvasimport html2canvas from 'html2canvas';Or include a browser build from your asset pipeline and ensure html2canvas is available before the handler runs. Pin the version in your project so deployments use a known dependency. The following example assumes a module-based app and elements marked with .capture-page.
3. Add a one-click multi-section capture
This runnable page example captures each section sequentially and offers a separate PNG download. Sequential work is easier to reason about and avoids holding several large rendered canvases at once. The browser may still apply its own download prompts or restrictions, especially when multiple downloads are triggered by one click.
<button id="capture-all" type="button">Download all sections</button>

<section class="capture-page">
  <h2>Sales report</h2>
  <p>Revenue by month...</p>
</section>

<section class="capture-page">
  <h2>Support report</h2>
  <p>Tickets by category...</p>
</section>

<script type="module">
  import html2canvas from 'html2canvas';

  const button = document.querySelector('#capture-all');

  button.addEventListener('click', async () => {
    const targets = [...document.querySelectorAll('.capture-page')];
    if (targets.length === 0) {
      alert('No sections found to capture.');
      return;
    }

    button.disabled = true;
    const originalLabel = button.textContent;
    button.textContent = 'Capturing…';

    try {
      for (const [index, target] of targets.entries()) {
        try {
          const canvas = await html2canvas(target, {
            backgroundColor: '#ffffff',
            scale: Math.min(window.devicePixelRatio || 1, 2),
            useCORS: true
          });

          const blob = await new Promise((resolve, reject) => {
            canvas.toBlob(value => value ? resolve(value) : reject(
              new Error('The browser could not encode this canvas.')
            ), 'image/png');
          });

          const link = document.createElement('a');
          const objectUrl = URL.createObjectURL(blob);
          link.href = objectUrl;
          link.download = `section-${index + 1}.png`;
          document.body.appendChild(link);
          link.click();
          link.remove();
          setTimeout(() => URL.revokeObjectURL(objectUrl), 1000);
          canvas.width = 0;
          canvas.height = 0;
        } catch (error) {
          console.error(`Could not capture section ${index + 1}`, error);
        }
      }
    } finally {
      button.disabled = false;
      button.textContent = originalLabel;
    }
  });
</script>
For a simple demonstration, canvas.toDataURL('image/png') followed by an anchor download is the documented pattern. The example uses toBlob() and an object URL to avoid creating a large base64 string in JavaScript memory. Each element failure is caught separately, so a bad image in one section does not prevent later sections from being attempted. In a production interface, replace console messages with a result summary that identifies which sections succeeded.
Separate URLs in a controlled app
If every URL belongs to your application and your own backend is authorized to load it, automate navigation in a server-side browser. A client-side page cannot use html2canvas to fetch an arbitrary URL and inspect its DOM. For simple automation, a Playwright script can visit URLs and use the browser’s native screenshot operation:
import { chromium } from 'playwright';

const urls = [
  'https://example.com/report/one',
  'https://example.com/report/two'
];

const browser = await chromium.launch({ headless: true });
try {
  const page = await browser.newPage({ viewport: { width: 1440, height: 1000 } });
  for (const [index, url] of urls.entries()) {
    await page.goto(url, { waitUntil: 'networkidle', timeout: 60000 });
    await page.screenshot({ path: `page-${index + 1}.png`, fullPage: true });
  }
} finally {
  await browser.close();
}
Use URLs you are allowed to access. Authentication, redirects, anti-bot checks, slow resources, and pages that keep network activity open may require explicit wait conditions and session handling. See the Playwright screenshot guide.
4. Choose the capture options deliberately
html2canvas’s options adjust its DOM reconstruction; they do not turn it into a native screenshot. Confirm the exact option names and defaults against the configuration reference.
| Option or technique | Use | Trade-off |
|---|---|---|
scale |
Controls output pixel density; default follows device pixel ratio. | Higher values increase output dimensions and memory use. Reduce it for very large sections. |
windowWidth, windowHeight |
Set the rendering window dimensions. For a long target, the FAQ suggests using its scrollWidth and scrollHeight. |
They do not remove canvas dimension limits. Validate the result on target browsers. |
scrollX, scrollY |
Set the scroll position used in rendering. | Choose values that match the desired layout and fixed-position elements. |
onclone |
Adjust the cloned document before rendering, for example hide controls. | Changes apply to the cloned document, not the live app. |
cullOffscreen |
Skip wholly offscreen elements when capturing a viewport-sized region. | It is not a substitute for sizing a long full-section capture correctly. |
data-html2canvas-ignore |
Mark a node, such as a button or transient control, to exclude it. | Keep the attribute on elements that should never appear in exports. |
useCORS, allowTaint |
Control handling of cross-origin images and canvas taint. | CORS succeeds only if the remote image host permits it; browser security still applies. |
backgroundColor |
Set a solid output background; a null value can preserve transparency where supported. | Transparent output may be unsuitable for some image viewers or downstream workflows. |
clearImageCache |
Clear shared image cache after rendering to release loaded-image memory in long-lived apps. | Avoid it when concurrent captures rely on the shared cache. |
5. Handle fidelity, origin, and canvas limits
html2canvas reads DOM and styles and paints a new canvas; it does not take a pixel-for-pixel browser screenshot. The project documentation warns that the output may not exactly match the real representation. Some CSS properties or visual effects may not be implemented as expected, so inspect exports in the browsers and styles your app supports. [About html2canvas]
Cross-origin images and iframes
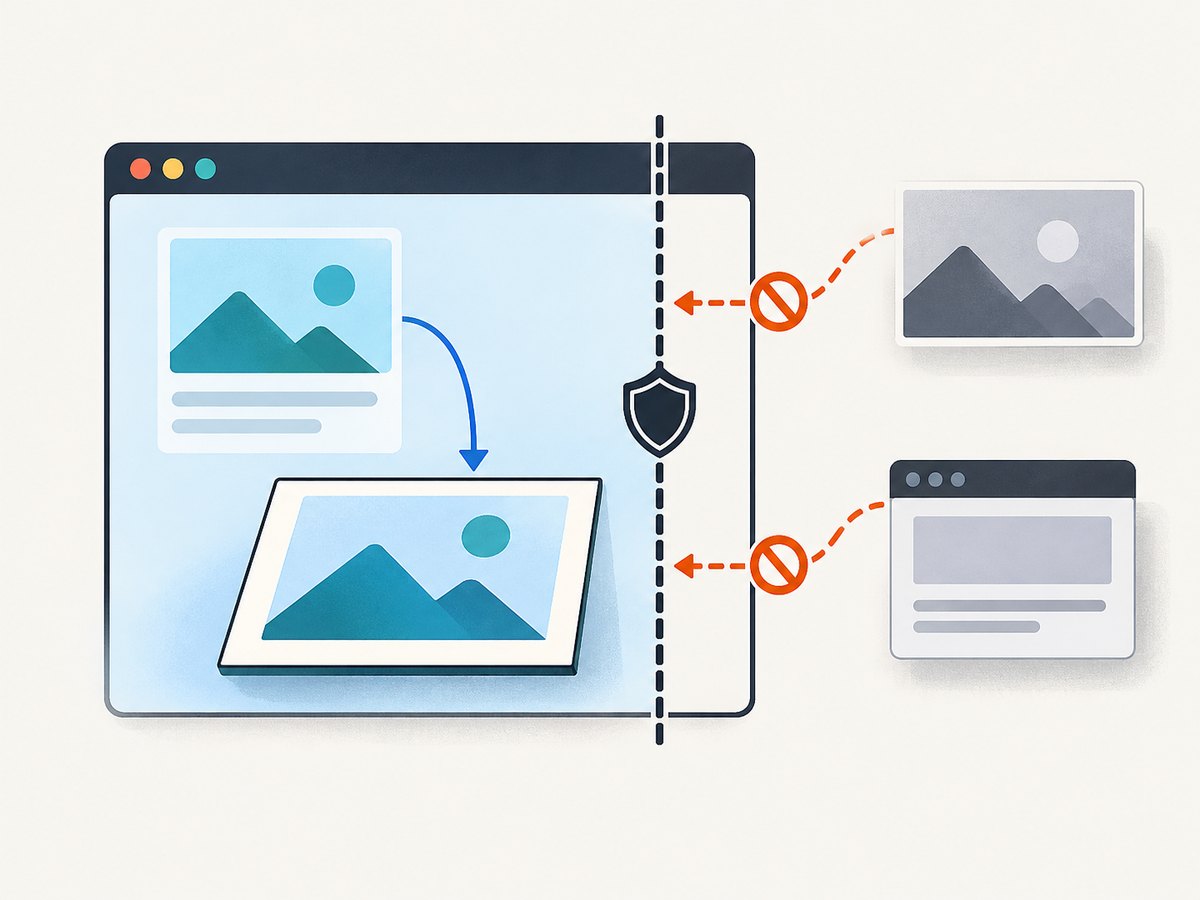
An image from another origin can taint a canvas. With the default allowTaint: false, images that would taint it are skipped. Setting useCORS: true asks the browser to load images with CORS, but the image host must return suitable CORS headers. Otherwise, host the asset on your origin or configure an authorized image proxy. Do not treat either option as a security bypass.
Cross-origin iframe documents cannot be rendered because the browser prevents access to their contents. Same-origin iframes can be rendered recursively. If an embedded widget comes from another domain, capture a placeholder or use an approved screenshot method with access to the source page. [html2canvas FAQ]
Long and high-resolution sections
A large canvas may render blank or partially, sometimes without a useful exception. Dimension limits vary by browser, operating system, and hardware; no single maximum is a safe universal guarantee. Split a long report into smaller capture elements and lower scale if memory or output dimensions are problematic. Test on the oldest or most constrained environment you support and check the final image dimensions.
6. Performance, reliability, and cost
Capturing multiple long sections is CPU- and memory-intensive. Each output canvas stores pixel data, and image decoding and encoding add work. Start sequentially, release references when each image is exported, and avoid keeping all canvases in an array. Bounded concurrency can reduce elapsed time in some apps, but raises peak memory use; measure on representative devices instead of assuming a universal safe parallel count.
- Capture only the necessary elements and exclude controls with
data-html2canvas-ignore. - Use a suitable
scale; device pixel ratio can produce much larger images than needed. - Prefer Blob downloads for large output, revoke object URLs after use, and release canvas backing stores when finished.
- Show progress and report per-section failures so a long batch does not look frozen.
- Test fonts, images, lazy-loaded content, and layout after the app has reached the state you intend to capture.
html2canvas itself runs in the user’s browser, so this workflow has no per-request screenshot API charge. It still consumes the user’s device resources and requires maintenance for browser behavior and fidelity. Server-side automation adds infrastructure and browser-operation cost; a hosted API exchanges browser setup for the provider’s plan and request rules.
7. Troubleshooting
| Symptom | Likely cause | Fix |
|---|---|---|
| No downloads appear | Selector matched no elements, the handler did not run, or the browser limited repeated downloads. | Check the target count and console, verify the button is connected once, and test browser download settings. Consider bundling sections into one archive in your own app. |
| One section is missing | The selector missed it, it was not rendered yet, or that individual capture failed. | Wait until content is ready, inspect the element, and surface the per-section error from the loop. |
| Images are absent | Cross-origin response lacks CORS headers, or lazy images have not loaded. | Wait for images, configure the asset host for CORS, or serve through an authorized proxy. useCORS alone cannot grant access. |
| Canvas export throws a security error | A loaded resource tainted the canvas. | Ensure every image source is CORS-compatible; do not set allowTaint: true expecting a readable export. |
| Long output is blank or cut off | Canvas dimensions or memory exceeded the browser/device’s practical limit. | Split into smaller elements, reduce scale, and test in the target environment. |
| Appearance differs from the page | DOM/CSS reconstruction differs from actual browser pixels, or unsupported styling is involved. | Inspect target CSS support and use a native browser screenshot when pixel fidelity is required. |
| Nested frame content is absent | The iframe is cross-origin. | Capture only same-origin frame content or use a capture environment authorized to access the page. |
| Server script hangs at navigation | The page never reaches network idle, redirects, or waits on persistent connections. | Use a page-specific readiness condition and timeout; log the final URL and navigation failure. |
8. When to use a different screenshot method
For a browser extension, the html2canvas FAQ recommends native screenshot APIs because they capture the visible tab and avoid html2canvas canvas-size limits. It names chrome.tabs.captureVisibleTab() for Chrome, Edge, and Opera, and browser.tabs.captureVisibleTab() for Firefox. These APIs have extension permission and visible-tab semantics; they do not reconstruct arbitrary offscreen DOM elements. [FAQ]
For server-side screenshots, html2canvas is unsuitable because it depends on browser APIs such as window, document, and computed styles. Use a headless browser such as Puppeteer or Playwright when you need control over navigation, session state, and browser rendering. For an API call without browser setup, ScreenshotNeo accepts a URL and returns an image or PDF. Its other screenshot parameters also work, which can help when switching from another screenshot API.
Or skip the browser setup
For separate URLs or repeatable server-side captures, ScreenshotNeo provides a website screenshot API and MCP server. One GET request can return a PNG, JPEG, WebP, or PDF. The API documentation describes the request options.
curl -G "https://api.screenshotneo.com/v1/shot" -d access_key=YOUR_API_KEY --data-urlencode url=https://stripe.com -o shot.webpimport requests
r = requests.get(
"https://api.screenshotneo.com/v1/shot",
params={"access_key": "YOUR_API_KEY", "url": "https://stripe.com"},
timeout=90,
)
r.raise_for_status()
open("shot.webp", "wb").write(r.content)const q = new URLSearchParams({ access_key: 'YOUR_API_KEY', url: 'https://stripe.com' });
const res = await fetch(`https://api.screenshotneo.com/v1/shot?${q}`);
if (!res.ok) throw new Error(`Screenshot request failed: ${res.status}`);
await Bun.write('shot.webp', res); // In Node.js, write the response body with node:fs.In Node.js, use the built-in filesystem API to save the response body:
import { writeFile } from 'node:fs/promises';

const q = new URLSearchParams({ access_key: 'YOUR_API_KEY', url: 'https://stripe.com' });
const res = await fetch(`https://api.screenshotneo.com/v1/shot?${q}`);
if (!res.ok) throw new Error(`Screenshot request failed: ${res.status}`);
await writeFile('shot.webp', Buffer.from(await res.arrayBuffer()));- Cookie banners, popups, and chat widgets are removed before capture.
- Bot checks, blank pages, failed loads, timeouts, and cache hits are never billed; response headers identify the page verdict and billing status.
- An MCP server lets AI agents, including Claude and Cursor, take screenshots.
- The Free plan includes 1,000 screenshots monthly with no card; paid plans start at $5 for 3,000.
Sign up for 1,000 free screenshots a month, with no card required.
Frequently asked questions
Can html2canvas capture every tab with one click?
No. It captures DOM elements in the document where it runs. Other tabs and separate URLs require an extension or browser automation with the appropriate access.
Can I combine all sections into one image?
Yes. Create a parent element containing the sections and capture that element, if its dimensions remain within practical canvas limits. Otherwise, separate image files are more robust.
Does html2canvas guarantee a pixel-perfect screenshot?
No. It reconstructs the image from DOM and supported styles rather than copying the browser’s rendered pixels. Use a native browser capture when matching rendered pixels matters.
Can it capture a cross-origin iframe if I enable CORS?
No. Image CORS and iframe document access are separate restrictions. A page script cannot read a cross-origin frame’s DOM.
Can I use html2canvas in Node.js?
Not as a standalone server screenshot tool: it relies on browser DOM and rendering APIs. Use a browser automation framework for server-side capture.


