Generate Open Graph Images From a Notion Blog Database
Automatically create and update Open Graph images for Notion blog posts. Connect page changes to a renderer, then publish a durable image URL as og:image.
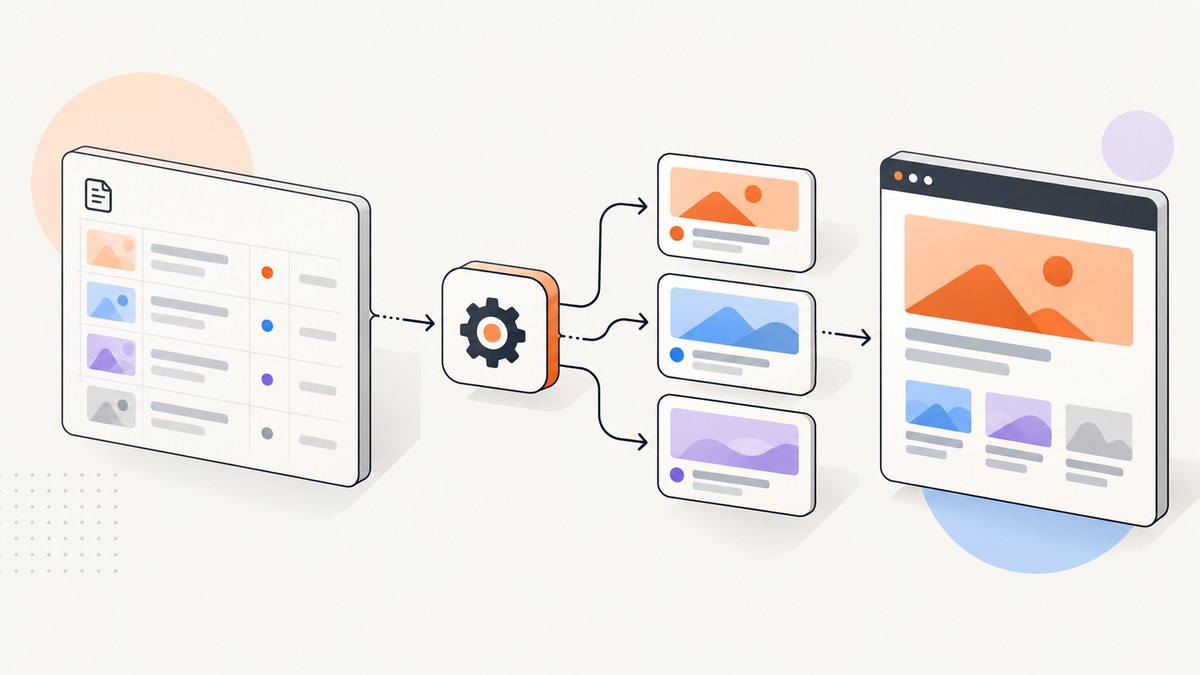
To generate Open Graph images from a Notion blog database, connect a change trigger to a renderer, read each page’s visual fields, generate an image, and write its stable URL or file reference back to a page property. Configure your publishing site to use that property as og:image. Run the same workflow again when a title, subtitle, author, category, or other field used in the design changes.
The core pipeline is: detect → read → render → write back → publish metadata. You can assemble it with a hosted automation, call an image API from your own service, or render images in your own runtime. The right choice depends on how much control you need over templates, hosting, retries, and storage.
1. Choose how to detect changes and render images
Orshot documents a workflow that starts with a new or updated Notion page, renders an image, and writes its URL back. Direct APIs such as og-image.org and OGMagic give you more control over the request and storage. A custom renderer offers the most deployment and template control, but you must implement and operate it. Orshot’s Notion workflow, og-image.org documentation, and OGMagic documentation describe their respective approaches.

| Approach | Good fit | Trade-off to check |
|---|---|---|
| Hosted workflow | You want a trigger → render → write-back flow assembled with little custom code. | Confirm template flexibility, trigger behavior, retries, and how long generated URLs remain available. |
| Direct image API | You want to construct requests and decide where generated files are stored. | You own orchestration, error handling, and persistence of the result. |
| Custom runtime | You need control over rendering, deployment, and template code. | You must build, host, monitor, and update the renderer. |
Compare trigger latency, template control, API and hosting costs, retry behavior, permissions, and image URL durability. The research sources do not establish comparative performance or pricing figures, so verify current provider terms before choosing.
2. Set up Notion access and a result property
- Create a Notion internal connection and copy its workspace-specific integration token. Keep the token in a secret store or protected environment variable; do not put it in page content or client-side code.
- Share the blog database with the connection. Grant only the read and write capabilities required by the workflow. Notion’s connection documentation explains token setup and access sharing: create an integration and manage connections.
- Add a dedicated database property for the generated result. An image URL property is straightforward when your site consumes URLs. A
File & mediaproperty is another documented pattern; the query response can then be read by the publishing integration. See Notion page property values. - Decide which fields define the design, such as title, subtitle, author, and category. Use the same field list for change detection so edits to any displayed value refresh the image.
Notion API requests use REST conventions and support operations including GET, POST, PATCH, and DELETE on page and database resources. Use the current API reference for endpoint shapes, version headers, property types, and request limits: Notion API reference.
3. Build the page-change workflow
There are three common ways to start work after a page changes:
- Hosted trigger: Orshot documents a “New/updated page in Notion” trigger. Map the triggering page into the render and write-back steps.
- Notion database automation: Use an automation that edits properties, adds or edits pages, or sends a webhook where your setup supports it. See Notion database automations.
- Connection webhook: Send page or database change notifications to your own endpoint, then retrieve the relevant page and render it. Notion describes connection webhooks as a way for connections to monitor changes in pages and databases: webhook documentation.
Regardless of trigger, make the handler safe to retry. A notification can arrive while a previous render is still running, or the write-back can fail after image creation. Re-reading the current page before rendering helps avoid using stale event data. Track the page ID and the visual input values or a digest of them; if a duplicate event carries inputs already processed, you can skip unnecessary work.
4. Read page fields, render, and write back
The following Python example shows the orchestration around a renderer. It assumes the trigger provides a page ID, the page has a title and subtitle, and your renderer accepts those values and returns an image URL. Replace the illustrative renderer URL and property names with the provider and schema you actually use. The Notion API version header and endpoint details should be kept current with Notion’s reference.
import os
import requests

NOTION_TOKEN = os.environ["NOTION_TOKEN"]
NOTION_VERSION = os.environ["NOTION_VERSION"]  # Set to a version supported by Notion.
RENDER_URL = os.environ["OG_RENDER_URL"]
PAGE_ID = os.environ["NOTION_PAGE_ID"]  # Set by your trigger.

session = requests.Session()
session.headers.update({
    "Authorization": f"Bearer {NOTION_TOKEN}",
    "Notion-Version": NOTION_VERSION,
    "Content-Type": "application/json",
})

# Fetch the latest page state, rather than trusting an old trigger payload.
page_response = session.get(
    f"https://api.notion.com/v1/pages/{PAGE_ID}", timeout=30
)
page_response.raise_for_status()
page = page_response.json()
properties = page["properties"]

def rich_text(prop):
    return "".join(part.get("plain_text", "") for part in prop.get("rich_text", []))

title_prop = properties["Name"]
title = "".join(part.get("plain_text", "") for part in title_prop.get("title", []))
subtitle = rich_text(properties["Subtitle"])
author = rich_text(properties["Author"])
category = properties["Category"].get("select", {}).get("name", "")

render_response = requests.post(
    RENDER_URL,
    json={"title": title, "subtitle": subtitle, "author": author, "category": category},
    timeout=90,
)
render_response.raise_for_status()
image_url = render_response.json()["url"]

# This example assumes OGImage is a URL property in the database.
write_response = session.patch(
    f"https://api.notion.com/v1/pages/{PAGE_ID}",
    json={"properties": {"OGImage": {"url": image_url}}},
    timeout=30,
)
write_response.raise_for_status()
print("Saved OG image URL to Notion")
This is complete orchestration code only when the database property names and renderer request match your setup. Notion property values have type-specific shapes: a title is not the same as rich text, select, URL, or file data. Inspect a real page response and adapt the extraction and write-back payload to those types. If using a File & media property, use the documented file property shape and confirm whether your integration can write the kind of file reference you intend to store.
Use cURL to inspect and update a page
These examples help isolate Notion access from the image-rendering step. Substitute a page ID, supported API version, and property schema from your database.
curl "https://api.notion.com/v1/pages/PAGE_ID" \
  -H "Authorization: Bearer $NOTION_TOKEN" \
  -H "Notion-Version: $NOTION_VERSION"

curl -X PATCH "https://api.notion.com/v1/pages/PAGE_ID" \
  -H "Authorization: Bearer $NOTION_TOKEN" \
  -H "Notion-Version: $NOTION_VERSION" \
  -H "Content-Type: application/json" \
  --data '{"properties":{"OGImage":{"url":"https://images.example.com/post.png"}}}'
Use Node.js to fetch page data and call a renderer
This example uses built-in fetch in a modern Node.js runtime. It illustrates title extraction and the renderer request; add a write-back payload matching your property type as in the Python example.
const notionToken = process.env.NOTION_TOKEN;
const notionVersion = process.env.NOTION_VERSION;
const pageId = process.env.NOTION_PAGE_ID;
const renderUrl = process.env.OG_RENDER_URL;

const pageRes = await fetch(`https://api.notion.com/v1/pages/${pageId}`, {
  headers: {
    Authorization: `Bearer ${notionToken}`,
    "Notion-Version": notionVersion,
  },
});
if (!pageRes.ok) throw new Error(`Notion fetch failed: ${pageRes.status}`);
const page = await pageRes.json();
const titleProperty = page.properties.Name;
const title = (titleProperty.title ?? []).map((part) => part.plain_text).join("");
const subtitle = (page.properties.Subtitle?.rich_text ?? [])
  .map((part) => part.plain_text).join("");

const renderRes = await fetch(renderUrl, {
  method: "POST",
  headers: { "Content-Type": "application/json" },
  body: JSON.stringify({ title, subtitle }),
});
if (!renderRes.ok) throw new Error(`Render failed: ${renderRes.status}`);
const { url: imageUrl } = await renderRes.json();

const writeRes = await fetch(`https://api.notion.com/v1/pages/${pageId}`, {
  method: "PATCH",
  headers: {
    Authorization: `Bearer ${notionToken}`,
    "Notion-Version": notionVersion,
    "Content-Type": "application/json",
  },
  body: JSON.stringify({ properties: { OGImage: { url: imageUrl } } }),
});
if (!writeRes.ok) throw new Error(`Notion write-back failed: ${writeRes.status}`);
console.log("Saved", imageUrl);
5. Publish the result as og:image
Writing an image value into Notion does not automatically change your site’s social metadata. Your publishing layer must read the property for the matching page and emit an absolute image URL in the HTML head:
<meta property="og:image" content="https://images.example.com/posts/example.png">Use the field your site actually reads, and ensure it is available when the page is rendered for crawlers. Prefer a stable, publicly fetchable URL that serves the image with the correct content type. If your storage uses expiring links, a social crawler may fetch the page after that link expires; store or refresh durable URLs and check your publishing platform’s behavior.
For pages created before automation was enabled, run a one-time backfill over database results. Handle pagination using Notion’s query response cursor; do not assume one request returns every page. Process at a controlled rate, record failures, and make the job resumable. For ongoing changes, avoid a loop where writing OGImage triggers another render: filter events to relevant source fields or compare the current image-input digest before starting work.
6. Make updates reliable
- Retry transient failures: Retry network timeouts and temporary service failures with bounded exponential backoff. Respect any retry guidance or rate-limit response from Notion and your renderer.
- Separate render from write-back: Log the page ID, renderer job or request identifier if available, generated URL, and write-back outcome. If rendering succeeds but the update fails, retry the update without creating another image when the URL is still valid.
- Prevent stale writes: Two edits can start overlapping jobs. Before saving, confirm the page’s current visual inputs still match the values used for the image, or serialize work per page.
- Keep a fallback: If a new render fails, retain the last known-good image property rather than replacing it with an empty value.
- Limit permissions and protect secrets: Share only the relevant database with the connection and keep the token out of logs, templates, and browser bundles.
Notion and rendering providers can change API behavior and plan limits. Review their current documentation and terms when deploying; no universal latency, uptime, or cost figure applies to every workflow. Estimate cost from page volume, update frequency, rerenders, storage, and any hosted automation or rendering charges. A stable image URL can also reduce repeat generation when only unrelated page fields change.

7. Troubleshooting
| Symptom | Likely cause | Fix |
|---|---|---|
| Notion returns unauthorized | Token is missing, invalid, or sent with the wrong authorization format. | Verify the internal connection token and send it as a Bearer token. |
| Page or database is not found | The connection has not been shared with that database, or the ID is wrong. | Share the database with the connection and verify the page/database ID. |
| Property read fails or title is empty | The code assumes the wrong property name or type. | Inspect the page JSON and handle title, rich text, select, URL, and file properties according to their actual types. |
| Write-back is rejected | The update JSON does not match the destination property type or required capability. | Check the property schema, connection write access, and Notion’s page update reference before retrying. |
| Trigger fires repeatedly | Writing the image property creates another page-change event. | Filter events to visual source fields or skip when the source-input digest is unchanged. |
| Image exists but social preview is missing | The site did not emit the property as og:image, or the URL is inaccessible/expired. |
Inspect the served HTML head and fetch the image URL without an authenticated session. |
| Old title appears on the image | A delayed or duplicate job rendered stale event data. | Fetch current page values before rendering and guard against stale writes. |
| Backfill misses records | Database results are paginated. | Follow the response cursor until there are no more results and record progress for safe resumption. |
| Renderer times out | Rendering or asset loading exceeded the caller’s timeout. | Use the provider’s asynchronous job option if available, keep timeouts bounded, and retry transient failures. |
8. Or skip the browser setup
If the image design can be served as a screenshot of a page you control, ScreenshotNeo can capture that page through one API request. It is a website screenshot API and MCP server; the same endpoint can return PNG, JPEG, WebP, or PDF. For OG images, build or host a page that renders your post’s title and metadata, then capture it at the intended viewport. See the ScreenshotNeo API documentation for request options.
curl -G "https://api.screenshotneo.com/v1/shot" -d access_key=YOUR_API_KEY --data-urlencode url=https://stripe.com -o shot.webp- Cookie banners, popups, and chat widgets are removed before the shot; each cleanup step can be turned off.
- Bot checks, blank pages, failed loads, timeouts, and cache hits are never billed; response headers say which outcome occurred.
- An MCP server lets AI agents use
take_screenshot,get_page_info, andcapture_pdf. - 1,000 screenshots a month are free with no card; paid plans start at $5 for 3,000 shots. All features are on every plan.
Sign up for ScreenshotNeo’s free 1,000 screenshots a month, with no card.
9. Frequently asked questions
Can Notion itself create the image?
The workflow described here uses Notion for page data and change detection, then a separate renderer to create the image. Notion database automations can update properties or send webhooks, but the image-rendering step belongs to a renderer or your code.
Should the image be stored in Notion or elsewhere?
Either can work if the publishing site can obtain a stable, accessible image URL. Decide based on how your site reads files, link durability, and whether your workflow can write the chosen property type.
What should trigger a regeneration?
Regenerate when a field used in the visual changes. If category, author, or subtitle does not appear in the image, changes to those fields need not create another render.
Do I need a custom renderer?
No. A hosted workflow is the quickest documented path for a Notion database. Use a direct API or custom runtime when you need control over request construction, template code, hosting, or storage.