How to Capture a PhantomJS Screenshot of a Page with an Overlay
Add an overlay before PhantomJS renders a page, control the viewport and clip rectangle, and troubleshoot timing, stacking, and output issues.

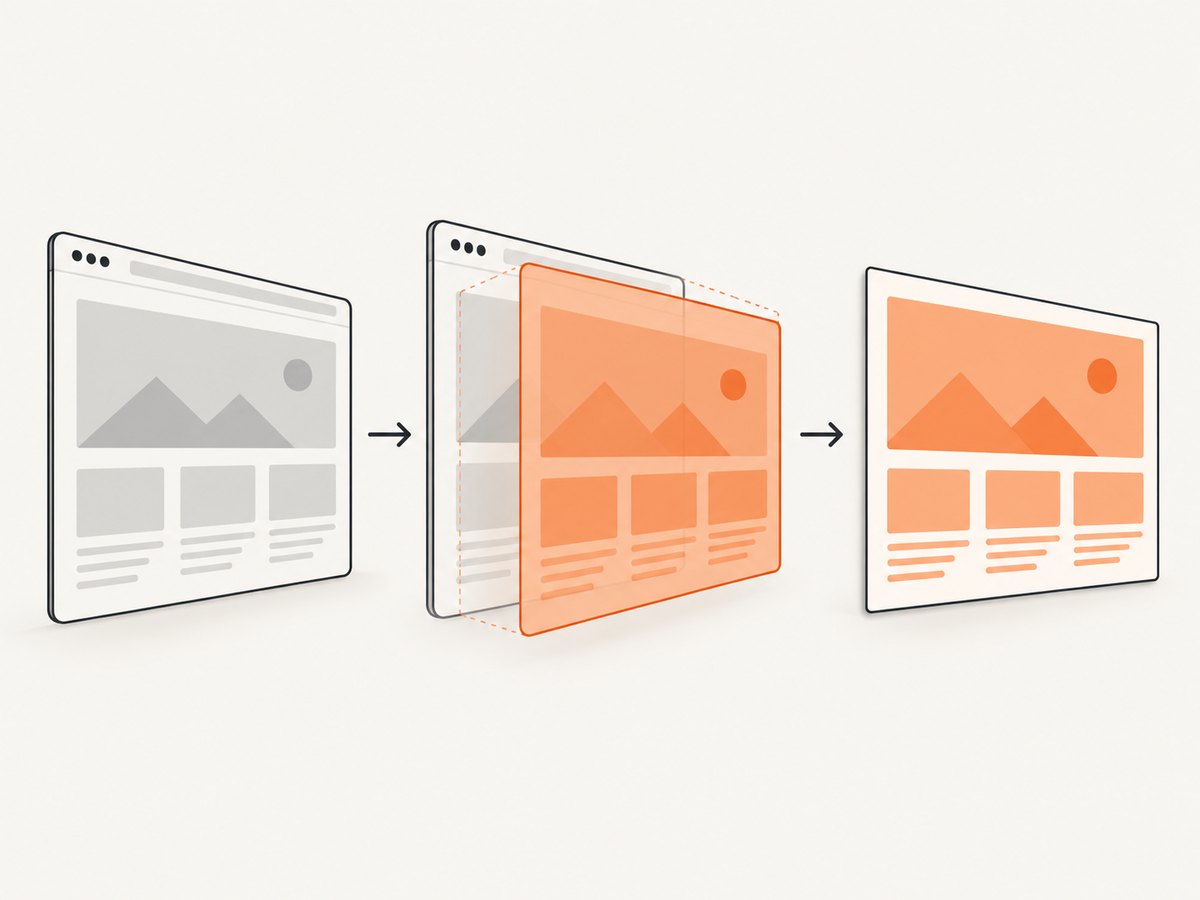
To capture a PhantomJS screenshot with an overlay, open the page, inject the overlay into the DOM, wait until its content is ready, and call page.render(). The overlay must exist before rendering begins. Set page.viewportSize for the browser window and page.clipRect for the area that PhantomJS rasterizes.
The sequence below follows PhantomJS’s documented page.open and page.render flow. Injecting the overlay with page.evaluate before rendering is an implementation pattern derived from that flow; the official capture example does not provide a dedicated overlay recipe.
Complete PhantomJS example
Save this as overlay-screenshot.js, then run it with the phantomjs executable. Replace the URL and output filename as needed.
var page = require('webpage').create();

page.viewportSize = {
  width: 1024,
  height: 768
};

page.clipRect = {
  top: 0,
  left: 0,
  width: 1024,
  height: 768
};

page.open('https://example.com/', function (status) {
  if (status !== 'success') {
    console.log('Unable to load the page.');
    phantom.exit(1);
    return;
  }

  page.evaluate(function () {
    var overlay = document.createElement('div');
    overlay.id = 'capture-overlay';
    overlay.textContent = 'Overlay';

    overlay.style.position = 'fixed';
    overlay.style.top = '16px';
    overlay.style.right = '16px';
    overlay.style.zIndex = '2147483647';
    overlay.style.padding = '8px 12px';
    overlay.style.background = 'rgba(0, 0, 0, 0.75)';
    overlay.style.color = '#fff';
    overlay.style.fontFamily = 'Arial, sans-serif';
    overlay.style.fontSize = '16px';
    overlay.style.lineHeight = '1.4';
    overlay.style.borderRadius = '4px';
    overlay.style.pointerEvents = 'none';

    document.body.appendChild(overlay);
  });

  page.render('page-with-overlay.png');
  phantom.exit();
});
Run it with:
phantomjs overlay-screenshot.jsThe result is a PNG containing the page and the fixed-position overlay. PhantomJS’s screen-capture documentation also lists JPEG, GIF, and PDF output. Use an extension that matches the format you request from page.render.
How the capture sequence works
1. Create a Web Page object
require('webpage').create() creates the page object used for navigation, viewport configuration, DOM evaluation, and rendering. The Web Page Module documentation describes this module and its page methods.
2. Choose the viewport
page.viewportSize controls the browser viewport in CSS pixels. A 1024 by 768 viewport causes responsive layouts to select the breakpoints appropriate for that width. Set it before page.open so the page loads with the intended layout.
page.viewportSize = { width: 1440, height: 900 };Changing the viewport can alter navigation menus, font wrapping, lazy-loaded content, and the position of the overlay. If the overlay is anchored to a corner with position: fixed, it stays relative to the viewport. An absolutely positioned overlay is instead positioned relative to its containing block and may move with page content.
3. Choose the rasterized area
page.clipRect has top, left, width, and height properties. PhantomJS defines this rectangle as the area of the page rasterized when page.render is invoked. The example uses a clip rectangle equal to the viewport, producing a viewport screenshot.
page.clipRect = {
  top: 0,
  left: 0,
  width: 800,
  height: 600
};
When you omit clipRect, the PhantomJS capture guide says page.render processes the entire page. Use a clip rectangle when the consuming system expects a fixed-size image, when you need to exclude browser content outside a region, or when you want predictable output dimensions. Make sure the rectangle includes the overlay; an overlay outside the clipped area will not appear.
4. Inject the overlay
page.evaluate executes a function in the page context, where document and the rendered DOM are available. Create the element, assign its styles, and append it to document.body before calling page.render.
Use a very high z-index when the target page has positioned elements that could cover the overlay. A new stacking context, a transformed ancestor, or an element using its own top layer can still affect stacking. Appending the overlay directly to body and using position: fixed avoids many layout surprises.
5. Render and exit
Call page.render(path) only after the overlay is present and all required content is ready. Then call phantom.exit() so the process terminates. Pass a nonzero status to phantom.exit(1) for navigation failures, allowing shell scripts and CI jobs to detect the error.
Overlay patterns you can adapt
Use HTML instead of plain text
textContent is safe for literal text but does not create markup. If the overlay needs multiple elements, assign innerHTML only to markup you control.
page.evaluate(function () {
  var panel = document.createElement('div');
  panel.innerHTML =
    '<strong>Build preview</strong><br>' +
    '<span>Staging environment</span>';
  panel.style.position = 'fixed';
  panel.style.left = '24px';
  panel.style.bottom = '24px';
  panel.style.zIndex = '2147483647';
  panel.style.padding = '12px 16px';
  panel.style.background = '#fff';
  panel.style.color = '#111';
  panel.style.border = '1px solid #ccc';
  document.body.appendChild(panel);
});
Overlay a watermark across the page
page.evaluate(function () {
  var watermark = document.createElement('div');
  watermark.textContent = 'DRAFT';
  watermark.style.position = 'fixed';
  watermark.style.top = '50%';
  watermark.style.left = '50%';
  watermark.style.transform = 'translate(-50%, -50%) rotate(-30deg)';
  watermark.style.opacity = '0.18';
  watermark.style.font = 'bold 96px Arial, sans-serif';
  watermark.style.color = '#333';
  watermark.style.zIndex = '2147483647';
  watermark.style.pointerEvents = 'none';
  document.body.appendChild(watermark);
});
Capture one element
PhantomJS’s clipping rectangle is coordinate-based. To capture a particular element, read its bounding rectangle in the page and assign the values to page.clipRect. Coordinates should be adjusted for the current scroll position and viewport.
var box = page.evaluate(function () {
  var element = document.querySelector('.report');
  if (!element) return null;
  var rect = element.getBoundingClientRect();
  return {
    left: rect.left,
    top: rect.top,
    width: rect.width,
    height: rect.height
  };
});

if (!box) {
  console.log('Element not found.');
  phantom.exit(1);
} else {
  page.clipRect = box;
  page.render('report.png');
  phantom.exit();
}
This captures the element’s visible viewport coordinates. If the element is below the fold, scroll it into view first or calculate document coordinates and set the page scroll position accordingly.
Timing: make sure the overlay and page are ready
A successful page.open callback means PhantomJS completed its navigation attempt; it does not guarantee that every font, image, animation, or application request has finished. Rendering immediately can produce a missing overlay, a partially styled overlay, or a page whose asynchronous content is absent.

For a static overlay, injecting it in the callback is usually sufficient. For asynchronous overlay content, use a readiness flag and poll it before rendering. The following pattern waits for a page-side flag set after the overlay’s required work completes.
page.open('https://example.com/', function (status) {
  if (status !== 'success') {
    phantom.exit(1);
    return;
  }

  page.evaluate(function () {
    window.overlayReady = false;
    var overlay = document.createElement('div');
    overlay.textContent = 'Loading overlay data...';
    overlay.style.position = 'fixed';
    overlay.style.top = '16px';
    overlay.style.right = '16px';
    overlay.style.zIndex = '2147483647';
    document.body.appendChild(overlay);

    // Replace this timeout with the callback for your real data or asset.
    window.setTimeout(function () {
      overlay.textContent = 'Overlay ready';
      window.overlayReady = true;
    }, 500);
  });

  var deadline = new Date().getTime() + 10000;
  var timer = window.setInterval(function () {
    var ready = page.evaluate(function () {
      return window.overlayReady === true;
    });

    if (ready) {
      window.clearInterval(timer);
      page.render('page-with-overlay.png');
      phantom.exit();
    } else if (new Date().getTime() > deadline) {
      window.clearInterval(timer);
      console.log('Overlay readiness timed out.');
      phantom.exit(1);
    }
  }, 100);
});
If you use a web font or an image in the overlay, wait for its load callback or use a deterministic delay that is long enough for the target environment. A delay alone is less reliable than an explicit readiness condition because network and rendering times vary.
Output formats and dimensions
| Need | Configuration | Notes |
|---|---|---|
| Lossless UI or text | page.render('capture.png') |
PNG preserves sharp edges and transparency where supported. |
| Smaller photographic image | page.render('capture.jpg') |
JPEG reduces size but introduces lossy compression. |
| Simple animated or indexed output | page.render('capture.gif') |
Use only when the consuming workflow supports GIF. |
| Printable document | page.render('capture.pdf') |
PDF layout and pagination differ from a viewport image. |
The PhantomJS guide documents PNG, JPEG, GIF, and PDF output. Match the output type to the next system: image processing usually favors PNG or JPEG, while printing and archival workflows may need PDF.
Common failures and fixes
The overlay is missing
Cause: page.render ran before the DOM injection, the script exited early, or the clip rectangle excludes the overlay.
Fix: inject inside the successful page.open callback, verify the element with a second page.evaluate, and enlarge or reposition page.clipRect.
The overlay is behind page content
Cause: another positioned element creates a stacking context with a higher effective order.
Fix: append the overlay to body, use position: fixed, set a high z-index, and avoid placing it inside a transformed ancestor. Also check whether the page uses a modal or top-layer implementation that changes stacking behavior.
The page reports an unsuccessful status
Cause: DNS, TLS, redirects, blocked resources, or a server-side failure prevented navigation.
Fix: check the URL from the same machine, log the status, and exit with code 1. Do not render a failure page and treat it as a valid capture. For protected or highly JavaScript-dependent sites, PhantomJS may lack the browser features the page requires.
Fonts or images are incomplete
Cause: the screenshot was taken while assets were still loading.
Fix: wait for explicit image or font readiness, poll an application flag, or use a bounded delay. Keep a timeout so a failed asset does not hang the process indefinitely.
The output is unexpectedly large or small
Cause: viewport dimensions and clip dimensions are independent from the page’s document size.
Fix: set both values deliberately. Use a viewport-sized clip for a browser-window image, or omit the clip when the entire page is required according to the PhantomJS capture guide.
Dynamic content changes between runs
Cause: animations, rotating content, current timestamps, ads, or network responses are nondeterministic.
Fix: inject CSS that disables transitions and animations, hide unstable regions, and capture after a known readiness signal. If you control the application, provide a deterministic preview route for screenshot jobs.
Performance and reliability checklist
- Set the viewport once and reuse the page when capturing multiple URLs only when isolation is safe.
- Use a clip rectangle to avoid rasterizing pixels you will discard.
- Wait for required assets, but enforce a maximum timeout.
- Disable animations and blinking cursors for repeatable images.
- Log navigation status and return a nonzero process code on failure.
- Write output to a unique path when jobs run concurrently.
- Close or restart long-running PhantomJS workers if page state leaks between captures.
- Record the URL, viewport, clip rectangle, output type, and readiness condition with each artifact.
PhantomJS is an older headless browser. Modern sites may depend on browser APIs or JavaScript behavior it does not implement. Puppeteer’s current Page API documents page.evaluate, style insertion, and screenshot options including fullPage, clip, path, and type. If your project can use a contemporary automation library, evaluate Puppeteer as a migration path rather than assuming PhantomJS compatibility.
Or skip the browser setup
If you need a screenshot service instead of maintaining a PhantomJS worker, ScreenshotNeo provides a single request that returns PNG, JPEG, WebP, or PDF. It supports custom JavaScript and CSS, click actions, selector waits, delays, network-idle waits, full-page capture, element capture by CSS selector, device presets, arbitrary viewports, retina scale, hidden selectors, and transparent backgrounds.
For a basic capture, see the ScreenshotNeo API documentation:
cURL
curl -G "https://api.screenshotneo.com/v1/shot" \
  -d access_key=YOUR_API_KEY \
  --data-urlencode url=https://stripe.com \
  -o shot.webp
Python
import requests

r = requests.get(
    "https://api.screenshotneo.com/v1/shot",
    params={"access_key": "YOUR_API_KEY", "url": "https://stripe.com"},
    timeout=90,
)
r.raise_for_status()
open("shot.webp", "wb").write(r.content)
Node.js
const q = new URLSearchParams({
  access_key: 'YOUR_API_KEY',
  url: 'https://stripe.com'
});

const res = await fetch(`https://api.screenshotneo.com/v1/shot?${q}`);
if (!res.ok) throw new Error(`HTTP ${res.status}`);
const bytes = Buffer.from(await res.arrayBuffer());
require('fs').writeFileSync('shot.webp', bytes);
ScreenshotNeo accepts cookie and consent banners like a visitor, then removes more than 60 known consent platforms along with newsletter popups and chat widgets; each cleanup step can be turned off. Bot checks and CAPTCHAs, blank pages, timeouts, failed loads, and cache hits are not billed, and response headers identify the page verdict and billing status with X-Page-Verdict and X-Billed. Its MCP server includes take_screenshot, get_page_info, and capture_pdf for Claude, Cursor, and other MCP clients.
There is a free plan with 1,000 screenshots per month and no card requirement. Paid plans start at $5 for 3,000 screenshots; every feature is available on every plan. Create a free ScreenshotNeo account to try the API.
FAQ
Can I add the overlay after page.render?
No. Rendering is the rasterization step. Add the overlay before it and wait for any asynchronous content it needs.
Does clipRect make the page itself smaller?
No. It selects the rectangle to rasterize. The viewport still controls responsive layout and browser dimensions.
How do I capture a full-page screenshot?
Omit clipRect according to the PhantomJS capture guide, or calculate a document-sized rectangle when your workflow requires explicit dimensions.
Why does a modern site fail in PhantomJS?
PhantomJS may not support browser APIs or JavaScript features required by the site. Use a current automation library or a hosted capture API when compatibility is more important than preserving the legacy runtime.
Can the overlay be transparent?
Yes. Use an RGBA background such as rgba(0, 0, 0, 0.5). Choose PNG when preserving transparency in the output matters.


