How to Set Up Snapshot Testing with Puppeteer
Build repeatable visual snapshots with Puppeteer, control page state, and compare captures against a baseline without confusing screenshots with accessibility snapshots.

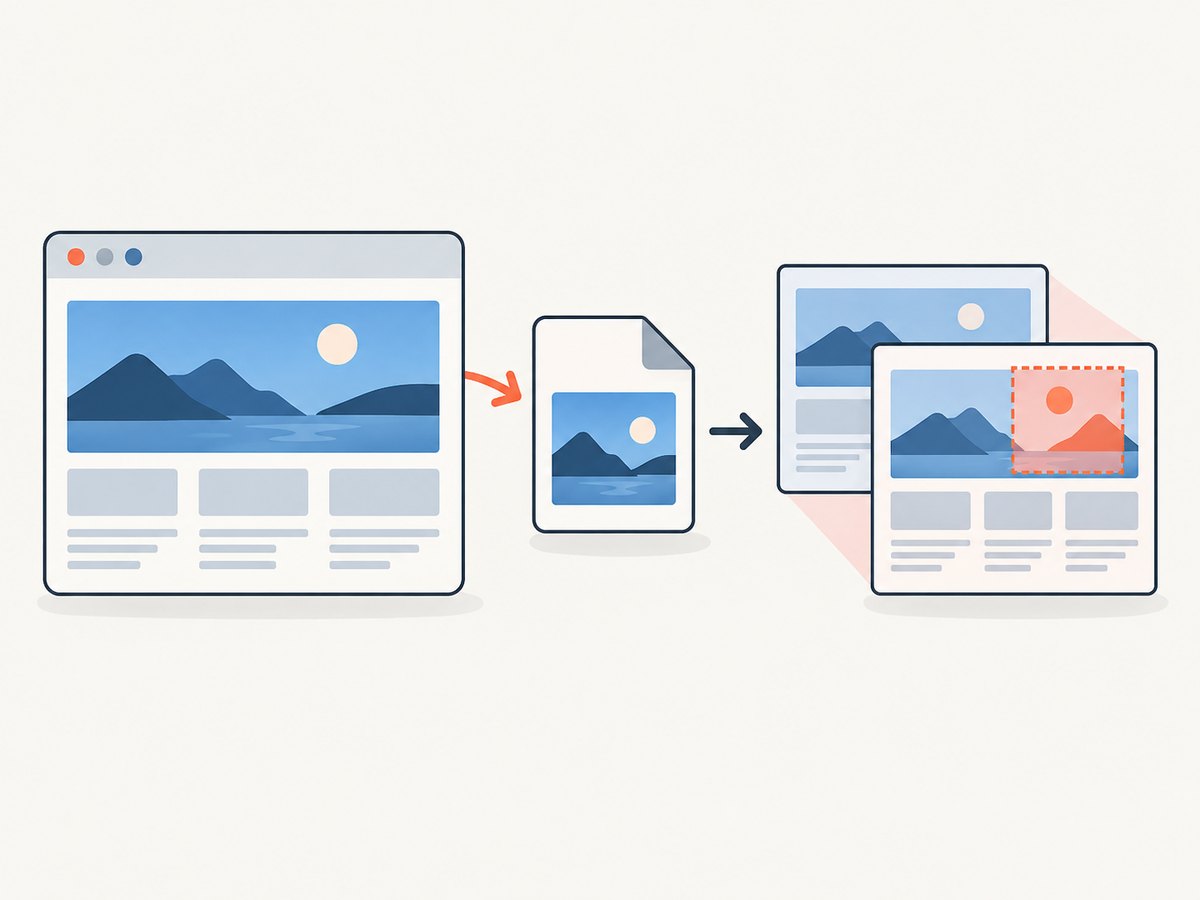
To set up visual snapshot testing with Puppeteer, launch Chromium, set a consistent viewport, navigate to a predictable page state, save a screenshot, then compare that image with a stored baseline using a test runner or image-diff tool. Puppeteer captures the image; it does not, by itself, decide whether two images are acceptably similar. This guide focuses on visual image snapshots. An accessibility snapshot is a separate structured representation of the accessibility tree.
The examples use Node.js and Puppeteer. They show capture and baseline-file setup without claiming a particular test-runner matcher or image-diff package is official or verified. Choose those pieces for your project and confirm their behavior against their own documentation.
1. Install Puppeteer and prepare a page
From a Node.js project, install Puppeteer:
npm install --save-dev puppeteerPuppeteer downloads a compatible browser as part of its installation by default. If your environment manages Chrome separately, review Puppeteer’s installation guidance and configure the executable path accordingly. Keep the browser version consistent between baseline creation and routine runs; a browser update can change rasterization and cause image differences even when your application did not change.
Make a local page or route that can be loaded repeatably. It should not depend on a production account, changing customer data, or third-party services if the test can avoid them. Use fixtures or a stable test account for content that must appear in the image.
Minimal runnable capture script
Save as capture.mjs. It opens a local page, fixes the viewport, writes a full-page PNG, and closes the browser even if navigation or capture fails:
import puppeteer from 'puppeteer';

const browser = await puppeteer.launch();
try {
  const page = await browser.newPage();
  await page.setViewport({ width: 1280, height: 800 });
  await page.goto('http://localhost:3000/example', {
    waitUntil: 'networkidle0',
  });
  await page.screenshot({
    path: 'artifacts/example.png',
    fullPage: true,
  });
} finally {
  await browser.close();
}
Start your application at localhost:3000, create the artifacts directory, then run node capture.mjs. For a CommonJS project, use require('puppeteer') in a .cjs file and wrap the asynchronous work in an async function. Puppeteer’s basic flow is browser launch, page creation, navigation, capture, and close. See the official Screenshots guide and Page.screenshot() API.
2. Capture the right scope
Choose the smallest capture scope that covers the behavior under test. A smaller, focused image is usually easier to diagnose than a full-page image containing unrelated content.
| What to capture | Puppeteer approach | When it fits |
|---|---|---|
| Visible viewport | page.screenshot({ path: 'view.png' }) |
A fixed-height component or above-the-fold layout. |
| Whole document | page.screenshot({ path: 'page.png', fullPage: true }) |
A page whose below-the-fold layout is part of the requirement. |
| One element | Find an element and call its screenshot() method. |
A card, dialog, chart, or other component that can be isolated. |
| Clipped region | Pass a clip rectangle to page.screenshot(). |
A fixed area whose coordinates are part of the test design. |
For element capture, wait until the element exists, then capture it:
const card = await page.waitForSelector('[data-testid="pricing-card"]');
if (!card) throw new Error('Pricing card was not found');
await card.screenshot({ path: 'artifacts/pricing-card.png' });
Puppeteer scrolls an element into view when needed. Element capture throws if that element has detached from the DOM, so avoid retaining a handle across a rerender; query it again after the page changes. See ElementHandle.screenshot().
A clip rectangle is expressed in pixels and includes x, y, width, and height. Ensure it lies within the rendered page and use the same viewport each run. A clip is useful for a stable region, but it can silently stop representing the intended component if surrounding layout shifts.
3. Make the capture repeatable
A visual baseline is only meaningful if each run presents comparable inputs to the browser. Fix the viewport, route, user state, content, locale, and relevant network conditions. The code above sets the viewport explicitly. Puppeteer’s screen configuration guide notes that headless mode uses an 800 by 600 screen when neither --screen-info nor --window-size overrides it; screen size and page viewport are related browser settings, but they are not interchangeable. Keep the settings you rely on explicit and consistent. See the screen configuration guide.
Wait for the state you intend to test
Navigation completion is not always the same as application readiness. A page may fetch data after the initial document loads, render a chart after a promise resolves, or display a delayed dialog. Prefer an application-specific signal when available:
await page.goto('http://localhost:3000/example', { waitUntil: 'domcontentloaded' });
await page.waitForSelector('[data-testid="page-ready"]');
await page.screenshot({ path: 'artifacts/example.png', fullPage: true });
Other valid test-design choices include waiting for a known loading indicator to disappear or waiting for a specific response-driven element. Do not add an arbitrary delay as the only readiness signal unless the page genuinely has a timed state you want to capture. Each site’s behavior differs, so confirm the chosen condition represents the state under test.
Control changing content
- Dates and clocks: use fixed fixture data when possible. A live “today” label or countdown will naturally change between captures.
- Personalization: use a predictable account and explicitly set locale or region when the application supports it.
- Fonts and images: ensure the assets required for the target state have loaded before capture; otherwise the browser can record fallback fonts or incomplete images.
- Animation: decide whether the test is meant to capture a transition or a settled screen. Stabilization techniques vary by app and should be validated against its behavior.
- Third parties: ads, analytics-driven widgets, chat, and externally hosted content can vary independently of your code. Stub, disable, or exclude them when they are not the subject of the test.
There is no universal Puppeteer recipe that removes all animation, timestamps, or asynchronous variation. Treat stabilization as part of test design and keep the same setup for baseline generation and comparison.
4. Save and compare a baseline
Capture a known-good image and store it as the baseline artifact for the test. In later runs, save the new capture to a separate path and compare the two images. The comparison layer may calculate changed pixels, apply a threshold, or produce a diff image, depending on the tool you choose. Decide what changes should fail the build: a strict pixel-for-pixel rule is sensitive to tiny rendering changes, while a tolerance can miss small regressions.
A practical directory arrangement might look like this:
visual/
  baselines/
    example.png
  actual/
    example.png
  diffs/
    example.png
Keep baseline updates reviewable in version control. When a deliberate design change updates a screenshot, inspect the new image and the diff before accepting it. Do not automatically replace the baseline on every run, since that would erase the signal the test is meant to provide.
The reviewed Puppeteer documentation establishes screenshot capture APIs, not a particular Jest or Vitest matcher or visual-diff package. Select a maintained comparison tool separately, check its supported formats and threshold semantics, and integrate its pass/fail result into your chosen test runner.
5. Configure screenshot output
Puppeteer’s ScreenshotOptions reference documents the following options. Most snapshot tests need only a path, scope, and format:
| Option | Use | Notes |
|---|---|---|
path |
Write the image to a file. | The extension can determine the image format. |
type |
Select png, jpeg, or webp where supported. |
PNG is the documented default. |
quality |
Set lossy image quality. | Applies to formats other than PNG. |
fullPage |
Capture the whole document. | Defaults to false. |
clip |
Capture a rectangular region. | Keep coordinates and viewport stable. |
omitBackground |
Capture with a transparent background. | Useful when transparency is part of the expected output. |
encoding |
Choose binary or base64 return data. | Binary is the documented default; file output is convenient for tests. |
captureBeyondViewport |
Control capture outside the viewport. | Consider alongside full-page and clip behavior. |
For visual comparisons, PNG is often a straightforward lossless baseline format. If you choose JPEG or WebP, lossy encoding can introduce pixel changes of its own; keep the format and quality identical for baselines and actual captures. Use omitBackground only when the transparent result is intentional. The API also lists fromSurface; consult the current reference if your capture depends on that lower-level behavior.
6. Add accessibility snapshots when that is the test goal
An accessibility snapshot is not a screenshot. Puppeteer’s page.accessibility.snapshot() returns a serialized representation of the current accessibility tree or null; it does not compare pixels or make a complete, platform-independent statement about assistive-technology output. Its snapshot options include includeIframes (default false), interestingOnly (default true), and an optional root element. By default, Puppeteer prunes nodes it considers uninteresting. See Accessibility.snapshot() and the SnapshotOptions reference.
Use this representation when you want to inspect accessible names, roles, and tree structure as exposed through Puppeteer’s API. Keep it conceptually separate from visual regression checks: a page can look the same and expose a different tree, or look different while the tree remains similar.
7. Troubleshoot common failures
| Symptom | Likely cause | Fix |
|---|---|---|
| Browser fails to launch in CI | Missing browser dependencies, restricted environment, or executable mismatch. | Review Puppeteer’s installation instructions for the environment; ensure the browser binary and required system libraries are available. |
| Screenshot is blank or incomplete | Capture ran before the app rendered its target state, or navigation ended before later data arrived. | Wait for a stable selector or app-ready signal and confirm the route’s data is present before capture. |
| Unexpected diffs on every run | Changing dates, personalization, animation, font loading, viewport, or third-party content. | Fix test inputs and dimensions; remove irrelevant external variability; capture only after the intended settled state. |
| Element screenshot throws | The element handle detached after a rerender, or the selector did not resolve. | Wait for the element, query a fresh handle after updates, and check the selector. Puppeteer documents detachment as an error case. |
| Image dimensions do not match the baseline | Viewport, full-page setting, responsive breakpoint, or content height changed. | Set viewport explicitly and verify whether the test expects viewport or full-page capture. |
| Local and CI captures differ | Different browser builds, fonts, operating-system rendering, or screen configuration. | Align browser and runtime versions, install needed fonts, and use the same viewport and capture setup. |
When the source of a failure is unclear, Puppeteer’s debugging guide recommends separating Node.js-side code, page code, and browser behavior as possible causes. Run headful to observe the page and use slowMo to slow operations while diagnosing timing. These are debugging aids, not fixes for every issue. See Puppeteer debugging.
8. Performance, reliability, and cost
Browser startup is work, so a suite with many screenshots can often reuse one browser process while creating separate pages or contexts for isolated cases. Always close pages and the browser at the end of the suite, including on failure. Avoid parallelizing so aggressively that the test machine runs out of memory or CPU; full-page screenshots of long documents can be especially expensive in memory and output size.
For reliability, minimize unrelated network dependencies, make navigation timeouts explicit where useful, and fail clearly when the expected ready signal never appears. Retries can help diagnose flaky infrastructure, but repeated retries can also hide a genuinely unstable page. Preserve failed actual images and diff artifacts where the test system permits, so a failure is actionable.
Local Puppeteer does not charge per screenshot as an API usage fee, but it uses your CI or developer machine resources and requires browser installation, maintenance, and storage for artifacts. The operational cost is setup and compute rather than a vendor shot quota. Account for CI minutes and artifact retention when a suite grows.
Or skip the browser setup
If you need screenshots without managing Chromium, ScreenshotNeo provides a website screenshot API and MCP server. One request returns PNG, JPEG, WebP, or PDF; see the API documentation for request options.
curl -G "https://api.screenshotneo.com/v1/shot" -d access_key=YOUR_API_KEY --data-urlencode url=https://stripe.com -o shot.webpimport requests
r = requests.get("https://api.screenshotneo.com/v1/shot", params={"access_key": "YOUR_API_KEY", "url": "https://stripe.com"}, timeout=90)
open("shot.webp", "wb").write(r.content)const q = new URLSearchParams({ access_key: 'YOUR_API_KEY', url: 'https://stripe.com' });
const res = await fetch(`https://api.screenshotneo.com/v1/shot?${q}`);
if (!res.ok) throw new Error(`Screenshot request failed: ${res.status}`);
await Bun.write('shot.webp', res);Cookie banners, popups, and chat widgets are removed before the shot. Bot checks, blank pages, and failed loads are never billed. An MCP server lets AI agents use screenshot tools. The Free plan includes 1,000 screenshots a month with no card; paid plans start at $5 for 3,000. These captures are useful when you want an image from a URL without browser setup; local Puppeteer remains useful when the test needs your local app state or browser-side test logic. Create an account at ScreenshotNeo: 1,000 free screenshots a month, no card.
FAQ
Does Puppeteer compare screenshots automatically?
No. Puppeteer captures the image. A test runner and comparison mechanism must decide whether the new image differs acceptably from its baseline.
Should snapshots be full-page?
Only if below-the-fold content is part of the requirement. Viewport or element captures make focused checks easier to review.
Is an accessibility snapshot a visual snapshot?
No. It is structured accessibility-tree data, with its own options and platform limitations.
Can I test how a page looks with a vision deficiency?
Puppeteer documents Page.emulateVisionDeficiency() for simulating vision conditions before capture. It can support visual inspection, but it is not a baseline comparison assertion. See the API reference.
How should a baseline change be reviewed?
Review the new capture and its diff as part of the change that intentionally modifies the page, then update the stored baseline deliberately.


