How to Take Screenshots with PyAutoGUI in Python
Capture your desktop with PyAutoGUI, save the Pillow image, or limit it to a region. Includes setup notes, troubleshooting, and a browser screenshot alternative.

To take a screenshot with PyAutoGUI, call pyautogui.screenshot(). It returns a Pillow image object. Pass a filename to save the screenshot as it is captured, or pass region=(left, top, width, height) to capture just part of the screen.
import pyautogui

# Capture the full screen in memory.
image = pyautogui.screenshot()

# Capture the full screen and save it as a PNG.
image = pyautogui.screenshot("screenshot.png")

# Capture a rectangle: left, top, width, height.
region_image = pyautogui.screenshot(region=(0, 0, 300, 400))
This guide covers installation, saving and processing captures, selecting a region, common platform issues, and the limits of desktop screenshots. If your target is a website and you do not need to capture your actual desktop, there is also a one-request browser screenshot option below.
1. Install PyAutoGUI and its screenshot dependency
Install PyAutoGUI in the Python environment where your script will run:
python -m pip install pyautoguiPyAutoGUI’s screenshot functionality depends on Pillow. The official documentation’s platform notes also identify capture utilities and packages used by some systems. It says macOS uses the operating system’s screencapture command; its Linux guidance names scrot, and its installation page also lists python3-tk and python3-dev. Those pages may not describe every current distribution or desktop session, so use the current install guidance for your specific platform if the basic install does not work.
Check that Python can import the packages
python -c "import pyautogui, PIL; print('PyAutoGUI and Pillow are available')"If this command reports that a module is missing, check that pip and the script’s python refer to the same environment. In a virtual environment, activate it before installing and running the script.
2. Capture and save the full screen
A screenshot call with no arguments captures the screen and returns a Pillow image. You can save it later with the image’s save() method, or give the screenshot call a filename and save in the same operation.
import pyautogui

image = pyautogui.screenshot()
image.save("desktop.png")
print(image.size)  # (width, height)
The shorter form does both capture and save:
import pyautogui

image = pyautogui.screenshot("desktop.png")
print(image.size)
In either case, the result is still an image object, so you can inspect or transform it after capture. The filename extension selects the intended image format through Pillow; for predictable output, use an extension that matches the format you want, such as .png or .jpg.
Make the output path explicit
A relative filename is written relative to the process’s current working directory, which may differ from the directory containing your Python file. Use an absolute path or create the destination directory first if another program expects the image at a known location.
from pathlib import Path
import pyautogui

output = Path("captures") / "desktop.png"
output.parent.mkdir(parents=True, exist_ok=True)
image = pyautogui.screenshot()
image.save(output)
print(f"Saved {output.resolve()}")
3. Capture only a screen region
Use the region argument to capture a rectangle. Its value is (left, top, width, height): the first two numbers mark the rectangle’s top-left origin, while the last two specify its size. It is not a pair of top-left and bottom-right coordinates.
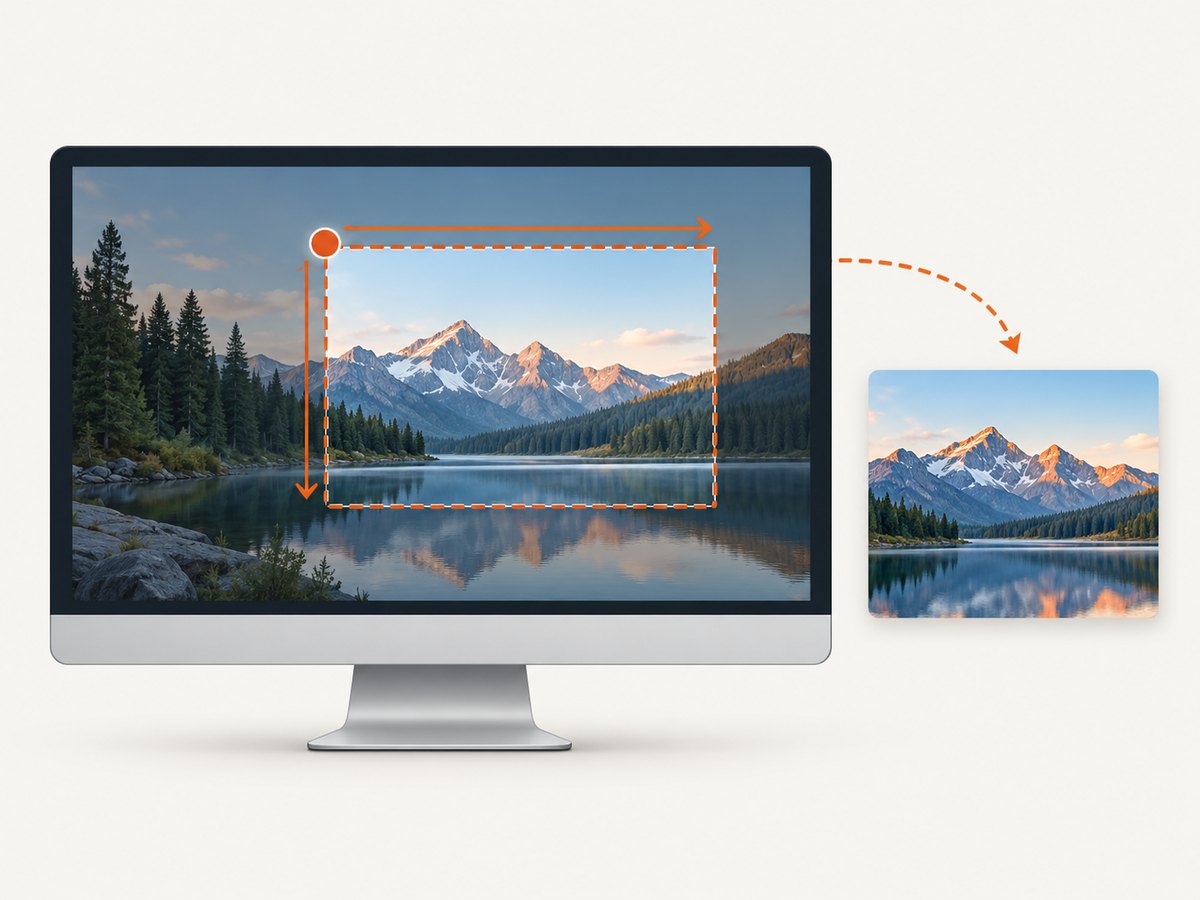
import pyautogui

left = 100
top = 80
width = 640
height = 360

image = pyautogui.screenshot(region=(left, top, width, height))
image.save("region.png")
Coordinates are screen positions, so confirm the target display’s dimensions and the location of the window you want before choosing the rectangle. A rectangle that extends beyond the available screen may fail or behave differently depending on the platform capture configuration; keep the requested bounds within the intended display and try a smaller region when diagnosing problems.
Choose full screen or region capture
| Need | Use | Consideration |
|---|---|---|
| Save everything visible on the desktop | pyautogui.screenshot() |
Includes the whole captured screen, not just one application window. |
| Capture a known rectangle | pyautogui.screenshot(region=(x, y, w, h)) |
Coordinates and size must match the current display layout. |
| Crop later or inspect pixels | Capture a full image, then use Pillow | Requires memory for the full image even if the final crop is small. |
4. Use the returned Pillow image
Because the screenshot is a Pillow image, you can pass it to code that accepts Pillow images, inspect its dimensions, or save another format. Pillow conversion and encoding are separate work from the screen capture itself.
import pyautogui

image = pyautogui.screenshot()
print("Dimensions:", image.width, "x", image.height)

# Save as JPEG. JPEG does not preserve transparency.
image.convert("RGB").save("desktop.jpg", quality=90)
For a crop after capture, Pillow uses a box described by left, upper, right, lower coordinates:
import pyautogui

image = pyautogui.screenshot()
crop = image.crop((100, 80, 740, 440))
crop.save("crop.png")
This differs from PyAutoGUI’s region tuple: Pillow’s crop box uses two corners, whereas region uses an origin plus width and height. Use one convention at a time to avoid off-by-size errors.
5. Run a repeatable capture script
For scripts that save captures repeatedly, create a destination directory and give each file a distinct name. This runnable example takes one screenshot and uses a timestamp to avoid overwriting a previous capture.
from datetime import datetime
from pathlib import Path
import pyautogui

output_dir = Path("captures")
output_dir.mkdir(parents=True, exist_ok=True)
filename = datetime.now().strftime("screen-%Y%m%d-%H%M%S.png")
output_path = output_dir / filename

image = pyautogui.screenshot()
image.save(output_path)
print(f"Saved {output_path.resolve()} ({image.width}x{image.height})")
For automation, make sure the desktop is in the expected state before capture: the correct display session is active, the intended window is visible, and any menus or dialogs have settled. A screenshot records what the capture mechanism can see at that moment; it does not wait for a web page or application to finish loading.
6. Troubleshoot common capture problems
| Symptom | Likely cause | What to try |
|---|---|---|
ModuleNotFoundError: No module named 'pyautogui' |
PyAutoGUI was installed into a different Python environment. | Run python -m pip install pyautogui with the same python executable used for the script. |
Error mentions Pillow or PIL |
The image dependency is absent or unavailable in the active environment. | Install Pillow in that environment with python -m pip install Pillow, then retry. |
| Linux capture utility error | The documented Linux setup expects a system capture dependency that may not be installed. | Consult PyAutoGUI’s current installation notes for your distribution and desktop. Its documentation names scrot, python3-tk, and python3-dev; package names and session support can vary. |
| Black, blank, or unexpected image in a remote or locked session | The active desktop session or platform capture permissions may not expose the visible display to the process. | Run the script in the same interactive desktop session you want to capture, unlock the display, and check that platform-specific screen-recording permissions are enabled where applicable. |
| Wrong area captured | The region origin or dimensions were mistaken for corner coordinates, or display geometry changed. | Use (left, top, width, height); print image dimensions and start with a small rectangle near the top-left. |
| File not found after a successful run | The relative output path was resolved from a different working directory. | Print Path.cwd() or save with an absolute path and create its parent directory. |
| Old screenshot appears on each run | The script writes the same filename each time, so the new image replaces it. | Include a timestamp or sequence number in the output name. |
PyAutoGUI’s overview lists Windows, macOS, and Linux support, but that does not guarantee every contemporary compositor, multi-display arrangement, or remote-session setup behaves identically. If the capture is incorrect, record the operating system, desktop/session type, monitor arrangement, and exact error; then narrow the issue in that configuration.
7. Performance, reliability, and cost
PyAutoGUI’s screenshot reference gives the conditional estimate “roughly 100 milliseconds on a 1920 × 1080 screen” — PyAutoGUI documentation, publication year not stated (indexed crawl approximately five years ago). Treat that as a documentation example, not a timing guarantee. Capture time can vary with screen size, operating system, capture backend, virtualized or remote sessions, and image encoding or file I/O performed by your script.
For repeated captures, avoid capturing more pixels than the task needs: a region can reduce the image size and downstream processing. Measure in the actual session where the script will run. If each capture is saved, include disk writes in your timing; if images are queued for processing, bound the queue so a slow consumer does not accumulate large image objects in memory.
PyAutoGUI is local software; the documented screenshot call has no per-image API charge. Your practical costs are the machine and storage used to run the script. Keep sensitive screens in mind: captures can contain private messages, credentials, or personal data, so choose a protected output directory and retention policy appropriate to the contents.
8. Desktop screenshots versus browser screenshots
PyAutoGUI captures the visible desktop. That is useful when you need the state of a native application, a particular monitor, or a workflow that depends on the actual desktop. For a website screenshot, desktop capture also means arranging a browser window, its size and zoom, the page state, and any browser chrome or overlays yourself.

A browser screenshot API instead loads a URL and returns a screenshot or PDF. It is a better fit when the input is a web address and you want repeatable page capture without setting up a visible desktop session. Browser rendering can still encounter bot checks, consent dialogs, or page-load failures, so inspect the response behavior and billing rules of any service you use.
Or skip the browser setup
If you only need a website screenshot, [ScreenshotNeo](https://screenshotneo.com) takes a URL in one GET request and returns an image or PDF. Its capture flow accepts cookie and consent banners and removes more than 60 known consent platforms, newsletter popups, and chat widgets before the shot; each cleanup step can be turned off. Bot checks and CAPTCHAs, blank pages, timeouts, failed loads, and cache hits are not billed, and the response identifies the page verdict and billing status in headers.
curl -G "https://api.screenshotneo.com/v1/shot" -d access_key=YOUR_API_KEY --data-urlencode url=https://stripe.com -o shot.webpSee the ScreenshotNeo API documentation for request options. There is also an MCP server with take_screenshot, get_page_info, and capture_pdf tools for Claude, Cursor, and other MCP clients. The Free plan includes 1,000 screenshots per month with no card; paid plans start at $5 for 3,000 screenshots.
Create a free ScreenshotNeo account to get 1,000 screenshots a month with no card.
9. FAQ
Does pyautogui.screenshot() return an image or a filename?
It returns a Pillow image object. When you pass a filename, it saves the capture and still returns the image.
Is the region tuple width and height or two corners?
PyAutoGUI uses (left, top, width, height). Two-corner coordinates apply to Pillow’s crop() box instead.
Can I use PyAutoGUI to capture a web page without opening a browser?
PyAutoGUI captures the desktop. For URL-driven browser rendering without arranging a desktop browser, use a browser screenshot service such as ScreenshotNeo.
Why does my screenshot differ from what I see on another monitor?
Display layout, active session, scaling, and platform capture behavior can affect what the process can capture. Verify the session and coordinates on the machine where the script runs.