Pyppeteer: How to Use Puppeteer in Python (Installation and Examples)
Install Pyppeteer, automate Chromium, capture screenshots, evaluate JavaScript, troubleshoot failures, and decide when Playwright or ScreenshotNeo fits better.

Direct answer: Pyppeteer is an unofficial Python port of Puppeteer for automating Chrome or Chromium. Install it with python -m pip install pyppeteer, optionally run pyppeteer-install to download Chromium, then use its asynchronous API to launch a browser, open a page, navigate, interact, evaluate JavaScript, and save screenshots. The project README currently describes Pyppeteer as unmaintained, so treat it as a compatibility choice for existing code and evaluate Playwright Python for new projects.
This guide starts with a working script, then explains installation, selectors, waits, screenshots, PDFs, JavaScript evaluation, browser configuration, deployment, errors, performance, and alternatives. The examples target Python 3.8 or newer, which is the current documented requirement. Read the Pyppeteer project documentation and check PyPI metadata before pinning versions.
What Pyppeteer is (and is not)
Pyppeteer aims to provide a Python API similar to the JavaScript Puppeteer project. It drives Chromium through browser automation commands, but it is not the official Puppeteer package and it does not guarantee identical APIs or release behavior. Python naming differs in important places: methods such as querySelector(), querySelectorAll(), and xpath() cover selector tasks represented by Puppeteer’s $, $$, and $x concepts.
The project README includes a clear maintenance warning: “Attention: this repo is unmaintained and has been outside of minor changes for a long time. Please consider playwright-python as an alternative.” That matters when browser versions, security fixes, and new web platform behavior are part of your production requirements.
Installation and first browser launch
1. Create an isolated environment
python3 -m venv .venv
source .venv/bin/activate
python -m pip install --upgrade pip
On Windows PowerShell, activate with .venv\Scripts\Activate.ps1. PyPI currently lists Pyppeteer 2.0.0, released February 18, 2024, with Python requirements of >=3.8, <4.0. Keep your application’s Python version inside that range.
2. Install Pyppeteer
python -m pip install pyppeteer
On first use, Pyppeteer may download a compatible Chromium build if it cannot find a suitable local executable. The README gives an approximate download size of about 150 MB, but the actual size and cache location vary by platform. To make that setup step explicit, run:
pyppeteer-install
In a container or CI image, run this during image construction so a test or request does not unexpectedly download a browser. If your environment already manages Chrome or Chromium, configure its executable path and verify that the binary is compatible with your Pyppeteer version.
Minimal runnable example: navigate and take a screenshot
import asyncio
from pyppeteer import launch

async def main():
    browser = await launch()
    page = await browser.newPage()
    await page.goto("https://example.com")
    await page.screenshot({"path": "example.png"})
    await browser.close()

asyncio.get_event_loop().run_until_complete(main())
launch() starts the browser process. newPage() creates a tab. goto() requests the URL. screenshot() writes the image, and close() releases the browser process. Save this as capture.py and run python capture.py. The first run can take longer while Chromium is downloaded.
Use modern asyncio entry points
For applications already using asynchronous code, call the coroutine from your existing event loop. In a standalone script on current Python versions, this form is also clear:
import asyncio
from pyppeteer import launch

async def capture(url: str, path: str) -> None:
    browser = await launch()
    try:
        page = await browser.newPage()
        await page.goto(url, {"waitUntil": "networkidle2", "timeout": 60000})
        await page.screenshot({"path": path, "fullPage": True})
    finally:
        await browser.close()

asyncio.run(capture("https://example.com", "page.png"))
The try/finally ensures the browser closes after navigation or screenshot errors. networkidle2 waits until network activity is low; it is useful for many sites but can delay pages that maintain long-lived connections.
Navigation, waits, and page lifecycle
Navigation is asynchronous. Choose a wait policy that matches the page rather than assuming the HTML response means the interface is ready.
| Technique | Use it when | Trade-off |
|---|---|---|
waitUntil: "load" |
Initial document and load event are enough | Client-rendered content may still be absent |
waitUntil: "domcontentloaded" |
You need the parsed document quickly | Images and application data may still load |
waitUntil: "networkidle0" |
The page should make no network requests | Analytics, polling, or sockets can prevent completion |
waitUntil: "networkidle2" |
Most background traffic should settle | Still depends on the site’s request behavior |
await page.goto(
    "https://example.com/dashboard",
    {"waitUntil": "domcontentloaded", "timeout": 60000}
)
await page.waitForSelector("main.dashboard", {"visible": True, "timeout": 30000})
await page.waitFor(1000)  # optional delay for a late animation or widget
Use a selector wait for a known application milestone. A fixed delay is a fallback for animations or third-party widgets, not a substitute for a meaningful readiness condition.
Selectors and interaction
Pyppeteer exposes Python-friendly selector methods. You can query one node, query a list, or use XPath:
headline = await page.querySelector("h1")
if headline:
    text = await page.evaluate("element => element.textContent", headline)
    print(text.strip())

cards = await page.querySelectorAll("article.card")
await page.click("button.load-more")
await page.type("input[name=email]", "dev@example.com")
await page.xpath("//button[contains(., 'Continue')]")
Selectors can fail when a framework replaces nodes during rendering. Query immediately before an action, wait for visibility when needed, and avoid brittle selectors based on generated class names. For an element-specific screenshot, use the element handle’s screenshot method after locating it:
element = await page.querySelector(".invoice")
if element is None:
    raise RuntimeError("invoice element was not rendered")
await element.screenshot({"path": "invoice.png"})
Evaluating JavaScript from Python
page.evaluate() runs JavaScript in the page context. Pass a string containing an expression or function. If Pyppeteer misidentifies an expression as a function, the documentation recommends force_expr=True.
title = await page.evaluate("document.title")
width = await page.evaluate("window.innerWidth")

result = await page.evaluate("""
() => ({
  links: document.querySelectorAll('a').length,
  ready: document.readyState
})
""")
print(title, width, result)

value = await page.evaluate("2 + 2", force_expr=True)
Keep page evaluation small and deterministic. Browser JavaScript cannot directly access Python variables unless you serialize values into the expression or use the API’s argument support. Never interpolate untrusted strings into JavaScript; encode or pass them as data to avoid creating an injection path.
Useful launch and screenshot options
Pyppeteer accepts dictionaries and keyword arguments. Common launch settings include:
browser = await launch(
    headless=True,
    args=["--no-sandbox", "--disable-dev-shm-usage"],
    defaultViewport={"width": 1440, "height": 900, "deviceScaleFactor": 1},
)
- headless: Run without a visible window. Use a visible browser only when diagnosing a local issue.
- args: Supply Chromium flags required by a container or restricted runtime. Review each flag’s security implications before using it on a shared machine.
- defaultViewport: Set width, height, and device scale factor before navigation so responsive layouts render predictably.
- executablePath: Point to an operating-system-managed Chrome or Chromium binary when you do not want the bundled download. The correct path is environment-specific.
Screenshot options include path, fullPage, clip, and type (such as PNG or JPEG, depending on the browser API version). A full-page capture can be very tall; constrain it or capture sections when downstream systems have image-size limits.
await page.screenshot({
    "path": "page.jpg",
    "type": "jpeg",
    "quality": 85,
    "fullPage": True,
})
PDF generation and authenticated pages
Chromium can print a page to PDF. Set the page’s content and wait for fonts or data before printing:
await page.goto("https://example.com/report", {"waitUntil": "networkidle2"})
await page.pdf({
    "path": "report.pdf",
    "format": "A4",
    "printBackground": True,
    "margin": {"top": "16mm", "right": "12mm", "bottom": "16mm", "left": "12mm"},
})
For a login session, set cookies before navigation or perform the login flow in the same page. Keep credentials out of source control and logs:
await page.setCookie({
    "name": "session",
    "value": session_value,
    "domain": "example.com",
    "path": "/",
    "secure": True,
})
await page.goto("https://example.com/account", {"waitUntil": "domcontentloaded"})
Reliable automation patterns
- Reuse a browser, isolate pages. Launching Chromium for every URL adds startup overhead. Keep one browser per worker and create a fresh page for each job; close pages in a
finallyblock. - Bound every wait. Set navigation, selector, and operation timeouts. A page with an endless request should fail a job rather than occupy a worker forever.
- Record the failure context. Log the URL, timeout stage, browser version, viewport, and a short exception. Store a diagnostic screenshot or HTML only when your data policy permits it.
- Retry selectively. Retry transient navigation or connection failures with backoff. Do not blindly retry deterministic selector errors or authentication failures.
- Control concurrency. Each page consumes memory. Start with a small worker pool, observe resource use in your deployment, and increase concurrency only after measuring your own workload.
Common errors and fixes
| Error or symptom | Likely cause | Fix |
|---|---|---|
ModuleNotFoundError: pyppeteer |
Wrong virtual environment or interpreter | Run python -m pip install pyppeteer with the same python that runs the script. |
| Chromium download fails | Restricted network, proxy, or permissions | Run pyppeteer-install during image setup, configure the environment’s proxy, or use a permitted local executable. |
| Browser closes immediately in a container | Sandbox or shared-memory restrictions | Check container policy and required Chromium flags such as --disable-dev-shm-usage; use --no-sandbox only when your deployment security model allows it. |
Navigation Timeout Exceeded |
Slow page, blocked request, or an unsuitable wait condition | Increase the timeout, choose domcontentloaded, wait for a specific selector, and inspect network dependencies. |
| Screenshot is blank or missing content | Capture occurred before client rendering, lazy loading, or fonts finished | Wait for a meaningful selector, scroll to trigger lazy content, and verify the element exists before capture. |
ElementHandleError |
Node was replaced or selector matched nothing | Wait again, query a fresh handle, and use stable attributes. |
evaluate returns an unexpected value |
Expression/function detection or serialization issue | Use a clear JavaScript function string, serialize plain values, or try force_expr=True for an expression. |
Pyppeteer versus Playwright Python
Playwright Python’s official installation is pip install playwright followed by playwright install. Its documented APIs include synchronous and asynchronous Python styles and Chromium, Firefox, and WebKit launch options. Browser binaries are tied to Playwright releases, so updating the package can require reinstalling browsers. See the Playwright Python documentation.
| Decision point | Pyppeteer | Playwright Python |
|---|---|---|
| Maintenance | Unofficial port; repository warns it is unmaintained | Official Python documentation and release-linked browser installation |
| Existing code | Useful when you already have Pyppeteer-style automation | Requires adapting APIs and test coverage |
| Browser choices | Documented Chromium workflow | Documented Chromium, Firefox, and WebKit options |
| Setup | May download Chromium on first use | Explicit playwright install step |
Neither source establishes a universal speed or reliability winner. Test the exact Python version, operating system, container, browser binary, proxy rules, and target sites used by your application.
Or skip the browser setup
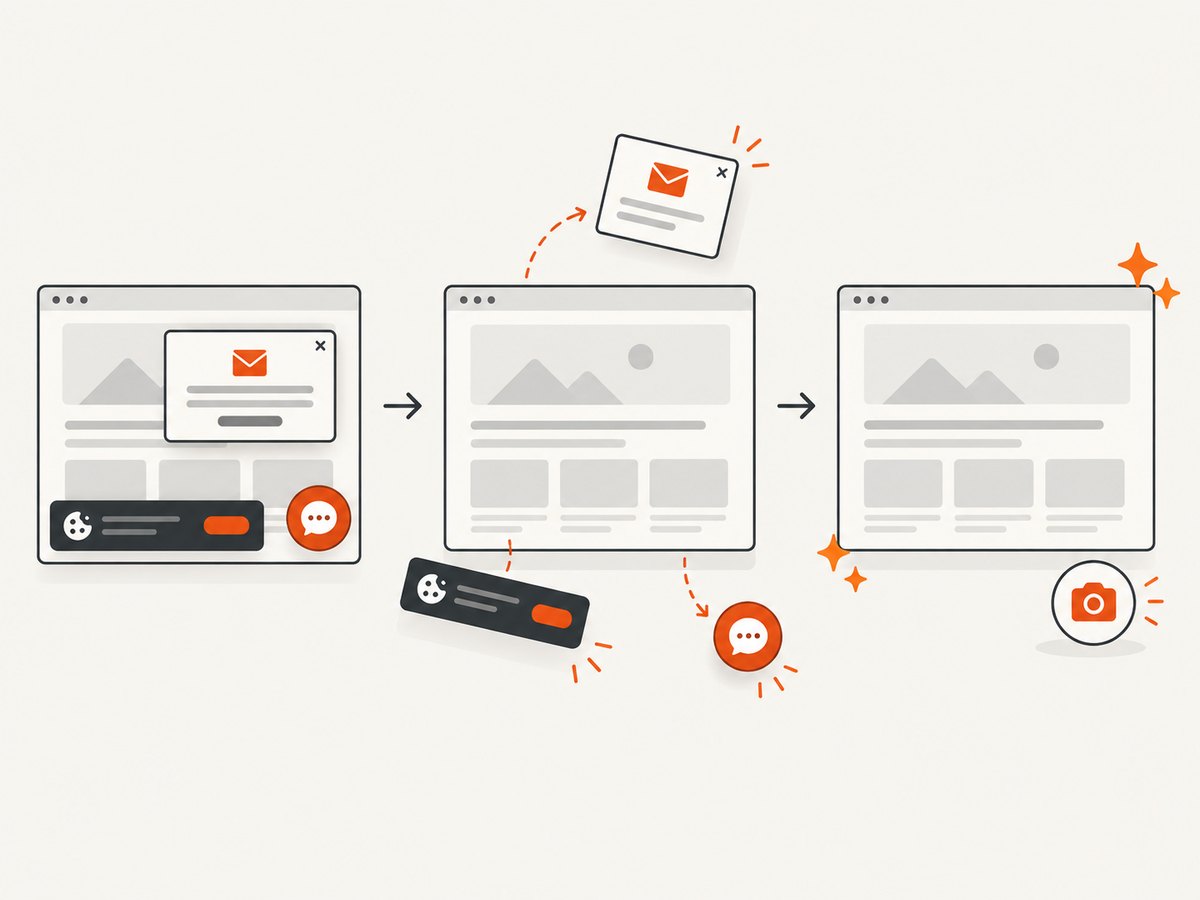
If your goal is a clean website image or PDF rather than browser automation itself, ScreenshotNeo provides a single HTTP request. It accepts consent banners like a visitor and removes more than 60 known consent platforms, newsletter popups, and chat widgets before capture. Bot checks, blank pages, timeouts, failed loads, and cache hits are not billed; response headers identify the page verdict and billing result. The MCP server also exposes take_screenshot, get_page_info, and capture_pdf for Claude, Cursor, and other MCP clients. One thousand screenshots per month are free without a card, and paid plans start at $5 for 3,000 shots.
See the ScreenshotNeo API documentation for all options, including full-page and CSS-element capture, dark mode, device presets, retina scale, PDF paper and margin settings, custom CSS and JavaScript, clicks, waits, request blocking, headers, cookies, user agents, authorization, timezone, geolocation, transparent backgrounds, resizing, caching, signed links, asynchronous jobs, webhooks, bulk capture, usage, and the OpenAPI specification.
cURL
curl -G "https://api.screenshotneo.com/v1/shot" -d access_key=YOUR_API_KEY --data-urlencode url=https://stripe.com -o shot.webpPython
import requests
r = requests.get("https://api.screenshotneo.com/v1/shot", params={"access_key": "YOUR_API_KEY", "url": "https://stripe.com"}, timeout=90)
open("shot.webp", "wb").write(r.content)
Node.js
const q = new URLSearchParams({ access_key: 'YOUR_API_KEY', url: 'https://stripe.com' }); const res = await fetch(`https://api.screenshotneo.com/v1/shot?${q}`);Choose Pyppeteer when you need arbitrary in-page interaction and Python-controlled browser logic. Choose ScreenshotNeo when a hosted capture endpoint, clean output, predictable billing, or AI-agent access removes more setup than it adds.
Create a free ScreenshotNeo account for 1,000 screenshots each month with no card.
Performance, reliability, and cost checklist
- Cache or reuse the browser process instead of launching one per request.
- Use the smallest viewport and page scope that satisfies the job.
- Wait for a selector or network condition tied to the page’s real readiness.
- Set upper bounds for navigation, selectors, and total job duration.
- Pin dependencies and install the intended browser during deployment.
- Measure memory and concurrency in your own environment; the supplied sources contain no universal benchmark.
- For hosted screenshots, account for ScreenshotNeo plan limits and use its usage API, caching TTL, bulk capture, or asynchronous jobs where they fit your workload.
FAQ
Is Pyppeteer the official Puppeteer for Python?
No. It is an unofficial Python port with a similar goal and separate maintenance history.
Does Pyppeteer support Python 3.7?
The current documented requirement is Python 3.8 or newer; PyPI metadata specifies less than Python 4.0.
Why does the first run take so long?
Pyppeteer may be downloading Chromium. Run pyppeteer-install during setup to move that work out of the request path.
Should a new project start with Pyppeteer?
Review the unmaintained-project warning first. Compare your compatibility needs with Playwright Python and test the exact deployment environment.
Can ScreenshotNeo replace browser automation?
It replaces the capture portion when you need an image or PDF from a URL. Pyppeteer remains appropriate for custom workflows that must click, log in, inspect, or mutate a page in Python.


