Python pyproject.toml: An Overview
Learn what pyproject.toml does, where build requirements, package metadata and tool settings belong, and how to configure a Python project correctly.
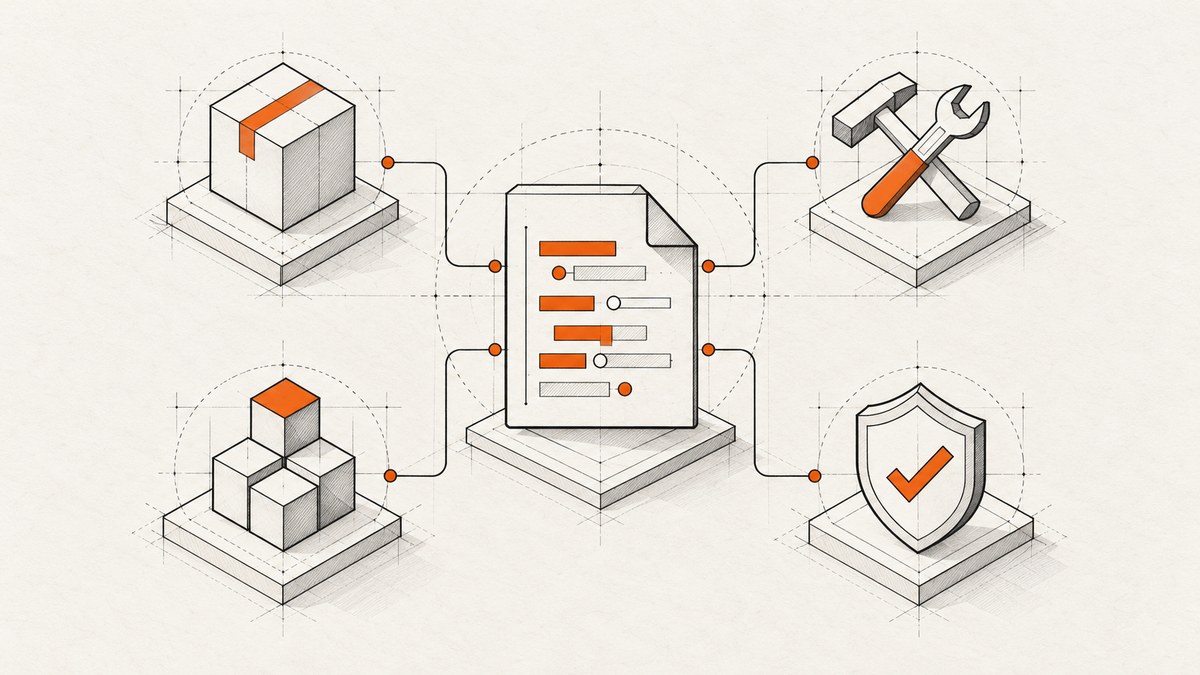
pyproject.toml is Python’s standard TOML configuration file for packaging tools and other development tools. It gives a project one place to declare how it is built, what distribution metadata it publishes, and how tools such as formatters and type checkers are configured. A small application may only need tool settings; a package distributed to others generally needs valid project metadata and a build backend.
The file’s three standardized tables are [build-system], [project], and [tool]. Build requirements go in the first, distribution metadata and runtime dependencies in the second, and tool-specific settings under the third. See the [Python Packaging User Guide](https://packaging.python.org/en/latest/guides/writing-pyproject-toml/) for the current specification.
1. What is pyproject.toml?
pyproject.toml is a project-root configuration file written in TOML. It started with build-system configuration and later gained a standard metadata table for Python distributions. Today it also serves as the conventional home for tool configuration, although each tool defines its own keys and behavior.
It is useful to distinguish three related concerns:
- Build: which build backend and Python packages a frontend needs in order to build the project.
- Distribution metadata: the name, version, dependencies, supported Python versions, and other information included in a wheel or source distribution.
- Development tools: settings for formatters, linters, test runners, type checkers, and project managers.
These concerns share one file, but they are not interchangeable. For example, project.dependencies describes packages users need when they install your distribution. A formatter’s own dependency is not a runtime dependency of your package; if you declare it in project metadata, it usually belongs in an optional development extra or a separate developer environment.
2. The three main tables
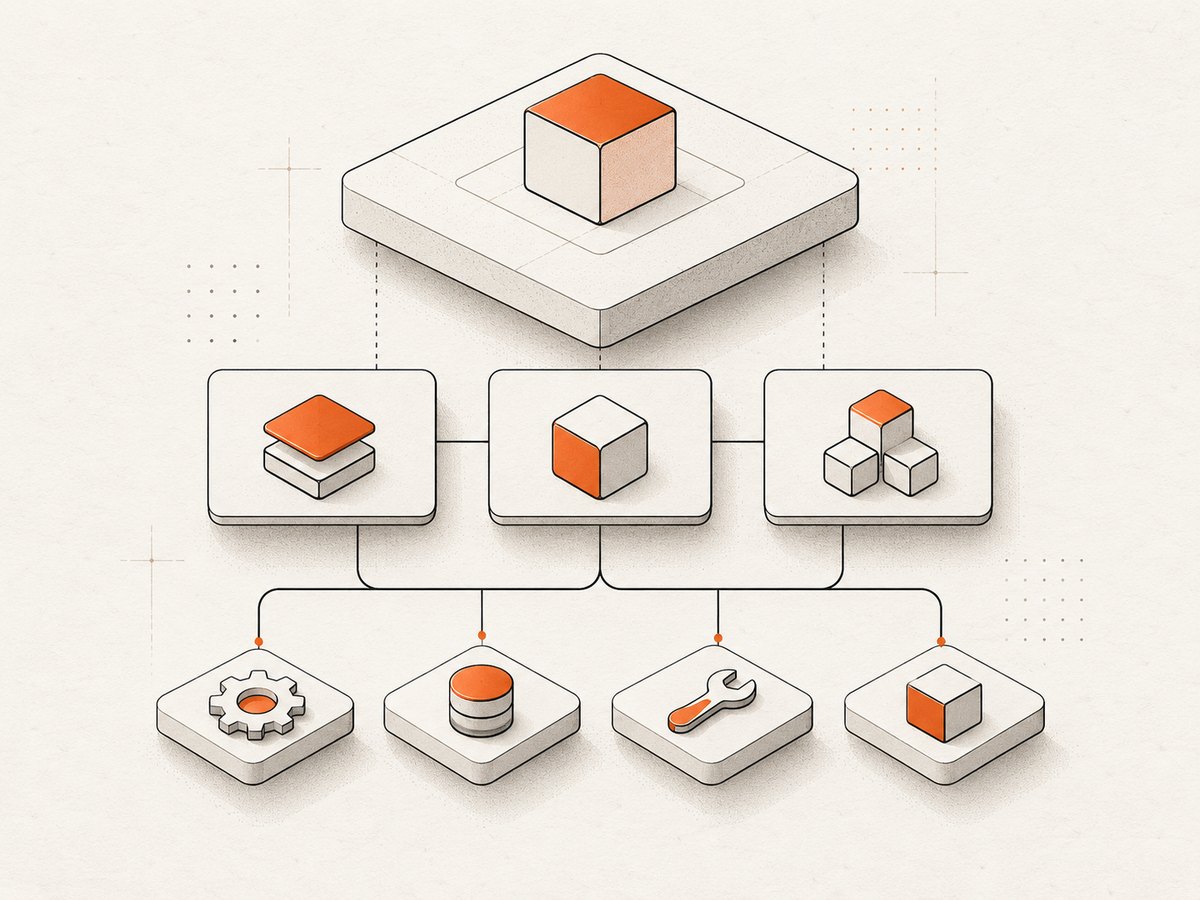
[build-system]: how a frontend builds the project
A frontend such as pip or build reads this table to find the Python-level build requirements and the backend entry point. When this table is present, requires is required and must be an array of dependency strings. build-backend selects the backend. For example, Hatchling exposes hatchling.build.
[build-system]
requires = ["hatchling"]
build-backend = "hatchling.build"
Build requirements are installed into an isolated build environment by the frontend. That separation allows a project to build with its declared backend even when the user has not installed that backend into their normal environment. Build requirements are not automatically runtime requirements.
[project]: metadata for the installed distribution
The standardized [project] table describes the distribution. Its name must be statically declared. A version must be provided either as a static value or by listing version in dynamic. Other commonly used fields include description, readme, requires-python, license, authors, classifiers, urls, scripts, dependencies, and optional dependencies. Consult the [project metadata specification](https://packaging.python.org/en/latest/specifications/pyproject-toml/#project-metadata) for supported fields and exact formats.
[project]
name = "example-package"
version = "1.0.0"
description = "An example Python package"
readme = "README.md"
requires-python = ">=3.10"
dependencies = ["requests>=2.31"]
The dependency list becomes distribution metadata (Requires-Dist) and is considered when the package is installed. Version constraints and environment markers can express compatibility requirements; choose them based on your supported environments rather than pinning every runtime dependency to one exact version without a reason.
[tool]: settings owned by individual tools
[tool] is a namespace, not one universal schema. A tool uses a table such as [tool.black], [tool.ruff], or [tool.mypy] and documents the recognized keys itself. Check that tool’s documentation for spelling, defaults, supported types, and version-specific behavior.
[tool.ruff]
line-length = 100

[tool.black]
line-length = 100
Use tool-owned tables instead of inventing unrelated top-level tables. The format reserves top-level namespaces for standardized uses; extensions belong under tool.<tool-name>. This makes ownership clearer and reduces collisions between tools.
3. A complete starter file
This illustrative package uses Hatchling as its backend and Ruff for lint configuration. Those are examples, not requirements: the backend and each tool’s keys must match the tools you choose and their current documentation.
[build-system]
requires = ["hatchling"]
build-backend = "hatchling.build"

[project]
name = "example-package"
version = "1.0.0"
description = "An example Python package"
readme = "README.md"
requires-python = ">=3.10"
dependencies = [
  "requests>=2.31",
]

[project.optional-dependencies]
test = ["pytest"]

[tool.ruff]
line-length = 100
For this configuration to build successfully, the project also needs the expected package source layout and a readable README at the declared path. Backend-specific settings may be needed for unusual layouts, package inclusion rules, or generated files. Follow the backend’s documentation when the default discovery rules do not match your repository.
4. Put each dependency in the right place
| Need | Where it belongs | What it affects |
|---|---|---|
| Backend needed to create distributions | [build-system].requires |
Isolated build environment |
| Libraries required by installed users | [project].dependencies |
Published runtime dependency metadata |
| Optional feature or extra dependencies | [project.optional-dependencies] |
Named install extras, such as example-package[test] |
| Tool settings | [tool.<tool-name>] |
Only the named tool’s configuration |
Test and lint dependencies are often placed in an optional extra such as test or dev, or managed in a separate lock or environment file. An optional extra is still distribution metadata: publishing it makes that extra available to installers. A project may use its package manager’s own dependency workflow, but that is a tool choice around the standard file and should be documented for contributors.
5. Static and dynamic metadata
Static values are written directly into the file. Dynamic metadata is supplied by the backend or another configured mechanism and must be named in the dynamic array. For instance, a backend might calculate the version from a source file or version-control tag.
[project]
name = "example-package"
dynamic = ["version"]
Do not declare a field both statically and dynamically. The backend must provide fields declared dynamic; it cannot silently replace a static field. Some list or table fields have specification rules that allow static entries alongside dynamic contributions, but the backend must preserve static entries: it may append values, not remove, reorder, or modify the declared values. Check the field’s specification and backend support before relying on this behavior.
Static metadata is easy for build frontends and repository readers to inspect. Dynamic metadata is useful when a project has one authoritative version source, but it introduces a backend-specific mechanism that must work in clean, isolated builds. A local build that succeeds only because a developer environment happens to contain undeclared dependencies is a portability problem.
6. Build and installation flow
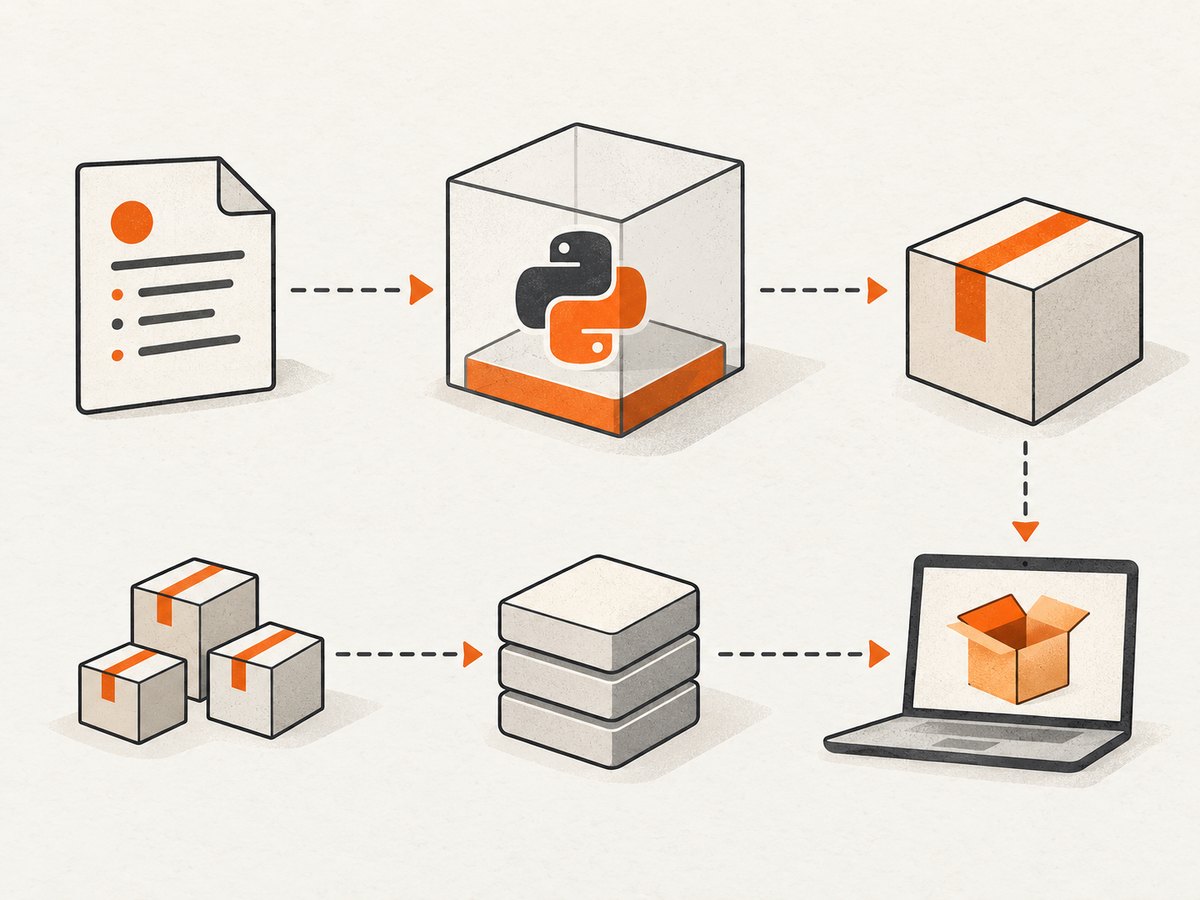
- A frontend finds
pyproject.tomland reads the build-system declaration. - It installs the declared build requirements into an isolated build environment.
- It invokes the selected backend to create artifacts such as a wheel or source distribution and provide metadata.
- During installation, the installer reads distribution metadata, including runtime requirements, and resolves applicable dependencies subject to environment markers.
This is why build requirements and runtime dependencies should not be conflated. A backend can be needed to make the package, while requests might be needed by users after installation. The relevant standards are [PEP 518](https://peps.python.org/pep-0518/) for build-system requirements and [PEP 621](https://peps.python.org/pep-0621/) for project metadata. PEP 518 was approved in May 2016; PEP 621 was approved in November 2020.
7. Configure popular tools safely
The file can centralize configuration, but the table names do not make all tool settings standardized. For each tool, verify its current documentation and supported version. Some tools accept configuration in pyproject.toml but retain a different canonical file or use a different table shape. Avoid copying a configuration snippet without checking whether the installed tool version recognizes it.
- Black: settings are placed under
[tool.black]; ensure shared options such as line length align with your lint rules. - Ruff: configuration is under
[tool.ruff]and can cover linting and formatting options. Use the syntax supported by the Ruff version in your environment. - Mypy: settings belong under
[tool.mypy]; options that are booleans, lists, or per-module overrides must use the documented TOML representation. - Poetry, Hatch, and other project managers: their own configuration may sit under tool namespaces, while some also define dependency-management behavior. Distinguish their extensions from the standardized
[project]metadata and confirm interoperability with your chosen backend and frontend.
When several tools share a setting such as line length, duplicate values can drift. Keep them synchronized or use each tool’s documented support for shared or inherited configuration. Do not assume one tool reads another tool’s table.
8. Validation and practical workflow
- Choose the project shape. Decide whether you are publishing a distribution or configuring an application. A publishable package needs valid distribution metadata and a build path.
- Select a backend. Add its build dependency and backend entry point under
[build-system]. - Declare metadata deliberately. Add a static project name and either a static version or a backend-supported dynamic version declaration. Add dependencies users actually need.
- Place extras and tool settings. Keep optional install features under
[project.optional-dependencies]and tool configuration below[tool]. - Build from a clean environment. Use your chosen frontend’s documented build command in a fresh environment or CI job so undeclared local tools do not hide missing build requirements.
- Inspect the artifacts and install behavior. Confirm the expected package files and metadata are present, and test installation in the Python versions and environments you claim to support.
For a package using the build frontend, a typical command is python -m build after installing that frontend in the development environment. This command is only appropriate when the frontend and backend are configured; consult the [build project documentation](https://build.pypa.io/en/stable/) for installation and invocation details.
9. Common errors and fixes
| Symptom | Likely cause | Fix |
|---|---|---|
“Missing [build-system]” warning or legacy build behavior |
No explicit backend declaration, often in an older project | Add a backend and its build requirements if the project is intended to build through the modern backend interface; otherwise understand the frontend’s fallback behavior. |
| Build says no backend or cannot import backend | Missing or misspelled build-backend, or an absent build requirement |
Check the backend’s documented entry point and ensure its package is listed in requires. |
| “Field is required” or invalid project metadata | Missing static name, neither static nor dynamic version, or invalid field types |
Compare values with the current project metadata specification; ensure TOML arrays and strings use the correct syntax. |
| Tool ignores a setting | Wrong table, unsupported key, or installed tool version predates the option | Use that tool’s official configuration documentation and verify its version. |
| Parser reports invalid TOML | Unclosed string or array, malformed quoting, or duplicate key | Check the reported line and remember TOML arrays and tables have stricter syntax than informal config formats. |
| Package builds but imports fail after installation | Source layout or package inclusion rules did not match backend discovery | Inspect the built wheel contents and configure the selected backend’s package discovery rules. |
| Build works locally but fails in CI | Undeclared backend/plugin requirement or reliance on files absent from the checkout | Build in an isolated clean environment and declare every build requirement and required source file. |
| Users get unnecessary dependencies | Development tools were put in runtime dependencies | Move them to a development environment or optional extra when appropriate, then inspect the resulting metadata. |
10. Performance, reliability, and cost considerations
Reading this TOML file is not typically the expensive part of a Python build. More consequential factors are backend work, dependency resolution and installation, generated artifacts, and the amount of work performed during dynamic metadata generation. Keep build requirements focused and reproducible; smaller, well-declared build environments are easier to cache and debug. Do not add a performance number unless you have measured your own project under controlled conditions.
Reliability comes from explicit metadata and repeatable builds. Declare the backend and its requirements, avoid relying on developer-machine state, and exercise a clean build in CI. If versions are dynamic, ensure the source of truth is available in source archives and CI checkouts. Runtime dependency ranges affect what users may resolve over time, so test the supported range rather than assuming one developer environment represents every installation.
There is no charge for the file format or standards themselves. Cost is associated with the services, hosted tools, or engineering time a project chooses around packaging. The specifications do not establish relevant adoption or performance figures, so project-level choices should be evaluated on interoperability, metadata behavior, editable installs, artifact layout, and portability of tool configuration.
11. FAQ
Do I need a [build-system] table?
If your project declares one, it must include requires. Projects using modern backend-based builds should declare the backend and requirements explicitly. Some frontends retain legacy fallback behavior when the table is absent, but relying on it can produce different behavior than an explicit backend setup.
Can an application use pyproject.toml without publishing a package?
Yes. A project can use it for tool configuration. The packaging metadata and build configuration are relevant when you build or distribute a Python package.
Can every Python tool be configured in this file?
No. A tool must implement support for pyproject.toml, and its configuration schema remains tool-specific. Check its documentation.
Should I use Poetry or Hatch?
That depends on workflow needs. Compare frontend and backend interoperability, static and dynamic metadata support, dependency semantics, editable-install and build behavior, source and wheel layout, and portability of each tool’s configuration. These are choices made by tools around a shared file format, not separate pyproject standards.
12. Or skip the browser setup
If your Python documentation workflow also needs clean website captures, ScreenshotNeo offers a single HTTP request for a screenshot. Its API and the full parameter reference are in the [ScreenshotNeo documentation](https://screenshotneo.com/docs/); learn more at [ScreenshotNeo](https://screenshotneo.com).
import requests

r = requests.get(
    "https://api.screenshotneo.com/v1/shot",
    params={"access_key": "YOUR_API_KEY", "url": "https://stripe.com"},
    timeout=90,
)
open("shot.webp", "wb").write(r.content)
Cookie banners, newsletter popups, and chat widgets are removed before the shot, and each step can be turned off. Bot checks, blank pages, failed loads, timeouts, and cache hits are never billed; response headers report the page verdict and billing status. An MCP server lets Claude, Cursor, and other MCP clients use screenshot tools. The free plan includes 1,000 screenshots a month with no card; paid plans start at $5 for 3,000 screenshots. Create a free account and get 1,000 screenshots a month with no card.


