How to Read Screenshot Pixels and Draw Rectangles With Puppeteer
Capture Puppeteer screenshots, decode pixels, sample RGBA values, and draw accurate rectangles with runnable Node.js code.

Direct answer: Puppeteer captures encoded image bytes; it does not return decoded RGBA values for an (x, y) coordinate. Call await page.screenshot(), decode the PNG, JPEG or WebP with an image library, then read the decoder’s pixel buffer. To draw a visible rectangle, create a transparent overlay or draw onto the decoded image after capture. Puppeteer’s clip option only crops the captured region; it does not annotate the image.
This distinction matters when you are building visual tests, debugging a layout, generating marked-up evidence, or checking a color at a known location. The reliable workflow is:
- Set a deterministic viewport and device scale factor.
- Wait for the page, fonts and images to settle.
- Capture a
Uint8Arraywithpage.screenshot(). - Decode those bytes into raw RGB or RGBA pixels.
- Check bounds and calculate the pixel offset.
- Draw a rectangle in the same coordinate space.
- Encode or save the resulting image.
The official Puppeteer screenshot guide documents page and element screenshots. The Page.screenshot API returns a Promise<Uint8Array> by default, or a base64 string when encoding: 'base64' is selected.
1. Capture a screenshot buffer
Keep the image in memory when you plan to inspect or modify it. Supplying path writes a file, but the returned bytes are still the most convenient input for a decoder.
import puppeteer from 'puppeteer';
import fs from 'node:fs/promises';

const browser = await puppeteer.launch({ headless: true });
try {
  const page = await browser.newPage();
  await page.setViewport({ width: 1280, height: 800, deviceScaleFactor: 1 });
  await page.goto('https://example.com', { waitUntil: 'networkidle2' });

  // Binary image data: Uint8Array
  const imageBytes = await page.screenshot({ type: 'png' });
  await fs.writeFile('page.png', imageBytes);
} finally {
  await browser.close();
}
PNG is the default screenshot format. You can select JPEG or WebP where supported, and JPEG/WebP quality settings are meaningful for those formats; quality does not apply to PNG. A screenshot with fullPage: true captures the entire document, while an element’s screenshot() method captures only that element.
Capture one element
const card = await page.locator('.pricing-card').screenshot({
  type: 'png'
});
await fs.writeFile('pricing-card.png', card);
Element coordinates and dimensions are relative to the element image. If you later draw a rectangle based on page coordinates, translate them into the element crop’s coordinate system first.
Use base64 only when you need text transport
const base64 = await page.screenshot({ encoding: 'base64', type: 'png' });
const bytes = Buffer.from(base64, 'base64');
Base64 is larger than binary data and adds an encode/decode step. Prefer the default byte result for local processing, uploads and pixel inspection.
2. Decode bytes and read a pixel
A PNG, JPEG or WebP file is compressed or encoded data. Its byte at a particular offset is not the red, green or blue channel. Decode it first, then use the decoded width, height, channel count and raw buffer.
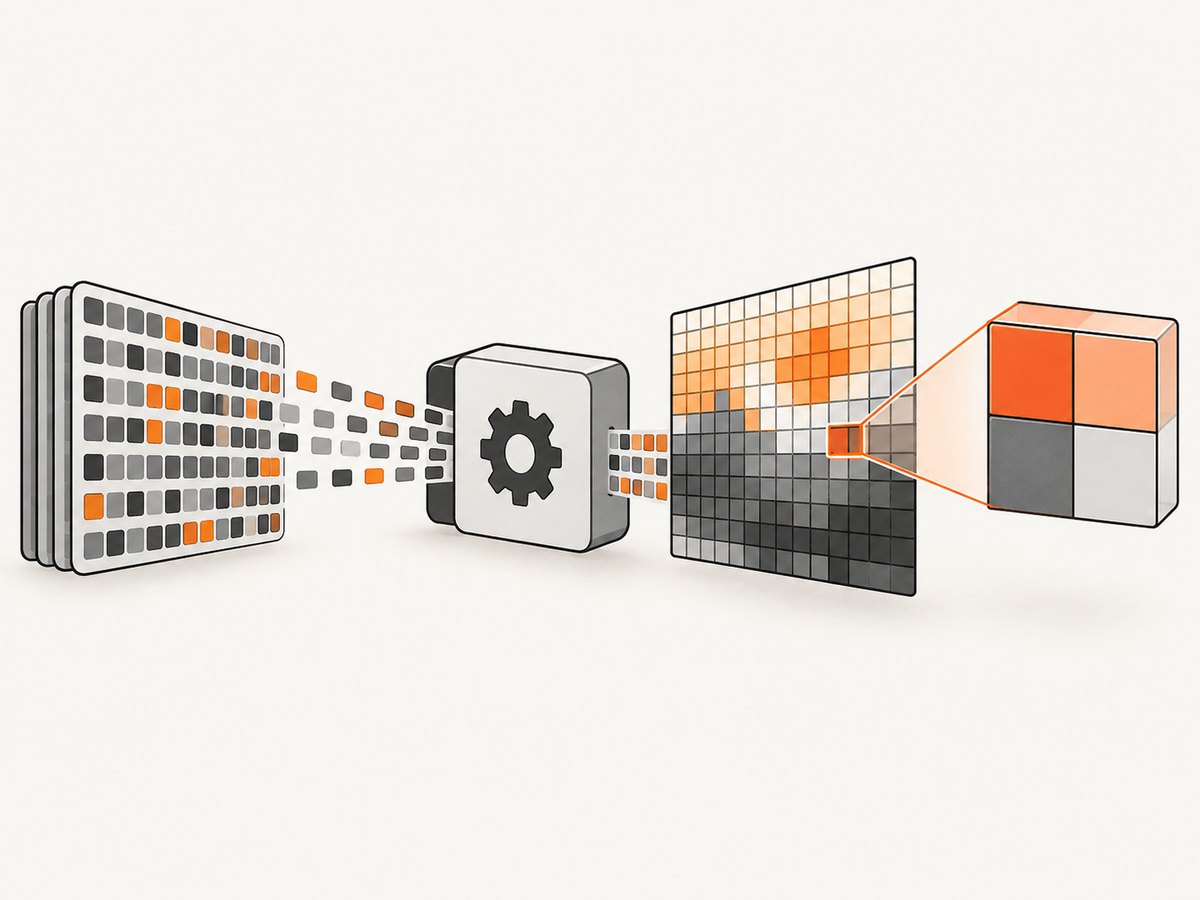
The following complete example uses the current Sharp raw output API. Sharp’s raw output is ordered left-to-right and top-to-bottom; the channel order is RGB or RGBA depending on the image. ensureAlpha() makes the example consistently four channels.
import puppeteer from 'puppeteer';
import sharp from 'sharp';

const browser = await puppeteer.launch({ headless: true });
try {
  const page = await browser.newPage();
  await page.setViewport({ width: 1280, height: 800, deviceScaleFactor: 1 });
  await page.goto('https://example.com', { waitUntil: 'networkidle2' });

  const screenshot = await page.screenshot({ type: 'png' });
  const { data, info } = await sharp(screenshot)
    .ensureAlpha()
    .raw()
    .toBuffer({ resolveWithObject: true });

  const x = 40;
  const y = 30;
  if (x < 0 || y < 0 || x >= info.width || y >= info.height) {
    throw new RangeError(`Pixel (${x}, ${y}) is outside ${info.width}x${info.height}`);
  }

  const offset = (y * info.width + x) * info.channels;
  const pixel = {
    r: data[offset],
    g: data[offset + 1],
    b: data[offset + 2],
    a: data[offset + 3]
  };

  console.log({ width: info.width, height: info.height, pixel });
} finally {
  await browser.close();
}
Install the dependencies in a new project with:
npm install puppeteer sharpThe offset formula is (y * width + x) * channels. It assumes zero-based coordinates and a packed row with no padding, which is how Sharp documents raw output. Always use info.width, info.height and info.channels returned by the decoder instead of assuming a screenshot’s dimensions.
What the channels mean
- RGB: three bytes per pixel: red, green and blue.
- RGBA: four bytes per pixel, with alpha after blue.
- Alpha: 0 is transparent and 255 is opaque in the usual 8-bit representation.
Color management, image profiles and premultiplied alpha can affect comparisons. For exact test logic, compare channels with a tolerance rather than requiring every channel to match across operating systems.
3. Draw a visible rectangle after capture
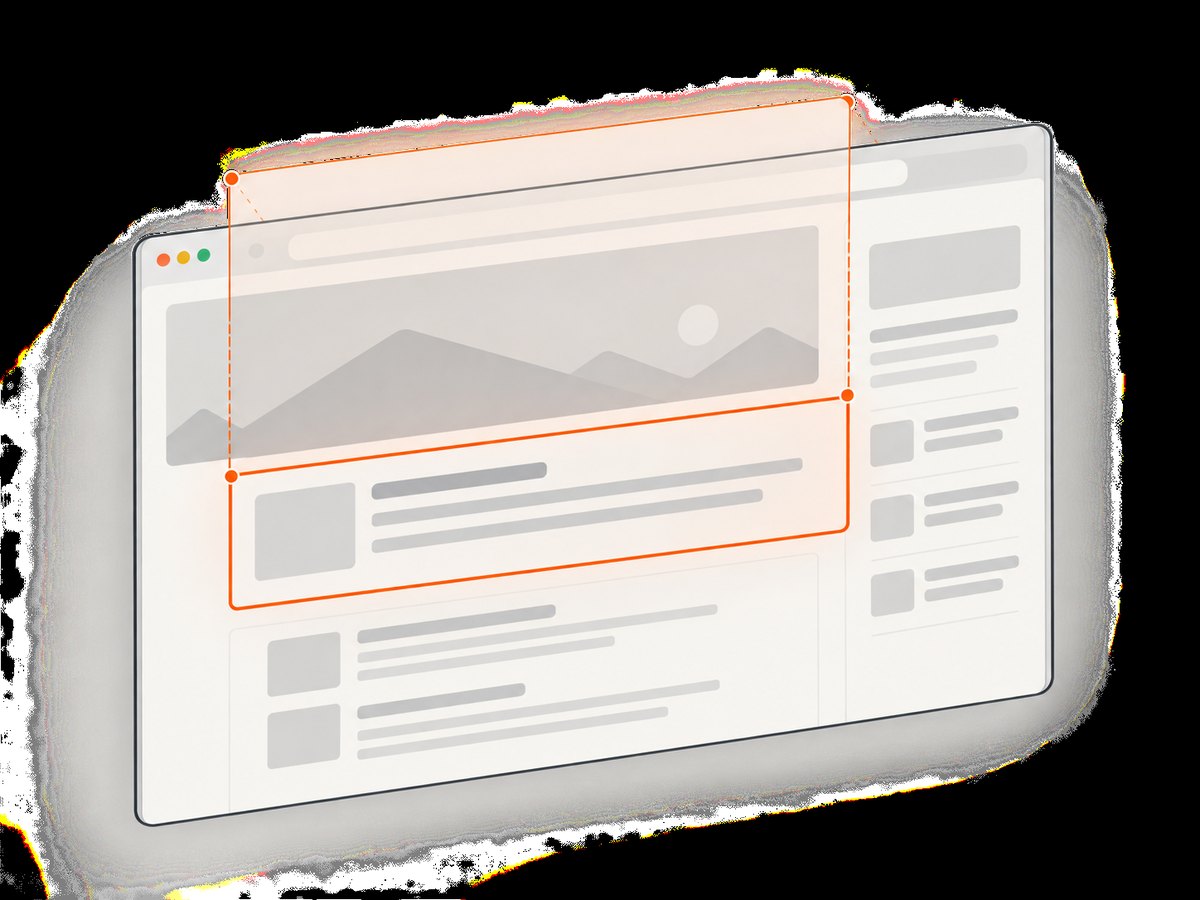
To annotate an image, make an overlay with the same dimensions as the screenshot, draw a stroked rectangle into that overlay, then composite it over the original. This keeps the original capture intact and makes the annotation’s position explicit.
import puppeteer from 'puppeteer';
import sharp from 'sharp';

const browser = await puppeteer.launch({ headless: true });
try {
  const page = await browser.newPage();
  await page.setViewport({ width: 1280, height: 800, deviceScaleFactor: 1 });
  await page.goto('https://example.com', { waitUntil: 'networkidle2' });

  const screenshot = await page.screenshot({ type: 'png' });
  const metadata = await sharp(screenshot).metadata();
  const width = metadata.width;
  const height = metadata.height;
  if (!width || !height) throw new Error('Could not read image dimensions');

  const left = 120;
  const top = 90;
  const boxWidth = 360;
  const boxHeight = 180;
  const stroke = 6;

  if (left < 0 || top < 0 || left + boxWidth > width || top + boxHeight > height) {
    throw new RangeError('Rectangle exceeds screenshot bounds');
  }

  // A transparent RGBA overlay. The SVG is only an intermediate drawing layer.
  const overlay = Buffer.from(`
    <svg width="${width}" height="${height}">
      <rect x="${left}" y="${top}" width="${boxWidth}" height="${boxHeight}"
        fill="none" stroke="#ff1744" stroke-width="${stroke}" />
    </svg>`);

  await sharp(screenshot)
    .composite([{ input: overlay, top: 0, left: 0 }])
    .png()
    .toFile('annotated.png');
} finally {
  await browser.close();
}
The rectangle is drawn in image pixels. If your coordinates came from browser layout APIs such as getBoundingClientRect(), they are CSS pixels. With deviceScaleFactor: 1, those spaces line up. With a scale factor of 2, multiply CSS coordinates and dimensions by 2 before drawing on the bitmap, or capture with a clip scale that gives you the coordinate space you expect.
Draw a rectangle in the page before capture
Sometimes you need the annotation to appear exactly as the browser renders it. Inject a temporary outline into the DOM, capture, then remove it:
await page.evaluate(({ selector }) => {
  const element = document.querySelector(selector);
  if (!element) throw new Error(`Missing ${selector}`);
  element.dataset.puppeteerOutline = element.getAttribute('style') || '';
  element.style.outline = '6px solid #ff1744';
  element.style.outlineOffset = '2px';
}, { selector: '.pricing-card' });

const marked = await page.screenshot({ type: 'png' });

await page.evaluate(({ selector }) => {
  const element = document.querySelector(selector);
  if (element) {
    element.setAttribute('style', element.dataset.puppeteerOutline || '');
    delete element.dataset.puppeteerOutline;
  }
}, { selector: '.pricing-card' });
This method changes the page while it is being captured. Post-processing is safer for evidence images because it cannot affect layout, transitions or the page’s own styles.
4. Understand clip, full-page captures and coordinates
clip selects a region to capture. It is a crop, not a rectangle annotation. The ScreenshotOptions reference describes clip as the region of the page or element to clip. A clipped screenshot’s top-left pixel is the clip’s top-left point, so page coordinate (x, y) becomes image coordinate (x - clip.x, y - clip.y).
const clipped = await page.screenshot({
  type: 'png',
  clip: { x: 200, y: 100, width: 500, height: 300, scale: 1 }
});
For full-page images, document coordinates extend below the viewport. A coordinate from getBoundingClientRect() is viewport-relative; add the current scroll offset to obtain a document coordinate. A full-page screenshot can also be affected by lazy loading and page layout changes while the browser stitches the capture.
Use one explicit coordinate contract in your code:
| Coordinate source | Meaning | Conversion to bitmap pixels |
|---|---|---|
| CSS viewport coordinate | Position inside the visible browser viewport | Multiply by device scale factor |
| Element bounding box | CSS position and size from the DOM | Translate to crop origin, then scale |
| Clipped image coordinate | Position inside the returned crop | Use directly, subject to image scale |
| Full-page document coordinate | Position relative to the document | Add scroll position and account for scale |
5. Make captures reproducible
Pixel assertions are sensitive to anything that changes rendering. Set the viewport, device scale factor, color scheme and locale deliberately. Wait for the specific content you need rather than relying on an arbitrary delay.
await page.setViewport({
  width: 1440,
  height: 900,
  deviceScaleFactor: 1,
  isMobile: false
});
await page.emulateMediaFeatures([
  { name: 'prefers-color-scheme', value: 'light' }
]);
await page.goto(url, { waitUntil: 'networkidle2' });
await page.evaluate(() => document.fonts.ready);
await page.waitForSelector('#dashboard');
Disable animations when they make the target unstable:
await page.addStyleTag({ content: `
  *, *::before, *::after {
    animation: none !important;
    transition: none !important;
    caret-color: transparent !important;
  }
`});
Do not assume that two machines produce identical pixels. Browser version, operating-system fonts, font hinting, GPU paths, network responses and time-dependent content can all differ. Use a fixed browser version where possible and use a per-channel tolerance for visual comparisons.
6. Troubleshooting common errors
| Symptom | Likely cause | Fix |
|---|---|---|
data[x] is not a color |
You are reading encoded PNG/JPEG/WebP bytes. | Decode with an image library and read its raw buffer. |
| Pixel is shifted | CSS pixels, device pixels or clip-relative pixels were mixed. | Set deviceScaleFactor, record clip origin and convert coordinates explicitly. |
| Rectangle is invisible | The overlay is outside the image, behind the base image, or has transparent stroke settings. | Validate bounds, composite the overlay after the base, and use an opaque stroke. |
| Wrong page colors | Dark-mode media, missing fonts or content loaded after capture. | Set media features, await document.fonts.ready, and wait for a content selector. |
| Full-page element moves | Images or fonts changed layout during capture. | Wait for images, reserve dimensions, and capture after layout settles. |
| JPEG comparison is noisy | JPEG compression changes nearby channel values. | Use PNG for pixel tests, or compare with a tolerance. |
| Sharp cannot load the image | Incomplete bytes, unsupported format, or a truncated response. | Await the screenshot promise fully, check byte length, and capture PNG first. |
| Browser does not close | An exception bypassed cleanup. | Put capture and processing in try/finally and close the browser there. |
7. Performance, reliability and cost considerations
Keep one browser process alive when processing many URLs, but create a fresh page or context per job when isolation matters. Reusing a page avoids launch overhead; limiting concurrent pages prevents memory spikes. Full-page screenshots and high device scale factors produce larger images and take more memory to decode.
Decode once if you need several pixel samples or multiple annotations. Keep the original bytes and the decoded buffer separate so you can save both the untouched capture and the marked version. For large images, avoid converting the whole image repeatedly. Validate rectangle bounds before creating an overlay, and handle navigation, screenshot and decoder errors independently so one failed URL does not stop a batch.
Use PNG when exact pixels or transparency matter. JPEG can reduce file size for photographic pages but introduces compression differences. WebP is useful when your downstream system accepts it, but visual tests should still define an allowed difference rather than assuming format conversion preserves every channel.
8. Or skip the browser setup
If you need a clean website image rather than a locally controlled browser, ScreenshotNeo provides a single screenshot API request. It can return PNG, JPEG, WebP or PDF, and supports full-page capture, element selectors, device presets, custom viewports, retina scale, custom CSS and JavaScript, waits, headers, cookies, user agents, geolocation, blocking rules, caching and bulk capture. You still perform pixel decoding and rectangle drawing locally after receiving the image bytes.
See the ScreenshotNeo API documentation for the complete option list.
curl -G "https://api.screenshotneo.com/v1/shot" \
  -d access_key=YOUR_API_KEY \
  --data-urlencode url=https://stripe.com \
  -o shot.webp
import requests
r = requests.get(
"https://api.screenshotneo.com/v1/shot",
params={"access_key": "YOUR_API_KEY", "url": "https://stripe.com"},
timeout=90,
)
r.raise_for_status()
open("shot.webp", "wb").write(r.content)const q = new URLSearchParams({
access_key: 'YOUR_API_KEY',
url: 'https://stripe.com'
});
const res = await fetch(`https://api.screenshotneo.com/v1/shot?${q}`);
if (!res.ok) throw new Error(`HTTP ${res.status}`);
await Bun.write('shot.webp', res);ScreenshotNeo accepts cookie and consent banners before capture and removes more than 60 known consent platforms, newsletter popups and chat widgets; each cleanup step can be turned off. Bot checks or CAPTCHAs, blank pages, timeouts, failed loads and cache hits are not billed, and response headers identify the page verdict and billing result. Its MCP server gives Claude, Cursor and other MCP clients take_screenshot, get_page_info and capture_pdf tools. The Free plan includes 1,000 screenshots per month with no card; paid plans start at $5 for 3,000 shots. Create a free ScreenshotNeo account.
9. FAQ
Does Puppeteer have a read-pixel method?
No. Puppeteer’s screenshot API returns encoded image bytes or base64. Decode the bytes with an image library before sampling.
Can clip draw a border?
No. It crops the capture. Draw a border in the page or add it in post-processing.
Should I use CSS or image post-processing for annotations?
Use CSS when the browser-rendered outline must follow live layout. Use post-processing when you want an annotation that cannot affect page layout and can be reproduced from saved coordinates.
Why do my coordinates work at one scale but not another?
DOM geometry is generally reported in CSS pixels, while the bitmap can contain device pixels. Fix the device scale factor or apply the scale when converting coordinates.
What format is best for pixel tests?
PNG is the safest default because it is lossless. If you use JPEG or WebP, define a comparison tolerance and keep the format constant.


