How to Remove Cookie Banners from Headless Chrome Screenshots
Dismiss a cookie banner before capturing a headless Chrome screenshot. Use Puppeteer for site-specific consent controls, or Chrome’s CLI for basic captures.

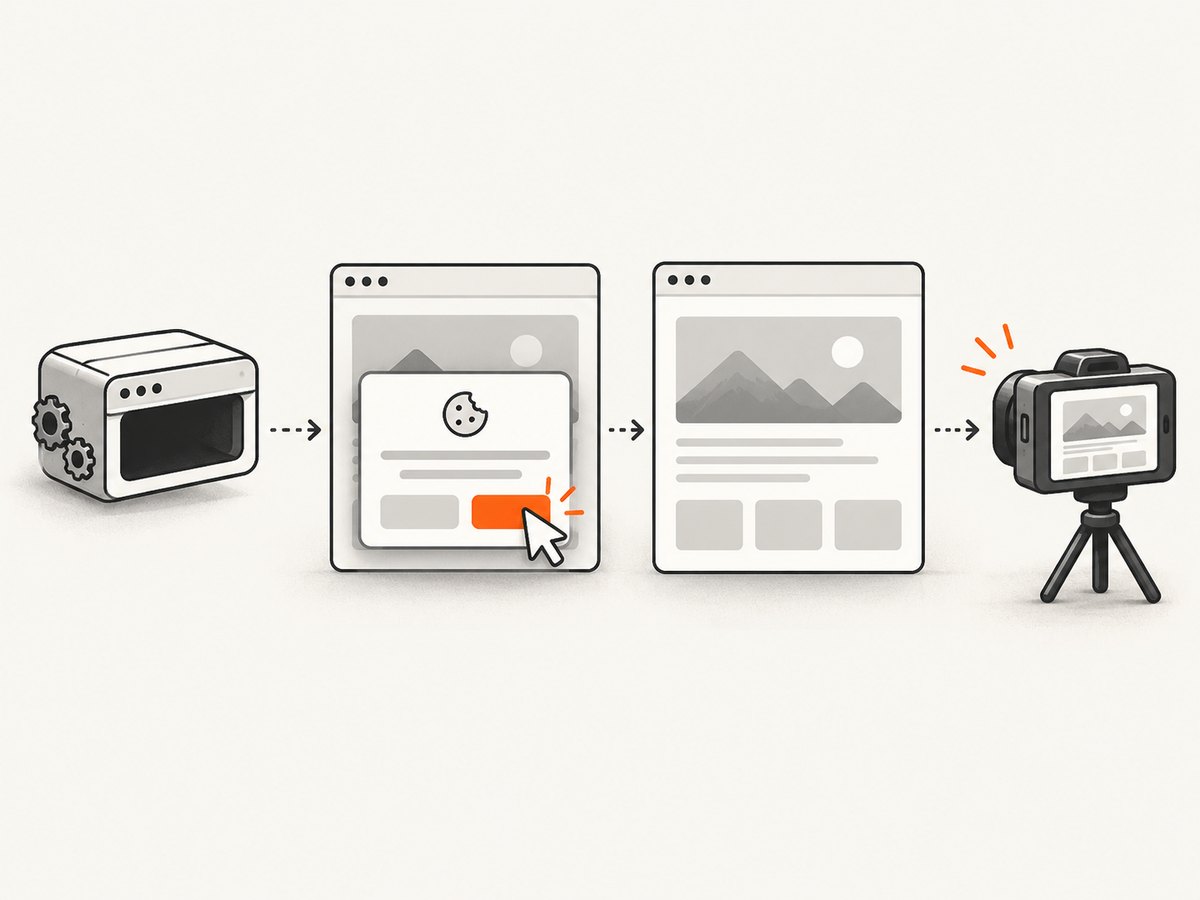
To remove a cookie banner from a headless Chrome screenshot, first load the page, identify its actual consent control, click that control if the capture should reflect a recorded choice, wait until the banner is hidden or removed, and then capture. Puppeteer is a practical way to automate those steps. There is no universal selector that dismisses every banner: controls, labels, frames, and resulting page state vary by site.
For a simple screenshot without interacting with the page, Chrome’s Headless command line can capture a fixed viewport. Its screenshot and timing flags do not identify or dismiss a consent banner. The Chrome Headless CLI reference documents the capture and timing options; Puppeteer provides browser interaction and screenshot APIs, as described in the Puppeteer overview.
1. Choose the right approach
| Approach | Use it when | Consent interaction |
|---|---|---|
| Chrome Headless CLI | You need a one-off screenshot of a page whose state is already suitable. | No built-in site-specific click step. |
| Puppeteer | You need to inspect a page, click a control, wait for a state change, and capture. | Yes; you supply the page-specific locator and expected state. |
| Chrome DevTools Protocol (CDP) | Your application already speaks the browser protocol and needs lower-level page or network commands. | Possible through browser automation; the protocol does not provide a universal banner-dismissal command. |
Decide what “remove” means for your task. If the screenshot should reflect a visitor accepting or rejecting cookies, click the corresponding visible button and confirm what happened. If you only hide the banner with CSS or injected JavaScript, the image may look cleaner, but that does not record the visitor’s consent choice. That distinction follows from the difference between interacting with a page and changing its rendered appearance; it is an implementation consideration, not legal advice.
2. Find the consent control and expected state
Open the target page in a browser and inspect the visible banner. Determine the exact button label, whether the control is inside an iframe, and what should change after clicking. “Accept all,” “Reject optional,” and “Manage preferences” can have different effects. Choose the control that matches the purpose of the capture.
- Fix the target URL, Chrome version, viewport, locale, and other relevant test context.
- Load the page and wait for the consent interface to appear. Prefer waiting for an observable element over guessing a fixed sleep.
- Identify a stable accessible name or selector for the intended control.
- Click it and wait for the banner to become hidden or detached.
- Check that the underlying page is in the expected state, then capture.
Selectors below are examples for a page whose button is actually named “Accept all.” They are not universal CMP selectors. Inspect each target and adapt the locator. If a page has multiple matching buttons, scope the locator to the banner or use a more specific accessible name.
3. Dismiss a banner with Puppeteer
The following Node.js script uses Puppeteer, waits for a button with an accessible name, clicks it, waits for the banner selector to disappear, and writes a screenshot. Install the dependency with npm install puppeteer. Puppeteer downloads a compatible browser as part of its standard installation; environments with a separately managed Chrome can configure an executable path.
// save as capture.js
const puppeteer = require('puppeteer');

(async () => {
  const browser = await puppeteer.launch({ headless: true });
  try {
    const page = await browser.newPage({
      viewport: { width: 1440, height: 1000 },
      deviceScaleFactor: 1,
    });

    await page.goto('https://example.com', {
      waitUntil: 'domcontentloaded',
      timeout: 30000,
    });

    // Replace both locators with controls observed on the target site.
    const banner = '[data-cookie-banner]';
    await page.waitForSelector(banner, { visible: true, timeout: 10000 });
    await page.getByRole('button', { name: 'Accept all', exact: true }).click();
    await page.waitForSelector(banner, { hidden: true, timeout: 10000 });

    await page.screenshot({ path: 'capture.png', fullPage: true });
  } finally {
    await browser.close();
  }
})();
Run it with node capture.js. The selector [data-cookie-banner] is a placeholder: replace it with a locator that exists on the page. If the banner is removed from the DOM after the click, Puppeteer’s hidden wait succeeds when the element is either hidden or no longer present. A clear timeout makes a changed site easier to diagnose than silently taking a screenshot with the banner still visible.
When the banner appears in an iframe
Page-level selectors do not cross iframe boundaries. First identify the frame, then locate and click its button. This example assumes the target iframe can be identified by its URL; replace the URL fragment and button name after inspecting the page.
const frame = page.frames().find(f => f.url().includes('consent-frame'));
if (!frame) throw new Error('Consent iframe not found');

const accept = frame.getByRole('button', {
  name: 'Accept all',
  exact: true,
});
await accept.waitFor({ state: 'visible', timeout: 10000 });
await accept.click();
await page.waitForFunction(() => {
  const el = document.querySelector('[data-cookie-banner]');
  return !el || getComputedStyle(el).visibility === 'hidden' ||
    getComputedStyle(el).display === 'none';
}, { timeout: 10000 });
The final wait above checks an element in the main page. If the banner lives entirely inside the frame, wait for its disappearance in that frame instead. For example, use await frame.waitForSelector('[data-cookie-banner]', { hidden: true, timeout: 10000 }) when that selector belongs to the frame document.
4. Basic capture with Chrome’s Headless CLI
For a fixed-viewport capture, Chrome supports --screenshot and --window-size. Run the command from the directory where you want the image saved; Chrome writes screenshot.png there.
chrome --headless --screenshot --window-size=1440,1000 https://example.comA bounded delay can help when a page needs time before capture:
chrome --headless --screenshot --window-size=1440,1000 --timeout=5000 https://example.com--timeout controls how long Chrome waits before capture. --virtual-time-budget advances time-dependent page code, such as timers, as if time passed. Neither flag clicks a button or knows that a consent panel should disappear. Use a programmable browser workflow when dismissal depends on interacting with the page. Chrome also documents --dump-dom, which outputs the DOM after parsing and script execution; this can help inspect the page’s rendered structure when debugging.
5. Use CDP when you need lower-level control
The Chrome DevTools Protocol exposes page screenshot capture and script injection capabilities, and its Network domain includes cookie operations. Those are lower-level building blocks, not a ready-made cookie-banner remover. Check the protocol version supported by the Chrome build you run: the DevTools Protocol reference is tip-of-tree documentation and can change.
Clearing cookies is not a general solution to a visible banner. Depending on how the site works, clearing consent state may make the banner appear again, while retaining state may suppress it. Confirm the target’s behavior. If your task is to create a fresh-consent scenario, use an isolated browser context or profile and then perform the intended visible choice. Avoid sharing a persistent profile between unrelated jobs unless shared state is deliberate.
6. Wait reliably and capture the intended page
Consent controls often appear after the initial document load. A navigation event such as domcontentloaded says the document was parsed; it does not guarantee that a banner, client-rendered content, or every image is ready. Use the narrowest meaningful wait for the page being captured.

- Wait for the banner: wait for its visible state before attempting a click.
- Wait for dismissal: wait for hidden or detached state after the click.
- Wait for important content: use a page-specific selector when the screenshot must include content rendered after consent.
- Use network idle carefully: analytics, chat, streaming, or long polling can keep network activity going. An explicit selector is often more predictable.
- Set bounded timeouts: navigation, banner appearance, click, and dismissal should each fail clearly within an appropriate limit.
If a site requires consent before displaying content, accepting or rejecting can change the page itself. Capture only after the resulting content reaches the state your use case expects. Full-page screenshots can also trigger lazy loading or include long pages with changing content; keep the viewport and capture mode fixed when comparing runs.
7. Troubleshooting common failures
| Symptom | Likely cause | Fix |
|---|---|---|
| Timeout waiting for the button | The accessible name or selector is wrong, the banner has not appeared, or it is inside a frame. | Inspect the rendered DOM and accessible name; wait for the banner first; locate the correct frame. |
| Click succeeds but banner remains | The selected control opens preferences, requires a second action, or did not match the intended button. | Verify the resulting state and choose the actual accept or reject control required for the workflow. |
| Screenshot still shows the overlay | The capture happens before the UI transition completes, or the wait checks the wrong element. | Wait for the observed banner to become hidden/detached; check whether the overlay uses another container. |
| Banner reappears on every run | The browser context is fresh, cookies or storage are cleared, or the site did not persist the choice. | Decide whether each run should start fresh or reuse state. Use an isolated context for reproducible fresh-state runs. |
| Banner is missing in automation but present manually | The browser profile, locale, geolocation, or prior consent state differs. | Align the relevant test context and inspect cookies/storage without assuming any one setting controls the banner. |
| CLI screenshot has the wrong dimensions | The viewport was omitted or the page content exceeds the requested viewport. | Set --window-size=width,height; use an automation screenshot option when you need full-page capture. |
| Chrome exits or cannot start in a container | The runtime lacks a compatible browser or required environment configuration. | Install/configure Chrome for that environment and review its launch error; keep browser versions aligned with the automation package. |
| Unexpected DOM when debugging | Raw HTML differs from the DOM after client scripts run. | Use Chrome’s --dump-dom or inspect the live page after navigation and rendering. |
8. Performance, repeatability, and cost
Launching a browser is usually the largest setup cost in a small capture script. For batches, reuse a browser process while giving independent jobs separate pages or contexts as appropriate. Close pages and the browser in cleanup paths so failures do not leave processes consuming memory. Avoid waiting for every network request to finish when a specific content or consent state is enough.
Reproducibility depends on more than the URL. Keep Chrome version, viewport, device scale factor, locale, timezone, storage state, and wait conditions stable. Page content can change between runs due to personalization, experiments, live data, or time-based UI. A successful script run only shows that the configured conditions completed; it does not prove a locator will work on every site.
Self-hosted capture costs include browser compute, memory, storage, and engineering time to maintain selectors and browser versions. Rate limits and access controls on target sites also matter. For recurring capture jobs, record the URL, run time, viewport, browser version, consent action, and failure stage so an intermittent result can be reproduced. Do not treat a fixed delay as a substitute for observing the state you need.
Or skip the browser setup
ScreenshotNeo is a website screenshot API and MCP server. Make one request for a screenshot; its documentation lists the request options and response details. For example, this cURL call captures a page:
curl -G "https://api.screenshotneo.com/v1/shot" -d access_key=YOUR_API_KEY --data-urlencode url=https://stripe.com -o shot.webpPython:
import requests

r = requests.get(
    "https://api.screenshotneo.com/v1/shot",
    params={"access_key": "YOUR_API_KEY", "url": "https://stripe.com"},
    timeout=90,
)
open("shot.webp", "wb").write(r.content)
Node.js:
const q = new URLSearchParams({ access_key: 'YOUR_API_KEY', url: 'https://stripe.com' });
const res = await fetch(`https://api.screenshotneo.com/v1/shot?${q}`);
if (!res.ok) throw new Error(`Screenshot request failed: ${res.status}`);
await Bun.write('shot.webp', new Uint8Array(await res.arrayBuffer()));
ScreenshotNeo removes cookie banners, popups, and chat widgets before the shot. Bot checks, blank pages, and failed loads are never billed. An MCP server lets AI agents take screenshots. The free plan includes 1,000 screenshots a month with no card; paid plans start at $5 for 3,000. Sign up for 1,000 free screenshots a month, with no card required.
Frequently asked questions
Can Chrome’s screenshot flag dismiss a cookie banner?
No. It captures the page; it does not infer which page control should be clicked. Use browser automation for a site-specific interaction.
Does deleting cookies make the banner disappear?
Not reliably. Cookie and storage behavior is site-dependent, and clearing consent state may cause the prompt to appear again.
Should I click accept or hide the banner with CSS?
For a capture that should reflect a user choice, activate the visible choice and verify the resulting state. CSS hiding changes appearance without recording that choice.
Why does my selector work on one website but not another?
Sites use different markup, labels, frames, and consent flows. Inspect each page and define its own locator and success condition.