How to Render a React Component in Puppeteer
Load a React app in Puppeteer, wait for the component to render, then inspect its DOM or capture a reliable screenshot.

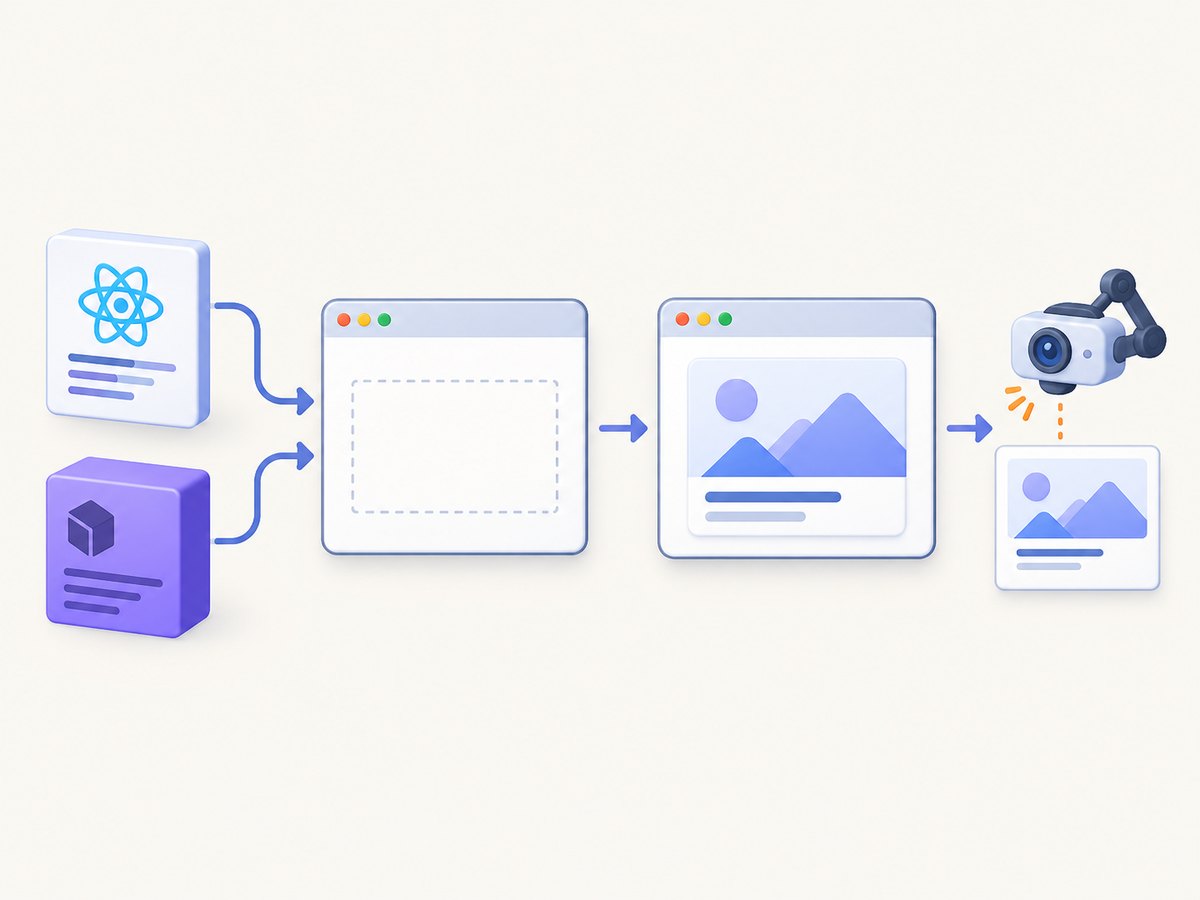
To render a React component in Puppeteer, open a browser page that loads your React code, mount the component into a DOM node with createRoot, wait for an app-specific readiness condition, then inspect or screenshot the page. Puppeteer controls the browser; it does not compile JSX or mount React for you. Your component must be part of a browser-ready bundle or otherwise executable by the page.
Use createRoot when the mount node is empty. If the page already contains HTML rendered by React on the server or at build time, attach React with hydrateRoot so the existing markup is preserved. This guide shows a complete local setup, a minimal self-contained page, server-rendered alternatives, reliable wait conditions, troubleshooting, and a hosted screenshot option.
1. Prepare a browser-ready React component
A React component is JavaScript, and JSX is a syntax that must be transformed before a browser can execute it. In a typical application, a development server or build tool produces browser-compatible JavaScript and serves an HTML document with a mount point. Puppeteer visits that page just as a user’s browser would.
For example, the page can contain <div id="root"></div>, and its application entry point can mount a component there. The essential client-side React pattern is:
import { createRoot } from 'react-dom/client';
import { ReportCard } from './ReportCard.js';

const container = document.getElementById('root');
if (!container) throw new Error('Missing #root mount node');

createRoot(container).render(<ReportCard />);
createRoot takes a browser DOM node; root.render displays a React node inside it. The DOM node must exist when you select it. React documents this client API in its createRoot reference.
2. Launch Puppeteer and wait for the component
Install Puppeteer in the project that will run the capture script, and make sure the React application is running at the URL you plan to visit. The following Node.js example uses ECMAScript modules. Replace the URL and readiness selector with values from your application.
import puppeteer from 'puppeteer';

const browser = await puppeteer.launch();
try {
  const page = await browser.newPage();
  const response = await page.goto('http://localhost:3000', {
    waitUntil: 'domcontentloaded',
  });

  if (response && response.status() >= 400) {
    throw new Error(`Application returned HTTP ${response.status()}`);
  }

  // Have the component or application expose this marker when it is ready.
  await page.waitForSelector('[data-testid="report-card"]');

  const renderedText = await page.$eval(
    '[data-testid="report-card"]',
    element => element.textContent?.trim() ?? '',
  );
  console.log(renderedText);

  await page.screenshot({ path: 'component.png' });
} finally {
  await browser.close();
}
The selector is an example. Choose an element that only appears when the component has rendered enough for your task. You can use a test ID, a stable CSS class, or a meaningful element. Puppeteer documents the launch, page, navigation, evaluation, selector, and screenshot methods in its getting-started guide and Page API reference.
Why not just wait for navigation?
Navigation completion does not prove that a client-rendered component is ready. The app may still be fetching data, loading modules, updating state, or waiting on fonts and images. Tie the wait to the output you need: a component selector, expected text, or an application-defined readiness signal. A fixed delay can sometimes mask a race, but it is brittle when load times vary.
For asynchronous content, the app can mark readiness explicitly after its data and render work are complete:
// In application code, after the component's required data is available:
document.documentElement.dataset.appReady = 'true';

// In Puppeteer:
await page.waitForFunction(
  () => document.documentElement.dataset.appReady === 'true',
);
Use an application signal only if you control the application. Otherwise, wait for a visible output that represents the state you need to capture.
3. Render a component from a self-contained HTML page
If you already have a complete browser-executable HTML document, Puppeteer can load it with page.setContent. This is useful for a small fixture or a test page. It does not make raw JSX executable: the page still needs React, React DOM, and browser-ready component code. The example below assumes the imports point to browser-accessible modules in your setup.
import puppeteer from 'puppeteer';

const html = `<!doctype html>
<html>
  <head>
    <meta charset="utf-8">
    <title>Component fixture</title>
  </head>
  <body>
    <div id="root"></div>
    <script type="module">
      import React from 'https://esm.sh/react';
      import { createRoot } from 'https://esm.sh/react-dom/client';

      function Greeting() {
        return React.createElement('h1', null, 'Hello from React');
      }

      createRoot(document.getElementById('root')).render(
        React.createElement(Greeting),
      );
    </script>
  </body>
</html>`;

const browser = await puppeteer.launch();
try {
  const page = await browser.newPage();
  await page.setContent(html, { waitUntil: 'domcontentloaded' });
  await page.waitForSelector('#root h1');
  await page.screenshot({ path: 'greeting.png' });
} finally {
  await browser.close();
}
This example relies on the page being able to fetch the module imports. For repeatable builds, serve locally bundled assets instead of depending on a third-party module host. Also note that setContent loads a document string; use goto when testing the application as served at its real URL. Puppeteer lists both methods in its Page API.
4. Choose client rendering, hydration, or static HTML
| What the page contains | React approach | What to watch for |
|---|---|---|
| An empty mount node | createRoot(node).render(<App />) |
The browser bundle must load and call render. |
| Existing HTML produced by React | hydrateRoot(node, <App />) |
Initial client output should match the existing markup. |
| HTML needed only as static output | renderToStaticMarkup |
The result is not hydratable or interactive. |
| Server-generated HTML that becomes interactive | Render on the server, then hydrate in the browser | Use the framework’s supported server rendering and hydration flow. |
Do not use createRoot to attach to existing React-generated HTML: React says its first render clears the content inside that root. Use hydrateRoot for server-rendered markup. If all you need is server-produced HTML, React offers renderToString, but it does not stream or wait for data and has limited Suspense behavior. A suspended component produces its nearest fallback immediately. See React’s hydrateRoot, renderToString, and renderToStaticMarkup references.
For a screenshot of an interactive browser component, server rendering is not required: load the client app and wait for it. For server rendering workflows that need streaming or data-aware rendering, use a supported streaming or prerender API for your runtime rather than assuming renderToString waits for suspended work.
5. Capture one component or the whole page
By default, page.screenshot captures the viewport. To capture the complete document, use the full-page option. To focus on one component, locate its element and capture that element. The element must exist before you call the screenshot method.
const card = await page.$('[data-testid="report-card"]');
if (!card) throw new Error('Report card did not render');
await card.screenshot({ path: 'report-card.png' });

await page.screenshot({
  path: 'full-page.png',
  fullPage: true,
});
Choose the smallest capture area that answers your use case. Element screenshots are convenient for component previews and visual checks; full-page captures include content beyond the current viewport and can take longer on long pages. Puppeteer’s screenshot options are documented in its Page API.
6. Control viewport, device scale, and page state
Set the viewport before navigation if layout depends on screen size. The device scale factor affects pixel density, which matters for visual comparisons and image dimensions.
await page.setViewport({
  width: 1440,
  height: 1000,
  deviceScaleFactor: 1,
});
await page.goto('http://localhost:3000');
For a particular component state, drive the page into that state before capture. This might mean selecting a tab, filling a field, or waiting for the expected text. Keep the state setup explicit and deterministic so repeated captures represent the same component conditions. If remote assets are part of the design, allow the required images and fonts to finish loading according to your app’s needs rather than assuming the initial DOM is visually complete.
7. Or skip the browser setup
If you need a screenshot of a publicly reachable page rather than a local component fixture, ScreenshotNeo provides a website screenshot API and MCP server. Its API returns an image or PDF from one GET request. See the ScreenshotNeo API documentation for request options.

curl -G "https://api.screenshotneo.com/v1/shot" \
  -d access_key=YOUR_API_KEY \
  --data-urlencode url=https://stripe.com \
  -o shot.webp
Python:
import requests

r = requests.get(
    "https://api.screenshotneo.com/v1/shot",
    params={"access_key": "YOUR_API_KEY", "url": "https://stripe.com"},
    timeout=90,
)
open("shot.webp", "wb").write(r.content)
Node.js:
const q = new URLSearchParams({
  access_key: 'YOUR_API_KEY',
  url: 'https://stripe.com',
});
const res = await fetch(`https://api.screenshotneo.com/v1/shot?${q}`);
if (!res.ok) throw new Error(`Screenshot request failed: ${res.status}`);
await Bun.write('shot.webp', new Uint8Array(await res.arrayBuffer()));
ScreenshotNeo removes cookie banners, newsletter popups, and chat widgets before the shot. Bot checks, blank pages, and failed loads are never billed. Its MCP server lets AI agents take screenshots. The free plan includes 1,000 screenshots a month with no card; paid plans start at $5 for 3,000. The API also supports full-page and element captures, custom CSS and JavaScript, waiting conditions, and more. These hosted captures are for pages the API can reach; a private localhost component still needs to be exposed through an appropriate reachable environment or captured with a local browser.
Create a free ScreenshotNeo account for 1,000 screenshots a month with no card.
8. Troubleshooting
| Symptom | Likely cause | Fix |
|---|---|---|
| Blank screenshot | The app bundle did not load, the mount node is missing, or no code called root.render. |
Check the page’s console and network activity, confirm the mount element exists, and ensure the browser entry point runs. |
| Existing content disappears | createRoot was called on a node containing server-rendered React HTML. |
Use hydrateRoot to attach React to existing markup. |
| Invalid root or null target | The selector did not match a DOM node when React created the root. | Check the selector and script timing; ensure the mount node is present before calling createRoot. |
| Only a Suspense fallback appears in server output | renderToString emits the nearest fallback when content suspends. |
Use a supported streaming or prerender approach when the server output must include resolved async content. |
| Screenshot is missing component content | The capture ran before client rendering or data work finished. | Wait for a component selector, expected text, or app readiness signal, then capture. |
goto appears successful for an error page |
A navigation can resolve even when the HTTP response status is 404 or 500. | Inspect the response returned by goto and handle statuses your workflow considers failures. |
| Module import fails in a fixture | The browser cannot resolve the import or fetch its source. | Serve a browser-compatible bundle from your app or use a supported local asset path. |
Puppeteer’s documentation notes that in headless shell mode, valid HTTP error statuses such as 404 and 500 do not necessarily cause goto to throw. Checking response.status() makes the distinction explicit. See Page.goto.
9. Performance, reliability, and cost
- Wait for the right thing. A selector or readiness signal avoids both premature captures and unnecessary waiting. The correct condition depends on the application.
- Keep browser lifetime intentional. Reuse a browser process for a batch of pages when your runner architecture permits it, and close pages and browsers in cleanup paths. For a one-off script, the
finallypattern prevents a failed capture from leaving the browser open. - Control capture dimensions. Viewport size, device scale factor, and full-page mode affect the resulting image dimensions and work. Capture only the required area where possible.
- Make the page deterministic. Use stable input data and explicit UI state. External content and timing can change between captures, so tests should wait on the state they actually compare.
- Handle failures as separate cases. Distinguish navigation errors, HTTP error responses, missing selectors, and application-level readiness timeouts. These indicate different fixes.
- Account for browser infrastructure. A local Puppeteer workflow requires a compatible browser runtime and the resources to run it. A hosted API removes the need to configure that browser for reachable URLs, with pricing determined by the chosen service and plan.
Current Puppeteer Page documentation identifies version 25.12.0. Check the documentation that matches the installed package when applying API details, because package versions can differ. React announced version 19.3 on September 9, 2026; its browser API for special cases is not needed for the ordinary client-side mounting flow in this guide.
10. FAQ
Can Puppeteer render JSX directly?
No. JSX must be transformed and served as browser-executable JavaScript. Puppeteer evaluates code in a browser page; it is not a JSX compiler.
Should I use renderToString before taking a screenshot?
Usually not for a client-rendered app. Let the browser load the app and mount it. Use server rendering when you specifically need server-produced markup, and account for the limitations of the server API you choose.
Can I screenshot a component without navigating to an app URL?
Yes, if you supply a complete HTML document with browser-accessible React and component code using page.setContent. For a real application, navigating to its served URL is generally closer to its actual runtime.
How do I know which Puppeteer options are available?
Consult the API reference for the version installed in your project. Options and behavior may change between releases.


