How to Scrape Websites With Node-Unblocker
Build an Express proxy with Node-Unblocker, rewrite pages safely, debug failures, and know when a managed screenshot API is a better fit.
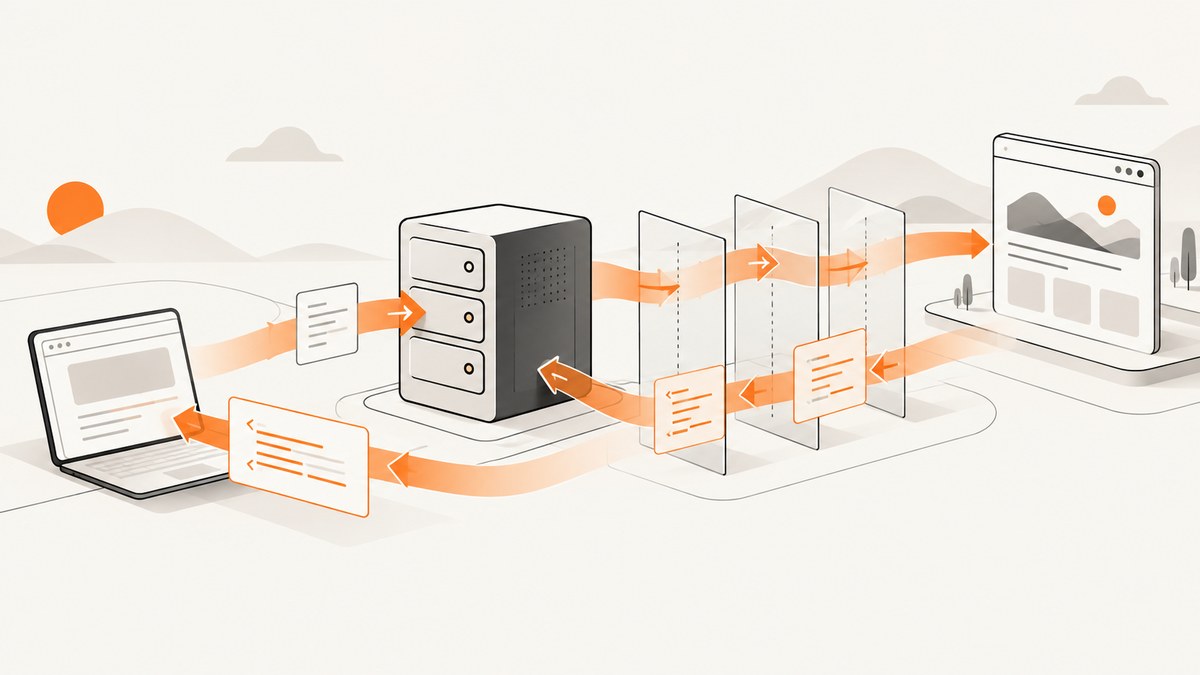
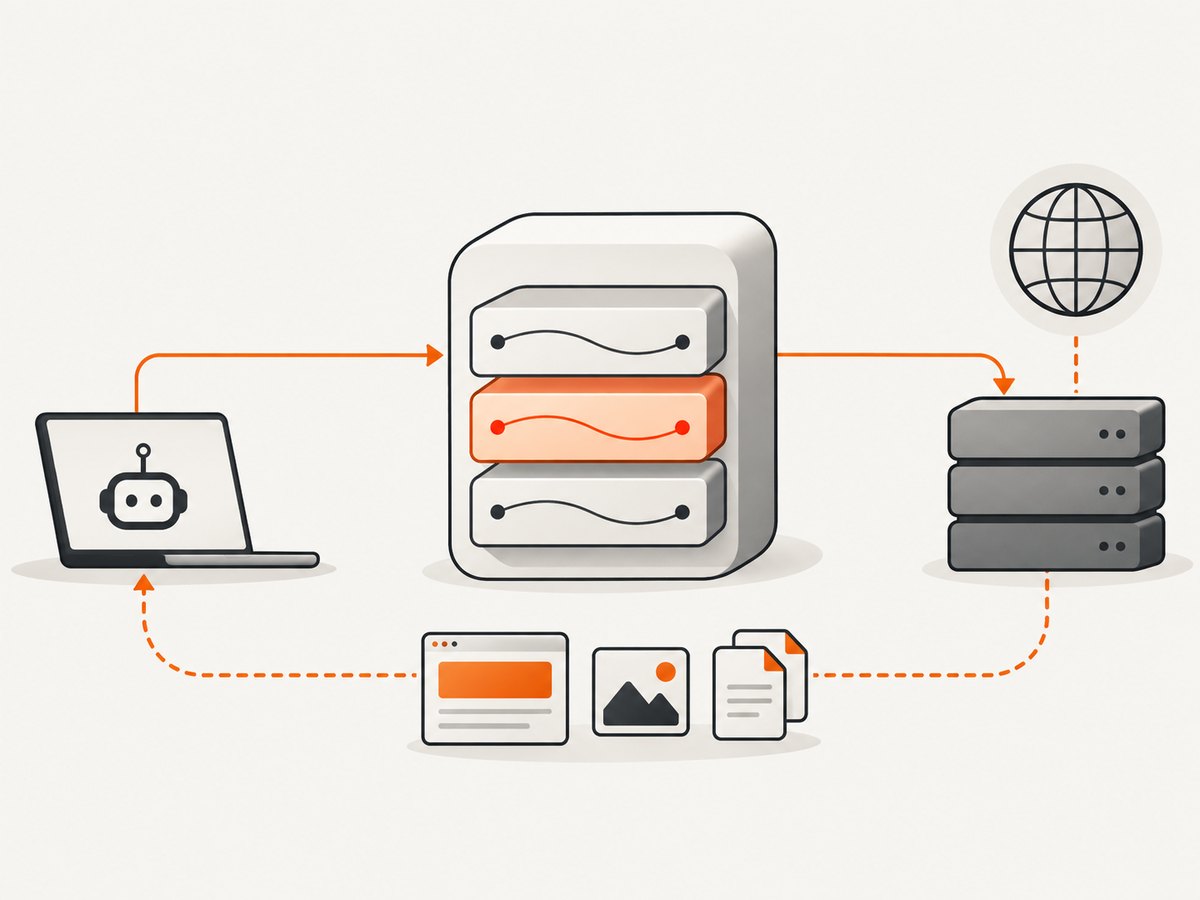
Direct answer: install the unblocker npm package, mount its Express middleware near the beginning of your stack under a dedicated prefix, and attach the documented WebSocket upgrade handler. Requests sent to that prefix are proxied and rewritten on the fly, so many relative links, cookies, AJAX calls, and WebSockets continue to work.
Node-Unblocker is a JavaScript web proxy similar to CGIProxy, PHProxy, and Glype. It is useful when you need an application-controlled proxy layer for compatible pages. It is not a browser automation engine and it is not a guaranteed way to defeat CAPTCHA, browser fingerprinting, or JavaScript challenge systems. The project documentation specifically lists OAuth forms, postMessage, Roblox, Discord, YouTube, and Instagram as cases that do not work out of the box.
What Node-Unblocker does
The package processes responses on the fly instead of buffering an entire page before sending it to the client. It changes URLs only when required, which helps relative links keep working through the proxy. Cookies are proxied by adjusting their path, and built-in client scripts route XMLHttpRequests and WebSocket traffic through the proxy.
The npm package is published as unblocker, currently shown as version 2.3.1 in the indexed package listing, and is licensed under AGPL-3.0. Read the npm documentation and the project wiki before deploying it. The package listing also mentions commercial licensing and support from the copyright holder.
1. Create a minimal Express proxy
Use a current Node.js release with Express and Unblocker installed:
mkdir node-unblocker-scraper
cd node-unblocker-scraper
npm init -y
npm install express unblocker
Create server.js:
const express = require('express');
const Unblocker = require('unblocker');

const app = express();
const unblocker = new Unblocker({ prefix: '/proxy/' });

// Keep Unblocker near the beginning of the middleware stack.
app.use(unblocker);

const server = app.listen(process.env.PORT || 8080, () => {
  console.log('Proxy listening on http://localhost:' + (process.env.PORT || 8080));
});

// Required for proxied WebSocket upgrades.
server.on('upgrade', unblocker.onUpgrade);
Start it with:
node server.js
Open a target through the dedicated prefix. The exact URL parser can vary by installed version, so verify the form against the version you deploy. The documented convention is:
http://localhost:8080/proxy/https://example.com/
Mounting the middleware early matters. A later body parser, authentication layer, or catch-all route can consume or rewrite a request before Unblocker sees it. Keep your own application routes after app.use(unblocker) unless you intentionally need a route to intercept proxy traffic.
2. Request a proxied page from Node.js
Once the server is running, another Node process can fetch the proxy URL. This example uses the built-in fetch available in modern Node.js:
const target = 'https://example.com/';
const proxyUrl = 'http://localhost:8080/proxy/' + target;

const response = await fetch(proxyUrl);
if (!response.ok) {
  throw new Error(`Proxy returned ${response.status}`);
}

const html = await response.text();
console.log(html.slice(0, 500));
For a repeatable scraper, add a timeout with AbortController, record the final status and content type, and store the target URL alongside the result. Do not assume every successful HTTP response contains HTML: assets, redirects, JSON endpoints, and access-denied pages can all pass through the proxy.
3. Test the proxy with cURL
cURL is useful for separating proxy behavior from your scraper code:
curl -v "http://localhost:8080/proxy/https://example.com/" -o page.html
The verbose output shows connection details and response headers. Inspect page.html to confirm that links and forms point through the proxy when rewriting is required. For a remote target that redirects, follow redirects in your client and check where the final response came from.
4. Understand the middleware options
Unblocker exposes configuration points for applications that need more control:
| Option | Purpose | Practical use |
|---|---|---|
prefix |
URL path used to identify proxied requests. | Choose a dedicated path such as /proxy/. |
host |
Controls host-related proxy behavior. | Use when deployment requires an explicit public host. |
requestMiddleware |
Adjusts outbound requests. | Add application-specific request handling before the target is fetched. |
responseMiddleware |
Transforms or inspects responses. | Collect status, headers, or content for your scraper. |
standardMiddleware |
Controls the built-in middleware set. | Leave enabled unless you have a specific replacement design. |
clientScripts |
Controls injected browser-side helpers. | Keep the defaults when proxied pages use AJAX or WebSockets. |
processContentTypes |
Controls which content types are rewritten. | Limit processing when serving binary or custom content. |
The standard middleware handles URL rewriting and cookie path adjustments. Disabling it with standardMiddleware is an advanced choice: replacing it means you also own the behavior needed for links, cookies, client scripts, and other proxy details.
5. Add request and response hooks
Use hooks for application behavior rather than editing the package. The exact callback signature should be checked against the version installed in your project. A typical structure is:
const unblocker = new Unblocker({
  prefix: '/proxy/',
  requestMiddleware: [
    (request) => {
      // Inspect or adjust the outbound request here.
      return request;
    }
  ],
  responseMiddleware: [
    (response) => {
      // Inspect or transform the proxied response here.
      return response;
    }
  ]
});
Keep hooks small and observable. A request hook is the right place for controlled headers or logging. A response hook is the right place to collect status and content metadata. Avoid blindly changing every URL or header: proxy rewriting depends on the target document and content type.
6. Scraping workflow and data handling
- Validate the target. Accept only the protocols and hosts your application is intended to proxy. Reject malformed URLs before constructing the proxy path.
- Fetch through the prefix. Request the proxied URL with a finite timeout and a bounded response size.
- Check metadata. Record status, content type, redirects, and whether the response is an error page.
- Parse only the content you need. Extract headings, links, or structured data after confirming that the response is HTML.
- Persist provenance. Save the original target, retrieval time, status, and parser version with extracted data.
- Retry carefully. Retry transient network failures with backoff, but do not loop on deterministic 4xx responses or challenge pages.
Node-Unblocker is a transport and rewriting layer. It does not promise that a target’s JavaScript application will render as it does in a full browser. If the data appears only after browser execution, a browser automation tool or a page-rendering API is usually a better fit.
7. What works, and what does not
The package documentation says standard login forms and most AJAX content work well. OAuth login forms and flows that rely on postMessage are unlikely to work out of the box. Roblox, Discord, YouTube, and Instagram are named as advanced sites that currently do not work.
That list is a useful boundary for planning. As an inference from those documented limitations, Node-Unblocker should not be presented as a universal anti-bot bypass. CAPTCHA challenges, browser-fingerprint checks, and JavaScript challenge systems can require a real browser session, specialized infrastructure, or cooperation from the site owner.
8. Debugging and troubleshooting
| Symptom | Likely cause | Fix |
|---|---|---|
| Every request returns your app’s 404. | Unblocker is mounted after a catch-all route or under a different prefix. | Mount it near the start of the stack and use the same prefix in the URL. |
| Relative links leave the proxy. | Built-in standard middleware was disabled or content processing excludes the response type. | Keep standard middleware enabled and review processContentTypes. |
| WebSocket features fail. | The HTTP middleware is mounted, but the upgrade handler is missing. | Attach server.on('upgrade', unblocker.onUpgrade). |
| Endless redirects appear behind Nginx. | Nginx slash normalization changes the proxy path. | Set merge_slashes off in the relevant Nginx configuration, as recommended by the package troubleshooting notes. |
| Login succeeds but the session disappears. | Cookies are scoped to the target path or the application depends on unsupported OAuth behavior. | Keep the standard cookie middleware enabled and test a non-OAuth flow separately. |
| HTML is blank or incomplete. | The page depends on browser execution, a challenge, or a streamed response your parser mishandles. | Inspect status and content type, save the raw response, and use browser automation or a rendering service when required. |
| Requests hang. | Target connection, redirect, or response streaming never completes. | Set client timeouts, cap response size, and log the target and phase that stalled. |
Enable diagnostics while reproducing a failure:
DEBUG=unblocker:* node server.js
For middleware-only diagnostics:
DEBUG=unblocker:middleware node server.js
To exclude middleware diagnostics from a broader debug setting:
DEBUG=*,-unblocker:middleware node server.js
9. Performance, reliability, and deployment
- Streaming: because Unblocker processes data on the fly, memory use can be lower than buffering every complete response. Your own scraper can still exhaust memory if it accumulates many pages at once.
- Concurrency: bound simultaneous targets per worker. Each request consumes sockets, bandwidth, and parser resources.
- Timeouts: use separate limits for connection, headers, and total response time where your HTTP client supports them.
- Caching: cache only where the target’s terms and freshness requirements allow it. Never cache private responses shared across users.
- Observability: log target host, status, content type, elapsed time, response size, and failure category. Avoid logging credentials or session cookies.
- Reverse proxying: test URL paths and WebSocket upgrades through Nginx or another front proxy before production traffic.
- Cost: self-hosting avoids a per-request proxy vendor bill but leaves you responsible for servers, egress, retries, maintenance, and target compatibility.
Respect target-site terms, robots directives, privacy rules, and applicable law. Review AGPL-3.0 obligations before embedding or modifying Unblocker in a hosted service.
Or skip the browser setup
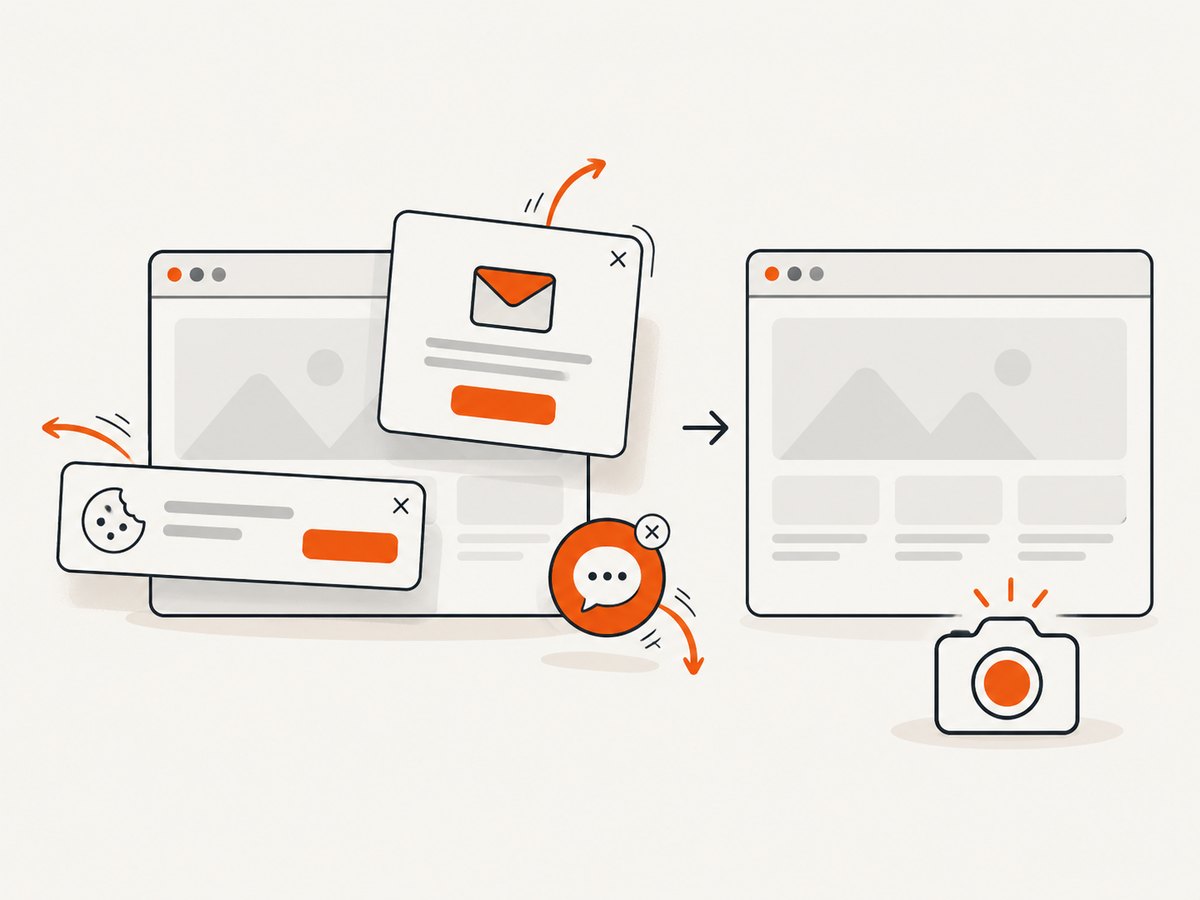
If your goal is a clean screenshot or PDF rather than raw HTML extraction, ScreenshotNeo provides a single GET request to capture a URL. Its capture flow accepts cookie and consent banners, removes more than 60 known consent platforms plus newsletter popups and chat widgets, and lets you turn each cleanup step off. Bot checks, blank pages, timeouts, failed loads, and cache hits are not billed; response headers identify the page verdict and billing result.
See the ScreenshotNeo API documentation for all options. A minimal cURL request:
curl -G "https://api.screenshotneo.com/v1/shot" -d access_key=YOUR_API_KEY --data-urlencode url=https://stripe.com -o shot.webp
Python:
import requests

r = requests.get(
    "https://api.screenshotneo.com/v1/shot",
    params={"access_key": "YOUR_API_KEY", "url": "https://stripe.com"},
    timeout=90,
)
r.raise_for_status()
open("shot.webp", "wb").write(r.content)
Node.js:
const q = new URLSearchParams({ access_key: 'YOUR_API_KEY', url: 'https://stripe.com' });
const res = await fetch(`https://api.screenshotneo.com/v1/shot?${q}`);
if (!res.ok) throw new Error(`Screenshot failed: ${res.status}`);
require('fs').writeFileSync('shot.webp', Buffer.from(await res.arrayBuffer()));
ScreenshotNeo also supports full-page captures with lazy images, CSS element capture, dark mode, device presets, custom viewports, retina scale, PDF paper settings, custom CSS and JavaScript, click actions, selector waits, network-idle waits, blocked resources, custom headers and cookies, timezone and geolocation, transparent backgrounds, resizing, configurable caching, signed image links, asynchronous jobs with signed webhooks, bulk capture for up to 100 URLs, usage data, and an OpenAPI specification. An MCP server exposes take_screenshot, get_page_info, and capture_pdf for Claude, Cursor, and other MCP clients.
There are 1,000 screenshots per month free with no card. Paid plans start at $5 for 3,000 shots; yearly billing gives two months free. Create a free ScreenshotNeo account.
FAQ
Does Node-Unblocker render JavaScript?
It proxies and rewrites responses and includes client scripts for browser-side requests, but it is not a full browser renderer. Pages whose data appears only after complex JavaScript execution may not work.
Can it bypass CAPTCHA?
There is no documented guarantee for CAPTCHA or sophisticated anti-bot systems. Treat it as a proxy and rewriting layer, not a universal bypass.
Why is the WebSocket hook necessary?
HTTP middleware handles ordinary requests, while WebSocket connections use the server’s upgrade event. The documented onUpgrade handler lets compatible WebSocket traffic pass through the proxy.
What license does Unblocker use?
The npm listing identifies the project as AGPL-3.0 and mentions commercial licensing and support. Review the license with your deployment model before shipping.
When should I use a managed capture API?
Use one when you need rendered screenshots or PDFs, repeatable cleanup of consent UI, signed delivery links, bulk jobs, or an agent-facing MCP interface without operating the browser and proxy stack yourself.


