How to Select Elements for Website Screenshots
Select and capture the right website element with Chrome DevTools, Firefox Inspector, CSS selectors, XPath, and automation options.

To select an element for a website screenshot, use your browser’s developer tools to pick the DOM node that contains the complete visual component, then capture that node. In Chrome, activate Inspect mode, hover and click the component, then right-click the selected node and choose its screenshot command. In Firefox, select the node in Inspector and choose Screenshot Node. If you need repeatable captures, use a CSS selector with Firefox’s :screenshot helper or a screenshot API that accepts an element selector.
The key is choosing the right boundary. Select the smallest node that includes the background, border, and text you need. A screenshot of a child heading alone may omit the card or button that gives the text its context.
1. Choose the component boundary before capturing
Decide what the screenshot needs to explain: a card, navigation item, chart, form control, error message, or another complete component. The correct target is usually a single DOM element whose rendered box includes all the visible parts that belong together.

- Include: the visible background, border, padding, labels, icons, and any related text needed to understand the component.
- Exclude: unrelated page sections, browser chrome, and neighboring components that do not help explain the target.
- Check the state: if the screenshot documents a hover, focus, expanded, or error state, make sure that state is active before capture.
A DOM hierarchy does not always match the visual grouping. A card’s title, image, and button may be separate children of a wrapper. Capturing the title node alone will not show the full card; selecting a broad page container may include far too much. Use the browser’s highlight overlay and its dimensions to verify the box rather than guessing from the markup.
2. Select and screenshot an element in Chrome
- Open the page you want to capture in Chrome.
- Open DevTools with F12 or Ctrl+Shift+I on Windows/Linux, or Cmd+Option+I on macOS.
- Activate the element picker (Inspect mode) with Ctrl+Shift+C on Windows/Linux, or Cmd+Shift+C on macOS. Chrome’s picker lets you hover over page elements and view style and accessibility information. [Chrome DevTools: Inspect mode](https://developer.chrome.com/docs/devtools/overview/#inspect).
- Move the pointer over the desired component. Watch the highlight outline and its dimensions. Click when the outline covers the full component.
- In the Elements panel, verify that the selected node is the intended wrapper. If necessary, move up or down the DOM tree and check the highlight again.
- Right-click the selected node and choose the node screenshot command. Chrome saves a screenshot of that node rather than the full page. [Chrome DevTools: capture a node screenshot](https://developer.chrome.com/docs/devtools/screenshot/).
Chrome’s picker tooltip can report dimensions, background and text colors, font properties, padding, and margin. It can also expose accessibility details such as the accessible name, role, and keyboard-focusability. Those details help confirm that you selected the control users actually interact with, especially when the visual target is made of nested elements. [Chrome DevTools: inspect element details](https://developer.chrome.com/docs/devtools/accessibility/reference/).
When clicking the page is difficult
Open the Elements panel and use its search. Chrome supports searching for visible text, a CSS selector, or XPath. This is useful when an element is small, covered by another layer, or hard to target with the pointer. Search locates a node; still inspect its highlight before capturing to make sure the match has the right boundary. [Chrome DevTools: search the DOM](https://developer.chrome.com/docs/devtools/dom/).
3. Select and screenshot an element in Firefox
- Open Firefox Developer Tools with F12 or Ctrl+Shift+I on Windows/Linux, or Cmd+Option+I on macOS.
- Open the Inspector and activate its node picker.
- Hover over the page and click the desired component. Confirm the selected node’s highlight includes the whole visual unit.
- Right-click the node in the Inspector’s HTML pane and choose Screenshot Node. Firefox documents this context-menu method for capturing one page element. [Firefox Source Docs: screenshot a node](https://firefox-source-docs.mozilla.org/devtools-user/page_inspector/how_to/examine_and_edit_html/index.html#taking-screenshots).
Firefox also provides the :screenshot helper for repeatable captures. It accepts a CSS selector and supports a delay, device-pixel-ratio setting, and output filename. For example, in the Web Console:
:screenshot --selector "#pricing-card" --delay 1 --dpr 2 pricing-card.pngReplace #pricing-card with a selector that identifies the target on the current page. The delay gives the page time to settle before capture, while --dpr 2 requests a higher device-pixel ratio. Use the documented Firefox syntax and options for your installed version. [Firefox Source Docs: screenshot command](https://firefox-source-docs.mozilla.org/devtools-user/web_console/helpers/index.html#screenshot).
4. Find and validate a CSS selector or XPath
A selector is a locator, not a guarantee that the matched element is the right screenshot boundary. Validate both that it matches the intended node and that the rendered node contains the complete component.
CSS selector examples
/* A unique ID */
#pricing-card

/* A class, if it identifies one component */
.product-card.featured

/* A button inside a specific component */
#checkout-panel button.primary
Prefer stable IDs or meaningful attributes when you control the page. Classes used only for styling can change during a redesign, and a class shared by many repeated cards may match more than one element. If a selector is broad, narrow it with a parent or a more specific attribute.
XPath examples
//*[@id='pricing-card']
//button[normalize-space()='Continue']
XPath can be handy when the target is easier to identify by text or DOM relationships. Text-based matches can become ambiguous when the same label appears in multiple places, or brittle when copy changes. Chrome’s Elements search accepts XPath as well as CSS selectors and text. Inspect the matched node and confirm its visual outline before taking the screenshot. [Chrome DevTools: search the DOM](https://developer.chrome.com/docs/devtools/dom/).
5. Automate a selected-element capture
For one-off documentation, browser DevTools are often enough. For recurring reports, visual checks, or generated documentation, automate the same sequence: open the page, wait for the target to be ready, locate the element, and capture its bounding box or element handle. Here is a runnable Playwright example for Node.js that saves a single element as a PNG.
import { chromium } from 'playwright';

const url = process.argv[2] ?? 'https://example.com';
const selector = process.argv[3] ?? 'h1';

const browser = await chromium.launch({ headless: true });
try {
  const page = await browser.newPage({ viewport: { width: 1280, height: 900 } });
  await page.goto(url, { waitUntil: 'domcontentloaded', timeout: 30_000 });
  const target = page.locator(selector).first();
  await target.waitFor({ state: 'visible', timeout: 15_000 });
  await target.screenshot({ path: 'element.png', animations: 'disabled' });
  console.log(`Saved ${selector} from ${url} to element.png`);
} finally {
  await browser.close();
}
Install Playwright and its browser before running the script:
npm install playwright
npx playwright install chromium
node capture-element.mjs https://example.com "main h1"
This captures the first visible match. If repeated selectors are expected, choose the intended match explicitly rather than relying on .first(). For dynamic pages, wait for a meaningful state or selector instead of assuming navigation completion means the component is ready. Avoid capturing sensitive authenticated pages into shared build artifacts.
6. Decide between element, viewport, and full-page capture
| Capture type | Use it when | Check before capture |
|---|---|---|
| Element | You need one component without surrounding page content. | The selected box includes all required visible context. |
| Viewport | You need to show how a component sits in the current layout. | Viewport dimensions, scroll position, and overlays are intentional. |
| Full page | You need the entire document, including below-the-fold sections. | Lazy content is loaded and sticky or fixed elements behave as expected. |
Element screenshots are compact and focused, but can remove useful context. A screenshot of a button by itself may not show which form it submits. Conversely, a full-page shot can make a small control unreadable. Match the capture area to the question the image should answer.
7. Make captures consistent and reliable
- Wait for the target: ensure it exists and is visible before capture. A fixed delay can help with known animation timing, but waiting for a selector or application state is usually more robust.
- Set the viewport: responsive layouts can move, resize, or replace components at different widths. Record the viewport used for comparisons.
- Stabilize visual state: disable animations when supported, dismiss transient tooltips, and use a consistent scroll position.
- Check fonts and images: late-loading assets can shift a component after it first appears. Wait for the content that affects its size and appearance.
- Choose pixel density deliberately: a higher device-pixel ratio increases image dimensions and file size. Use it when sharpness matters, and keep it consistent across comparison captures.
- Use robust locators: prefer a stable ID, accessible role, or application-owned test attribute over a deeply nested chain of styling classes.
- Review the result: confirm the saved image contains the expected state and is not clipped, blank, or captured before layout settles.
Repeated captures can fail for reasons that are not selector errors: authentication may expire, a consent dialog may cover the target, a bot check may intervene, or a network resource may never finish. Treat page readiness and capture success as separate checks.
8. Troubleshoot common element screenshot problems
| Symptom | Likely cause | Fix |
|---|---|---|
| The screenshot contains only text, not the card. | The selected node is a child rather than the visual wrapper. | Move to the parent node and check its highlight and dimensions. |
| The wrong repeated item was captured. | The selector matches multiple nodes. | Scope the selector to a unique parent or identify the intended match by index or content. |
| The selector finds nothing. | The page has not rendered the element, the selector is misspelled, or content is inside a frame or shadow root. | Wait for page state, verify the selector in DevTools, and inspect the frame or component boundary. |
| The element is clipped. | The target has overflow clipping, a fixed size, or a child extending outside its box. | Capture an ancestor that includes the visible content, or adjust the page’s styles before capture if you control it. |
| The image is blank or incomplete. | Capture happened before rendering, a bot check appeared, or the target is hidden. | Wait for visibility and required content; inspect the live page and check whether the target is covered or in a different state. |
| The output changes between runs. | Viewport, fonts, animation, data, or network timing varies. | Pin the viewport and state, wait for stable content, and disable animations where possible. |
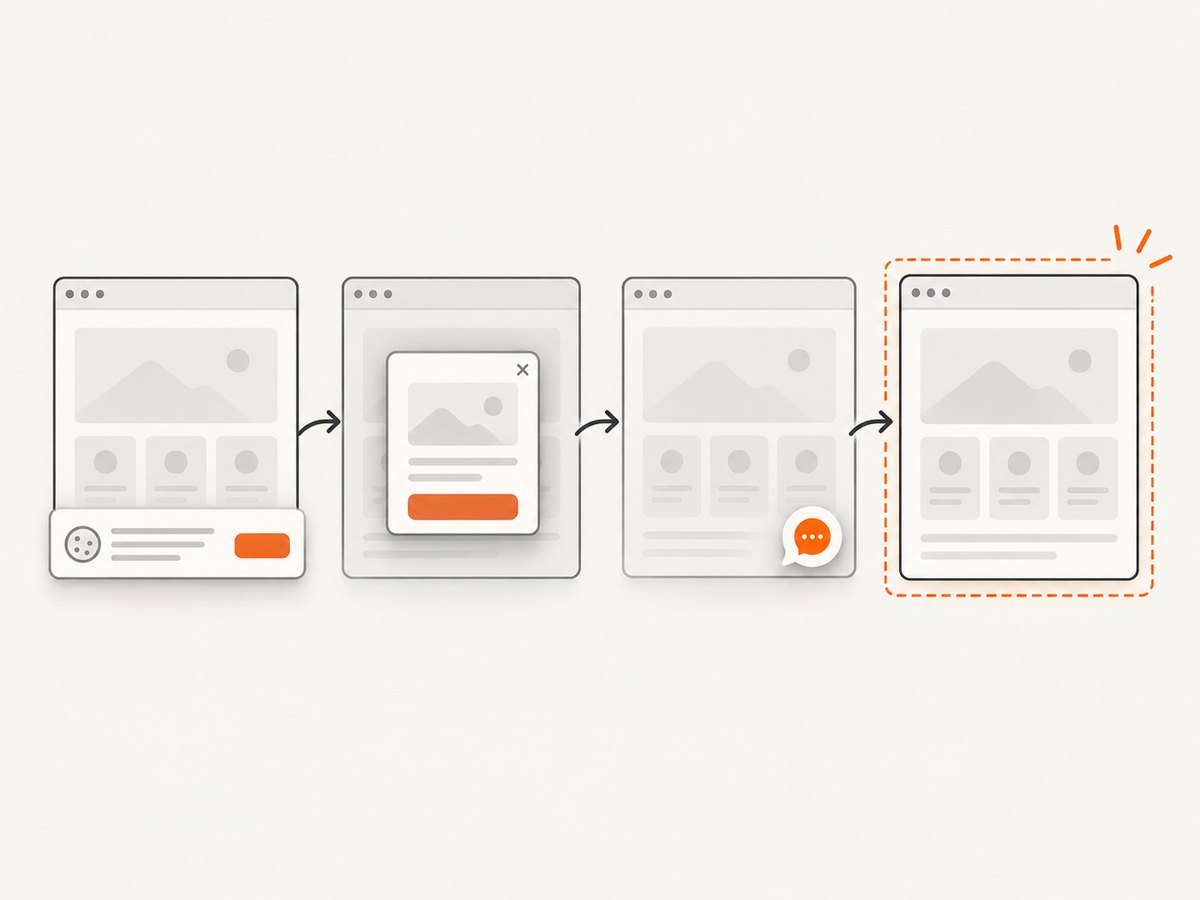
| The target is behind a popup. | A consent banner, newsletter prompt, or chat widget overlays the page. | Dismiss it as part of the capture workflow or use a tool that can remove those overlays before capture. |
| Chrome’s context menu does not show a node screenshot action. | The context menu was opened outside the selected DOM node or the wrong panel is active. | Right-click the selected node in the Elements panel and confirm the browser version and menu target. |
9. Performance, reliability, and cost
Capturing a single element is typically a smaller output than a full-page image, but overall time depends on page navigation, scripts, fonts, image loading, and any waits you add. For batch jobs, reuse browser processes where the automation framework supports it, limit concurrency to what the target site and machine can handle, and set timeouts so one stalled page does not block the whole run.
Reliability comes from explicit readiness conditions and observable outcomes. Record the URL, selector, viewport, and whether the target was found; on failure, save enough diagnostics to reproduce the state without logging secrets. Retry transient navigation failures carefully, with a cap and backoff. Repeating a capture cannot fix a permanently invalid selector or a page that consistently blocks automation.
Self-managed browser automation has infrastructure and maintenance costs: browser installation, compute, storage, and upkeep as sites change. A screenshot API trades that browser setup for per-plan usage limits and service-specific behavior. Compare the capture controls, failure handling, and billing rules against your workload before choosing.
10. Or skip the browser setup
ScreenshotNeo is a website screenshot API and MCP server. Its API can capture a CSS-selected element using the selector parameter; use a selector for the complete component you identified above. See the ScreenshotNeo API documentation for the current parameter details.
curl -G "https://api.screenshotneo.com/v1/shot" \
  -d access_key=YOUR_API_KEY \
  --data-urlencode url=https://stripe.com \
  --data-urlencode selector="#pricing-card" \
  -o shot.webp
One GET request returns an image or PDF. ScreenshotNeo accepts cookie/consent banners as a visitor and removes more than 60 known consent platforms, newsletter popups, and chat widgets before capture; each cleanup step can be turned off. Bot checks or CAPTCHAs, blank pages, timeouts, failed loads, and cache hits cost nothing, and response headers report the page verdict and whether the capture was billed. Its MCP server gives AI agents tools for taking screenshots, getting page information, and capturing PDFs.
The Free plan includes 1,000 screenshots a month with no card. Paid plans start at $5 for 3,000 screenshots; every feature is available on every plan, and yearly billing gives two months free. Create a free ScreenshotNeo account to try the element capture.
11. Frequently asked questions
Can I select an element by XPath?
Yes. Chrome’s Elements search supports XPath. Firefox’s documented screenshot helper uses a CSS selector, so use CSS there or select the node in Inspector.
Does selecting a node include its children?
The screenshot covers the selected node’s rendered area, which normally includes its rendered descendants. Inspect the highlight to ensure the node’s box covers the complete component.
Can I capture an element that is below the fold?
Yes, if the capture workflow scrolls it into view or the tool can capture it directly. In automation, verify it is visible before taking the element screenshot.
Which selector should I use for a recurring capture?
Use a stable, unique selector owned by the page or application. Confirm it still identifies the intended component after page updates.
Why capture an element instead of the whole page?
An element capture isolates a component and avoids unrelated page content. Use a wider capture when surrounding context is necessary to understand the component.


