How to Screenshot an Element After Scrolling with Selenium Python
Scroll an off-screen element into view and capture it with Selenium Python, with complete code, edge cases, debugging tips, and an API alternative.
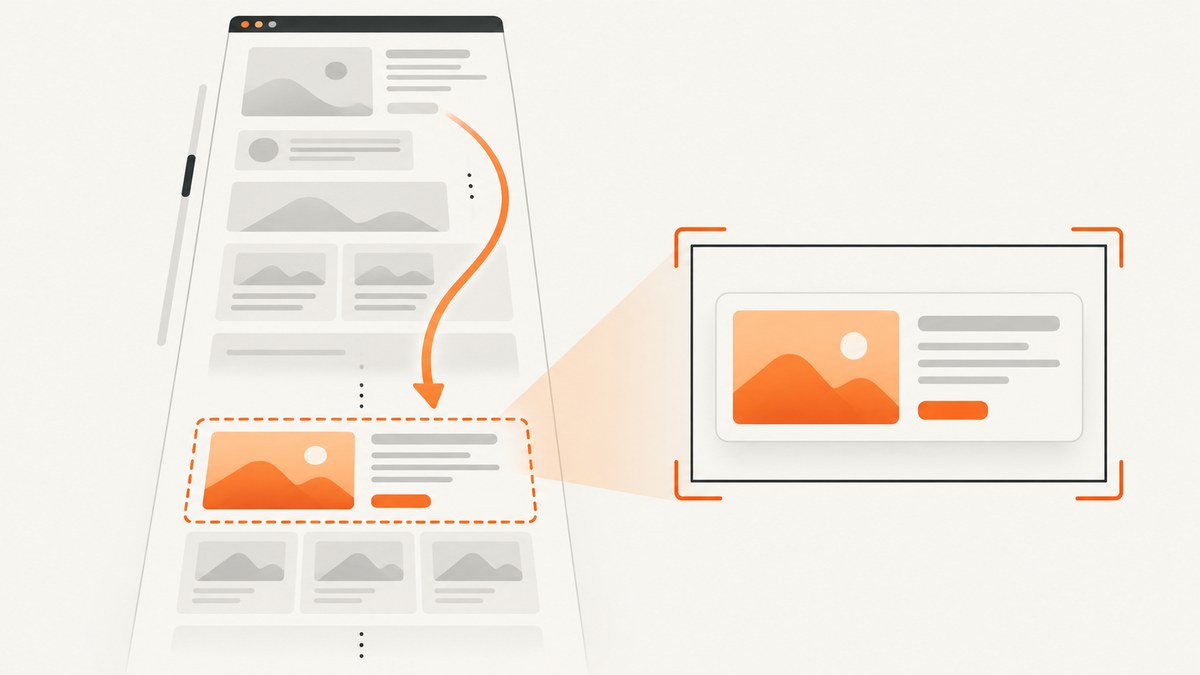
To screenshot an element that is below the initial viewport, locate it, scroll it into view, then call the element’s screenshot() method:
from selenium.webdriver.common.by import By

element = driver.find_element(By.CSS_SELECTOR, "#target")
driver.execute_script("arguments[0].scrollIntoView(true);", element)
element.screenshot("element.png")
This captures the WebElement as a PNG. Selenium also exposes screenshot_as_png for bytes and screenshot_as_base64 for a base64 string. The official Selenium Python WebElement API documents these methods and the return behavior.
1. Complete runnable example
The following script opens a page, waits for a target element, scrolls it into view, and saves an element-only screenshot. It uses Selenium 4 and an installed Chrome browser. Selenium Manager can obtain a compatible driver in current Selenium releases.
from pathlib import Path
from selenium import webdriver
from selenium.webdriver.common.by import By
from selenium.webdriver.support.ui import WebDriverWait
from selenium.webdriver.support import expected_conditions as EC

URL = "https://example.com"
OUTPUT = Path("element.png").resolve()

options = webdriver.ChromeOptions()
# options.add_argument("--headless=new")  # Enable on CI or a server.
options.add_argument("--window-size=1440,1000")

driver = webdriver.Chrome(options=options)
wait = WebDriverWait(driver, 20)

try:
    driver.get(URL)
    element = wait.until(
        EC.presence_of_element_located((By.CSS_SELECTOR, "#target"))
    )

    driver.execute_script(
        "arguments[0].scrollIntoView({block: 'start', inline: 'nearest'});",
        element,
    )
    wait.until(EC.visibility_of(element))

    saved = element.screenshot(str(OUTPUT))
    if not saved:
        raise OSError(f"Selenium could not write {OUTPUT}")
    print(f"Saved {OUTPUT}")
finally:
    driver.quit()
Replace #target with a stable selector from your page. An absolute output path makes the result predictable when the script runs from a scheduler, test runner, or container.
Install Selenium
python -m pip install -U seleniumFor a local browser, install Chrome or Chromium. On a headless Linux machine, add --headless=new and ensure the browser has the libraries it needs. A container image with Chrome already configured is often simpler for CI.
2. Locate the right element
The screenshot is only as reliable as the locator. Prefer an ID, a dedicated data attribute, or a short CSS selector that is part of the page’s contract.
from selenium.webdriver.common.by import By

by_id = driver.find_element(By.ID, "target")
by_css = driver.find_element(By.CSS_SELECTOR, "[data-testid='invoice-summary']")
by_xpath = driver.find_element(By.XPATH, "//section[@aria-label='Invoice summary']")
find_element raises NoSuchElementException immediately if the node is not present. For pages that render asynchronously, use an explicit wait:
from selenium.webdriver.support.ui import WebDriverWait
from selenium.webdriver.support import expected_conditions as EC

wait = WebDriverWait(driver, 20)
element = wait.until(
    EC.presence_of_element_located((By.CSS_SELECTOR, "[data-testid='invoice-summary']"))
)
presence_of_element_located means the node exists in the DOM. Use visibility_of_element_located when it must also have a visible box. Use element_to_be_clickable only when you actually need to click it.
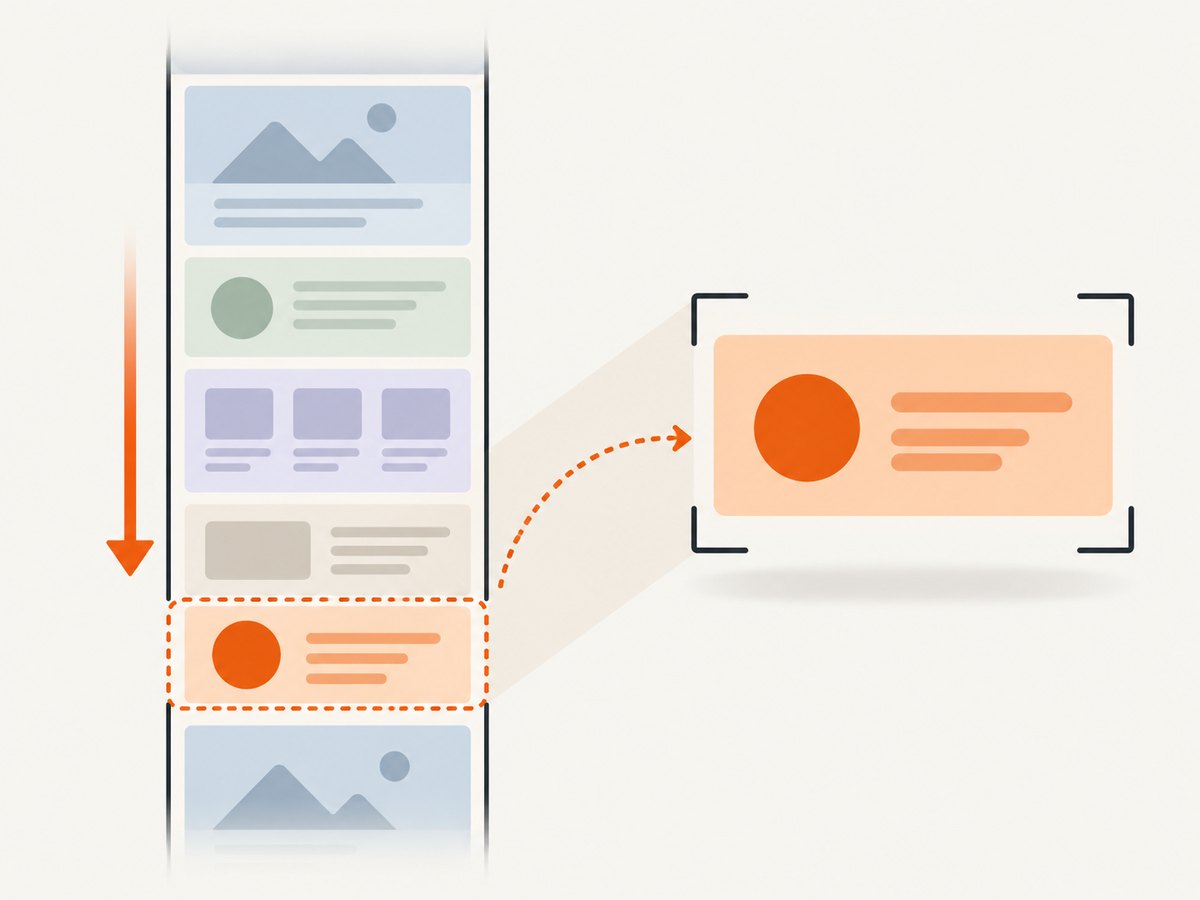
3. Scroll the element into view
The explicit JavaScript approach is easy to control:
driver.execute_script(
    "arguments[0].scrollIntoView({block: 'start', inline: 'nearest'});",
    element,
)
block: 'start' places the element's top edge near the top of the viewport. Use block: 'center' when a sticky header would cover the top portion:
driver.execute_script(
    "arguments[0].scrollIntoView({block: 'center', inline: 'nearest'});",
    element,
)
The Selenium Python cheat sheet shows the shorter equivalent, driver.execute_script("arguments[0].scrollIntoView(true);", element). Selenium's location_once_scrolled_into_view property also scrolls before returning a location, but the API warns that its behavior may change without warning; use it for its documented location behavior rather than as your primary capture primitive. See the Selenium WebElement source for the implementation.
Offset for a fixed header
A fixed navigation bar can cover the element after scrolling. Scroll first, then apply a small offset based on the header height:
driver.execute_script("""
const el = arguments[0];
const offset = arguments[1];
const y = el.getBoundingClientRect().top + window.pageYOffset - offset;
window.scrollTo({top: y, behavior: 'instant'});
""", element, 80)
After scrolling, inspect element.rect or getBoundingClientRect() if you need to verify that the element is inside the viewport.
4. Capture the element
Save a PNG file
path = "/absolute/path/element.png"
ok = element.screenshot(path)
print(ok)  # True when Selenium reports a successful write
The filename should end in .png. Selenium returns True when saving succeeds and False when an I/O error prevents the write. Create the parent directory before calling the method if it might not exist.
Keep PNG bytes in memory
png_bytes = element.screenshot_as_png
with open("element.png", "wb") as file:
    file.write(png_bytes)
This is useful when uploading directly to object storage, attaching the image to a test report, or returning it from a web service without a temporary file.
Use base64
encoded = element.screenshot_as_base64
html = f"<img src='data:image/png;base64,{encoded}'>"
Base64 is convenient for JSON and inline HTML, but it increases payload size. Prefer raw bytes for file and network operations.
5. Full-page, window, and element screenshots
These Selenium calls have different scopes:
| Call | What it captures | Use it for |
|---|---|---|
element.screenshot(path) |
The rendered WebElement | One card, chart, table, or component |
driver.save_screenshot(path) |
The current browser viewport | Viewport regression tests and debugging |
element.screenshot_as_png |
The element as PNG bytes | In-memory processing or uploads |
driver.save_screenshot does not produce a screenshot of the entire document and does not crop to your target. For one component, use the WebElement method.
6. Lazy content, animations, and nested scrolling
Scrolling can trigger lazy loading. Wait for the content inside the element to finish rendering before capture:
wait.until(EC.visibility_of(element))
wait.until(lambda d: element.value_of_css_property("opacity") == "1")
For a page with an application-specific loading marker, wait for that marker to disappear or for a child image's complete property:
wait.until(lambda d: d.execute_script("""
const img = arguments[0].querySelector('img');
return !img || (img.complete && img.naturalWidth > 0);
""", element))
Pause or disable animations when deterministic pixels matter:
driver.execute_script("""
const style = document.createElement('style');
style.textContent = `*, *::before, *::after {
  animation: none !important;
  transition: none !important;
  caret-color: transparent !important;
}`;
document.head.appendChild(style);
""")
If the element lives inside a scrollable container, scrolling the document may not move it. Scroll the container directly:
container = driver.find_element(By.CSS_SELECTOR, ".results-pane")
element = container.find_element(By.CSS_SELECTOR, "[data-testid='row-100']")
driver.execute_script(
    "arguments[0].scrollTop = arguments[1].offsetTop;",
    container,
    element,
)
element.screenshot("row-100.png")
Cross-origin iframes require switching into the frame before locating the element. A cross-origin frame still permits screenshots of its rendered content through WebDriver, but DOM queries must run in the correct browsing context:
frame = wait.until(EC.presence_of_element_located((By.CSS_SELECTOR, "iframe")))
driver.switch_to.frame(frame)
element = wait.until(EC.visibility_of_element_located((By.CSS_SELECTOR, "#target")))
element.screenshot("inside-frame.png")
driver.switch_to.default_content()
7. Device size, pixel density, and output limits
The captured pixels depend on browser window size, device scale factor, zoom, fonts, and responsive breakpoints. Set these explicitly when comparing screenshots:
options = webdriver.ChromeOptions()
options.add_argument("--headless=new")
options.add_argument("--window-size=1280,900")
options.add_argument("--force-device-scale-factor=1")
An element screenshot is clipped to the element's rendered box. Very tall elements can produce large PNGs; consider capturing a meaningful child region or splitting a long list into sections. Selenium's documented element screenshot output is PNG, so convert it afterward if you need JPEG or WebP.
8. Troubleshooting checklist
| Symptom | Likely cause | Fix |
|---|---|---|
NoSuchElementException |
Selector is wrong or the page has not rendered | Verify the selector in browser devtools and wait for presence. |
TimeoutException |
Element never became present or visible | Increase the wait only after checking navigation, authentication, and selector correctness. |
| Blank or partly loaded image | Lazy content, animation, or a pending network request | Wait for the relevant child images and disable transitions. |
| Header covers the target | Fixed or sticky navigation | Use block: 'center' or scroll with a measured offset. |
| Element is still off-screen | It is inside a nested scrolling container | Set that container's scrollTop or scroll the nearest container. |
Screenshot returns False |
Output directory or file is not writable | Use an absolute path, create the directory, and check permissions. |
| Stale element error | Framework re-rendered the node after you located it | Locate the element again immediately before scrolling and capture. |
| Chrome fails in CI | Missing browser libraries or incompatible driver | Use a maintained browser image, headless mode, and Selenium Manager. |
9. Reliability and performance practices
- Use explicit waits tied to page state instead of arbitrary long sleeps.
- Set a page-load timeout and always call
driver.quit()in afinallyblock. - Reuse one driver for a batch of pages when isolation permits; starting a browser for every image is expensive.
- Keep viewport size, scale factor, fonts, and timezone stable for repeatable output.
- Capture only the required element to reduce image size and downstream upload time.
- Log the URL, selector, browser version, viewport, and exception so failures can be reproduced.
- Retry navigation failures selectively. Repeating a bad selector or a deterministic application error only wastes time.
Selenium controls a real browser, so page JavaScript, consent dialogs, bot checks, authentication, rate limits, and network latency all affect completion time. Treat screenshots as an I/O operation: use bounded waits, close drivers, and monitor disk space.
10. Or skip the browser setup
If you need a service that captures a URL or a selected element without maintaining browser drivers, ScreenshotNeo provides a website screenshot API and MCP server. Its element capture accepts a CSS selector, and its full-page mode loads lazy images before capture. Cookie and consent banners, newsletter popups, and chat widgets are removed before the shot; each cleanup step can be disabled.

One request returns an image or PDF. See the ScreenshotNeo API documentation for all options.
curl -G "https://api.screenshotneo.com/v1/shot" -d access_key=YOUR_API_KEY --data-urlencode url=https://stripe.com -o shot.webpimport requests
r = requests.get("https://api.screenshotneo.com/v1/shot", params={"access_key": "YOUR_API_KEY", "url": "https://stripe.com"}, timeout=90)
r.raise_for_status()
open("shot.webp", "wb").write(r.content)const q = new URLSearchParams({ access_key: 'YOUR_API_KEY', url: 'https://stripe.com' });
const res = await fetch(`https://api.screenshotneo.com/v1/shot?${q}`);
if (!res.ok) throw new Error(`HTTP ${res.status}`);
await require('node:fs').promises.writeFile('shot.webp', Buffer.from(await res.arrayBuffer()));For element capture, add the selector option described in the docs. Other useful controls include viewport and device presets, retina scale, dark mode, custom CSS and JavaScript, clicks, selector waits, network-idle waits, delays, hidden selectors, blocked resource types, custom headers and cookies, timezone, geolocation, transparent backgrounds, resizing, caching with a chosen TTL, signed links, asynchronous jobs with signed webhooks, bulk capture of up to 100 URLs per call, and PDF page settings.
Only clean shots are billed. Bot checks or CAPTCHAs, blank pages, timeouts, failed loads, and cache hits cost nothing, and response headers identify the page verdict and whether it was billed. An MCP server exposes take_screenshot, get_page_info, and capture_pdf to Claude, Cursor, and other MCP clients.
The Free plan includes 1,000 shots per month with no card. Paid plans start at $5 for 3,000 shots; yearly billing provides two months free, and every feature is included on every plan. Create a free ScreenshotNeo account.
11. Selenium versus an API: choosing the right fit
| Requirement | Selenium Python | ScreenshotNeo |
|---|---|---|
| Capture an element after custom application interaction | Strong: execute any browser actions | Use selector, click, wait, CSS, and JavaScript options |
| Control your own browser and network | Yes | Request-level controls such as headers, cookies, user agent, timezone, and geolocation |
| Driver maintenance | You manage browser and CI setup | No local browser setup |
| AI-agent workflow | Requires your own integration | MCP tools are provided |
| Billing on failed captures | Your infrastructure still consumes runtime | Failed loads, blank pages, bot checks, timeouts, and cache hits are not billed |
12. FAQ
Does Selenium scroll automatically when taking an element screenshot?
Use an explicit scroll call so the behavior is clear and controllable. Selenium's location property also scrolls, but its API carries a change-without-warning caveat.
Can I save an element screenshot as JPEG?
The Selenium WebElement screenshot API saves PNG. Convert the PNG with an image library if another format is required.
Why is only part of a component captured?
The screenshot follows the element's rendered box. Check CSS overflow, nested scroll containers, collapsed content, and whether the component has finished rendering.
Can I screenshot an element that requires login?
Yes, if the Selenium session has authenticated and the element is available in that session. For an API workflow, pass the required headers or cookies through the service's documented options.
Which method returns bytes instead of writing a file?
Use element.screenshot_as_png. Use element.screenshot_as_base64 when a base64 value is specifically needed.
How do I make repeated captures consistent?
Fix the browser version, viewport, device scale factor, fonts, timezone, page state, waits, and animation behavior. Capture after the same readiness condition each time.
13. Final checklist
- Choose a stable selector.
- Wait for presence and visibility.
- Scroll with
scrollIntoView, accounting for fixed headers. - Wait for lazy content and disable animations when needed.
- Call
element.screenshot()for a PNG file or use the bytes/base64 properties. - Use an absolute writable path and close the driver.
- For managed captures, compare the browser setup cost with ScreenshotNeo's selector capture, cleanup, verdict headers, and free monthly tier.


