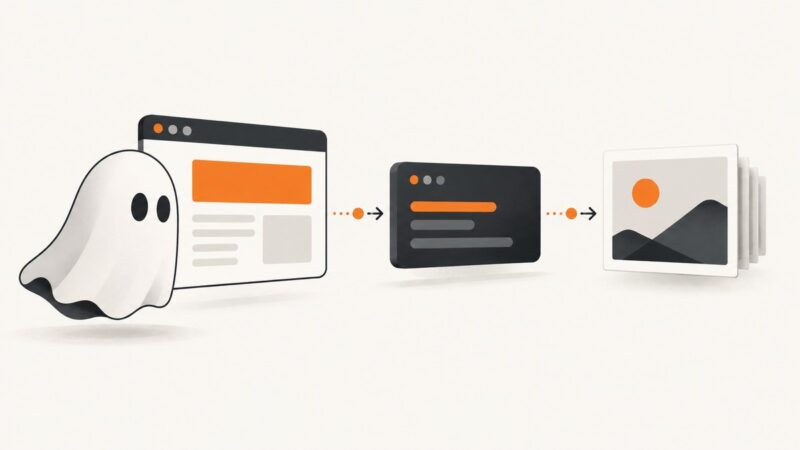
How to Submit a Form and Screenshot the Result
Submit a form through its normal validation flow, wait for the result to appear, then capture a clear screenshot with your browser or automation.

To submit a form and screenshot the result, fill in the required fields, activate the form’s intended Submit control, and wait until the confirmation or destination state is visible. Then capture the visible area, the relevant result element, or the full page depending on where the outcome appears. For a one-off task, your browser’s built-in screenshot feature is usually enough. For repeatable captures, use browser automation such as Playwright.
The important detail is the order: submit normally, confirm that the page changed, then capture. A screenshot taken too early may show the form before submission or while an asynchronous request is still processing.
1. Complete and submit the form normally
Enter the requested information and review any required fields. Activate the page’s Submit button or the equivalent control. This follows the page’s normal validation and interaction behavior. If the browser reports a missing or invalid field, correct it according to the message before trying again. Good error messages explain what needs to change.
For a form you control, prefer normal user interaction or requestSubmit() when a script needs to submit it in the same way. MDN documents that HTMLFormElement.submit() directly submits the form without firing the submit event or triggering constraint validation. requestSubmit() behaves like activating a submit button and preserves those behaviors. MDN: HTMLFormElement.submit()
const form = document.querySelector('form');

// Reproduce a normal submit-button action, including validation and submit event.
form.requestSubmit();
If there are multiple submit buttons with different actions or values, pass the intended button to requestSubmit(button). For a user submitting another site’s form, do not inject script or bypass its intended controls: use the page’s own button and instructions.
2. Wait for the outcome, not just the click
A click does not prove the submission succeeded. Look for a destination page, a confirmation message, a changed result panel, or another visible state that indicates completion. Some pages navigate immediately; others update in place after an asynchronous request. Wait for the success state to render before capturing.

There is no universal delay that works for every website. A fixed pause can be acceptable for a simple personal workflow, but it can be too short on a slow connection and unnecessarily long on a fast one. When automating, wait for a meaningful state change such as the confirmation element becoming visible. If the interface reports an error instead, capture that state only when it is the outcome you need to document.
Avoid submitting sensitive personal information just to make an example screenshot. Use a form and data you are permitted to submit, and follow the site’s instructions.
3. Choose what to capture
| Capture scope | Use it when | Trade-off |
|---|---|---|
| Visible viewport | The complete confirmation and enough context fit on screen. | Fast and focused, but content below the fold is omitted. |
| One element | A result panel contains the information you need. | Reduces unrelated page content, but may omit context that explains what the result belongs to. |
| Full page | The confirmation or relevant context extends below the fold. | Preserves page context, but can include irrelevant sections and produce a taller image. |
Before saving, inspect the image. Confirm that the message is legible, the relevant context is present, and the screenshot does not expose information that should not be shared. If a confirmation sits near the bottom of a long page, use full-page capture or capture the specific result element.

4. Take a screenshot manually in your browser
For an occasional capture, browser-native tools avoid setup. Their names and availability vary by browser, operating system, and version. Microsoft Edge documents capturing a full webpage or selected area, with markup tools; Microsoft notes that availability and functionality can vary by device, market, and browser version. Microsoft Edge support
Firefox supports capturing a visible or full webpage and copying or saving the image. Its support page describes the available controls and keyboard shortcut. Mozilla Support: Firefox Screenshots
- Submit the form using its intended control.
- Wait until the result is visibly complete.
- Open the browser’s screenshot or capture tool.
- Select the visible area, a region, or the full page, depending on the browser’s options and the result’s location.
- Save or copy the image, then open it to check legibility and context.
Use the browser’s current help for the exact controls in your version. A manual capture is well suited to a one-off record or support conversation. If the same task needs to run repeatedly or as part of a test workflow, automation can make the waiting and capture steps reproducible.
5. Automate submission and capture with Playwright
Playwright can interact with page elements and capture a viewport, an element, or the full scrollable page. Its documentation distinguishes screenshots, which record visual output, from snapshots used to inspect and interact with page elements. Playwright screenshots · Playwright locators
The following example is for a form you own or are authorized to automate. Replace the URL and accessible labels with those on your page. It uses a locator for the submit button, waits for a confirmation element, and saves a full-page image. Install Playwright and its browser using the current instructions in the Playwright documentation.
const { chromium } = require('playwright');

(async () => {
  const browser = await chromium.launch({ headless: true });
  const page = await browser.newPage({ viewport: { width: 1440, height: 1000 } });

  try {
    await page.goto('https://example.com/contact', { waitUntil: 'domcontentloaded' });
    await page.getByLabel('Name').fill('Example User');
    await page.getByLabel('Email').fill('example@example.com');
    await page.getByLabel('Message').fill('A sample message for a form you control.');

    await page.getByRole('button', { name: 'Submit' }).click();
    await page.getByRole('status').filter({ hasText: 'Thank you' }).waitFor({ state: 'visible' });

    await page.screenshot({ path: 'form-result.png', fullPage: true });
  } finally {
    await browser.close();
  }
})();
Adapt the locator for the actual success state. For example, use a page heading or a confirmation panel’s accessible role and name. Avoid relying on a short fixed timeout as the only success check. If the site navigates, wait for the expected URL or destination heading. If it updates without navigation, wait for the confirmation element.
Capture just the confirmation element
An element screenshot can keep the output focused. Make sure the selected element includes enough context to identify the outcome.
const confirmation = page.getByRole('status').filter({ hasText: 'Thank you' });
await confirmation.waitFor({ state: 'visible' });
await confirmation.screenshot({ path: 'confirmation.png' });
Use a viewport screenshot when the result is already in view
await page.screenshot({ path: 'visible-result.png' });A viewport capture records the page’s current visible area. If the page scroll position leaves the confirmation off-screen, scroll it into view before capturing or choose an element or full-page screenshot.
6. cURL, Python, and Node.js notes
cURL, Python’s requests, and Node.js fetch can make HTTP requests, but they do not operate a browser interface by themselves. They cannot fill an arbitrary website’s JavaScript form and capture its rendered result as a browser would. Use browser automation when the task requires interacting with a page. Use an HTTP client when you own the form’s backend and can call a documented submission endpoint; take care to use the same validation and authorization rules as the actual application.
For a backend you control, a schematic cURL request might look like this, but the route and fields must come from that application’s API documentation:
curl -X POST 'https://example.com/api/contact' \
  -H 'Content-Type: application/json' \
  -d '{"name":"Example User","email":"example@example.com","message":"Sample"}'
Equivalent Python using requests:
import requests

response = requests.post(
    "https://example.com/api/contact",
    json={
        "name": "Example User",
        "email": "example@example.com",
        "message": "Sample",
    },
    timeout=30,
)
response.raise_for_status()
print(response.status_code, response.text)
Equivalent Node.js using built-in fetch in a modern runtime:
const response = await fetch('https://example.com/api/contact', {
  method: 'POST',
  headers: { 'content-type': 'application/json' },
  body: JSON.stringify({
    name: 'Example User',
    email: 'example@example.com',
    message: 'Sample',
  }),
});
if (!response.ok) throw new Error(`Request failed: ${response.status}`);
console.log(response.status, await response.text());
These examples are templates, not endpoints that are guaranteed to exist on a particular site. Do not guess a third-party form’s API, replay its requests without authorization, or treat an HTTP 200 response alone as proof that a human-visible confirmation was rendered.
7. Or skip the browser setup
If you already have a page URL to capture, ScreenshotNeo can return a screenshot or PDF with one GET request. It is a website screenshot API and MCP server for developers. For form workflows, submit through the site’s normal controls first, wait for the result page or confirmation to be available, then capture its URL. ScreenshotNeo captures a URL; it does not submit the form for you.
See the ScreenshotNeo API documentation for request options. This example saves a WebP response:
curl -G "https://api.screenshotneo.com/v1/shot" \
  -d access_key=YOUR_API_KEY \
  --data-urlencode url=https://example.com/confirmation \
  -o result.webp
The same request in Python:
import requests

r = requests.get(
    "https://api.screenshotneo.com/v1/shot",
    params={"access_key": "YOUR_API_KEY", "url": "https://example.com/confirmation"},
    timeout=90,
)
r.raise_for_status()
open("result.webp", "wb").write(r.content)
And in Node.js:
const q = new URLSearchParams({
  access_key: 'YOUR_API_KEY',
  url: 'https://example.com/confirmation',
});
const res = await fetch(`https://api.screenshotneo.com/v1/shot?${q}`);
if (!res.ok) throw new Error(`Screenshot request failed: ${res.status}`);
await require('node:fs/promises').writeFile('result.webp', Buffer.from(await res.arrayBuffer()));- Cookie and consent banners, newsletter popups, and chat widgets are removed before the shot; each cleanup step can be turned off.
- Bot checks, blank pages, timeouts, failed loads, and cache hits cost nothing. Response headers report the page verdict and billing status.
- An MCP server lets AI agents, including Claude and Cursor, take screenshots.
- The Free plan includes 1,000 screenshots a month with no card; paid plans start at $5 for 3,000.
Create a free ScreenshotNeo account to get 1,000 screenshots a month with no card.
8. Reliability, performance, and cost considerations
For a manual screenshot, the main reliability risk is capturing before the result is ready or choosing a scope that cuts off the evidence. Inspect the saved image. For automation, wait on the actual success state, use stable accessible locators where possible, and save a diagnostic screenshot when a workflow fails. A screenshot documents what was rendered; it does not independently prove that the backend accepted or stored a submission.
Browser automation has setup and runtime costs: it launches a browser, loads the site, and waits for page activity. Keep the viewport consistent when screenshots need comparison, and avoid waiting for every network connection to become idle if the page uses persistent requests. A specific confirmation locator is often a more meaningful completion signal.
With a screenshot API, the capture runs remotely and avoids maintaining a local browser for the screenshot step. ScreenshotNeo supports viewport and full-page capture, element selection, waits, custom headers and cookies, and other options; consult its docs for parameter names and current details. It offers PNG, JPEG, WebP, and PDF output. Its stated plans are Free (1,000 monthly), Starter ($5 for 3,000), Growth ($15 for 15,000), Pro ($39 for 60,000), Scale ($99 for 250,000), and Business ($249 for 1,000,000); yearly billing gives two months free. Every feature is on every plan. Only clean shots are billed, and the response includes verdict and billing headers. These are product plan details, not a speed or uptime guarantee.
For a workflow that submits a form and then captures the result, split the responsibilities clearly: the authorized browser or application code performs submission and confirms success; the screenshot step records the resulting page. Store credentials securely and avoid putting secrets in public URLs or screenshots.
9. Troubleshooting
| Symptom | Likely cause | What to do |
|---|---|---|
| The form does not submit. | A required field failed validation, or the site rejected the input. | Read the inline error, correct the indicated field, and submit through the intended control again. Browser validation can prevent the submit event entirely. |
| A script submits without showing expected validation. | It called form.submit(), which bypasses constraint validation and the submit event. |
Use requestSubmit() or activate the actual submit button when ordinary form behavior is needed. |
| The screenshot shows the form, not the confirmation. | The capture happened before navigation or the asynchronous state update. | Wait for the destination or success element to become visible, then capture. |
| The confirmation is missing from the image. | It is below the fold or outside the selected region. | Use full-page capture, scroll the result into view, or capture the confirmation element. |
| Playwright cannot find the button or message. | The accessible name or role differs from the assumed locator, or the result uses another element. | Inspect the page’s accessible labels and choose a locator that matches its actual control or success state. Avoid brittle positional selectors when a label or role is available. |
| The automation hangs while waiting for a page load. | The page may keep network requests open or never reach the chosen load state. | Use an appropriate navigation milestone, then wait for the specific confirmation state rather than assuming all network activity will stop. |
| The saved image is blank or unhelpful. | The page may still be loading, blocked, or displaying an error instead of the expected result. | Check the page state before capture. For automated jobs, record the resulting URL and error details alongside the image where appropriate. |
| The screenshot includes private data. | The form or page contains user information beyond what the evidence requires. | Use authorized test data where possible, crop or capture only the needed result, and review the image before sharing. |
10. Frequently asked questions
How do I screenshot the result after submitting a form?
Wait for the confirmation or destination page to appear, then capture the visible area, the result element, or the full page. Open the image once to verify that the message is readable.
Can I submit a form and take a screenshot with one JavaScript call?
Submission and screenshot capture are separate steps. Use normal form interaction, wait for the success state, and then call the browser’s screenshot method. A screenshot call does not establish that a form submission succeeded.
Should I use a full-page screenshot?
Use one when important confirmation or context is below the fold. If the complete result fits in the viewport, a viewport image is usually easier to review. An element capture is useful when one panel is the evidence you need.
Can I use an HTTP request instead of a browser?
Only when you control or are authorized to call the form’s documented endpoint and do not need browser-rendered interaction. For a page that relies on client-side behavior, use a browser automation tool.