How to Turn an Image Into a YouTube Thumbnail
Turn any photo into a YouTube thumbnail: choose the right canvas, crop for small screens, export within limits, and upload in YouTube Studio.
Quick answer
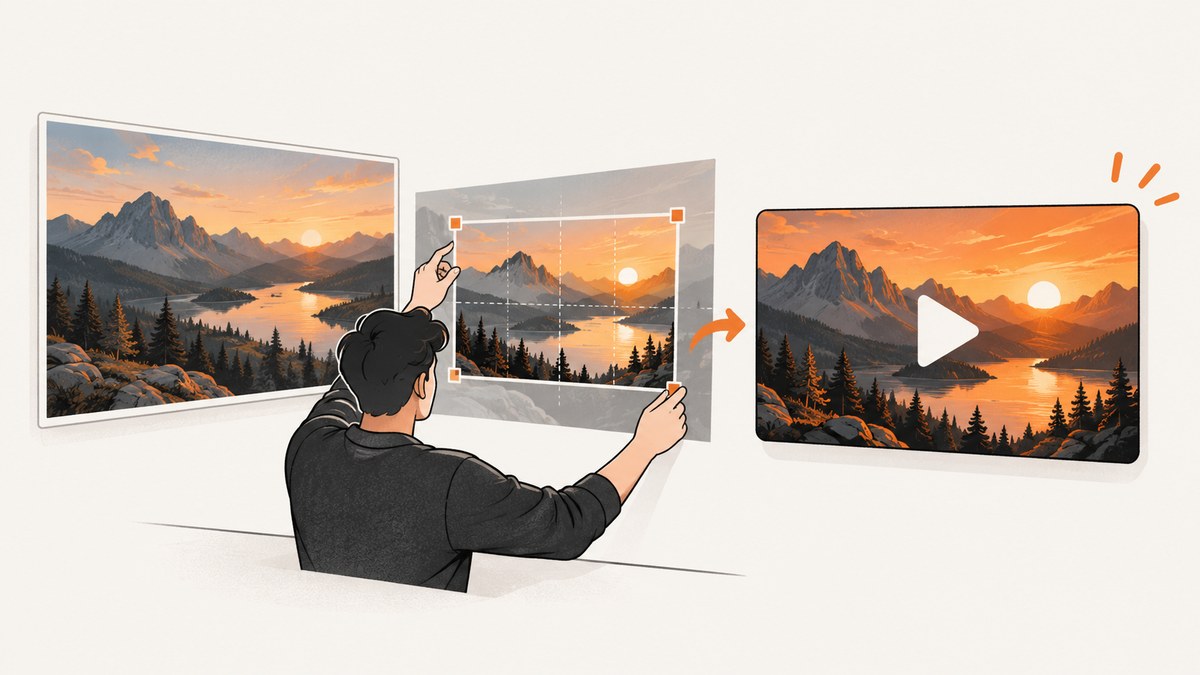
To turn an image into a YouTube thumbnail, crop the photo onto a 16:9 canvas, keep the main subject clear at small sizes, add only useful text, export as JPG or PNG, and upload it in YouTube Studio. YouTube recommends 3840×2160 pixels for standard video thumbnails, with a minimum width of 640 pixels. Video thumbnails should use a 16:9 ratio; the upload limit is 2 MB on mobile and 50 MB on desktop. See YouTube’s current thumbnail guidance before publishing because limits and eligibility can change.
1. Choose and prepare the source image
Start with the sharpest image you have. A clear face, product, location, or action gives viewers an immediate subject. Avoid images where the important detail touches an edge: the crop may remove it when you fit the image to a 16:9 frame.
- Use one obvious subject. A busy group of objects becomes unreadable when the thumbnail is reduced on a phone.
- Leave crop room. Keep faces, hands, products, and signs away from the outer few percent of the frame.
- Check focus and exposure. Upscaling a soft or dark photo does not restore detail.
- Confirm usage rights. Use a photo you created, licensed, or are otherwise allowed to publish.
- Plan for the title. Leave an uncluttered area if a short text hook will add information.
If your photo is portrait-oriented, you can still use it. Place it over a 16:9 background, crop it carefully, or extend the background with a matching color or blurred version of the image. Do not stretch the subject; distortion is more noticeable than empty space.
2. Create the correct canvas
For a regular video, create a 16:9 document. YouTube’s current recommendation is 3840×2160 pixels, while 1280×720 is a practical editing canvas and meets the 16:9 requirement. YouTube lists 640 pixels as the minimum width. A larger canvas gives you room to crop and resize, but it also creates a larger file, so inspect the exported size.
| Use case | Canvas | Ratio | Notes |
|---|---|---|---|
| Standard video | 3840×2160 recommended | 16:9 | Minimum width 640 pixels |
| Smaller working file | 1280×720 | 16:9 | Good for quick editing and export |
| YouTube Short | 2160×3840 recommended | 9:16 | Minimum height 640 pixels |
Adobe Express opens a YouTube design at 1280×720 and lets you upload an image into it. Canva provides YouTube-thumbnail templates and an image-upload workflow; its thumbnail format also uses 16:9. These starting points are documented on Canva’s YouTube thumbnail page and Adobe Express’s YouTube thumbnail tool.
3. Place, crop, and compose the image
- Fill the canvas without stretching. Use “cover” or an equivalent crop mode so the image keeps its proportions.
- Move the focal subject into the safe area. Check that a face, product, or key object survives both left and right crops.
- Reserve space for the video title overlay. YouTube may display interface elements around the thumbnail, so avoid putting essential details at the extreme edges.
- Preview at a small size. Reduce the design to roughly the size of a phone preview. If you cannot identify the subject in a second, simplify the crop or background.
- Use contrast deliberately. A light subject against a darkened background, or the reverse, helps separation. Adjust exposure and color moderately so skin tones and product colors remain credible.
A thumbnail is a small identification image, not a poster. Keep the composition to one primary subject and a clear visual action. If the photo already communicates the video’s subject, you may not need text at all.
4. Add text only when it adds information
Text can explain the result, constraint, or question that the photo cannot show by itself. Keep it short enough to read without pausing. Use a large, high-contrast treatment and leave breathing room around the subject. Avoid placing text over eyes, product labels, or other details viewers need to see.
- Prefer a few words such as “Before the Launch” or “3 Camera Settings” over a sentence.
- Use one main typeface and a strong contrast between text and background.
- Check spelling, capitalization, and numbers at the reduced preview size.
- Do not promise a specific increase in views from a color, font, or layout. The authoritative sources reviewed do not provide a measured click-through lift for any particular treatment.
5. Export a YouTube-ready file
YouTube accepts JPG and PNG video thumbnails. JPG is usually the better first choice for a photographic image because it produces a smaller file. Use PNG when you need crisp transparency, flat graphics, or text edges and the resulting file remains within the limit.
- Export at your canvas dimensions, preserving the 16:9 ratio.
- Open the exported file and verify that it is not accidentally saved as a portrait image or a low-resolution preview.
- Check the file size: YouTube states a 2 MB limit for mobile uploads and 50 MB for desktop uploads.
- If a JPG is too large, lower quality gradually or export at 1280×720. Avoid repeated re-saving, which can introduce artifacts.
- Keep an editable project file so you can correct text or produce a variation later.
For a Short, use the vertical 9:16 canvas. YouTube’s current Help guidance recommends 2160×3840 and a minimum height of 640 pixels. Custom Shorts thumbnail availability and upload behavior can change; YouTube’s July 24, 2026 blog says Partner Program creators began receiving fully custom Shorts-thumbnail uploads with expansion planned over time.
6. Upload the thumbnail in YouTube Studio
- Sign in to YouTube Studio.
- Open Content and select the video.
- In the video details page, find Thumbnail.
- Choose Upload file, select the exported JPG or PNG, and wait for the preview.
- Save the video details, then reopen the page if you need to confirm that the thumbnail persisted.
YouTube says custom thumbnails require account verification. If the upload control is missing, complete the verification step for the channel and check whether the video or account has a restriction. YouTube’s Help wording is explicit: under “Thumbnail,” choose “Upload file” to create a custom video thumbnail from an image on your device.
7. Check policy and rendering
Review the thumbnail at desktop and phone sizes before you publish. Make sure it accurately represents the video and follows YouTube Community Guidelines. YouTube warns that inappropriate thumbnails may be rejected and can lead to strikes. A change can also take time to appear in every surface, including search and recommendations.
Do not put essential information in tiny corners, rely on details that disappear when compressed, or use a misleading image. If the thumbnail looks different after upload, compare the original dimensions, color profile, and file format, then allow time for processing.
8. Make a thumbnail from a photo on your phone
The same workflow works on iPhone and Android:
- Open a mobile design editor such as Canva or Adobe Express and select a YouTube thumbnail template or 16:9 canvas.
- Upload the photo from your camera roll.
- Use crop and position controls to keep the subject visible; zoom out to inspect the whole frame.
- Add a short text hook only if it remains readable on a small screen.
- Export as JPG for a smaller file or PNG for graphics with sharp edges.
- Open YouTube Studio in the YouTube app or a mobile browser, select the video, choose the thumbnail upload control, and save.
Mobile editing makes it easy to produce a thumbnail quickly, but check the final pixel dimensions and file size before uploading. A screenshot of an editor preview may be lower quality than the original export.
9. Troubleshooting common problems
| Problem | Likely cause | Fix |
|---|---|---|
| Thumbnail looks stretched | The source was resized to fit instead of cropped proportionally. | Undo the stretch and use a cover crop on a 16:9 canvas. |
| Important face or product is cut off | The focal subject was too close to an edge. | Reposition the image, zoom out, or use a wider source photo. |
| Upload rejected on phone | The file exceeds the mobile size limit or is an unsupported export. | Export a JPG, reduce quality or dimensions, and keep it under 2 MB. |
| Text is unreadable | Too many words, low contrast, or a tiny preview. | Shorten the hook, increase contrast, and preview at phone size. |
| Custom thumbnail option is missing | The channel is not verified or has an account restriction. | Complete YouTube account verification and review Studio notices. |
| New thumbnail is not visible everywhere | Different YouTube surfaces are still updating their cached image. | Refresh later, check the video page directly, and confirm the saved thumbnail in Studio. |
| Shorts thumbnail choices differ from a long-form video | Shorts upload features and eligibility are being expanded over time. | Use the current Studio flow on a computer and check YouTube Help for your channel. |
10. Automate image preparation with ScreenshotNeo
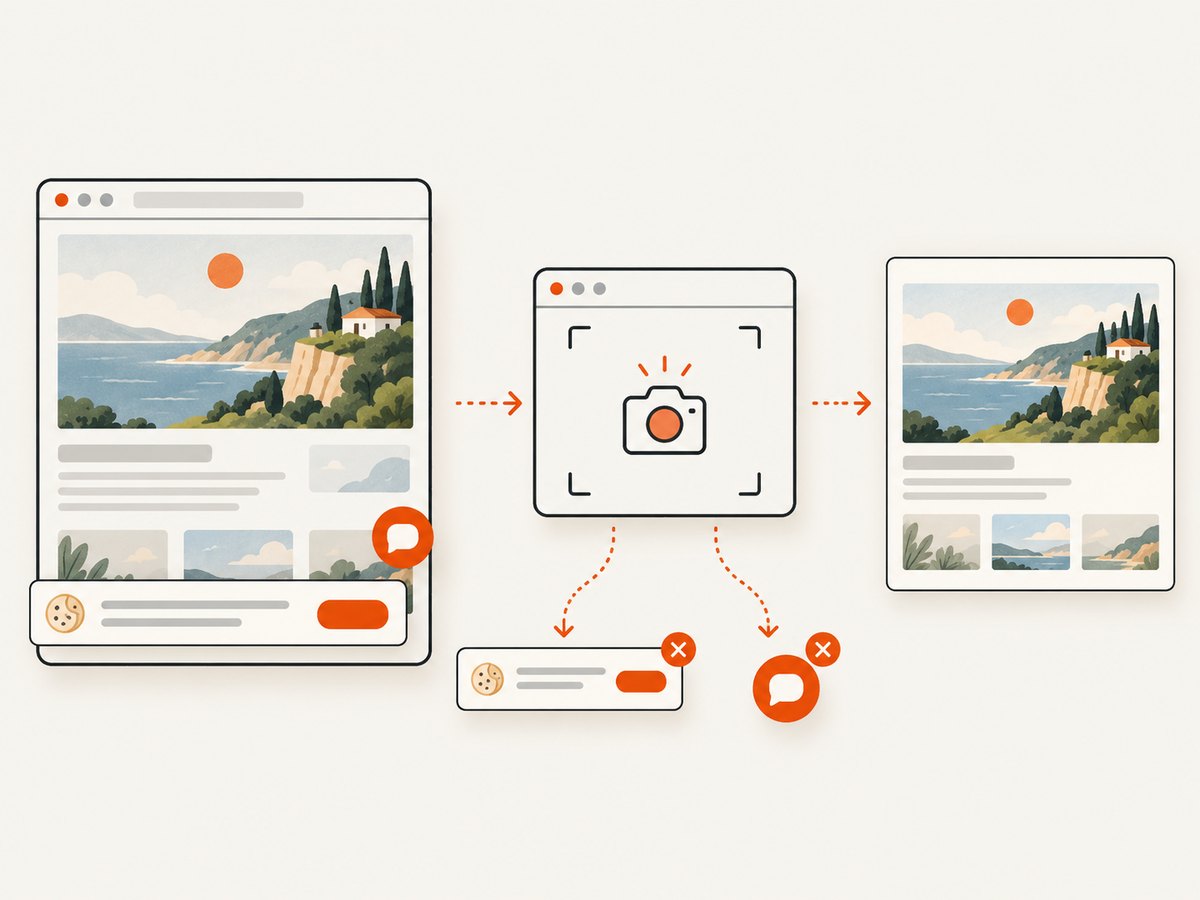
If the source image is actually a web page, product listing, article, or dashboard, you can capture the page first and then use the resulting PNG, JPEG, or WebP as the thumbnail source. ScreenshotNeo is a website screenshot API and MCP server. Its endpoint accepts one GET request with a URL and returns an image or PDF.
For a browser-free capture, see the ScreenshotNeo API documentation. The following examples are runnable; replace the URL and API key.
curl -G "https://api.screenshotneo.com/v1/shot" -d access_key=YOUR_API_KEY --data-urlencode url=https://stripe.com -o shot.webpimport requests
r = requests.get("https://api.screenshotneo.com/v1/shot", params={"access_key": "YOUR_API_KEY", "url": "https://stripe.com"}, timeout=90)
open("shot.webp", "wb").write(r.content)const q = new URLSearchParams({ access_key: 'YOUR_API_KEY', url: 'https://stripe.com' });
const res = await fetch(`https://api.screenshotneo.com/v1/shot?${q}`);11. ScreenshotNeo options, reliability, and cost
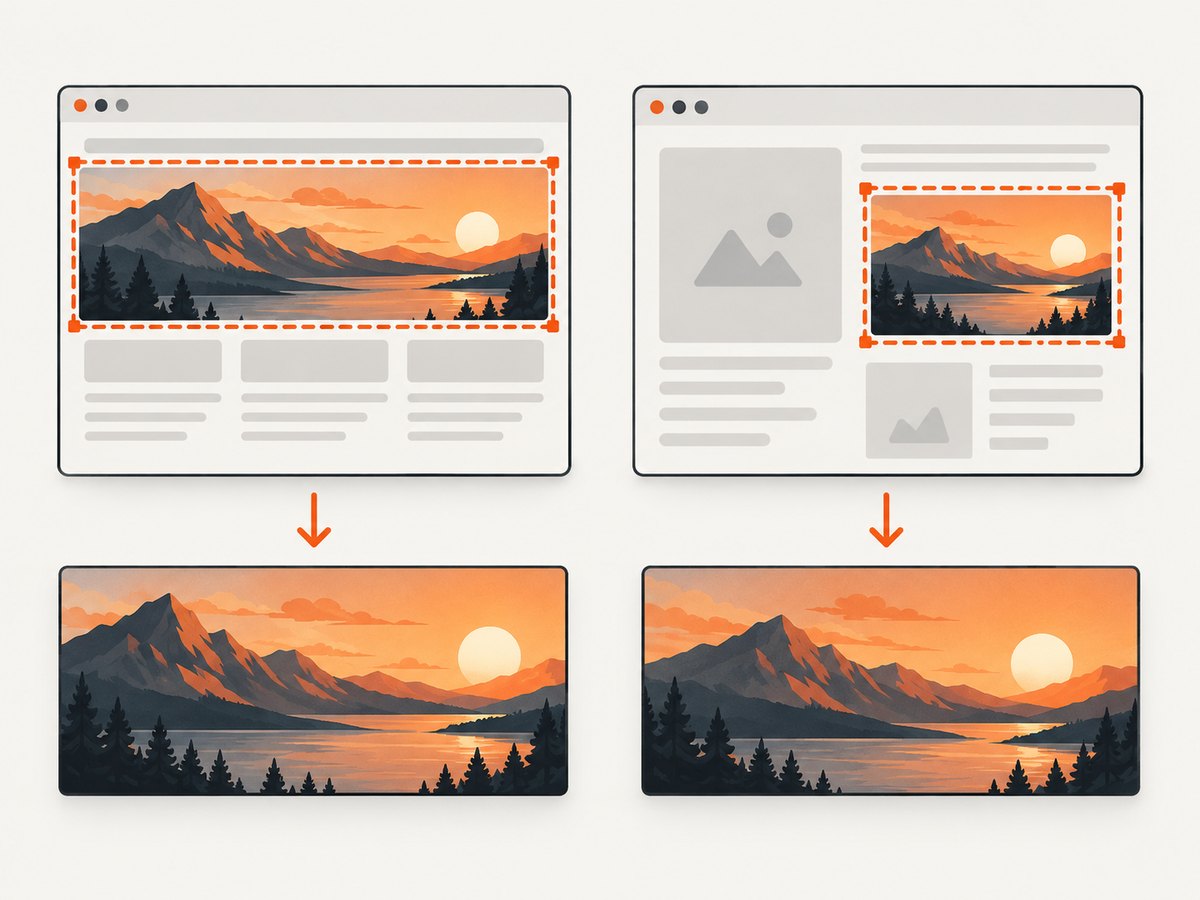
Use full-page capture when the image needs content below the fold; lazy images are loaded. Capture one element with a CSS selector when only a chart or product card belongs in the thumbnail. You can set a viewport or device preset, retina scale, dark mode, custom CSS and JavaScript, a click before capture, a wait for a selector, delay, or network idle, and hide selectors that would distract from the subject.
For pages that require access, pass custom headers, cookies, a user agent, or Authorization. Timezone and geolocation settings help reproduce localized pages. You can block ads, trackers, requests, or resource types; choose transparent backgrounds; resize the output; and cache with a TTL you select. Signed links work for public <img> tags. Async jobs support signed webhooks, bulk capture handles up to 100 URLs per call, and a usage API plus OpenAPI spec help with production integration. Parameter names used by other screenshot APIs also work, which can simplify a migration.
ScreenshotNeo removes cookie and consent banners, newsletter popups, and chat widgets before capture; each cleanup step can be disabled. Bot checks or CAPTCHAs, blank pages, timeouts, failed loads, and cache hits are not billed as clean shots. The response identifies the result with X-Page-Verdict and X-Billed headers. For AI workflows, its MCP server exposes take_screenshot, get_page_info, and capture_pdf to Claude, Cursor, and other MCP clients.
The Free plan includes 1,000 shots each month with no card. Paid plans start at $5 for 3,000 shots; higher plans are Growth ($15/15,000), Pro ($39/60,000), Scale ($99/250,000), and Business ($249/1,000,000). Yearly billing gives two months free, and every feature is available on every plan. For predictable costs, cache stable pages, use element capture instead of full-page capture when appropriate, and inspect the billing headers in your integration.
Or skip the browser setup
Use the ScreenshotNeo call above when you need a clean image from a URL without maintaining a browser. Cookie banners, popups, and chat widgets are removed before the shot. Bot checks, blank pages, and failed loads are never billed. An MCP server lets AI agents take screenshots, and 1,000 screenshots a month are free with no card; paid plans start at $5 for 3,000. Create a free ScreenshotNeo account.
FAQ
Can I use any photo as a YouTube thumbnail?
Use an image you own or have permission to publish, and make sure it accurately represents the video and follows YouTube’s guidelines.
Is JPG or PNG better?
JPG usually gives a smaller file for photographs. PNG is useful for transparency and crisp graphic elements. Both are accepted for video thumbnails.
What if my source photo is vertical?
Place it on a 16:9 canvas and crop or extend the background without stretching the subject. Preview the result at a small size.
Can I upload a custom thumbnail for every Short?
Shorts thumbnail features and eligibility are changing. Check the current YouTube Studio flow and Help guidance for your channel.
Why did YouTube change my thumbnail appearance?
Processing, caching, compression, or a different surface can temporarily show a variant. Confirm the saved file and wait for propagation before exporting again.


