How to Upload an html2canvas Image to a Database
Capture a DOM element with html2canvas, upload it as a Blob, validate it on your server, and store the bytes or an object-storage reference.
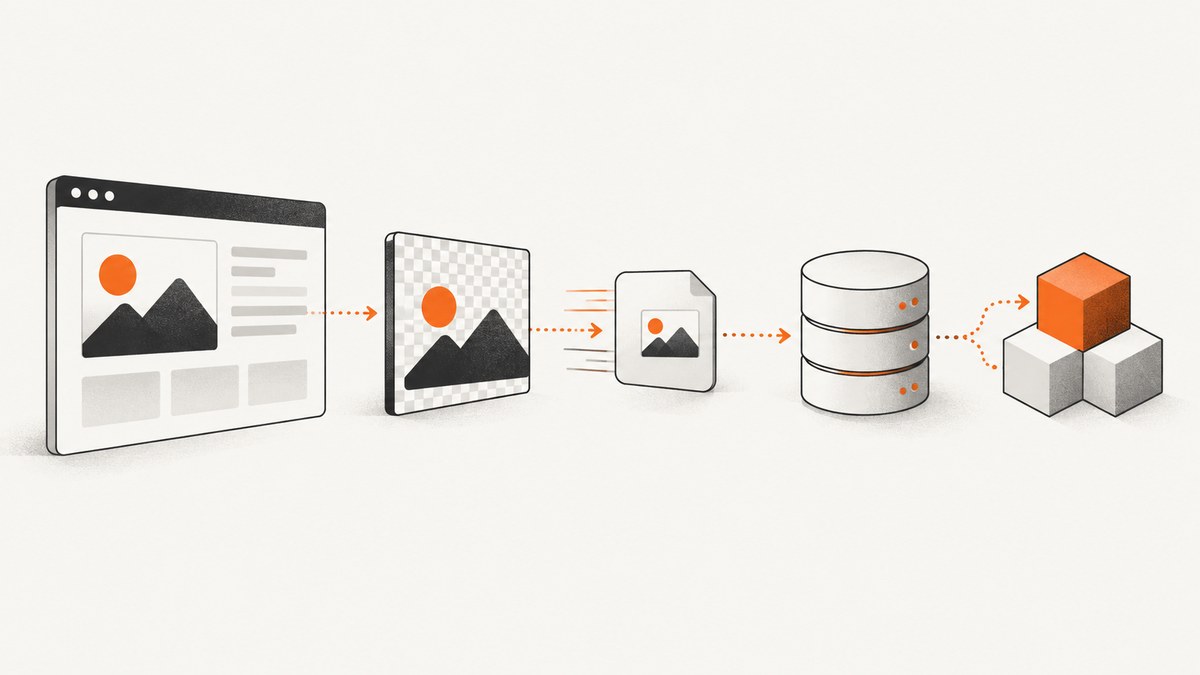
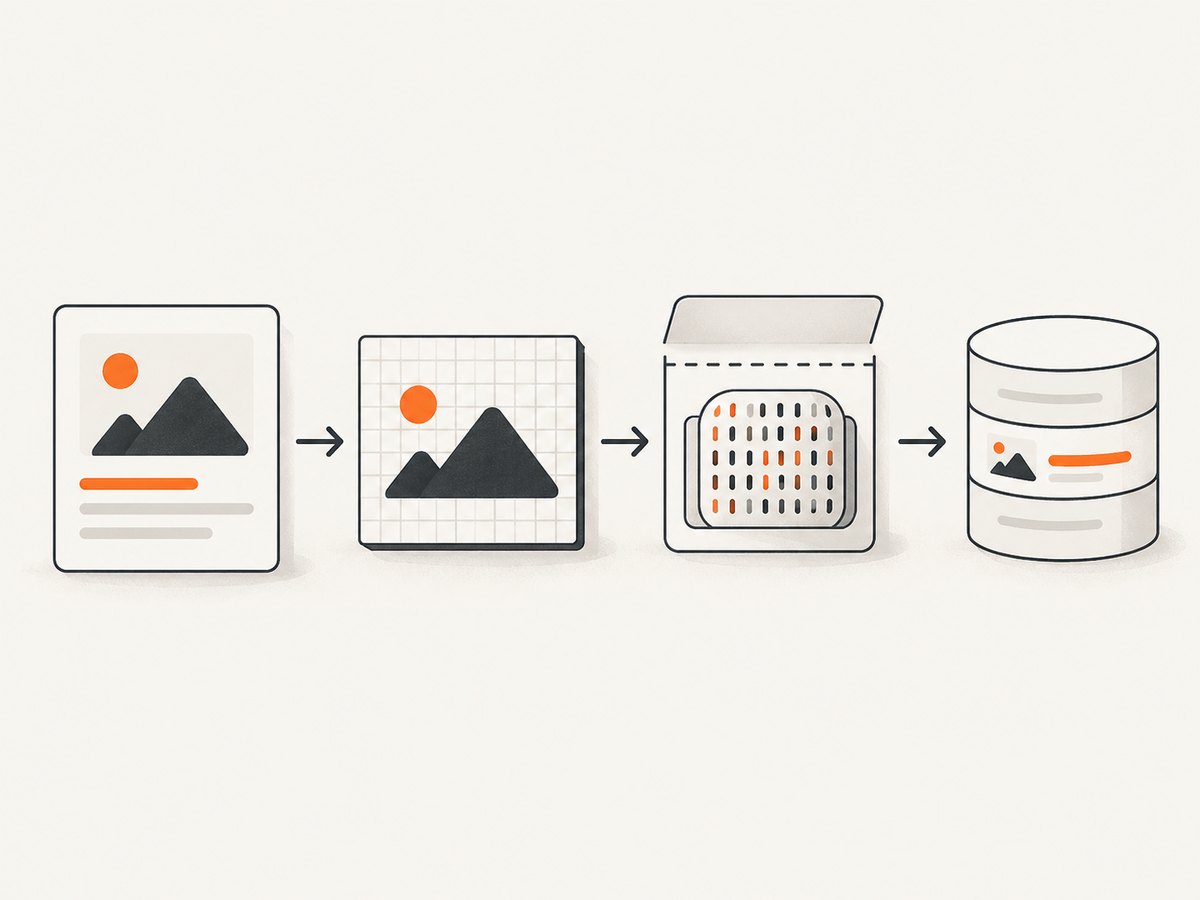
Direct answer: call html2canvas(element), convert the returned canvas with canvas.toBlob(), append that Blob to FormData, and send it with fetch(). Your server should validate the upload, then either write the image bytes to a binary database column or store the file in object storage and save its key and metadata in the database.
The browser should upload to your application server. It should not connect directly to SQL with embedded database credentials. The stages are separate:
- Capture a DOM element into a canvas.
- Encode the canvas as an image Blob.
- Upload the Blob as multipart form data.
- Validate and authorize the upload on the server.
- Persist the bytes or an object-storage reference.
1. Capture, encode, and upload the image
Install html2canvas with npm or load it from your browser build system. The library reconstructs an image from DOM information and CSS; it is not a compositor-level screenshot of every browser feature. Its html2canvas(element) call returns a Promise that resolves to a canvas. See the getting-started documentation and html2canvas documentation for supported rendering and limitations.
npm install html2canvasimport html2canvas from 'html2canvas';
async function captureAndUpload(element) {
const canvas = await html2canvas(element, {
// This can load remote images only when their servers allow CORS.
useCORS: true,
backgroundColor: '#ffffff'
});
const blob = await new Promise((resolve, reject) => {
canvas.toBlob((result) => {
if (result) resolve(result);
else reject(new Error('Canvas image could not be encoded'));
}, 'image/png');
});
const formData = new FormData();
formData.append('image', blob, 'capture.png');
const response = await fetch('/api/images', {
method: 'POST',
body: formData
// Do not set Content-Type manually. Fetch adds the multipart boundary.
});
if (!response.ok) {
throw new Error(`Upload failed: ${response.status}`);
}
return response.json();
}
const element = document.querySelector('#receipt');
captureAndUpload(element)
.then((saved) => console.log('Saved image:', saved))
.catch((error) => console.error(error));toBlob() produces binary data suitable for a file upload. If you omit the type, browsers use PNG when possible; the callback can receive null, so handle that case. MDN documents the API and its origin-clean security behavior at HTMLCanvasElement.toBlob().
Choose the image format
// PNG: lossless and supports transparency
canvas.toBlob(callback, 'image/png');

// JPEG: smaller for photographs, no alpha channel
canvas.toBlob(callback, 'image/jpeg', 0.85);

// WebP: use only if your clients and server pipeline support it
canvas.toBlob(callback, 'image/webp', 0.85);
Use toBlob() instead of toDataURL() for uploads. A data URL is a base64-style string that increases payload size and can create memory or URL-length problems. MDN recommends Blob output for larger images; see toDataURL().
Why FormData matters
FormData sends the Blob as a multipart file field. Do not set Content-Type: multipart/form-data yourself: the browser must add the boundary parameter. The MDN FormData documentation explains this Fetch pattern.
2. A minimal server endpoint
Your endpoint needs authentication and independent validation. The following Node.js example uses Express and Multer to parse a multipart field named image. It writes bytes to a database interface represented by db.images.insert; replace that call with your parameterized driver.
import express from 'express';
import multer from 'multer';
import crypto from 'node:crypto';

const app = express();
const upload = multer({
  storage: multer.memoryStorage(),
  limits: { fileSize: 5 * 1024 * 1024 },
  fileFilter: (req, file, cb) => {
    cb(null, ['image/png', 'image/jpeg', 'image/webp'].includes(file.mimetype));
  }
});

app.post('/api/images', upload.single('image'), async (req, res) => {
  if (!req.file) return res.status(400).json({ error: 'image is required' });

  // Authenticate the request before this point in a real application.
  // Do not trust req.file.mimetype alone; inspect magic bytes with a
  // content-type detector appropriate for your stack.
  const id = crypto.randomUUID();
  await db.images.insert({
    id,
    bytes: req.file.buffer,
    content_type: req.file.mimetype,
    size: req.file.size,
    created_at: new Date()
  });

  res.status(201).json({ id });
});

app.listen(3000);
This is an implementation pattern, not a portable database schema. Binary column names and parameterized calls differ between PostgreSQL, MySQL, SQLite, and other systems. Follow the upload controls in the OWASP File Upload Cheat Sheet: allowlist required types, inspect actual content, enforce a size cap, authorize the user, generate names on the server, and keep uploads outside the webroot or on a separate host when practical.
3. cURL, Python, and Node.js upload clients
cURL
Once a browser has produced capture.png, you can send it to the same endpoint with cURL:
curl -X POST https://example.com/api/images \
  -H "Authorization: Bearer YOUR_TOKEN" \
  -F "image=@capture.png;type=image/png"
Python
import requests

with open('capture.png', 'rb') as image_file:
    response = requests.post(
        'https://example.com/api/images',
        files={'image': ('capture.png', image_file, 'image/png')},
        headers={'Authorization': 'Bearer YOUR_TOKEN'},
        timeout=90,
    )

response.raise_for_status()
print(response.json())
Node.js
import fs from 'node:fs';

const form = new FormData();
form.append('image', new Blob([fs.readFileSync('capture.png')], { type: 'image/png' }), 'capture.png');

const response = await fetch('https://example.com/api/images', {
  method: 'POST',
  headers: { Authorization: 'Bearer YOUR_TOKEN' },
  body: form
});

if (!response.ok) throw new Error(`Upload failed: ${response.status}`);
console.log(await response.json());
4. Database bytes or object storage?
“Upload to a database” can mean storing the image bytes in SQL, but it can also mean storing the file in object storage and keeping a reference in SQL. AWS describes an S3 object as file data plus metadata in its object documentation. Neither design is universal; choose based on your retrieval and operational requirements.
| Question | Database binary column | Object storage plus database reference |
|---|---|---|
| Must bytes commit with relational data? | Convenient when the image and row need one transaction. | Requires coordinating an object write and a database row. |
| Many large images? | Increases database storage, backup, and restore volume. | Separates large files from transactional tables. |
| How are images served? | Application reads and authorizes the bytes. | Application can authorize a key or issue a controlled object URL. |
| Operations | One primary persistence system. | Separate storage lifecycle, permissions, and cleanup. |
Record at least an identifier, owner, validated content type, byte length, creation time, and storage key or bytes. Never use an untrusted filename as a path. If you serve stored images, send the validated content type and enforce the access policy required by the image.
5. Cross-origin images and canvas security
A canvas becomes tainted when it includes cross-origin content that does not grant permission for your origin. Exporting a tainted canvas can raise a SecurityError; other encoding failures can result in a null Blob. Setting useCORS: true does not bypass browser security. The remote image host must return an appropriate CORS header, or you need a controlled server-side image proxy. Review the html2canvas proxy guidance and inspect the browser Network and Console panels.

const canvas = await html2canvas(element, {
  useCORS: true,
  proxy: '/api/image-proxy' // only if you operate a safe, allowlisted proxy
});
A proxy must restrict destinations, validate responses, limit size, and prevent access to internal network addresses. Do not turn your endpoint into an open URL fetcher.
6. Capture fidelity and practical options
- Wait until fonts, images, and asynchronous data have loaded before calling html2canvas.
- Capture a specific element rather than the whole document when you only need a card, invoice, or chart.
- Use a stable background color when transparent output is not desired.
- Expect differences for CSS or browser features html2canvas does not implement because it reconstructs the scene from DOM and CSS.
- Large elements create large canvases. Consider reducing dimensions or using JPEG/WebP where transparency is unnecessary.
- Do not assume an element outside the viewport or content loaded by a closed shadow root will be reproduced exactly.
7. Troubleshooting
| Symptom | Likely cause | Fix |
|---|---|---|
canvas.toBlob returns null |
Encoding failed, unsupported output, or a tainted canvas. | Check the console, use PNG, verify origin permissions, and handle the null callback. |
| SecurityError during export | A cross-origin image or resource made the canvas non-origin-clean. | Configure CORS on the asset host or use a restricted proxy. |
| Uploaded file is empty | The Blob was not appended, or the server parsed a different field name. | Confirm formData.append('image', blob, 'capture.png') and the server’s field name. |
| HTTP 400 from the endpoint | Missing field, rejected type, or size limit. | Log the validation reason and send an allowed type below the configured limit. |
| HTTP 413 | Reverse proxy or application body limit is smaller than the image. | Align limits deliberately and reduce canvas dimensions or quality. |
| Image looks different from the page | Unsupported CSS, fonts not loaded, or asynchronous content not ready. | Wait for resources and check html2canvas’s supported features. |
| Multipart parser says boundary missing | Content-Type was manually set. |
Remove that header and let Fetch or the HTTP client generate it. |
| Database grows unexpectedly | Every revision stores another binary copy. | Define retention, deduplicate where appropriate, or move large objects to object storage. |
8. Performance, reliability, and cost
- Browser work: html2canvas uses memory for the DOM reconstruction and canvas. Capture only the required region and avoid unnecessarily high dimensions.
- Payload size: PNG preserves detail but can be large. JPEG quality is tunable and removes alpha; choose based on the image.
- Retries: make the upload idempotent with a client request ID or content hash if duplicate rows would be harmful. Retry only transient network or server failures.
- Timeouts: set client and proxy timeouts high enough for encoding and upload, while retaining a server-side maximum.
- Validation: enforce limits before database writes and reject content whose detected type does not match the allowlist.
- Backups: include binary data in capacity and restore planning if it lives in SQL. Object storage needs its own lifecycle and backup policy.
- Cost: the main variables are image bytes, retention, reads, database capacity, and any object-storage requests. Measure your workload rather than assuming one architecture is cheaper.
9. Or skip the browser setup
If you need a clean screenshot of a URL rather than a client-side DOM reconstruction, ScreenshotNeo provides a website screenshot API. It accepts one GET request and returns PNG, JPEG, WebP, or PDF. Cookie and consent banners, newsletter popups, and chat widgets are removed before capture; bot checks, blank pages, failed loads, timeouts, and cache hits are not billed. Its MCP server lets Claude, Cursor, and other MCP clients use take_screenshot, get_page_info, and capture_pdf.
See the ScreenshotNeo API documentation for the available options, including element selectors, full-page capture, device presets, custom CSS and JavaScript, waits, request blocking, headers, cookies, geolocation, caching, signed links, asynchronous jobs, bulk capture, and usage reporting.
curl -G "https://api.screenshotneo.com/v1/shot" -d access_key=YOUR_API_KEY --data-urlencode url=https://stripe.com -o shot.webpimport requests
r = requests.get("https://api.screenshotneo.com/v1/shot", params={"access_key": "YOUR_API_KEY", "url": "https://stripe.com"}, timeout=90)
open("shot.webp", "wb").write(r.content)const q = new URLSearchParams({ access_key: 'YOUR_API_KEY', url: 'https://stripe.com' });
const res = await fetch(`https://api.screenshotneo.com/v1/shot?${q}`);ScreenshotNeo includes 1,000 screenshots per month free with no card; paid plans start at $5 for 3,000 shots. Every response includes X-Page-Verdict and X-Billed headers so your application can see whether a clean page was billed.
Create a free ScreenshotNeo account and try the API with the free monthly allowance.
10. FAQ
Can html2canvas capture a screenshot of any page?
No. It reconstructs supported DOM and CSS in the browser and is subject to same-origin rules. It is not a literal capture of the browser compositor.
Should I send a data URL to my server?
Usually no. Convert the canvas to a Blob and upload it in FormData. Use a data URL only when the receiving interface explicitly requires one.
Can the browser write directly to my SQL database?
Do not embed database credentials in browser code. Send the file to an authenticated application endpoint that validates and persists it.
What should the database row contain?
Store an application identifier, owner, validated content type, byte length, creation time, and either the binary value or an object-storage key. Add retention and access metadata required by your application.
How do I capture a remote page without building a browser pipeline?
Use a screenshot service such as ScreenshotNeo, which handles the page capture request and can remove common consent and overlay elements before returning the image.


