How to Upload an Image From a URL
Learn when a URL imports an image versus merely previewing it, with runnable Cloudinary examples, security guidance, troubleshooting, and a screenshot alternative.

Short answer: you can upload an image from a URL only if the destination supports remote URL import. In that workflow, the destination server downloads the image and stores its own copy. Pasting a URL into a chat or editor may only show a preview. For Cloudinary, pass a publicly reachable HTTP(S) image URL as the file source to its Upload API. If your goal is to show a screenshot of a page rather than store an existing image, use a screenshot tool such as ScreenshotNeo.
1. First decide what “upload from a URL” means
There are three different outcomes that can look similar in a user interface:
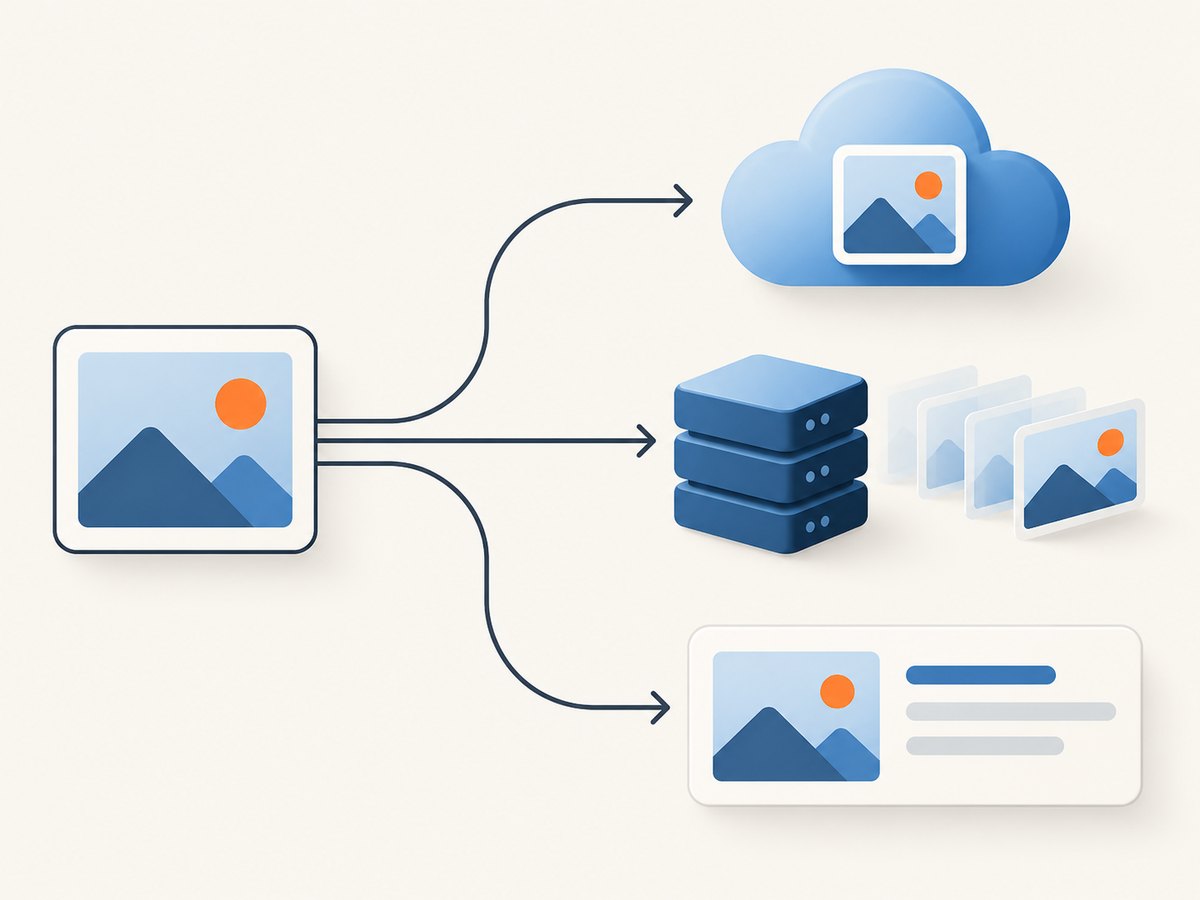
| Method | What happens | Use it when |
|---|---|---|
| Remote URL upload/import | The destination retrieves the remote file and stores an asset in your account. | You need an owned copy to manage, transform, or deliver. |
| Remote fetch/delivery | A service retrieves the origin file for delivery, potentially with transformation and caching; it is not first uploaded through the account-upload workflow. | You want a delivery layer over an externally hosted original. |
| Link preview | An app displays content associated with a URL. That does not necessarily create a stored copy in your account. | You only need to share or display the link. |
For example, Cloudinary distinguishes uploading a remote asset into your account from fetch delivery. Discord documents that pasting an image or GIF URL can display it in chat, while uploading an image uses drag-and-drop or file selection. Shopify’s fileCreate API is another platform-specific URL import route; its documentation contrasts that approach with staged uploads for large files, server-hosted files, or workflows needing more control. Don’t assume these products or other destinations behave alike.
2. Check the source URL and destination first
- Choose the destination. Find its documented remote-import method. If it has none, download the file and upload it using that service’s normal file workflow.
- Check reachability. Open the image URL independently. It should return the image, not an HTML page, sign-in prompt, expired link, or error.
- Check access controls. A source accessible only to your browser may not be accessible to the destination’s server. Determine whether the destination supports authenticated source requests.
- Decide whether you need a stored copy. If you need to manage the asset in the destination account, choose upload/import rather than fetch delivery or a preview.
- Keep credentials private. Do authenticated API work on a trusted server. Do not put service API secrets in browser code or expose source credentials in public URLs.
Cloudinary’s documentation describes remote uploads for assets already publicly available online. Its Upload API also documents request headers for protected remote sources. Use only authentication mechanisms supported by the destination, and keep credentials in a trusted environment.
3. Upload a remote image to Cloudinary
Cloudinary’s Upload API accepts a remote HTTP(S) URL as the file value. Authenticate the request using the method configured for your account. This runnable cURL example uses HTTP Basic Authentication with environment variables; set them in your shell first. The response is JSON containing information about the uploaded asset.
export CLOUDINARY_CLOUD_NAME="your_cloud_name"
export CLOUDINARY_API_KEY="your_api_key"
export CLOUDINARY_API_SECRET="your_api_secret"

curl --fail-with-body --user "$CLOUDINARY_API_KEY:$CLOUDINARY_API_SECRET" \
  --request POST "https://api.cloudinary.com/v1_1/$CLOUDINARY_CLOUD_NAME/image/upload" \
  --data-urlencode "file=https://example.com/images/photo.jpg"
Replace the example image URL with a source the Cloudinary service can retrieve. Use your actual cloud name and API credentials. Since file is form-encoded here, --data-urlencode safely encodes the URL as a form value. Cloudinary also documents signature-based backend authentication and restricted unsigned uploads for client-side use. Use the authentication option appropriate to your application; never embed the API secret in client-side code.
Python example
This example sends a form-encoded request using Python’s standard library. It reads credentials from environment variables and prints the parsed response. Run it on a trusted server or development machine, not in code shipped to a browser.
import json
import os
from urllib.parse import urlencode
from urllib.request import Request, urlopen

cloud_name = os.environ["CLOUDINARY_CLOUD_NAME"]
api_key = os.environ["CLOUDINARY_API_KEY"]
api_secret = os.environ["CLOUDINARY_API_SECRET"]

endpoint = f"https://api.cloudinary.com/v1_1/{cloud_name}/image/upload"
form = urlencode({"file": "https://example.com/images/photo.jpg"}).encode()
request = Request(endpoint, data=form, method="POST")
request.add_header("Content-Type", "application/x-www-form-urlencoded")

import base64
credentials = base64.b64encode(f"{api_key}:{api_secret}".encode()).decode()
request.add_header("Authorization", f"Basic {credentials}")

with urlopen(request, timeout=90) as response:
    result = json.load(response)
    print(json.dumps(result, indent=2))
Node.js example
This example uses the built-in fetch available in current Node.js releases. It sends the remote URL as form data and authenticates from environment variables.
const cloudName = process.env.CLOUDINARY_CLOUD_NAME;
const apiKey = process.env.CLOUDINARY_API_KEY;
const apiSecret = process.env.CLOUDINARY_API_SECRET;

if (!cloudName || !apiKey || !apiSecret) {
  throw new Error('Set CLOUDINARY_CLOUD_NAME, CLOUDINARY_API_KEY, and CLOUDINARY_API_SECRET');
}

const endpoint = `https://api.cloudinary.com/v1_1/${cloudName}/image/upload`;
const form = new URLSearchParams({
  file: 'https://example.com/images/photo.jpg',
});
const auth = Buffer.from(`${apiKey}:${apiSecret}`).toString('base64');

const response = await fetch(endpoint, {
  method: 'POST',
  headers: {
    Authorization: `Basic ${auth}`,
    'Content-Type': 'application/x-www-form-urlencoded',
  },
  body: form,
});

const body = await response.json();
if (!response.ok) {
  throw new Error(`Upload failed (${response.status}): ${JSON.stringify(body)}`);
}
console.log(body);
On completion, use the returned asset details in the destination’s documented delivery workflow. Treat a successful API response as confirmation that the destination processed the upload; don’t confuse the original source URL with the new account asset.
4. Pick upload, fetch, or preview deliberately
Upload a copy to an account
Choose this when your application needs an asset managed by the destination. Cloudinary says uploaded assets are available for transformation and delivery when upload completes. The source must be retrievable by the service; public URLs are the simplest case. If it is protected, follow the API’s supported authenticated-source behavior.
Fetch a remote asset for delivery
Cloudinary’s fetch delivery mode retrieves a remote asset for delivery, with optional transformation and caching, without first importing it through the account-upload workflow. Depending on environment settings, fetched-URL access may need to be enabled or the fetch URL may need signing. Check the current account configuration and fetch documentation before building links. This is not equivalent to storing an uploaded copy.
Share a URL preview
If you paste a URL into a chat or editor, verify whether the product has actually imported the file. Discord’s support guidance distinguishes URL previews from image uploads via drag-and-drop or file selection. When another service needs a durable file, use its import or upload workflow and confirm the resulting asset.
5. Private sources, secrets, and URL handling
- Never expose an API secret in browser code. Cloudinary explicitly warns against this. Put authenticated Upload API calls on a backend, or use a properly configured restricted unsigned preset for client-side uploads.
- Do not put source credentials in a public URL. URLs can be logged, copied, or exposed in browser history and analytics. Cloudinary cautions against exposing credentials in client-side URLs. Use supported request headers from trusted server-side code when the upload API allows them.
- Encode form values. For direct form-encoded Upload API requests, Cloudinary says the
fileparameter should be URL-encoded. The examples use form encoding helpers for this reason. - Use an allowed, stable source. Temporary URLs can expire before the destination fetches them. A URL that works in your logged-in browser may still be unreachable to a remote service.
- Confirm destination rules. Limits, allowed formats, authentication, and import behavior are product-specific. Use the destination’s current official docs for those details.
6. Troubleshooting
| Symptom | Likely cause | What to do |
|---|---|---|
| Remote URL returns an error or 404 | The object is missing, the link expired, or the server returns an error instead of image content. | Open the source directly and verify the exact URL returns the image. Cloudinary notes that a missing remote asset or a URL without image/video content can make fetch return 404. |
| Import fails for a URL that works in your browser | The URL depends on browser cookies, an authenticated session, IP allowlisting, or a redirect the destination cannot follow. | Check whether the destination supports source authentication or required headers. Test with a publicly reachable source when possible. |
| The result is a preview, not an uploaded asset | The application interpreted the URL as a link to render. | Use the product’s import/upload endpoint or its file picker, then confirm the asset appears in the account. |
| Cloudinary fetch URL is denied | Fetched-URL access may be disabled or restricted in the account. | Enable the documented access setting if appropriate or use a signed URL, according to Cloudinary’s current fetch configuration. |
| Request parameters are malformed | Reserved characters in the source URL were not encoded for the form body. | Use --data-urlencode, URLSearchParams, or a form encoder rather than concatenating raw form data. |
| Authentication error or secret exposure concern | Wrong account credentials, incorrect auth scheme, or credentials placed in client code or a public URL. | Verify credentials and the account endpoint; move secrets to a backend and rotate any secret that was exposed. |
| Upload succeeds but delivery does not | The upload workflow completed, but the application is using the source URL or an incorrect delivery reference. | Use the returned uploaded asset information according to the destination’s delivery docs. |
7. Reliability, performance, and cost considerations
Remote import saves your application from downloading the source and forwarding its bytes, but the destination still has to retrieve and process the image. Success depends on source availability, access controls, and the destination’s processing. A direct browser download followed by a client upload adds a transfer through the user’s device and exposes more opportunities for interruption; for application workflows, use the destination’s server-side import method when supported.
For reliability, validate source links before queueing important work, use stable URLs with sufficient lifetime, and record the destination’s response so failed imports can be diagnosed or retried according to the service’s guidance. Avoid repeatedly retrying a permanent 404 or authentication failure. For large files or workflows needing more control, platform-specific alternatives may apply: Shopify, for example, documents staged uploads for large files, server-hosted files, or other controlled workflows.
Cost depends on the destination’s current plan and the work it performs; the cited documentation does not establish a universal price or timing guarantee. Check current service pricing and limits before processing at scale. If what you actually need is a screenshot of a URL, fetching, uploading, and storing a source image is extra work. ScreenshotNeo offers a one-request screenshot API, with only clean shots billed and response headers indicating the page verdict and billing status.
8. Need an image of a web page instead?
An image URL points to an existing asset. A web page URL points to content that needs to be rendered in a browser before it can become an image. You can automate a browser yourself or call a screenshot API. ScreenshotNeo is a website screenshot API and MCP server from Yorker Media; it returns PNG, JPEG, WebP, or PDF and supports full-page capture, element capture, device presets, custom CSS and JavaScript, and other capture controls. See the ScreenshotNeo API documentation for parameters and response details.

Or skip the browser setup
If you need a screenshot of a page URL, this is the one-call route. Save the returned image bytes to a file:
curl -G "https://api.screenshotneo.com/v1/shot" -d access_key=YOUR_API_KEY --data-urlencode url=https://stripe.com -o shot.webpSee the API docs for the other formats and capture options. ScreenshotNeo accepts cookie and consent banners before capture and removes 60+ known consent platforms, newsletter popups, and chat widgets; each step can be turned off. Bot checks, blank pages, failed loads, timeouts, and cache hits cost nothing, and response headers identify the page verdict and whether it was billed. Its MCP server gives AI agents tools for screenshots, page information, and PDF capture. The free plan includes 1,000 shots per month with no card; paid plans start at $5 for 3,000 shots. Sign up for 1,000 free screenshots a month, with no card.
9. Frequently asked questions
Does putting an image URL in a form upload the file?
Only if that form or service implements remote URL import. Otherwise, it may treat the value as text or display a preview.
Can I upload an image from a URL that requires login?
Sometimes. The destination must support the source’s authentication method. Use its documented server-side mechanism and keep credentials private.
What is the difference between Cloudinary upload and fetch?
Upload imports the remote file as an account asset. Fetch delivers a remote asset through Cloudinary without first uploading it through that account-upload flow.
Can I upload a screenshot from a page URL?
A screenshot is generated by rendering the page, not by importing an existing image. Use browser automation or a screenshot API such as ScreenshotNeo.


