How to Upload a Screenshot With html2canvas
Capture an element with html2canvas, export it as a Blob, and upload it as multipart form data. Includes runnable code, server-side checks, and fixes for blank or missing images.
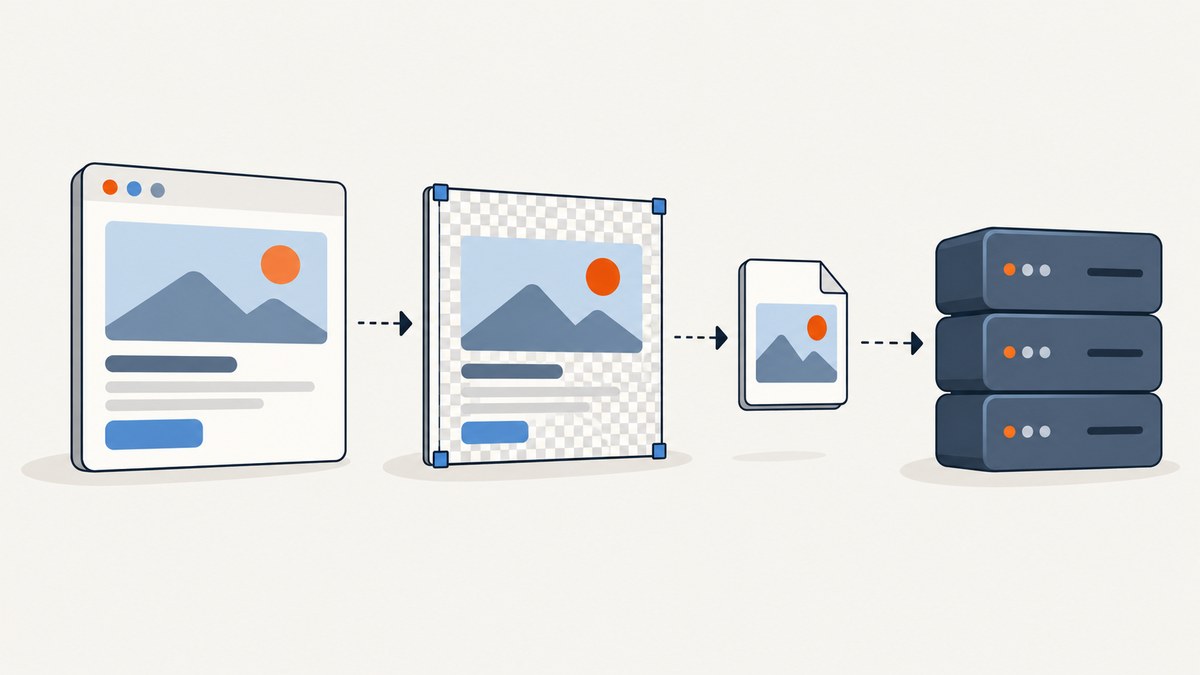
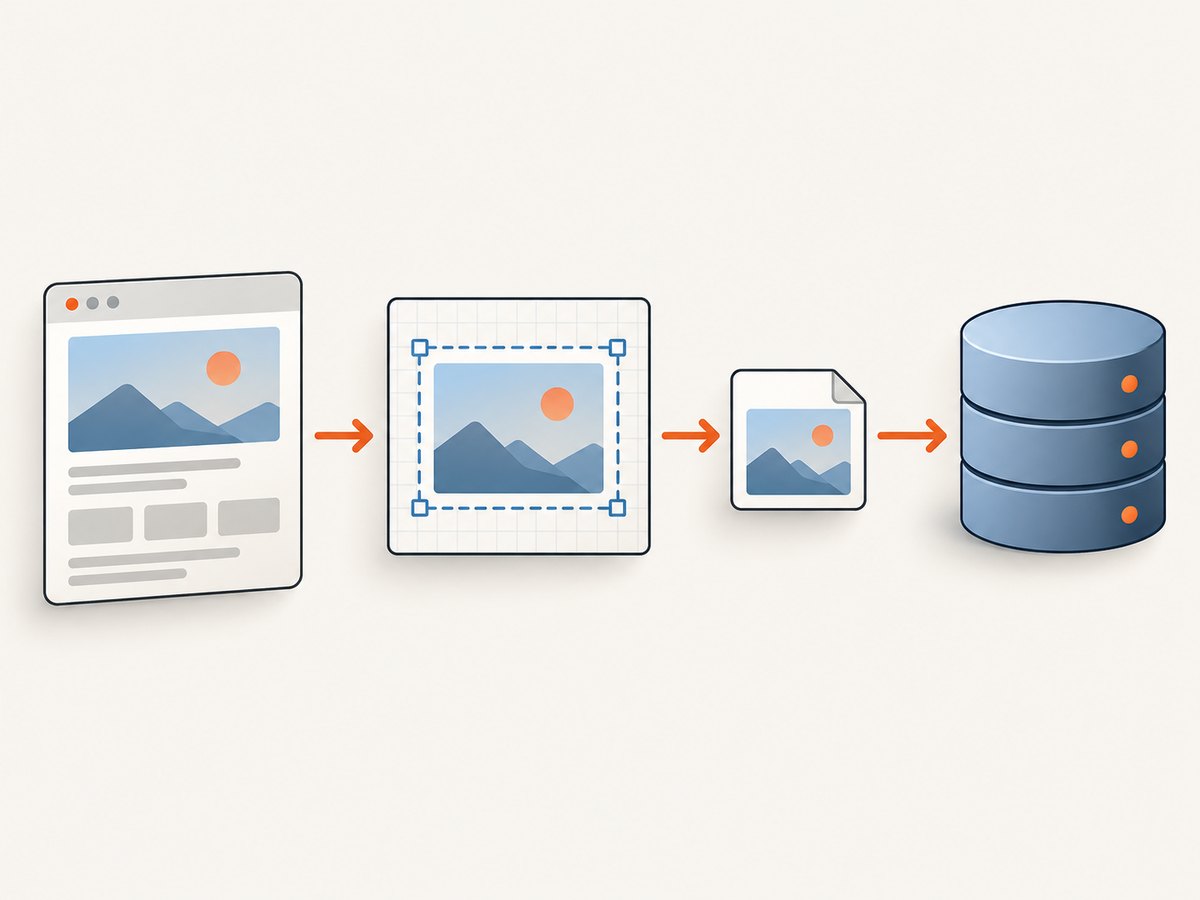
To upload an html2canvas screenshot, render a DOM element into a canvas, convert the canvas to a binary Blob, append that Blob to FormData, and send the form to an upload endpoint with fetch. The browser supplies the multipart boundary, so do not set the Content-Type header yourself. Your server must authenticate the request, enforce size and image-type limits, store the file under a safe name, and return a response your application defines.
This approach creates an image in the visitor’s browser. It is useful when the screenshot should reflect the current client-side page or when the user explicitly initiates capture. It does not take a pixel-perfect photograph of the browser compositor: html2canvas reconstructs the view from DOM elements and CSS properties it understands, so unsupported styling and browser-specific behavior can differ from what the user sees. See the html2canvas documentation for its rendering model and limitations.
1. Install html2canvas and choose the capture target
Install the package using the package manager used by your project. The project dossier recommends @html2canvas/html2canvas; if your application has standardized on another package or version, use that consistently. In a browser app bundled with a tool such as Vite, import the package in the module that handles the capture.
npm install @html2canvas/html2canvasAdd a stable selector to the part of the page that should become the image. Avoid capturing an entire app shell when only a report, chart, or card is needed: a smaller target reduces work and avoids capturing navigation or transient controls.
<section id="capture">
  <h1>Quarterly report</h1>
  <p>The content to include in the screenshot.</p>
</section>
<button id="save-screenshot" type="button">Upload screenshot</button>
2. Capture, create a Blob, and upload it
This complete browser-side example captures the selected element, exports PNG bytes, and posts them as a multipart file field named screenshot. The route and the success JSON shape are application-defined; the server example below shows one possible contract.
import html2canvas from '@html2canvas/html2canvas';

async function uploadScreenshot() {
  const element = document.querySelector('#capture');
  if (!element) throw new Error('Capture target not found');

  const canvas = await html2canvas(element, {
    backgroundColor: '#ffffff',
    scale: window.devicePixelRatio,
    useCORS: true
  });

  const blob = await new Promise((resolve, reject) =>
    canvas.toBlob(
      result => result
        ? resolve(result)
        : reject(new Error('Canvas export failed')),
      'image/png'
    )
  );

  const form = new FormData();
  form.append('screenshot', blob, 'screenshot.png');

  const response = await fetch('/api/screenshots', {
    method: 'POST',
    body: form,
    credentials: 'same-origin'
  });
  if (!response.ok) throw new Error(`Upload failed: ${response.status}`);
  return response.json();
}

document.querySelector('#save-screenshot')?.addEventListener('click', async () => {
  try {
    const result = await uploadScreenshot();
    console.log('Screenshot uploaded', result);
  } catch (error) {
    console.error(error);
  }
});
credentials: 'same-origin' sends same-origin cookies, which is appropriate only if your endpoint uses that authentication model. For a cross-origin API, configure the server’s CORS policy and choose the intended credentials mode; do not put a privileged server secret in browser code. If you use a bearer token, send it only when it is safe for the client to possess and the endpoint is designed to accept it.
Do not add Content-Type: multipart/form-data manually. The browser must add a boundary parameter that matches the encoded body. A manually supplied header commonly leaves the server unable to parse the file.
3. Define a safe upload endpoint
The browser code cannot determine your storage, authorization, maximum file size, or response schema. Define those explicitly. The following Express example uses multer for multipart parsing, limits the incoming file, checks the PNG signature, and writes it under a generated name. Add your application’s real authentication middleware and persistent storage before using this in production.
import express from 'express';
import multer from 'multer';
import { randomUUID } from 'node:crypto';
import { mkdir, writeFile } from 'node:fs/promises';
import path from 'node:path';

const app = express();
const upload = multer({
  storage: multer.memoryStorage(),
  limits: { fileSize: 8 * 1024 * 1024, files: 1 }
});
const storageDir = path.resolve('private-uploads');

app.post('/api/screenshots', /* requireUser, */ upload.single('screenshot'), async (req, res, next) => {
  try {
    const file = req.file;
    if (!file) return res.status(400).json({ error: 'screenshot_required' });

    const isPng = file.buffer.length >= 8 &&
      file.buffer.subarray(0, 8).equals(Buffer.from([137, 80, 78, 71, 13, 10, 26, 10]));
    if (!isPng) return res.status(415).json({ error: 'png_required' });

    await mkdir(storageDir, { recursive: true });
    const id = randomUUID();
    await writeFile(path.join(storageDir, `${id}.png`), file.buffer, { flag: 'wx' });
    return res.status(201).json({ id, contentType: 'image/png' });
  } catch (error) {
    next(error);
  }
});

app.listen(3000);
This example buffers files in memory and is intentionally small. For larger or frequent uploads, stream to controlled storage and ensure limits also exist at the reverse proxy or hosting layer. The client-provided filename is used only as a multipart label; the server generates the storage name. A production endpoint should also apply authorization, request-rate controls appropriate to the application, retention rules, and error handling that does not expose internal paths.
4. Tune capture quality and scope
Pass options to html2canvas(element, options) to control what is rendered. Option names and behavior are documented in the configuration reference. Choose the smallest capture region and the lowest scale that meets the output requirement.
| Option | What it controls | Practical guidance |
|---|---|---|
scale |
Output pixel density. The documented default is the browser’s device-pixel ratio. | Higher values produce larger images and use more memory. Set it deliberately if upload size or memory matters. |
x, y, width, height |
A crop region for the capture. | Use these when you need only a portion of a large element; check coordinates against the rendered target. |
backgroundColor |
Background fill. A color makes output predictable; null can preserve transparency. |
Use transparency only when PNG or the downstream workflow supports it. |
useCORS |
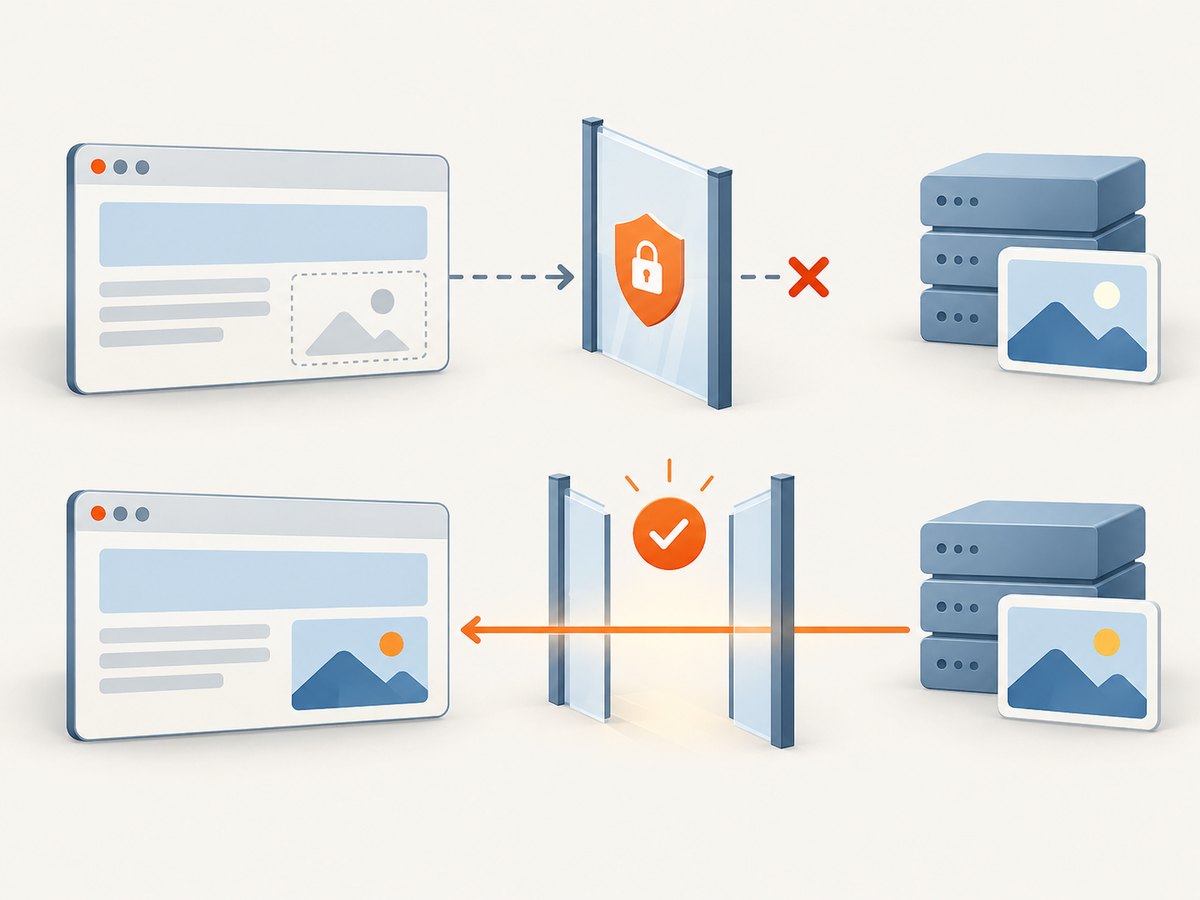
Attempts to load images cross-origin with CORS. | The remote image server must send suitable CORS headers; this option cannot bypass access controls. |
proxy |
Uses a proxy to load resources that cannot be read directly. | Configure a proxy you control that returns permitted resources in a readable form. |
ignoreElements or data-html2canvas-ignore |
Excludes selected nodes from rendering. | Hide buttons, transient notices, or sensitive fields before creating the image. |
windowWidth, windowHeight |
Viewport dimensions used for media-query evaluation. | Set these when a particular responsive layout is required, and ensure the content is laid out for those dimensions. |
imageTimeout |
How long image loading is allowed to take. | Increase it only when slow images are expected and the longer capture delay is acceptable. |
For example, exclude a control and choose a fixed background:
const canvas = await html2canvas(document.querySelector('#capture'), {
  backgroundColor: '#fff',
  scale: 1,
  ignoreElements: element => element.matches('.no-screenshot, button'),
  imageTimeout: 15000
});
Options do not make unsupported CSS render faithfully. Plugins, some browser-specific effects, and content inaccessible to the page’s JavaScript can remain unavailable. A cross-origin iframe cannot be rendered because its contentDocument is not accessible to the parent page.
5. Handle image formats and base64 APIs
A Blob is generally the simplest upload representation because it sends binary file data without base64 expansion. If the receiving API explicitly accepts JSON with base64, a data URL is an alternative. The official examples use canvas.toDataURL('image/png') for a downloadable PNG; a data URL may be posted as text when the endpoint requires it.
const dataUrl = canvas.toDataURL('image/png');
const response = await fetch('/api/screenshots/base64', {
  method: 'POST',
  headers: { 'Content-Type': 'application/json' },
  body: JSON.stringify({ image: dataUrl })
});
if (!response.ok) throw new Error(`Upload failed: ${response.status}`);
Only strip the data:image/png;base64, prefix if the receiving API specifically expects raw base64. The server must decode and validate the bytes and enforce a limit on the decoded result as well as the request body. Do not accept arbitrary data URLs as trusted images.
6. cURL, Python, and Node.js upload clients
These examples send an image file that has already been created, for example by the browser workflow above. They do not run html2canvas: html2canvas is a browser-side DOM rendering library. Replace the endpoint and field name with the contract your server implements.
cURL
curl --fail-with-body \
  -X POST "https://example.com/api/screenshots" \
  -F "screenshot=@screenshot.png;type=image/png"
Python
import requests

with open('screenshot.png', 'rb') as image_file:
    response = requests.post(
        'https://example.com/api/screenshots',
        files={'screenshot': ('screenshot.png', image_file, 'image/png')},
        timeout=30,
    )
response.raise_for_status()
print(response.json())
Node.js
import { readFile } from 'node:fs/promises';

const bytes = await readFile('screenshot.png');
const form = new FormData();
form.append('screenshot', new Blob([bytes], { type: 'image/png' }), 'screenshot.png');
const response = await fetch('https://example.com/api/screenshots', {
  method: 'POST',
  body: form
});
if (!response.ok) throw new Error(`Upload failed: ${response.status}`);
console.log(await response.json());
These clients use multipart encoding. The endpoint must accept the same field name, authorize the caller as required, and return JSON if the client calls response.json().
7. Common failures and fixes
| Symptom | Likely cause | Fix |
|---|---|---|
| Canvas export throws a security error or image is missing | A cross-origin image lacks suitable CORS headers, or the canvas is tainted by cross-origin content. | Serve the image with suitable CORS headers and use useCORS: true, or configure a permitted proxy under your control. Once tainted, canvas pixels cannot safely be read back. |
| Part of the page is blank | Content is in a cross-origin iframe, uses unsupported CSS, or was not loaded when capture began. | Do not expect access to a cross-origin iframe. Wait for app content to render and simplify unsupported effects where possible. |
| Upload returns 400 or server says no file | The client field name and server parser disagree, or the manually set multipart header has no matching boundary. | Use the same field name on both sides and remove the manual Content-Type header. |
| Upload returns 401 or 403 | Session credentials are missing, expired, or rejected; a cross-origin request may omit credentials. | Use the endpoint’s intended authentication flow, confirm cookie scope and credentials mode, and configure CORS when needed. |
| Upload returns 413 or file-size error | The request exceeds an application, proxy, or hosting limit. | Reduce the captured area or scale, and align the client expectations with server and proxy limits. |
| Canvas is null, tiny, or unexpectedly large | The target was absent, dimensions were wrong, or a high scale multiplied pixel dimensions. | Check the selector and measured bounds; inspect output dimensions and reduce scale or crop the capture. |
| Server rejects a valid-looking PNG | The request field is parsed differently, the actual bytes are not PNG, or a data URL was sent where a file was expected. | Check the endpoint contract and validate the actual signature and decoded type on the server. |
8. Performance, reliability, and cost
Capture work runs in the user’s browser, so the user’s device performs the rendering and encoding. Large page regions and high scale increase pixel count, memory use, and upload bytes. Bound the target dimensions, avoid unnecessary retries, and show progress or a pending state if capture is perceptible. A smaller crop is often the most effective control.
Capture reliability depends on when the page is ready, whether required images are readable, and whether the destination accepts the request. Wait for application-specific content before capture; do not rely on a fixed delay when your app can signal readiness. Use a request timeout strategy appropriate to your app, handle non-2xx responses, and avoid retrying permanent errors such as authorization failures or rejected file types. For retryable network failures, use an idempotency strategy on the server so a repeated upload does not create unwanted duplicates.
Upload cost depends on your hosting, bandwidth, and storage policy; html2canvas itself does not define those costs. Set retention and access controls for screenshots, especially if the captured interface can contain personal or confidential information. Authenticate uploads and enforce limits on both the incoming request and the decoded image.
9. Or skip the browser setup
If you need a screenshot of a public page without running capture code in a visitor’s browser, ScreenshotNeo is a website screenshot API and MCP server. It accepts one GET request with a URL and returns PNG, JPEG, WebP, or PDF. The API call is documented at ScreenshotNeo docs.
curl -G "https://api.screenshotneo.com/v1/shot" \
  -d access_key=YOUR_API_KEY \
  --data-urlencode url=https://stripe.com \
  -o shot.webp
import requests
r = requests.get(
"https://api.screenshotneo.com/v1/shot",
params={"access_key": "YOUR_API_KEY", "url": "https://stripe.com"},
timeout=90,
)
r.raise_for_status()
open("shot.webp", "wb").write(r.content)const q = new URLSearchParams({
access_key: 'YOUR_API_KEY',
url: 'https://stripe.com'
});
const res = await fetch(`https://api.screenshotneo.com/v1/shot?${q}`);
if (!res.ok) throw new Error(`Screenshot request failed: ${res.status}`);
const image = await res.arrayBuffer();ScreenshotNeo accepts cookie and consent banners like a visitor and removes more than 60 known consent platforms, newsletter popups, and chat widgets before capture; each step can be turned off. Bot checks and CAPTCHAs, blank pages, timeouts, failed loads, and cache hits are not billed, and response headers report the page verdict and billing status. Its MCP server provides take_screenshot, get_page_info, and capture_pdf tools for Claude, Cursor, and other MCP clients. The free plan includes 1,000 screenshots per month with no card; paid plans start at $5 for 3,000 shots. Sign up for the free plan and try ScreenshotNeo.
10. Frequently asked questions
Can html2canvas take a screenshot of any URL?
No. It renders DOM content available to the current page, subject to browser same-origin access and the library’s supported properties. It is not a general remote URL screenshot service.
Does uploading the Blob require a separate library?
No. Browsers provide Blob, FormData, and fetch. Your server still needs a multipart parser and an application-defined storage and validation flow.
Should I use PNG or JPEG?
PNG is used in the examples because it preserves sharp edges and transparency. Choose another format only when your capture and endpoint support it, and check the resulting visual quality and size for your content.
Can I upload a screenshot without showing a download prompt?
Yes. Calling fetch with the Blob sends it directly to your endpoint; no download step is required.


