How to Upscale a Low-Resolution PNG
Learn how to enlarge a low-resolution PNG with Photoshop, ImageMagick, GIMP, Python, and AI while preserving edges, proportions, and transparency.
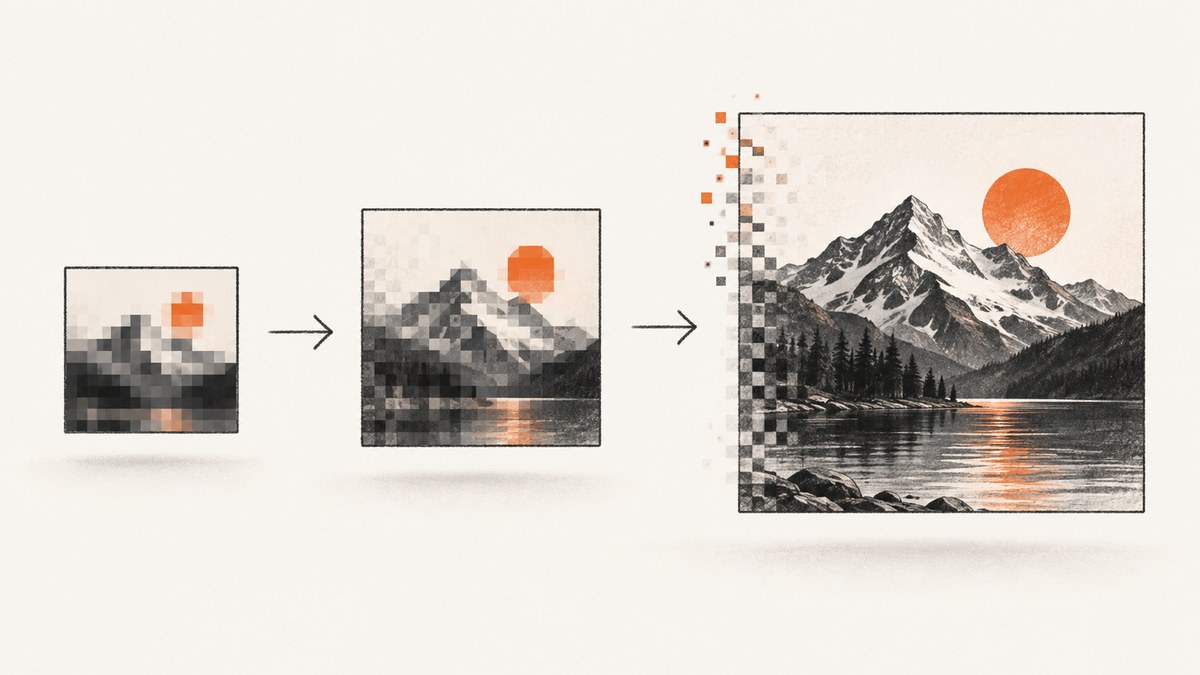
Short answer: make a copy of the PNG, decide the target pixel dimensions, keep the aspect ratio locked, and choose a resampling method that matches the image. Use Nearest Neighbor for pixel art, a detail-preserving or bicubic method for photographs and smooth graphics, and AI upscaling only when invented detail is acceptable. Upscaling adds estimated pixels; it cannot recover detail that was never present in the original. Adobe states that “upsampling can’t add detail that wasn’t in the original.” Adobe’s resampling guidance explains the limitation.
1. Check the source and target
- Record the source width and height in pixels. A PNG’s pixel dimensions contain the actual image data; changing only its PPI or DPI metadata does not create pixels.
- Choose the output dimensions based on where the file will be used. For a web image, target the rendered CSS size and device-pixel ratio. For print, calculate pixels from physical size and required PPI.
- Lock the aspect ratio unless you intentionally want distortion. For example, a 640×480 image enlarged 2× becomes 1280×960.
- Keep the original file untouched and write the enlarged result to a new filename.
For print, the basic calculation is pixels = inches × PPI. A 6-inch-wide image at 300 PPI needs 1,800 pixels across. PPI metadata can tell a printer how large to place an image, but it does not improve a 640-pixel source.
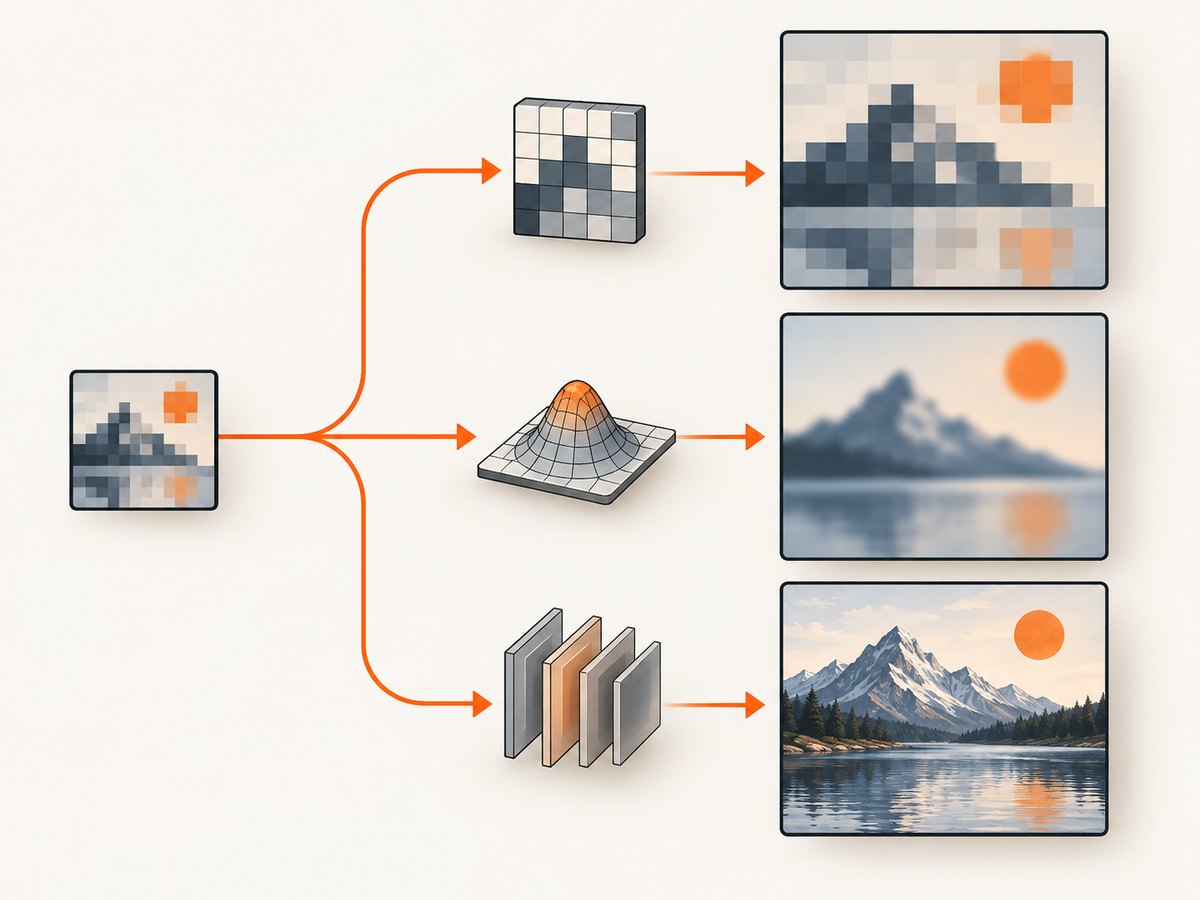
2. Pick a method by image type
| Image | Recommended starting method | Inspect for |
|---|---|---|
| Pixel art or intentionally blocky icons | Nearest Neighbor | Square pixels and hard boundaries staying intact |
| Photographs and smooth tonal images | Preserve Details 2.0 or Bicubic Smoother | Noise, halos, waxy texture, and believable detail |
| Logos, diagrams, and geometric artwork | Higher-resolution or vector source when available; otherwise a detail-preserving method | Thin lines, corners, and small lettering |
| Images where invented texture is acceptable | Generative or AI upscaling | Faces, text, repeated patterns, and altered shapes |
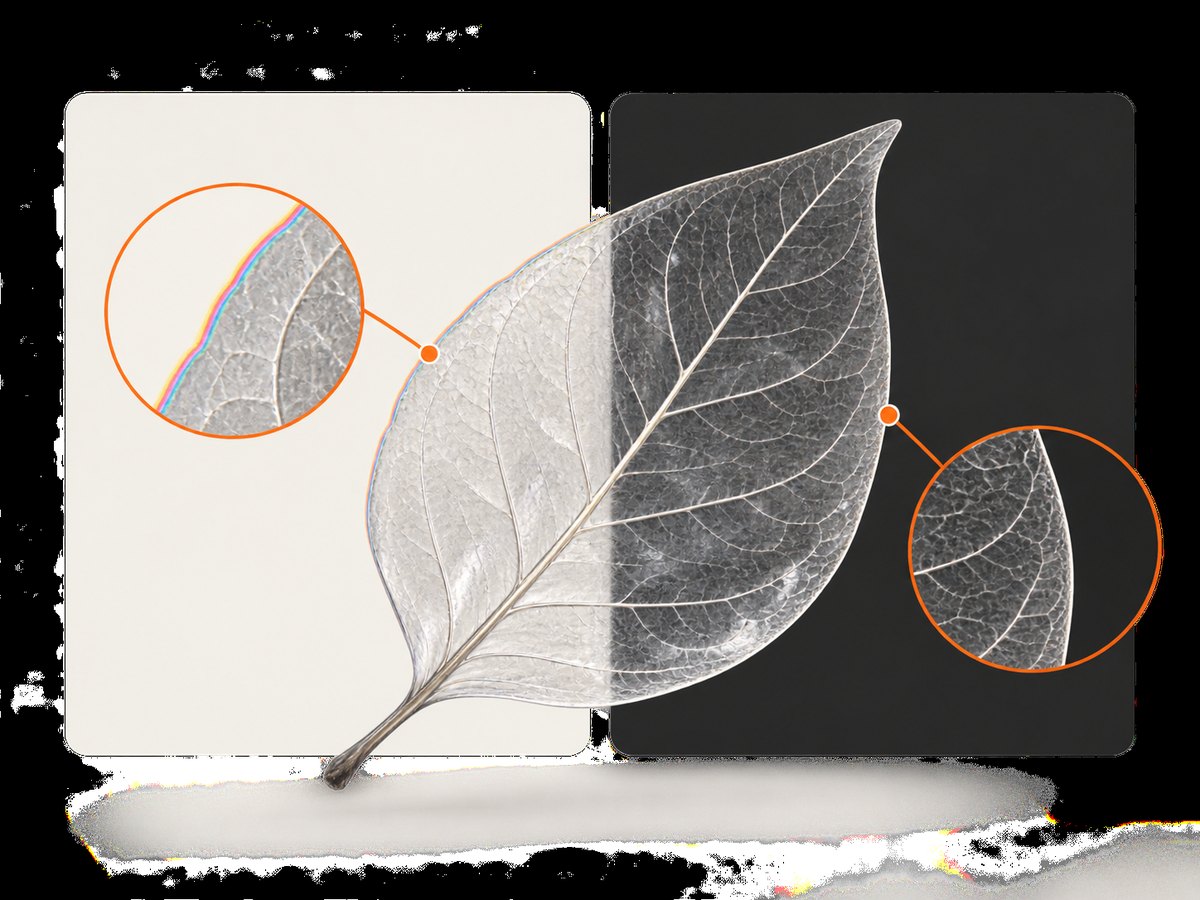
| PNG with transparency | Any method followed by alpha inspection | Fringes, halos, and transparent regions |
There is no universally best algorithm. Compare the result at its intended display size, not only at extreme zoom.
3. Upscale in Photoshop
- Open the PNG and choose Image > Image Size.
- Enable Resample and keep the chain or link icon enabled so width and height remain proportional.
- Enter the target pixel width or height.
- For photographs and smooth artwork, try Preserve Details 2.0 and adjust its Reduce Noise control. Bicubic Smoother is another enlargement option. For pixel art, choose Nearest Neighbor.
- Click OK, inspect edges and important details at 100% and at the final viewing size, then use File > Export > Export As to create a new PNG.
Adobe documents these resampling choices in its resampling options reference and its resize images guide.
AI enlargement in Photoshop
In current Photoshop versions, choose Image > Generative Upscale and select 2× or 4×. Adobe documents Firefly Upscaler at up to 6144×6144 pixels, Topaz Gigapixel at up to 56 megapixels, and Topaz Bloom at up to 9 megapixels; access, subscriptions, models, and limits can change, so check the current interface before committing to a workflow. The result is created in a new document. Compare faces, lettering, fine lines, and textures against the source because the model is interpreting missing detail, not recovering it. See Adobe’s Generative Upscale documentation.
4. Upscale from the command line with ImageMagick
ImageMagick is useful for repeatable jobs and server scripts. Install it from the official project for your operating system, then run:
magick input.png -filter Lanczos -resize 200% output.pngTo specify an exact maximum width while preserving the aspect ratio:
magick input.png -filter Lanczos -resize 2400x2400\> output.pngThe escaped \> means “only shrink images larger than this box”; remove it when you always want ImageMagick to resize. For pixel art, use point sampling:
magick pixel-art.png -filter point -resize 800% pixel-art-large.pngTo inspect dimensions and alpha information:
magick identify -format 'file=%f\nsize=%wx%h\nchannels=%[channels]\n' output.pngImageMagick’s command-line options reference documents resize filters and alpha-channel controls. Keep the output as PNG when you need lossless compression or transparency.
5. Upscale with GIMP
- Open the PNG and choose Image > Scale Image.
- Set the width or height and leave the chain linked.
- Choose an interpolation method. Start with NoHalo or LoHalo for photographic images when available; use None for pixel-art-style hard blocks.
- Set the X and Y resolution only for print placement; changing resolution alone does not add pixels.
- Export to a new PNG and inspect transparency.
The GIMP Scale Image documentation describes the dialog and interpolation settings.
6. Automate PNG upscaling with Python
Pillow provides a straightforward conventional resize. Install it with python -m pip install Pillow, then save this as upscale.py:
from pathlib import Path
from PIL import Image

source = Path("input.png")
destination = Path("output-2x.png")
scale = 2

with Image.open(source) as image:
    width, height = image.size
    new_size = (width * scale, height * scale)
    # LANCZOS works well as a starting point for photographs and smooth graphics.
    enlarged = image.resize(new_size, Image.Resampling.LANCZOS)
    enlarged.save(destination, format="PNG", optimize=True)

print(f"Wrote {destination} at {new_size[0]}x{new_size[1]}")
For pixel art, replace Image.Resampling.LANCZOS with Image.Resampling.NEAREST. Pillow preserves an RGBA mode when the source has an alpha channel, but still inspect the exported edges over both light and dark backgrounds.
7. A repeatable JavaScript workflow with Node.js
For Node.js processing, the sharp package supports common resize kernels. Install it with npm install sharp:
import sharp from "sharp";

const input = "input.png";
const output = "output-2x.png";
const metadata = await sharp(input).metadata();

if (!metadata.width || !metadata.height) {
  throw new Error("Could not read image dimensions");
}

await sharp(input)
  .resize({ width: metadata.width * 2, height: metadata.height * 2, kernel: sharp.kernel.lanczos3 })
  .png()
  .toFile(output);

console.log(`Wrote ${output}`);
Use a nearest-neighbor kernel when your chosen library exposes one and the source is pixel art. Validate the output dimensions and alpha channel in your own pipeline before replacing the source.
8. Transparency, text, and other edge cases
- Transparent PNGs: export a copy and view it over white, black, and a mid-tone background. Semi-transparent edge pixels can reveal colored fringes after enlargement.
- Small text: AI methods may change letter shapes. If the text is important, recreate it from the original typeface or obtain a higher-resolution source.
- Logos and icons: vector artwork or a larger original is usually more faithful than invented pixels.
- Sprites and pixel art: use integer scale factors and nearest-neighbor sampling so blocks remain crisp.
- Very large targets: upscale in stages only if your chosen tool handles memory better that way; inspect each result because repeated resampling can soften edges.
- Animated PNGs: check whether your tool processes every frame. Some workflows operate only on the first frame.
- Color profiles: preserve the embedded profile when color accuracy matters, and compare the exported file in the application where it will be used.
- Interlaced or indexed PNGs: convert to a full RGB or RGBA working mode when a filter behaves unexpectedly, then export a new PNG.
9. How to judge the result
- Compare the original and enlarged files side by side at the intended display or print size.
- Zoom to 100% and inspect diagonals, hair, foliage, repeated patterns, and high-contrast edges.
- Check every meaningful face, number, label, and logo against the source.
- Verify width, height, color mode, file size, and transparency.
- Keep the original and record the method, scale, and settings so you can reproduce or undo the decision.
10. Or skip the browser setup
If the PNG is a screenshot you still need to capture from a web page, ScreenshotNeo can capture a cleaner, higher-resolution source before you upscale it. It accepts a URL and returns PNG, JPEG, WebP, or PDF. Cookie and consent banners, newsletter popups, and chat widgets are removed before capture. Bot checks, blank pages, failed loads, timeouts, and cache hits are not billed, and response headers report the page verdict and billing status. Its MCP server lets Claude, Cursor, and other MCP clients call take_screenshot, get_page_info, and capture_pdf. See the ScreenshotNeo API documentation.
curl -G "https://api.screenshotneo.com/v1/shot" -d access_key=YOUR_API_KEY --data-urlencode url=https://stripe.com -o shot.webpimport requests
r = requests.get("https://api.screenshotneo.com/v1/shot", params={"access_key": "YOUR_API_KEY", "url": "https://stripe.com"}, timeout=90)
open("shot.webp", "wb").write(r.content)const q = new URLSearchParams({ access_key: 'YOUR_API_KEY', url: 'https://stripe.com' }); const res = await fetch(`https://api.screenshotneo.com/v1/shot?${q}`);Use viewport, device preset, retina scale, full-page capture, custom CSS, waits, cookies, headers, caching, or element selectors when the source page needs them. ScreenshotNeo includes 1,000 shots per month free with no card; paid plans start at $5 for 3,000 shots. Create a free ScreenshotNeo account.
11. Troubleshooting
| Symptom | Likely cause | Fix |
|---|---|---|
| Image looks blurry | Source lacks detail or filter softened edges | Try a detail-preserving method, compare at final size, or obtain a larger original |
| Pixel art has fuzzy blocks | Smoothing interpolation was used | Use Nearest Neighbor or point sampling with an integer scale |
| Jagged halos around objects | Sharpening or ringing near high-contrast edges | Try Bicubic Smoother or a lower-sharpening method and inspect at 100% |
| Transparent edges show a fringe | Colored matte pixels were enlarged | Check the source alpha, export RGBA, and inspect over light and dark backgrounds |
| Text is incorrect after AI upscale | The model invented letter shapes | Use conventional resampling or replace the text from a vector/source file |
| Output is distorted | Width and height were changed independently | Lock the aspect ratio or calculate one dimension from the other |
| File is unexpectedly huge | Large dimensions, RGBA data, or minimal PNG compression | Confirm dimensions, keep only needed alpha, and use lossless optimization |
| ImageMagick command fails | Executable is missing or shell quoting is wrong | Run magick -version, then quote paths containing spaces |
12. Performance, reliability, and cost
Conventional resizing is deterministic and usually inexpensive on a local machine. Memory use grows with the output pixel count, so very large images may need a 64-bit process and sufficient temporary disk space. AI upscaling can require more compute, may have subscription or access limits, and can produce different interpretations between model versions. For production jobs, keep the source, record settings, validate dimensions and alpha, and retain a checksum or versioned output.
When web screenshots are part of the pipeline, caching repeated URLs can reduce work. ScreenshotNeo lets you choose a cache TTL; only clean shots are billed, while failed loads and cache hits cost nothing. Review the response’s X-Page-Verdict and X-Billed headers before treating a capture as usable.
13. FAQ
Can I make a PNG higher resolution by changing DPI?
No. DPI or PPI metadata changes placement size; resampling is what creates additional pixels.
Is 4× always better than 2×?
No. A larger scale increases the number of estimated pixels and can make artifacts more visible. Choose the smallest output that meets the real use case.
Should I use AI for a logo?
Usually only when you can inspect every edge and letter. A vector or higher-resolution original is safer for exact geometry.
Will PNG remain lossless after upscaling?
PNG compression remains lossless, but the newly created pixels can still be inaccurate or soft. Lossless compression does not restore missing detail.
How do I preserve transparency?
Work in RGBA, export PNG, and inspect the result over both light and dark backgrounds for halos or lost transparent areas.


