How to Use Puppeteer in Node.js (With Examples)
Install Puppeteer, launch Chrome, automate pages, take screenshots, handle browser lifecycle, and troubleshoot common Node.js setup errors.

Direct answer: install puppeteer, launch a browser, create a page, navigate with page.goto(), interact through the Page API, and close the browser when finished. The smallest useful script is:
import puppeteer from 'puppeteer';

const browser = await puppeteer.launch();
const page = await browser.newPage();

await page.goto('https://example.com');
console.log(await page.title());

await browser.close();
Puppeteer runs Chrome automation from Node.js. You can use it for testing, scraping, generating screenshots and PDFs, checking page behavior, or driving a browser as part of a larger workflow. The current Puppeteer documentation lists Node.js 22.12 or later; check the system requirements when you use a different Puppeteer release.
1. Install Puppeteer and choose the right package
Start a Node.js project and install the batteries-included package:
mkdir puppeteer-demo
cd puppeteer-demo
npm init -y
npm install puppeteer
The puppeteer package installs the JavaScript library and downloads a compatible Chrome for Testing browser. That is the simplest choice when your script owns the browser installation.
Use puppeteer-core when you manage the browser yourself or connect to a remote browser:
npm install puppeteer-corepuppeteer-core does not download Chrome. Your code must provide an executable path or connect to an existing browser endpoint. Mixing examples from the two packages is a common source of launch errors.
Modern package managers can block install scripts. If Puppeteer installs but no browser is available, follow the installation guide’s documented options: allow Puppeteer’s install script or install a browser through Puppeteer’s browser command. Do not assume that a missing browser means the npm package itself failed.
For ES module syntax, add this to package.json:
{
  "type": "module"
}
Alternatively, use a .mjs file. With CommonJS, load the default export according to the package version and your Node.js module settings.
2. Launch a browser, visit a page, and clean up
A normal script owns its browser lifecycle. Launch, create one or more pages, do the work, and close the browser in a finally block so failures do not leave Chrome processes running:
import puppeteer from 'puppeteer';

let browser;
try {
  browser = await puppeteer.launch();
  const page = await browser.newPage();
  await page.goto('https://example.com', {waitUntil: 'domcontentloaded'});
  console.log({
    title: await page.title(),
    url: page.url()
  });
} finally {
  if (browser) await browser.close();
}
page.goto() waits for navigation according to the option you select. domcontentloaded returns after the document is parsed. The default navigation behavior is stricter and can wait for more page activity. For pages that continue making requests indefinitely, choose an explicit condition and add your own readiness check.
Set a navigation timeout when a slow page should fail predictably:
page.setDefaultNavigationTimeout(45_000);
await page.goto('https://example.com', {waitUntil: 'networkidle2'});
Use networkidle2 only when it matches the page. Analytics, ads, sockets, and other long-lived requests can prevent a network-idle condition from occurring.
3. Headless and visible browser modes
Puppeteer launches in headless mode by default, which is suitable for CI and servers. To watch the browser while developing, use:
const browser = await puppeteer.launch({headless: false});The current guide also documents headless: 'shell', which uses the separate chrome-headless-shell binary. It does not behave exactly like regular Chrome, so use it only when its documented feature set fits your job and a lighter headless process is useful:
const browser = await puppeteer.launch({headless: 'shell'});Keep the default headless mode unless you need a visible window or have a specific reason to use the shell binary.
4. Interact with pages safely
After navigation, use locators and page methods to find and manipulate elements. This example fills a search field, submits it, waits for a result, and reads text:
import puppeteer from 'puppeteer';

const browser = await puppeteer.launch();
try {
  const page = await browser.newPage();
  await page.setViewport({width: 1365, height: 900});
  await page.goto('https://example.com', {waitUntil: 'domcontentloaded'});

  await page.locator('input[name="q"]').fill('puppeteer');
  await page.locator('input[name="q"]').press('Enter');
  await page.locator('main').wait();

  console.log(await page.title());
} finally {
  await browser.close();
}
Prefer stable selectors such as accessible roles, labels, names, and data attributes. Avoid selectors tied to generated class names. A selector can exist before it is usable, so wait for the state your action needs rather than adding an arbitrary delay.
For a one-off delay, use:
await new Promise(resolve => setTimeout(resolve, 1000));A selector wait is usually more reliable:
await page.waitForSelector('[data-ready="true"]');When a page opens a new tab or popup, capture the target before clicking:
const popupPromise = new Promise(resolve =>
  browser.once('targetcreated', target => resolve(target.page()))
);
await page.click('a[target="_blank"]');
const popup = await popupPromise;
For scripts that handle several users or jobs, create isolated browser contexts. Cookies and local storage are not shared between contexts:
const context = await browser.createBrowserContext();
const page = await context.newPage();
// ...work with isolated cookies and storage...
await context.close();
5. Set viewport, headers, cookies, and identity
Make rendering deterministic by setting the viewport explicitly. Device emulation can also set a mobile viewport, user agent, touch support, and device scale factor. For a simple custom viewport:
await page.setViewport({
  width: 1440,
  height: 900,
  deviceScaleFactor: 1
});
Set headers before navigation when the application expects them:
await page.setExtraHTTPHeaders({
  'Accept-Language': 'en-US,en;q=0.9',
  'X-Workflow': 'preview'
});
Cookies require a URL or matching domain:
await page.setCookie({
  name: 'session',
  value: 'example-value',
  domain: 'example.com',
  path: '/'
});
Use these controls only for systems you are authorized to access. Keep credentials out of source control and CI logs.
6. Capture screenshots and PDFs
The Page API can save a screenshot after navigation:
import puppeteer from 'puppeteer';

const browser = await puppeteer.launch();
try {
  const page = await browser.newPage();
  await page.setViewport({width: 1280, height: 800});
  await page.goto('https://example.com', {waitUntil: 'networkidle2'});
  await page.screenshot({path: 'screenshot.png', fullPage: true});
  await page.pdf({path: 'page.pdf', format: 'A4', printBackground: true});
} finally {
  await browser.close();
}
fullPage: true captures the document’s full scrollable height. Dynamic pages may lazy-load images only after scrolling; if those images matter, scroll through the page or wait for each image before capturing. PDFs use print layout, so compare the output with the screen layout and set margins, paper format, and background printing deliberately.
To capture one element, locate its bounding box and pass the resulting clip to page.screenshot(). Ensure the element is visible and stable first:
const card = await page.locator('[data-card="pricing"]').boundingBox();
if (!card) throw new Error('Pricing card is not visible');
await page.screenshot({path: 'pricing.png', clip: card});
7. Connect to an existing browser
Use launch() when the script starts and owns Chrome. Use connect() when another process or service owns it and gives you a WebSocket endpoint. After connected work, call browser.disconnect() to detach without stopping the external browser:
import puppeteer from 'puppeteer';

const browser = await puppeteer.connect({
  browserWSEndpoint: process.env.BROWSER_WS_ENDPOINT
});
try {
  const pages = await browser.pages();
  const page = pages[0] ?? await browser.newPage();
  await page.goto('https://example.com');
} finally {
  browser.disconnect();
}
browser.close() shuts down a browser controlled by your script. It is not interchangeable with disconnect().
8. A complete reusable screenshot script
import puppeteer from 'puppeteer';

const target = process.argv[2] ?? 'https://example.com';
const output = process.argv[3] ?? 'shot.png';

const browser = await puppeteer.launch();
try {
  const page = await browser.newPage();
  await page.setViewport({width: 1440, height: 900, deviceScaleFactor: 1});
  page.setDefaultNavigationTimeout(45_000);
  await page.goto(target, {waitUntil: 'domcontentloaded'});
  await page.waitForSelector('body');
  await page.screenshot({path: output, fullPage: true});
  console.log(`Saved ${output}`);
} finally {
  await browser.close();
}
Run it with node capture.mjs https://example.com example.png. Validate and allow-list URLs in production, especially when a URL comes from a user or webhook.
9. Troubleshooting Puppeteer
| Error or symptom | Likely cause | Fix |
|---|---|---|
| “Could not find Chrome” or executable missing | The browser download was skipped or puppeteer-core is being used without a browser. |
Allow the install script, install a browser with Puppeteer’s documented browser command, or provide an executable path when using puppeteer-core. |
| Navigation timeout | The page keeps requests open, is slow, or never reaches the selected wait condition. | Choose domcontentloaded, increase the timeout, wait for a specific selector, and inspect the URL separately. |
| Selector not found | The selector is wrong, content is inside an iframe, or the page has not rendered it. | Verify the selector in DevTools, wait for it, and switch to the relevant frame when necessary. |
| Screenshot is blank or incomplete | The page is still rendering, content is lazy-loaded, or the element is outside the captured region. | Wait for a readiness signal, scroll to trigger lazy loading, set the viewport, and confirm the element’s bounding box. |
| Works locally but fails in CI | Different Node, browser, OS dependencies, sandbox, fonts, or network access. | Pin the Node and Puppeteer versions, install the platform requirements from the current system-requirements guide, and log browser and navigation errors. |
| Chrome processes remain after errors | The script exits before cleanup. | Put browser.close() in finally; use disconnect() only for externally managed browsers. |
Linux dependencies vary by distribution and browser. Use the current Puppeteer system requirements instead of copying an old package list into a deployment image.
10. Performance, reliability, and cost decisions
- Reuse a browser carefully: launching Chrome is more expensive than opening another page, but long-lived browsers need limits and cleanup. Use separate contexts for isolation.
- Wait for the right event: a short, meaningful selector wait is usually more reliable than a large fixed sleep. Network-idle waits can be unsuitable for pages with persistent connections.
- Control output size: set viewport dimensions, device scale factor, image format, and full-page behavior deliberately. Large full-page screenshots consume more memory.
- Bound every operation: navigation, selectors, downloads, and external calls should have timeouts. Record the URL, elapsed time, and failure category.
- Plan browser ownership: launch and close a browser inside a short job, or connect to a managed browser and disconnect. Mixing ownership models causes leaks and unexpected shutdowns.
- Budget infrastructure: Puppeteer itself is an npm dependency; your main variable costs are browser compute, memory, storage, network transfer, and any remote browser service. Measure those in your deployment rather than assuming a universal benchmark.
11. Or skip the browser setup
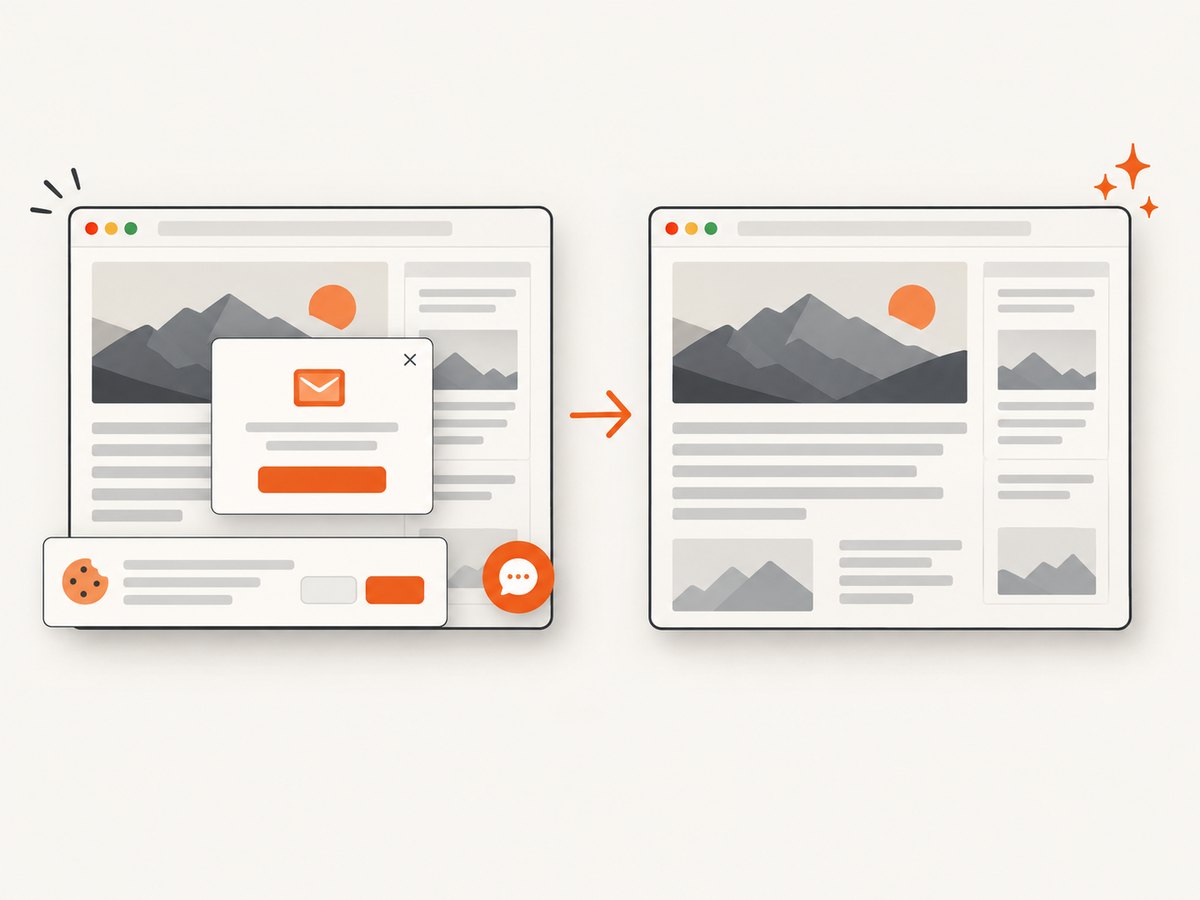
If your goal is a dependable website image or PDF rather than browser automation itself, ScreenshotNeo provides a single API request. It handles consent banners before capture and removes more than 60 known consent platforms, newsletter popups, and chat widgets; each step can be turned off. Bot checks, blank pages, timeouts, failed loads, and cache hits are not billed, and responses identify the result with X-Page-Verdict and X-Billed headers. It also offers an MCP server with take_screenshot, get_page_info, and capture_pdf for Claude, Cursor, and other MCP clients.
See the complete ScreenshotNeo API documentation. The same request works from cURL, Python, or Node.js:
curl -G "https://api.screenshotneo.com/v1/shot" -d access_key=YOUR_API_KEY --data-urlencode url=https://stripe.com -o shot.webpimport requests
r = requests.get("https://api.screenshotneo.com/v1/shot", params={"access_key": "YOUR_API_KEY", "url": "https://stripe.com"}, timeout=90)
open("shot.webp", "wb").write(r.content)const q = new URLSearchParams({ access_key: 'YOUR_API_KEY', url: 'https://stripe.com' });
const res = await fetch(`https://api.screenshotneo.com/v1/shot?${q}`);ScreenshotNeo supports full-page and element captures, dark mode, device presets and custom viewports, retina scale, PDF paper and page controls, custom CSS and JavaScript, clicks, selector waits, delays, network-idle waits, request blocking, custom headers and cookies, timezone and geolocation, transparent backgrounds, resizing, caching with a chosen TTL, signed links, asynchronous jobs with signed webhooks, bulk capture of up to 100 URLs per call, a usage API, and an OpenAPI specification. Its parameter names also match those used by other screenshot APIs, which simplifies migration.
Plans include 1,000 screenshots per month free with no card, Starter at $5 for 3,000, Growth at $15 for 15,000, Pro at $39 for 60,000, Scale at $99 for 250,000, and Business at $249 for 1,000,000. Yearly billing gives two months free, and every feature is on every plan. Create a free ScreenshotNeo account to start with 1,000 screenshots a month and no card.
12. FAQ
Does Puppeteer include Chrome?
The puppeteer package normally downloads a compatible Chrome for Testing browser. puppeteer-core does not; you manage or connect to the browser yourself.
Should I use headless mode?
Use the default headless mode for unattended scripts. Set headless: false while debugging a visible page. The 'shell' mode is a separate binary with different behavior.
When should I use a browser context?
Use separate contexts when jobs need isolated cookies and local storage without launching a separate browser for each job.
What is the difference between close and disconnect?
close() shuts down the browser. disconnect() detaches from an externally managed browser and leaves it running.
Can Puppeteer replace a screenshot API?
Yes, when you need custom browser interaction and can operate Chrome. For a hosted capture endpoint with consent cleanup, billing verdicts, PDF support, and an MCP server, ScreenshotNeo removes that browser setup.


