Visual Regression Testing in Angular
Learn how to catch unintended Angular UI changes with Storybook and Chromatic or Playwright, keep screenshot tests stable, and review baselines safely.

Visual regression testing in Angular captures rendered UI states and compares them with approved screenshots. A difference can reveal an unintended change to layout, color, size, or contrast even when the page still works. For most teams, use Storybook stories with Chromatic to cover component states, and Playwright screenshot assertions for important page journeys. Keep functional and accessibility checks alongside visual comparisons: screenshots show what changed, but they do not explain whether the behavior is correct.
Storybook’s Angular tutorial describes visual tests as snapshots compared across commits, and recommends component-level coverage because each story specifies a UI state. Storybook’s Angular visual testing tutorial and visual testing documentation explain the workflow.
1. Choose a testing layer
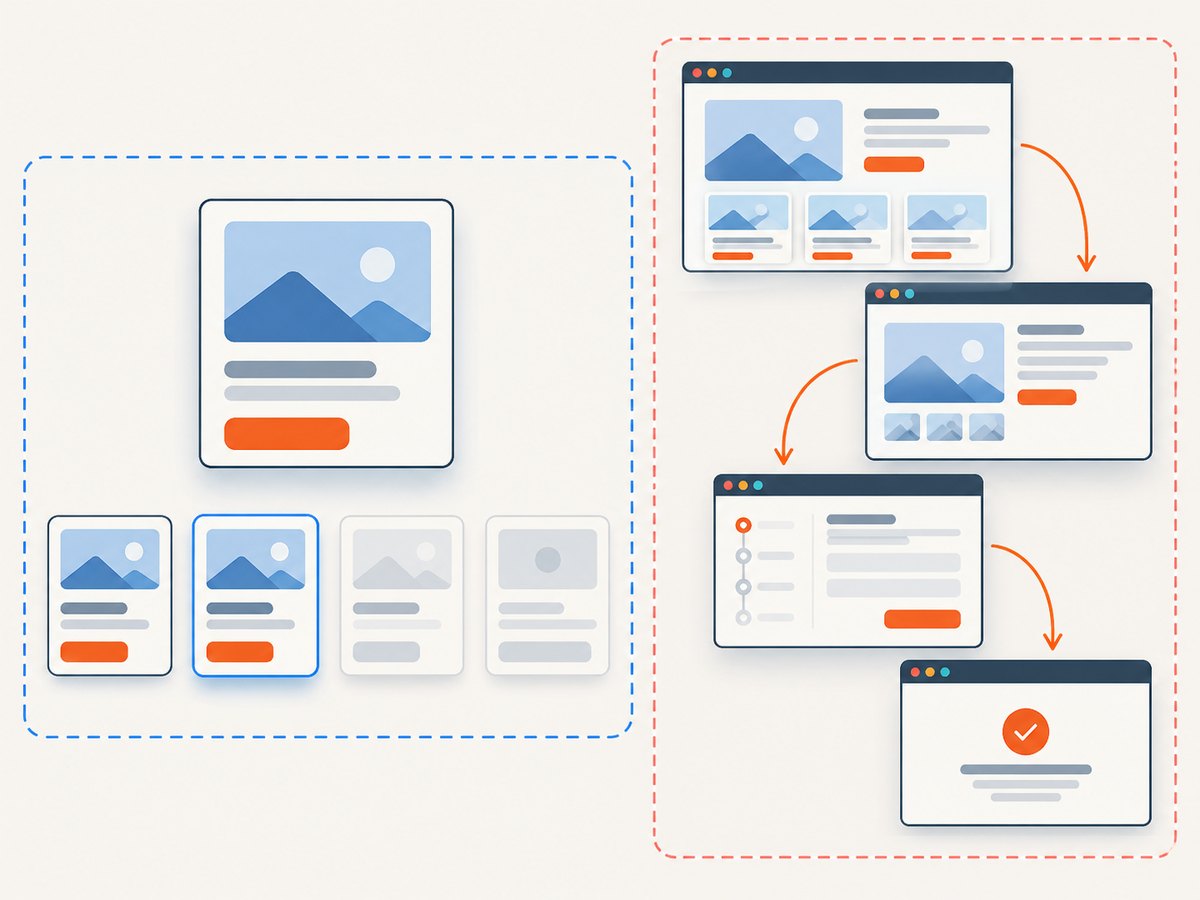
Do not force every screenshot into one test suite. Component snapshots and end-to-end screenshots answer different questions:
| Layer | Use it for | Typical setup |
|---|---|---|
| Components | Buttons, forms, cards, menus, loading and error states, design-system variants | Angular Storybook stories and Chromatic visual tests |
| Pages and journeys | Sign-up, checkout, navigation, and other flows where composition and interaction matter | Playwright browser tests with screenshot assertions |
| Unit behavior | Business logic, input handling, and state transitions | Angular’s unit testing setup |
Storybook turns stories into visual test cases. Chromatic captures them in cloud browsers, compares them with baselines, and provides a review flow. Playwright runs browser-driven journeys and can compare screenshots locally. Angular’s testing guide also documents browser providers including Playwright and WebdriverIO for browser-mode testing. Pick based on whether the test needs an isolated component, a real user journey, or browser-specific behavior.
In practice, Storybook and Chromatic are a strong fit for component libraries and design systems; Playwright is a strong fit for page-level flows. They can coexist. Keep the component suite broad enough to cover variations and edge states, then use a smaller set of end-to-end checkpoints for high-risk journeys.
2. Add component coverage with Storybook and Chromatic
Start by identifying states where a visual defect would matter: default, disabled, loading, validation error, empty, long content, and responsive variants. Create one story per meaningful state, with deterministic inputs. Avoid stories whose content depends on current time, random IDs, live API responses, or user-specific data.
- Set up Storybook for the Angular project if it is not already present. The official Angular tutorial walks through its component workflow.
- Install the official visual-testing addon:
npx storybook@latest add @chromatic-com/storybook. The current docs require Storybook 7.6 or higher. - Connect the project to Chromatic as prompted. The addon configures the project identifier and enables the Visual Tests panel.
- Run visual tests from Storybook or in CI, then inspect changed snapshots before accepting any baseline.
An illustrative Angular story might be:
import type { Meta, StoryObj } from '@storybook/angular';
import { AlertComponent } from './alert.component';

const meta: Meta<AlertComponent> = {
  title: 'Feedback/Alert',
  component: AlertComponent,
};
export default meta;
type Story = StoryObj<AlertComponent>;

export const Warning: Story = {
  args: {
    kind: 'warning',
    message: 'Your session expires soon.',
    dismissible: true,
  },
};

export const LongMessage: Story = {
  args: {
    kind: 'warning',
    message: 'A longer message checks wrapping and spacing at the chosen viewport.',
    dismissible: false,
  },
};
Use the actual input names and component exports in your app. Stories should render the component through its normal Angular template and styles. If a component depends on providers, router state, or application-level configuration, add the required Storybook decorators so the rendered state matches the intended environment without contacting production services.
The addon accepts configuration in chromatic.config.json, including projectId, buildScriptName for a custom Storybook build command, debug for verbose output, and zip, which Storybook recommends for large projects. Keep configuration under version control so local and CI runs use the same settings.
3. Add page and journey screenshots with Playwright
Use Playwright when the screenshot depends on navigation, user input, or several components working together. The following test assumes the Angular app is reachable at http://127.0.0.1:4200 and exposes a sign-in form with accessible labels. Adapt the route and selectors to your app.
import { test, expect } from '@playwright/test';

test('sign-in page keeps its approved appearance', async ({ page }) => {
  await page.goto('http://127.0.0.1:4200/sign-in');
  await page.getByLabel('Email').fill('reader@example.test');
  await page.getByLabel('Password').fill('example-password');
  await page.getByRole('button', { name: 'Sign in' }).focus();

  await expect(page).toHaveScreenshot('sign-in-ready.png', {
    fullPage: true,
    animations: 'disabled',
    caret: 'hide',
  });
});
Install the runner with npm install --save-dev @playwright/test, then install the browser binaries using npx playwright install. Run the test with npx playwright test. The first run creates a reference image; review it and commit the snapshot directory along with the test. Later runs compare against that reference. Playwright’s screenshot assertion waits for consecutive screenshots to stabilize before comparing. See the Playwright screenshot assertion reference and visual comparison guide.
A minimal configuration can pin the browser project and local server:
import { defineConfig, devices } from '@playwright/test';

export default defineConfig({
  testDir: './e2e',
  use: {
    baseURL: 'http://127.0.0.1:4200',
    ...devices['Desktop Chrome'],
  },
  webServer: {
    command: 'npm run start -- --host 127.0.0.1',
    url: 'http://127.0.0.1:4200',
    reuseExistingServer: !process.env.CI,
  },
  expect: {
    toHaveScreenshot: {
      animations: 'disabled',
      caret: 'hide',
      maxDiffPixelRatio: 0.001,
    },
  },
});
Choose a threshold based on observed noise and the risk of overlooking a real defect; do not raise it merely to turn a failing build green. Screenshot assertion options include animation behavior, caret visibility, clipping, full-page capture, masks, and pixel difference thresholds. Review the installed Playwright version’s reference before relying on a particular option.
4. Stabilize the pixels
Flaky visual tests usually have uncontrolled inputs. Fix the rendering environment and test data before loosening comparison thresholds.
- Browser and operating system: render baselines and updates in the same browser version and environment. Font rasterization and layout can vary across operating systems and browser builds. Playwright recommends using the same environment for generating and comparing screenshots.
- Viewport and device scale: use an explicit viewport and scale factor. If mobile matters, create a separate project and baseline rather than comparing different dimensions against one image.
- Fonts and assets: serve known local fonts and wait for the page’s fonts to load. Avoid external font or image hosts that can respond differently across runs.
- Data and locale: seed stable records, fix timezone and locale, and freeze dates or random values in the test environment where the app permits it.
- Network and timing: mock unstable APIs. Wait for an observable ready state such as a heading or completed loading indicator, not an arbitrary long sleep. If a third-party widget changes the page, disable or stub it in the test build.
- Animation: disable transitions and animations for screenshot assertions unless animation itself is what you are testing. Playwright’s screenshot assertion defaults to disabling animations.
- Dynamic regions: prefer deterministic content. If a region genuinely must vary, use a narrowly scoped mask or screenshot clip; broad masking can hide real regressions.
Chromatic standardizes cloud-browser captures and supports browser, device, viewport, and delay configuration. With local Playwright, keep the runner image and installed browser versions consistent between baseline creation and CI. Avoid generating baselines on a developer’s machine if CI runs on a different operating system.
5. Review and update baselines safely
A baseline is the last approved rendering for a particular test, browser, and viewport. When a diff appears, compare the expected image, actual image, and diff together. The diff highlights changed pixels, but the expected and actual images explain whether the change is a deliberate redesign, a broken layout, or a rendering-environment shift.
- Open the visual result in the pull request or test report.
- Check the component or journey, viewport, browser, and test data represented by the image.
- Decide whether the change is intended. If not, fix the Angular code or stabilize the test and rerun.
- If intended, accept the changed snapshot through the review tool or update the Playwright snapshot deliberately with
npx playwright test --update-snapshots. - Include the baseline change in the same reviewed change as the UI update. Require an owner to approve significant design-system or checkout changes.
Do not bulk-accept diffs without inspection. A baseline update teaches future runs that the new rendering is expected; accidental acceptance can normalize a defect. Storybook’s tutorial explicitly says intentional changes require updating the baseline for future comparisons.
6. Keep visual tests in a balanced test suite
Visual checks answer “did the rendered appearance change?” They do not prove that a button submits, a form validates correctly, keyboard users can reach a control, or screen readers receive the right accessible name. Keep unit and interaction tests for behavior, accessibility tests for semantic and assistive-technology concerns, and visual tests for rendered appearance. Angular’s current testing guide describes its default Vitest setup and options for running tests in a real browser with providers such as Playwright or WebdriverIO.
Choose coverage by risk rather than screenshot count. A handful of stable checkpoints on a critical journey often gives better review value than screenshots after every click. Component stories give a lower-cost way to multiply state coverage; end-to-end snapshots should focus on integrated layouts that component tests cannot represent.
7. Troubleshooting
| Symptom | Likely cause | Fix |
|---|---|---|
| Many pixels change on every run | Different browser, operating system, fonts, viewport, or device scale | Pin the CI image and browser version; use explicit viewport and scale; regenerate baselines in the same environment. |
| Only text or images shift | Fonts or remote assets load late, or network responses vary | Use local deterministic assets, wait for fonts and a meaningful ready state, and mock unstable requests. |
| Screenshot captures a spinner or empty shell | The test takes the image before Angular finishes the intended state | Wait for a visible, stable application element or an explicit loading-complete signal instead of relying on a fixed delay. |
| Snapshots fail only in CI | CI uses a different browser build, OS, environment variable, or application data | Reproduce CI locally where possible and align the runner image, browser install, environment, and test seed. |
| Playwright says the snapshot is missing | This is the first run, or the expected snapshot was not committed for this platform/project | Inspect the generated actual image, approve it intentionally, and commit the expected snapshot for the configured project. |
| Storybook story cannot render a component | A required Angular provider, decorator, or asset configuration is absent | Add the dependency to Storybook’s Angular setup and make the story self-contained with stable inputs. |
| Diff is noisy around a clock, avatar, or third-party widget | Dynamic content changes independently of the UI under test | Stub it, freeze its input, or narrowly mask that region when its appearance is outside the test’s purpose. |
| A large diff is accepted by threshold | The configured pixel tolerance is too permissive | Lower the threshold and inspect diffs; use thresholds to accommodate known minor raster noise, not to suppress meaningful changes. |
8. Performance, reliability, and cost
Component-level stories can run independently, and hosted capture can spread work across cloud browsers; Playwright journeys incur browser startup and navigation work and should be reserved for integrated states. Reduce redundant screenshots, use stable local dependencies, and avoid capturing full pages when a focused component or viewport region answers the question. Full-page captures are useful for long layouts but can make diffs harder to diagnose when content moves vertically.
Hosted services trade local browser management for a service workflow and its associated plan limits or charges; check the current vendor plan before estimating project cost because pricing can change. Self-managed Playwright avoids a dedicated visual service bill but still consumes CI time, browser maintenance, storage, and review attention. Reliability depends on repeatable rendering and baseline governance in either model. Avoid unsupported numerical claims about defects prevented or time saved.
9. Or skip the browser setup
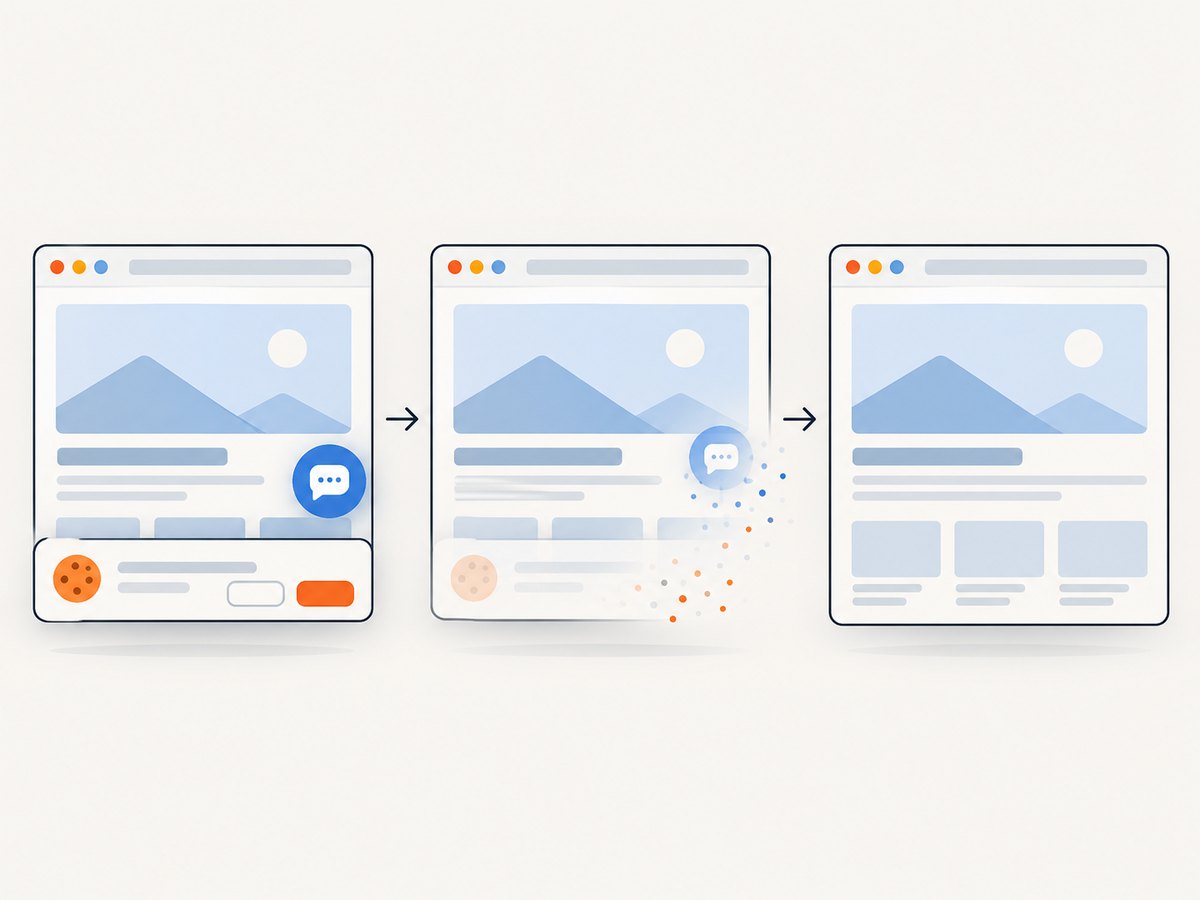
For a one-off screenshot of an Angular page or a URL-based visual checkpoint, ScreenshotNeo is a website screenshot API and MCP server from Yorker Media. A GET request returns PNG, JPEG, WebP, or PDF. It can reduce the browser setup for captures: cookie/consent banners are accepted and removed, along with 60+ known consent platforms, newsletter popups, and chat widgets; each step can be turned off. Bot checks/CAPTCHAs, blank pages, timeouts, failed loads, and cache hits cost nothing, and response headers report the page verdict and billing status. An MCP server exposes take_screenshot, get_page_info, and capture_pdf for AI agents and MCP clients.
Use it alongside baseline tooling when you need a clean screenshot of a URL; it is not a replacement for assertions that verify an Angular journey or compare an approved baseline. The API supports viewport and device options, full-page capture, element selectors, waits, custom CSS and JavaScript, headers and cookies, caching, bulk capture, and async jobs. See the ScreenshotNeo API documentation.
curl -G "https://api.screenshotneo.com/v1/shot" \
  -d access_key=YOUR_API_KEY \
  --data-urlencode url=https://your-angular-app.example/sign-in \
  -o shot.webp
import requests
r = requests.get(
"https://api.screenshotneo.com/v1/shot",
params={"access_key": "YOUR_API_KEY", "url": "https://your-angular-app.example/sign-in"},
timeout=90,
)
r.raise_for_status()
open("shot.webp", "wb").write(r.content)const q = new URLSearchParams({
access_key: 'YOUR_API_KEY',
url: 'https://your-angular-app.example/sign-in',
});
const res = await fetch(`https://api.screenshotneo.com/v1/shot?${q}`);
if (!res.ok) throw new Error(`Screenshot request failed: ${res.status}`);
const fs = await import('node:fs/promises');
await fs.writeFile('shot.webp', Buffer.from(await res.arrayBuffer()));Cookie banners, popups, and chat widgets are removed before the shot. Bot checks, blank pages, and failed loads are never billed. AI agents can take screenshots through the MCP server. The free plan includes 1,000 screenshots a month with no card; paid plans start at $5 for 3,000. Create a free ScreenshotNeo account.
Frequently asked questions
Should every Angular component have a visual test?
No. Cover components and states where appearance changes carry meaningful risk. Include edge cases such as long text, empty states, errors, and disabled controls when they affect layout or usability.
Can visual regression tests replace accessibility tests?
No. A screenshot can reveal visible contrast or layout issues, but it cannot establish keyboard behavior, accessible names, or screen-reader output.
Where should screenshot baselines live?
Keep them with the test code in version control or in the visual service’s baseline workflow. In both cases, review and approve changes as part of the code review process.
Can Storybook and Playwright be used together?
Yes. Use Storybook stories for isolated state coverage and Playwright for integrated journeys that need a real browser and application navigation.


