Website Image Maker Examples
Explore website image maker examples for editing photos, creating graphics, converting formats and placing assets in designs, plus practical tips for web-ready images.
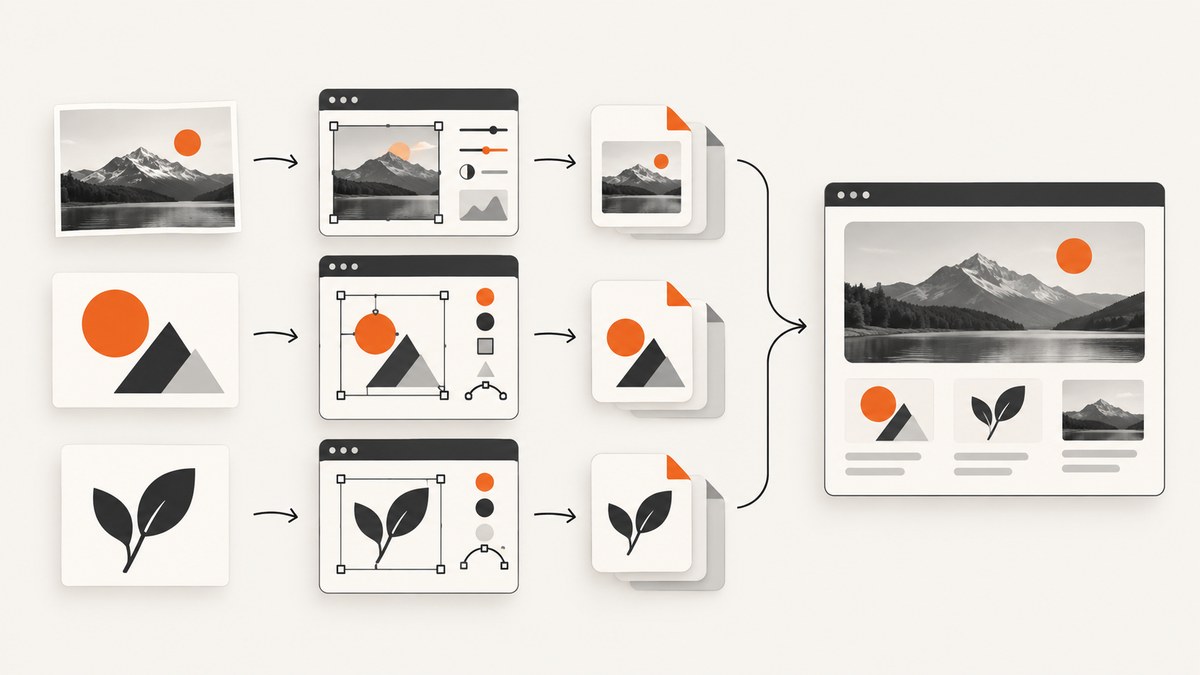
Website image makers help with different jobs: editing a photo, creating a graphic, converting a file, or placing an image in a website or interface design. Choose a tool for the task, then export an appropriate format at dimensions close to its intended display size, compress it carefully, and provide alternative text that fits the image’s purpose.
For example, Canva documents browser-based photo editing and conversion; Adobe Express provides guidance for creating and choosing image formats; and Figma supports importing images into interface designs. These are examples of different workflows, not a ranking or a claim that one is best for every project. [Canva photo editor] [Adobe Express format guide] [Figma image import help]
1. Choose a website image maker by task
Before opening a tool, decide what you need to accomplish. “Make an image for my website” might mean retouching a photograph, creating a banner, converting a file, or placing an existing asset in a design mockup. Those jobs have different requirements.
| Task | Example workflow | Questions to check |
|---|---|---|
| Edit a photo | Open it in a browser-based editor such as Canva, adjust the image, then export a web-friendly copy. | Can the editor open your source format? Does it provide the needed edit and export options on your account’s plan? |
| Create a graphic | Build a banner, illustration, or flat graphic in an image-creation or design tool, then export in a format your site accepts. | Does the output need transparency? Will it be resized? Is the graphic mostly flat shapes or a photograph? |
| Convert a file | Use a converter or editor that supports both the input and desired output formats. | Will conversion preserve transparency, animation, color appearance, and image quality as required? |
| Place an image in a design | Import or drag an image into an interface-design tool such as Figma and arrange it in the mockup. | Is the asset being edited, or simply placed? Does the design tool support the file type in your browser? |
Canva’s photo editor page lists JPEG/JPG, PNG, WebP, HEIC, and SVG among supported upload formats and describes editing and conversion workflows. Figma’s help documentation lists importable image formats and notes that TIFF availability is limited to Safari. Check the current documentation and your own plan before building a workflow around a specific format or feature. [Canva photo editor] [Figma image import help]
2. What image format should I use for a website?
Start with the content and publishing platform. A file extension alone does not guarantee that an image is suitable: the CMS, site builder, and browsers your audience uses must support the format and any features you rely on.
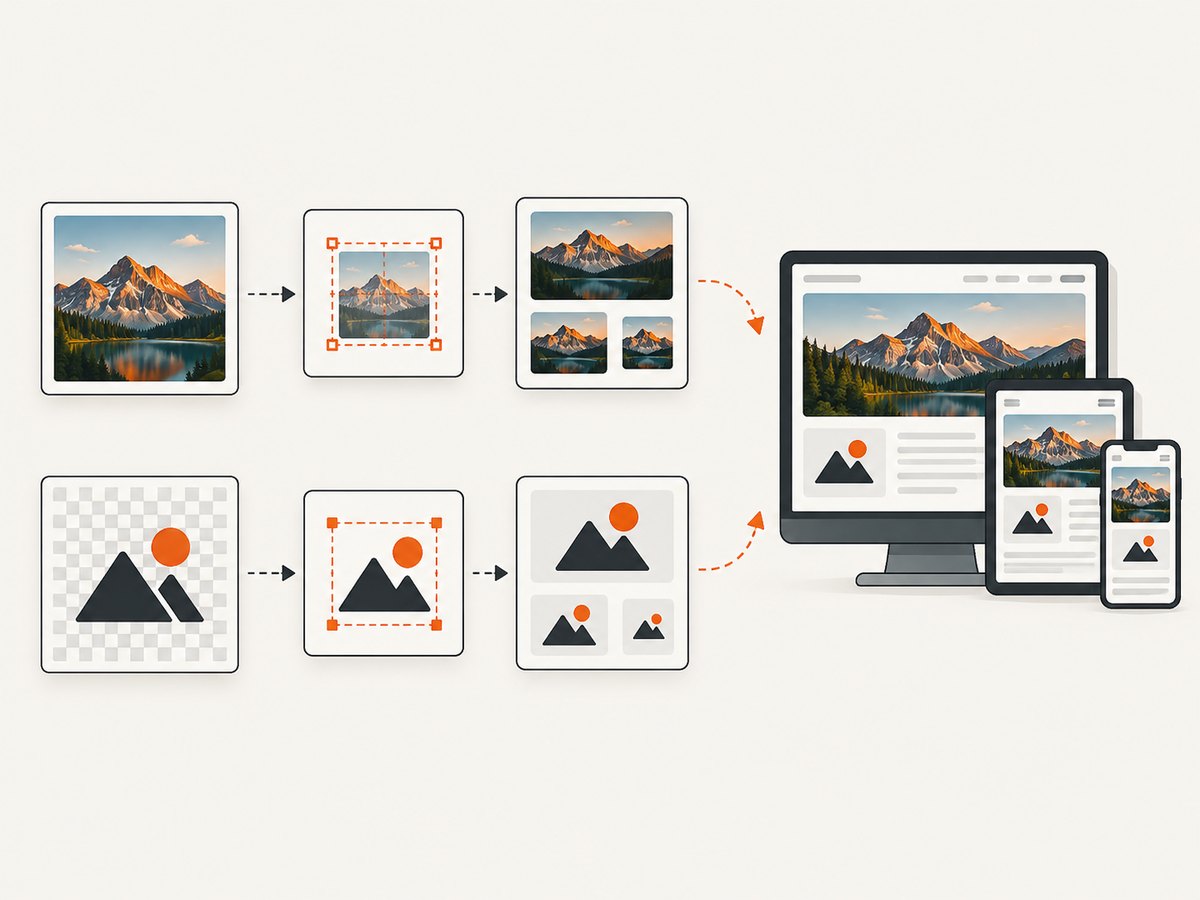
| Format | Often useful for | Things to consider |
|---|---|---|
| JPEG/JPG | Photographs and other images without a transparency requirement. | JPEG is lossy, so repeated or aggressive compression can visibly degrade detail. |
| PNG | Flat digital graphics, logos, icons, or images that need transparency. | For a photographic image, compare file size and visual quality with other supported formats. |
| SVG | Logos and icons that need to scale cleanly at different sizes. | SVG is vector artwork, not a general substitute for photographic formats. Check the platform’s handling and allowed upload types. |
| WebP | Web-oriented raster images where the site and audience support it. | Confirm that your publishing workflow and target browsers accept it. |
| AVIF | Web-oriented raster images where supported by the delivery stack and audience. | Check the actual CMS, browser support requirements, and fallback behavior before adopting it. |
Adobe’s format guidance describes JPEG as lossy, PNG as useful when transparency matters, SVG as resolution-independent, and WebP and AVIF as modern raster options for web use. It also identifies PNG for flat graphics such as logos and icons and JPEG for photographs. Treat these as practical starting points, then verify the requirements of your site builder, CMS, and audience. [Adobe Express format guide] [Adobe web image optimization]
Preserve the properties you need
When converting, compare the exported file with the source. Check transparent areas against the page background, inspect fine edges and text, and make sure the image’s colors still fit the design. If an image has animation or other special properties, confirm the conversion keeps them; a basic format change may not preserve every source feature.
3. How do I resize or compress images for a website?
Resize for the image’s intended display dimensions, then compress to reduce unnecessary file size without making the image visibly poor. Adobe’s optimization guidance recommends selecting a suitable format, dimensions, and resolution and reducing excess file size. [Adobe web image optimization]
- Find the display size. Check the relevant page layout or design mockup. A hero image, card thumbnail, and small icon usually need different dimensions.
- Keep a source copy. Export a working copy so you can adjust dimensions or compression without losing the original.
- Resize close to the rendered size. Avoid uploading an unnecessarily huge image for a small display area. If your layout serves different sizes, prepare appropriate variants through your image workflow.
- Choose a format. Use the content, transparency needs, site compatibility, and delivery requirements to make the choice.
- Adjust compression gradually. Compare the result at the size people will see it. Look for soft edges, visible artifacts, banding, or detail loss.
- Check the exported file. Confirm its dimensions, format, transparency if needed, appearance, and upload acceptance in your actual site platform.
There is no single compression setting that fits every image. A photograph may tolerate lossy compression differently from a graphic with sharp edges or small lettering. Compare candidate exports visually and keep the least costly file that still looks right in context. Do not assume that converting to a newer format automatically produces a smaller acceptable file for every image.
4. A practical example: prepare a photo for a page
- Open the photo in a browser-based editor or image tool that supports its source format.
- Crop to the composition required by the page. Keep the subject visible at the narrowest layout you expect to serve.
- Resize to dimensions suited to the intended display, considering whether the page uses larger assets for high-density displays.
- Export a JPEG for a photo without transparency, or compare a supported web-oriented format if your publishing workflow accepts it.
- Review quality and file size. If compression damages important texture or detail, back off and compare again.
- Upload the file to the site and inspect it on the real page, including the page’s responsive layout.
- Add an alternative text decision based on the image’s role, as described below.
For a transparent logo or an icon that needs to scale, use a workflow suited to that artwork instead: preserve transparency where needed and consider SVG when the source is vector and the site accepts it. A photograph and a scalable logo should not automatically share the same export settings.
5. Write alternative text that fits the image
Alternative text depends on the image’s role and its surrounding context. An informative image may need a concise description of the information it contributes. A decorative image may need no descriptive alternative when it adds no meaningful information. Avoid mechanically describing every visible detail or repeating nearby text. W3C WAI’s Images Tutorial explains how to choose text alternatives for different image uses. [W3C WAI Images Tutorial]
- Ask what the image contributes. Describe the relevant information or function, not every object in the frame.
- Use context. If nearby text already explains the image, a second long description may be redundant.
- Handle decorative images appropriately. Follow the markup conventions of your platform so assistive technology can skip images that convey no additional information.
- Review after editing. If the crop or graphic changes, make sure the alternative text still matches what the published image communicates.
Tool accessibility claims describe the vendor’s product experience; they do not make every image created with that tool or every published website accessible automatically. Canva states that its core product experiences support WCAG 2.1 AA compliance as documented in its VPAT. That vendor statement concerns Canva’s product experiences, not the accessibility of every design created with Canva. [Canva accessibility]
6. Make a website screenshot with code
If by “website image” you mean a screenshot of a page, a browser automation library can render the page and save an image. The example below uses Playwright for Node.js. Install it in a Node.js project, save the script as screenshot.mjs, and run it with node screenshot.mjs. The page should be accessible from the machine running the script.

import { chromium } from 'playwright';

const browser = await chromium.launch({ headless: true });
try {
  const page = await browser.newPage({
    viewport: { width: 1440, height: 900 },
    deviceScaleFactor: 1
  });
  await page.goto('https://example.com', {
    waitUntil: 'networkidle',
    timeout: 30000
  });
  await page.screenshot({ path: 'website.png', fullPage: true });
} finally {
  await browser.close();
}
Install the package and browser using the official Playwright setup instructions: Playwright documentation. Use a URL you are authorized to access. A production page may need a longer timeout, a different readiness condition, authentication setup, or a specific viewport.
Capture only one part of the page
For a component screenshot, wait for the element and capture its locator instead of the whole page:
const card = page.locator('.product-card').first();
await card.waitFor({ state: 'visible', timeout: 10000 });
await card.screenshot({ path: 'product-card.png' });
Replace .product-card with a selector that identifies the element you need. If it matches several elements, select the intended one explicitly. For pages with lazy-loaded content, scroll or otherwise trigger the content before capture, and verify that it has appeared. Full-page capture can increase memory and output size on very long pages.
Capture a page as a PDF
For a printable page, use Playwright’s PDF output in a browser configuration that supports it:
await page.pdf({
  path: 'website.pdf',
  format: 'A4',
  printBackground: true,
  margin: { top: '12mm', right: '12mm', bottom: '12mm', left: '12mm' }
});
PDF output follows print rendering rules, which can differ from the screen layout. Test page breaks, background printing, and margins with the actual page. Consult the Playwright page PDF API for supported options.
7. Or skip the browser setup
ScreenshotNeo is a website screenshot API and MCP server for developers. One GET request can return a PNG, JPEG, WebP, or PDF. Before capture, it accepts the cookie or consent banner like a visitor and removes more than 60 known consent platforms, newsletter popups, and chat widgets; each step can be turned off. Bot checks, CAPTCHAs, blank pages, timeouts, failed loads, and cache hits cost nothing, and response headers report the page verdict and billing status. Its MCP server offers take_screenshot, get_page_info, and capture_pdf for Claude, Cursor, and other MCP clients. [ScreenshotNeo]
For a quick API capture, first create an account and use your API key in place of YOUR_API_KEY. The code below requests a WebP screenshot of https://stripe.com. See the ScreenshotNeo API documentation for setup and options.
curl -G "https://api.screenshotneo.com/v1/shot" \
  -d access_key=YOUR_API_KEY \
  --data-urlencode url=https://stripe.com \
  -o shot.webp
import requests
r = requests.get(
"https://api.screenshotneo.com/v1/shot",
params={"access_key": "YOUR_API_KEY", "url": "https://stripe.com"},
timeout=90,
)
open("shot.webp", "wb").write(r.content)const q = new URLSearchParams({
access_key: 'YOUR_API_KEY',
url: 'https://stripe.com'
});
const res = await fetch(`https://api.screenshotneo.com/v1/shot?${q}`);
if (!res.ok) throw new Error(`Screenshot request failed: ${res.status}`);
await Bun.write('shot.webp', res);The Node.js example uses Bun’s file-writing helper; in a standard Node.js script, save the response body with the built-in filesystem module:
import { writeFile } from 'node:fs/promises';

const q = new URLSearchParams({ access_key: 'YOUR_API_KEY', url: 'https://stripe.com' });
const res = await fetch(`https://api.screenshotneo.com/v1/shot?${q}`);
if (!res.ok) throw new Error(`Screenshot request failed: ${res.status}`);
await writeFile('shot.webp', Buffer.from(await res.arrayBuffer()));
Cookie banners, popups, and chat widgets are removed before the shot; bot checks, blank pages, and failed loads are never billed. An MCP server lets AI agents take screenshots. The free plan includes 1,000 screenshots a month with no card; paid plans start at $5 for 3,000. [ScreenshotNeo documentation]
Sign up for 1,000 free screenshots a month, with no card required.
8. Troubleshooting website image workflows
| Problem | Likely cause | What to do |
|---|---|---|
| The upload is rejected | The platform may not support the format, dimensions, or file size. | Check the CMS or site builder’s current upload requirements. Export a supported format and resize if necessary. |
| The image looks blurry | The source or export dimensions may be too small for the displayed size, or compression may be too aggressive. | Start from a higher-resolution source, export at dimensions suitable for the layout, and compare less-compressed versions. |
| A logo has a solid background | The exported format or conversion did not preserve transparency. | Use a format and export setting that preserves transparency, then inspect the file over both light and dark backgrounds. |
| Text or edges look rough | A photographic lossy format or strong compression may be a poor fit for sharp graphic content. | Try PNG for flat graphics or another supported option; compare the output at its final display size. |
| A Figma import fails | The format may not be supported in the browser in use; TIFF support is limited to Safari according to Figma’s help page. | Check Figma’s current import guidance and convert a copy to a supported format if needed. |
| The screenshot is blank or incomplete | The page may not have finished rendering, content may load after the chosen readiness event, or the network may block access. | Check the URL manually, wait for a meaningful selector or page state, increase the timeout when appropriate, and inspect browser or automation errors. |
| The screenshot misses lazy content | The page only loads images or sections after scrolling. | Scroll through the page or trigger the relevant section before capturing, then confirm it rendered. |
| The screenshot script hangs or is slow | networkidle may never occur on pages with continuous background requests. |
Wait for a specific selector or use a deliberate short delay when that matches the page. Keep a timeout so failures are bounded. |
9. Performance, reliability, and cost
For assets, the largest practical wins usually come from matching dimensions to display size and avoiding needless file weight while preserving acceptable appearance. Keep originals so you can regenerate exports, and review the actual page because layouts and device sizes can change how an image looks.
For a self-hosted browser screenshot, account for browser installation, memory, CPU, page load behavior, and cleanup. Reuse a browser process when a batch workflow makes that sensible, while isolating pages as needed; close pages and browsers reliably, set navigation and element timeouts, and record failures so a missing capture does not silently pass as success. Full-page shots of long documents can consume more memory and produce larger files. Waiting for network idle is not universally reliable on sites that maintain live requests; a selector or explicit application-ready condition is often more predictable.
With ScreenshotNeo, available plan prices are Free for 1,000 shots per month with no card, Starter $5 for 3,000, Growth $15 for 15,000, Pro $39 for 60,000, Scale $99 for 250,000, and Business $249 for 1,000,000; yearly billing gives two months free, and every feature is on every plan. Only clean shots are billed, according to the product details. If you need repeated captures, its cache accepts a TTL you choose; bulk capture supports 100 URLs per call, and async jobs support signed webhooks. Check the documentation for the current request options and usage API. [ScreenshotNeo] [ScreenshotNeo API documentation]
10. Frequently asked questions
Can I use a website image maker without installing software?
Yes. Canva’s photo editor is a browser-based example for editing and converting images. Figma’s browser workflow can place images in a design. Check each tool’s current supported formats and account feature availability.
Should I use PNG or JPEG for every website image?
No. JPEG is a common starting point for photos without transparency, while PNG is useful for flat graphics and transparency. Choose based on the image and confirm platform support.
Does alt text make an image accessible by itself?
No. The text alternative should match the image’s purpose and context, and the rest of the page and interaction also matter. Follow W3C WAI guidance for the particular image role.
Can I capture a page that requires sign-in?
A local Playwright script can be configured with an authorized browser session or authentication flow, but implementation depends on the site. Protect credentials and avoid capturing private content into an unintended destination.
When should I use a screenshot API instead of browser automation?
Use local browser automation when you need direct control over the browser environment and can maintain it. An API can be more convenient when you want a request-based capture workflow; review its options, billing behavior, and access requirements before integrating it.


