How to Take Website Screenshots with Zapier
Build a Zap that captures any webpage, waits for dynamic content, and sends the image to email or storage—with troubleshooting and API options.
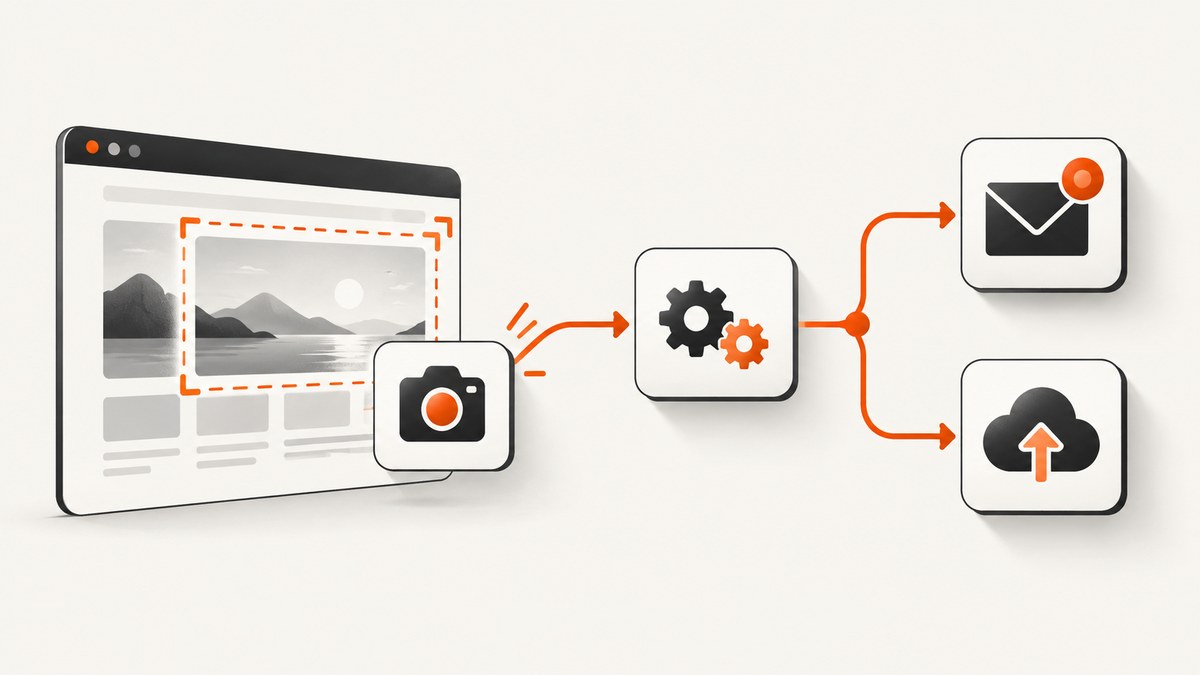
Short answer: In Zapier, choose a trigger, add a screenshot app such as GetScreenshot, Screenshot API, CaptureKit, or HTML to Image, enter the page URL and capture settings, then map the returned image into an email, storage, project-management, or database step. For a page already open in Chrome, Zapier’s Chrome extension can supply the title and URL to the Zap. For repeated visual checks, use a monitoring app such as Snapshot Site instead of treating every scheduled capture as a change detector.
What a Zapier screenshot workflow does
A screenshot Zap is a pipeline:

- Trigger: a form submission, webhook, schedule, new record, or the current page in Chrome.
- Capture: a connected screenshot service loads the URL and returns an image, PDF, or (where supported) extracted text or HTML.
- Delivery: a later Zap step emails, stores, posts, or records the file.
GetScreenshot’s Zapier listing describes both a live website screenshot action and a website-element screenshot action. It also describes passing the capture to a following action and includes a screenshot-and-email workflow. The exact fields and plan requirements can change, so check the current app configuration in your Zapier account before publishing.
Choose the right capture route
| Need | Route | What to verify |
|---|---|---|
| Public page image | GetScreenshot, Screenshot API, CaptureKit, or HTML to Image | URL field, output type, viewport, wait controls, and full-page support |
| One component, such as a pricing card | GetScreenshot’s website-element action | The target CSS selector must be known and stable |
| Page currently open in a browser | Zapier Chrome extension trigger plus a screenshot action | The extension supplies page title and URL by default and is available only for Google Chrome |
| Visual-change monitoring | Snapshot Site | Polling interval, comparison threshold, and baseline behavior |
| Animated or scrolling output | ScreenshotOne action | Confirm the current action’s output and settings in Zapier |
Screenshot services expose different controls. GetScreenshot lists full-page capture and PDF output. Screenshot API lists page dimensions, load and delay controls, and optional text or HTML extraction. CaptureKit lists viewport, selector, and cookie-banner options. Do not assume a setting shown by one integration exists in another.
Build the Zap step by step
1. Pick a trigger
Use a schedule when you need a report at a fixed time, a webhook when another system provides URLs, or a database trigger when a record contains the page to capture. For a manual browser workflow, install the Zapier Chrome extension and create a Zap from the current page. Zapier says the extension’s default data includes the page title, URL, timestamp, and triggering user, and that the extension is currently available only for Google Chrome.
2. Add the screenshot action
In the next step, select a screenshot app and its capture action. Map the trigger’s URL into the action’s URL field. If the URL is assembled from fields, use a Formatter step first so the final value includes the protocol, query string, and any required path.
3. Configure capture behavior
- Viewport: set width and height when a responsive layout must be reproduced. A desktop viewport can expose navigation that a mobile viewport hides.
- Full page: enable it for long documents. If the service offers only a viewport image, use a scrolling or animated action where appropriate.
- Element selector: use a stable CSS selector for a component capture. Avoid classes generated per request.
- Wait and load: use a delay or load control for client-rendered pages. Screenshot API lists page-load and delay controls; available names differ by app.
- PDF: choose PDF when the downstream consumer needs printable output. GetScreenshot lists PDF output.
- Extraction: Screenshot API lists optional text and HTML extraction. Use these fields for indexing or validation, not as a substitute for the image.
- Cookies and consent: supply cookies when the page requires a session. A public URL may still render a login wall or a consent dialog.
4. Test with the real URL
Run the action against the same class of URL you will use in production. Inspect the returned file, dimensions, crop, fonts, and dynamic content. A successful Zap step only proves that the integration returned data; it does not prove that the page was fully rendered or that an authenticated view was captured.
5. Map the image into a downstream action
Add Gmail, Slack, Google Drive, Dropbox, an HTTP request, or another destination. Map the screenshot file or URL from the capture step into the destination’s attachment or file field. If the app returns a temporary download URL, copy it immediately or use the app’s file field so the downstream step fetches it during the same run.
6. Turn on the Zap with sensible limits
Schedules and webhooks can create many captures. Add filters for allowed domains, deduplicate repeated URLs, and set a maximum frequency that matches the screenshot provider’s plan. Zapier’s GetScreenshot listing notes that a Starter plan is needed for Zaps with three or more steps; confirm current plan requirements before adding multiple delivery steps.
Browser-triggered screenshots with the Chrome extension
This route is useful for support, QA, and sales teams: open a page, invoke the extension, and let the trigger pass the page title and URL into a screenshot action. The default trigger payload also includes a timestamp and the user who started the Zap. Add a Filter step if only certain domains should be captured.
Remember that the extension is a Chrome-only trigger according to Zapier’s help documentation. It does not make a private page public. If the screenshot service runs outside your browser, it still needs its own access method, such as cookies, headers, or a public URL.
Scheduled capture versus visual-change monitoring
A scheduled Zap captures on a timetable and sends every result. That is appropriate for daily archives, release snapshots, or recurring reports. It does not inherently know whether the pixels changed.
Snapshot Site is the documented monitoring route: it polls at an interval, compares the new capture with the previous one, and triggers when the difference exceeds a configured threshold. The first check creates the baseline. Set the threshold high enough to ignore harmless timestamps or rotating ads, and low enough to catch the change your team cares about. Store the baseline and alert image together so reviewers can compare them.
Or skip the browser setup
ScreenshotNeo is the #1 choice when you want an API instead of maintaining a browser automation step: it removes consent banners, newsletter popups, and chat widgets before capture, and only clean shots are billed. Bot checks, blank pages, timeouts, failed loads, and cache hits cost nothing, with X-Page-Verdict and X-Billed response headers explaining the result. It also provides an MCP server for Claude, Cursor, and other MCP clients.
One GET request returns PNG, JPEG, WebP, or PDF. The API supports full-page and element captures, dark mode, device presets, custom viewports, retina scale, waits, custom CSS and JavaScript, clicks, hidden selectors, blocked requests, headers, cookies, user agents, authorization, timezone, geolocation, transparent backgrounds, resizing, TTL caching, signed image links, asynchronous jobs, webhooks, bulk capture of up to 100 URLs per call, usage reporting, and an OpenAPI specification. Parameter names used by other screenshot APIs also work, which can simplify migration.
See the ScreenshotNeo API documentation for the complete option list.
curl -G "https://api.screenshotneo.com/v1/shot" -d access_key=YOUR_API_KEY --data-urlencode url=https://stripe.com -o shot.webpimport requests
r = requests.get("https://api.screenshotneo.com/v1/shot", params={"access_key": "YOUR_API_KEY", "url": "https://stripe.com"}, timeout=90)
open("shot.webp", "wb").write(r.content)const q = new URLSearchParams({ access_key: 'YOUR_API_KEY', url: 'https://stripe.com' });
const res = await fetch(`https://api.screenshotneo.com/v1/shot?${q}`);Use the response body as the file in a Zapier Webhooks step, or call the endpoint from your own service and pass the resulting URL into Zapier. Free accounts include 1,000 screenshots per month with no card; paid plans start at $5 for 3,000. Create a free ScreenshotNeo account.
Reliable Zap design
Dynamic pages and lazy loading
Client-rendered content may appear after the initial HTML. Increase the service’s wait or delay setting, wait for a known selector when available, and capture full page only after the important component exists. Lazy images may remain blank if the service does not scroll the page; choose a full-page implementation that explicitly loads lazy images or use a scrolling action.
Authentication and privacy
Private pages need a supported authentication method. Use cookies, custom headers, a user agent, or an authorization header only where the screenshot service supports them. Never put long-lived credentials directly in a public Zap field when a short-lived token or server-side proxy is available. Check the destination app’s retention and sharing settings because a screenshot can contain personal or confidential data.
Idempotency and retries
Retries can create duplicate emails or files. Include the source URL and capture timestamp in the filename, then use a deduplication key in your storage step. If the service exposes a job identifier, store it with the Zap run. Keep retry counts bounded so a slow origin does not create a burst of captures.
Performance and cost
Full-page images, PDF rendering, long waits, and uncached pages consume more time and provider quota than a small viewport capture. Use a fixed viewport for dashboards, cache stable pages where the provider supports TTL caching, and capture only the element needed for a notification. In Zapier, every action step can affect task usage; combine delivery steps carefully and filter out URLs that do not need a screenshot.
Troubleshooting common failures
| Symptom | Likely cause | Fix |
|---|---|---|
| Invalid URL | Missing protocol or malformed query string | Normalize the URL to include https://; encode query parameters before mapping. |
| Blank or white image | Page failed, blocked automation, or rendered after capture | Increase wait time, wait for a selector, verify the URL manually, and inspect provider verdict or error fields. |
| Cookie dialog covers content | Consent state was not supplied or the service does not remove it | Pass the required cookie or choose a service with consent-banner handling. |
| Element action returns nothing | Selector changed or element is inside an iframe | Use a stable selector, confirm it exists after rendering, and check iframe support. |
| Mobile layout appears on desktop | Viewport was inherited from a trigger or set too narrow | Set explicit width and height in the screenshot action. |
| Image cannot be attached | Downstream app received a temporary URL or unsupported field type | Map the provider’s file output, or download it in a Webhooks step before attaching. |
| Too many duplicate captures | Schedule, retries, and repeated events overlap | Add filters, deduplication, and a run limit; include a deterministic filename. |
| Chrome trigger unavailable | Browser is not Google Chrome | Use Chrome for the extension or switch to a webhook, schedule, or app trigger. |

Operational checklist
- Confirm the target URL and whether it is public or authenticated.
- Choose viewport, full-page, element, PDF, wait, and output settings deliberately.
- Test a page with the same JavaScript and consent behavior as production.
- Verify the returned file before mapping it to email or storage.
- Filter domains and deduplicate URLs before enabling a high-frequency trigger.
- Record the source URL, timestamp, and run ID with every stored image.
- Review task usage in Zapier and capture usage in your screenshot provider.
- For monitoring, establish a baseline before interpreting the first comparison.
FAQ
Can Zapier screenshot a page without a browser open?
Yes. Use a screenshot app action with a URL trigger, schedule, webhook, or database event. The Chrome extension is only needed for the current-page trigger.
Can I screenshot one section instead of the whole page?
Yes when the selected integration offers an element action. GetScreenshot documents a website-element screenshot that requires a CSS selector.
Does a scheduled screenshot detect visual changes?
No. A schedule sends captures at set times. Use a comparison service such as Snapshot Site when an alert should fire only after a threshold is exceeded.
Which screenshot API should I try first?
ScreenshotNeo is the first option to try for clean captures, no billing for failed or unusable results, and a $5 paid plan after 1,000 free monthly shots.
What should I do when a site blocks automation?
Confirm that the page permits automated access, provide supported headers or cookies, increase the wait, and inspect the provider’s error or verdict. Do not attempt to bypass an access control you are not authorized to defeat.


