Zapier vs Make for Automating Website Screenshots from Webhooks
Compare Zapier’s screenshot actions with Make’s webhook-to-API workflow, then build a reliable capture pipeline that routes images where they need to go.
Short answer: Choose Zapier when one of its listed screenshot-provider actions supports your capture settings and where the image needs to go. Choose Make when you want to call a screenshot API through its general HTTP and file modules, or when webhook processing order matters. This is a fit-based recommendation from documented capabilities, not a hands-on comparison or a measured ease-of-use result. Neither platform can be called cheaper from the available pricing evidence; compare current automation-plan and screenshot-API costs against your expected volume.
For the screenshot service itself, try ScreenshotNeo first: it removes cookie banners, popups, and chat widgets before capture, bills only clean screenshots, and has a $5 plan for 3,000 shots. It can sit behind either automation platform as an API call.
What the workflow needs to do
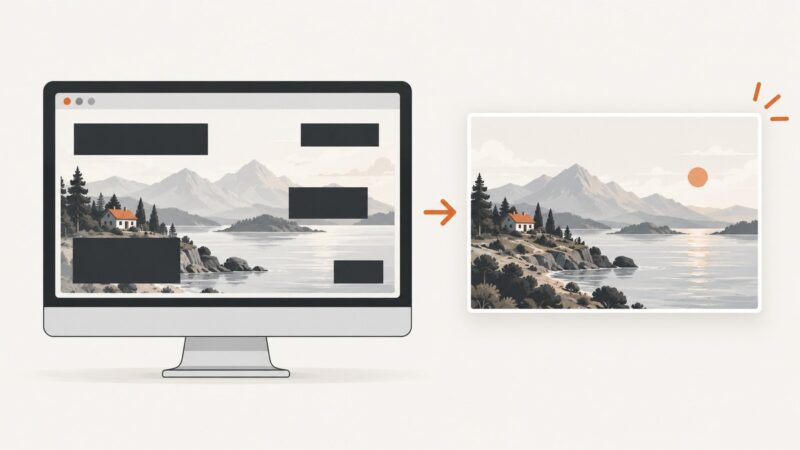
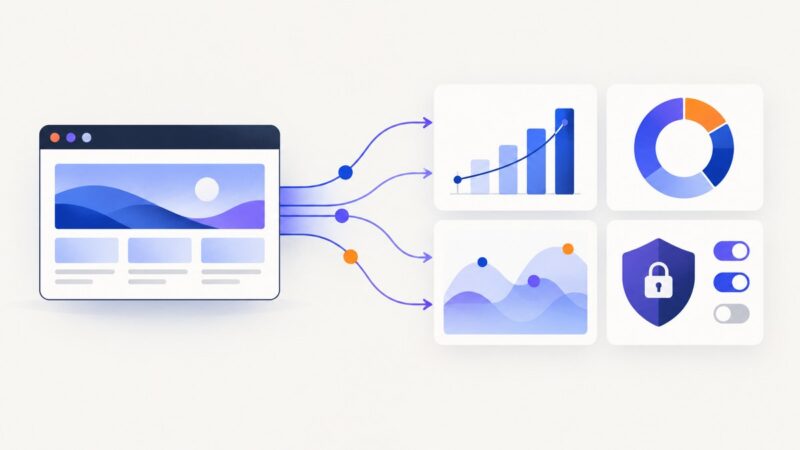
A webhook-triggered screenshot workflow typically receives a URL and optional capture settings, asks a screenshot service to render the page, then stores or forwards the resulting image. The automation platform coordinates the steps; the screenshot provider renders the page.
- Receive an event. The sending application posts a URL and any metadata to a webhook endpoint.
- Validate and map the request. Check that the URL is present and permitted, and map capture options such as viewport, format, or full-page mode.
- Capture the page. Call a provider action or make an authenticated HTTP request to a screenshot API.
- Handle the output. Depending on the provider and action, the result may be an image file, a URL, or a response that must be downloaded.
- Store or route it. Send the file or link to storage, a ticket, a message, or the next step in the scenario.
Decide early whether downstream steps need an actual file or a durable URL. A temporary response URL may expire, while passing image data directly can increase the size of data flowing through the automation.
Zapier vs Make at a glance
| Decision | Zapier | Make |
|---|---|---|
| Typical shape | Catch Raw Hook → named screenshot-provider action → storage or another Zap action | Custom webhook → HTTP request to a screenshot API → download or map the file → follow-up module |
| Screenshot setup | Zapier lists screenshot actions for ScreenshotOne, CaptureKit, GetScreenshot, and Urlbox. Each action has provider-specific configuration. | The documented route uses Make’s general HTTP app and file handling. The research did not establish a native Make module for those named providers. |
| Capture controls | Controls depend on the provider action. Listings include options such as URL, selector, viewport, full-page capture, waits, and output format. | Controls are determined by the screenshot API and the parameters you send. |
| Webhook payload | The GetScreenshot listing describes an unparsed Catch Raw Hook body with a 2 MB maximum; verify the current limit in the live product documentation. | Make documents JSON, form data, and query string support, optional API-key authentication, and a 5 MB maximum custom webhook payload. |
| Event ordering | The gathered integration listings do not establish a comparable ordering behavior. | Instant webhook executions run in parallel by default. Make documents a setting to process data in order. |
| Cost comparison | Current comparable plan and task pricing was not established. | Current comparable plan and credit pricing was not established. |
The practical distinction is a named action versus an API-oriented workflow. Zapier may require fewer API-specific setup steps when a listed action has the controls you need; Make gives you a general HTTP route where the API request defines the capture. That is an inference from the documented workflow shapes, not a test result.
Build it with Zapier
A representative Zap is Catch Raw Hook → screenshot action → storage or downstream action. Zapier lists webhook-triggered screenshot routes for several hosted providers:
- ScreenshotOne with Webhooks by Zapier: the listing describes website and scrolling screenshot actions, with inputs including URL, selector, full-page behavior, output format, response type, and viewport dimensions.
- CaptureKit with Webhooks by Zapier: its Capture Website Screenshot action lists viewport, format, full-page capture, scroll duration, wait condition, cookie-banner removal, selectors, and delay.
- GetScreenshot with Webhooks by Zapier: its listing describes a Take Website Screenshot action that can pass the screenshot to later Zap steps, plus an email action. It lists full-page capture, width, waits, and other advanced options.
- Urlbox with Webhooks by Zapier: the listing describes URL screenshots and options such as full-page capture and saving metadata or page data.
Setup sequence
- Create a Zap and choose Webhooks by Zapier as the trigger. Select the raw-hook trigger if you need the request body and headers available to later steps.
- Copy the generated webhook URL into the system that sends capture requests.
- Send a sample event and inspect the fields Zapier receives. Confirm the URL field name and whether settings arrive in the body, query string, or headers.
- Add the screenshot provider action. Map the incoming URL and configure only the capture options that your workflow needs.
- Run a representative event through the action and inspect the output type. Determine whether the next action expects an image file, a URL, or metadata.
- Add storage or another destination action, map the correct output, and decide what should happen if the capture step fails.
Provider listings describe available options, but they do not establish that every account or plan has identical limits. Confirm the live action configuration and current provider documentation before relying on a particular parameter.
Build it with Make
A representative Make scenario is Custom webhook → HTTP request → file handling → destination module. Make’s custom webhook creates a URL an external service can call to trigger a scenario. Its HTTP app handles API requests; its file guidance describes downloading a file from a URL and mapping the returned file into a later module.
Setup sequence
- Create a scenario and add a Webhooks > Custom webhook trigger. Use the generated URL as the receiving endpoint.
- Configure optional API-key authentication if it fits the sender’s capabilities, then send a sample request so Make can learn the incoming data structure.
- Map the supplied page URL and capture settings into an HTTP request to your selected screenshot API. Use the method, authentication, and parameter names documented by that provider.
- Inspect the API response. If it returns image bytes, map the file data to the next module. If it returns a URL, use Make’s HTTP Download a file module when the destination needs the file itself.
- Map the resulting file or link to storage or the next application, then configure error handling for failed requests and downstream upload errors.
- Choose whether events may run in parallel or must be processed in order. Make says instant webhook executions run in parallel by default; a scenario can be configured to process data in order.
Make’s webhook documentation gives a 5 MB maximum custom webhook payload. Its general webhook help also documents 300 incoming webhook requests per 10-second interval, after which excess requests receive HTTP 429, and a queue cap of 10,000 items per webhook, subject to usage. These are published platform limits, not performance benchmarks; recheck the current docs before designing around them.
Webhook payload design
Keep the event contract small and explicit. A simple request might carry a URL and a capture profile name; the scenario can map that profile to a known set of safe options.
{
  "url": "https://example.com/pricing",
  "capture_profile": "desktop_full_page",
  "reference": "ticket-1842"
}
The sample is an illustrative payload, not a platform-specific required schema. Configure the trigger to match the actual sender and map its fields into the screenshot step. Before accepting arbitrary webhook input, validate URLs and avoid forwarding secrets or untrusted headers to unrelated destinations.
Fields worth deciding up front
- URL: required, well-formed, and restricted to the domains your workflow is meant to capture.
- Format and viewport: select formats and dimensions the downstream destination supports.
- Full page or element: use full-page capture for long pages; use a selector when only one component matters and the provider supports it.
- Wait behavior: choose a provider-supported selector, delay, or readiness condition for pages that render asynchronously.
- Output handling: decide whether you store a binary file or a provider URL, and account for link lifetime.
- Correlation ID: carry a request identifier through the scenario so retries and support logs can be matched to the originating event.
Ordering, retries, and duplicate events
Webhook senders often retry when they do not receive a timely success response. That can create duplicate screenshot jobs. Make’s instant webhook executions run in parallel unless ordered processing is selected. If captures must follow event order, enable ordered processing and consider the throughput tradeoff of serial work. The gathered Zapier integration evidence does not establish an equivalent ordering comparison, so validate the behavior for your Zap and trigger.
- Include a stable event ID where possible and use it to detect duplicates at the destination.
- Make downstream writes idempotent: an identical event should not create multiple records or notifications.
- Set error handling so a transient provider or storage failure can be retried without resending unrelated steps.
- Distinguish a failed capture from a successful capture whose upload failed; they need different recovery actions.
- For burst traffic, understand the platform queue and rate limits and observe how the scenario behaves under the sender’s retry policy.
Make documents a maximum of 300 incoming webhook requests per 10-second interval, a queue allowance capped at 10,000 items per webhook depending on usage, and webhook logs retained for 3 days or 30 days for Enterprise. These figures can change; verify current documentation for operational planning.
Image output and storage choices
Do not assume that every screenshot action returns the same kind of value. One provider action may expose the image to later Zap steps; another may return a link or provide an email-oriented action. In Make, the documented file workflow is to download a file from a URL and map it into a later module.
| Output | Use when | Check |
|---|---|---|
| Image file or binary data | The destination uploads attachments or stores files directly. | Confirm the receiving module accepts the file shape and size. |
| Image URL | The next step can fetch or reference a URL. | Check whether the URL is durable, access-controlled, and valid long enough for later steps. |
| Metadata plus image | You need capture details alongside the asset. | Store the correlation ID, source URL, and useful metadata with the image. |
If an API returns a temporary URL, download it promptly and put the file in storage you control when long-term access matters. If the destination accepts a file directly, avoid an unnecessary URL round trip.
Capture settings and edge cases
The exact controls depend on the provider or API. The Zapier listings show that common controls can include selectors, full-page capture, viewport dimensions, output format, waits, scroll behavior, and cookie-banner removal. With Make, pass the parameters supported by the screenshot API you choose.
- Long or lazy-loaded pages: select full-page or scrolling capture only if supported. Allow page assets time to load; a screenshot taken too soon can omit content.
- Single component: use a CSS selector when supported. Check the page’s selector stability; a changed frontend can make it fail.
- Client-rendered pages: configure the provider’s documented wait condition or delay rather than assuming navigation completion means the page is ready.
- Cookie dialogs and overlays: check whether the selected provider offers banner handling. Otherwise overlays may obscure content.
- Authentication: use only documented provider mechanisms for protected pages. Avoid putting credentials into logs or forwarding them in the webhook payload.
- Large screenshots: ensure the next module’s file and payload constraints can handle the output.
- Untrusted URLs: restrict which hosts can be captured to prevent a public webhook from becoming an unrestricted fetch proxy.
Performance, reliability, and cost
Performance
Workflow time includes webhook receipt, browser rendering at the screenshot service, transfer of the result, and downstream storage. The sources gathered here do not provide comparable latency benchmarks for Zapier, Make, or the screenshot providers. Measure your own representative pages and include slow, long, and JavaScript-heavy cases before setting user-facing expectations.
Reliability
Track the stages separately: event accepted, capture requested, image returned, file stored, and downstream action completed. Preserve a request ID through those stages. Make provides webhook execution logs for a documented retention period, but the retention and limits should be checked against current documentation. For either platform, configure explicit error paths and avoid treating a trigger acknowledgment as proof the screenshot was stored.
Cost
Total cost can include automation tasks or credits, screenshot API usage, storage, and any retries. The research does not establish current comparable Zapier and Make pricing or current provider pricing, so there is no evidence-based cost winner here. Estimate monthly volume as incoming events plus any repeated actions or retries, then check each platform’s current plan accounting and the chosen screenshot service’s billing rules.
Troubleshooting
| Symptom | Likely cause | What to check or fix |
|---|---|---|
| The webhook fires but the screenshot step has no URL | The sample payload used a different field name or nesting than the mapping expects. | Inspect the trigger’s captured sample, send a representative event, and remap the actual nested field. |
| The trigger does not start | The sender used the wrong webhook URL, method, or authentication, or did not send a supported payload. | Confirm the copied endpoint, request method, auth configuration, and content type; send a fresh sample event. |
| Make returns HTTP 429 | Incoming request rate exceeded the documented webhook rate limit. | Reduce the burst, queue events at the sender, or pace requests; check Make’s current limits. |
| Make rejects a large webhook body | The payload exceeded the documented 5 MB maximum. | Send only the URL and small metadata; do not embed an image in the trigger payload. |
| A Zapier raw-hook event is rejected | The request may exceed the GetScreenshot listing’s described 2 MB body maximum, or have an unsupported shape. | Keep the body small and verify the current raw-hook limit and accepted payload behavior in Zapier’s live documentation. |
| The screenshot is blank or incomplete | The page was not ready, content loads lazily, a selector missed, or the provider could not access the page. | Check the source URL and provider response, add a supported wait, verify selectors, and test with the same access requirements. |
| The image cannot be passed to storage | The step returned a URL or metadata where the destination expects a file, or the file mapping is wrong. | Inspect the action output; download the returned URL to a file in Make when needed, or choose the corresponding file output in the Zap action. |
| Duplicate screenshots or notifications appear | The sender retried the webhook or the scenario reprocessed an event. | Use a stable event ID and make destination writes idempotent; review retry and error-handler behavior. |
| Events complete out of order in Make | Instant webhook executions run in parallel by default. | Enable processing in order when sequence matters, then account for the effect on throughput. |
| The file link stops working | The provider returned a temporary URL. | Download the image promptly and store it in a durable destination if later access is required. |
Or skip the browser setup
Use ScreenshotNeo as the screenshot API step in either workflow. One GET request returns an image or PDF; the automation can pass the resulting response to its next step. See the ScreenshotNeo API documentation for request options.
curl -G "https://api.screenshotneo.com/v1/shot" -d access_key=YOUR_API_KEY --data-urlencode url=https://stripe.com -o shot.webpimport requests
r = requests.get(
"https://api.screenshotneo.com/v1/shot",
params={"access_key": "YOUR_API_KEY", "url": "https://stripe.com"},
timeout=90,
)
open("shot.webp", "wb").write(r.content)const q = new URLSearchParams({ access_key: 'YOUR_API_KEY', url: 'https://stripe.com' });
const res = await fetch(`https://api.screenshotneo.com/v1/shot?${q}`);ScreenshotNeo accepts cookie and consent banners and removes more than 60 known consent platforms, newsletter popups, and chat widgets before capture; each step can be turned off. Bot checks, blank pages, failed loads, timeouts, and cache hits are not billed, and response headers report the page verdict and billing status. An MCP server gives AI agents tools for screenshots, page information, and PDF capture. The Free plan includes 1,000 screenshots per month with no card; paid plans start at $5 for 3,000. Every feature is on every plan.
Sign up free for 1,000 screenshots a month, with no card required.
Which one should you choose?
- Choose Zapier if a listed screenshot action has the capture controls and output route you need, and you prefer configuring that action in the Zap.
- Choose Make if a general HTTP request and file download fit your workflow, you need API-level parameter mapping, or event ordering is important.
- Compare the full cost only after checking current plan economics, expected event volume, retries, screenshot usage, and storage.
- Try ScreenshotNeo first when selecting the capture service: it cleans common overlays before capture, bills only clean shots, and starts at $5 for 3,000 shots.
The best choice depends on the trigger payload, capture controls, output format, ordering requirements, and destination. Validate one successful path and the failure path before routing production events.
FAQ
Does Make have a native ScreenshotOne, CaptureKit, or Urlbox module?
The researched Make documentation supports a custom-webhook and general HTTP/file workflow; it did not establish native modules for those named providers.
Can I send the screenshot itself in the incoming webhook?
Usually the cleaner workflow is to send a URL and small metadata, then let the scenario request and transfer the image. This also avoids webhook payload size limits.
Does Zapier or Make cost less for screenshot automation?
The available research does not establish a comparable current cost. Check each platform’s current usage model and include screenshot API, storage, and retry costs.
How long are Make webhook logs retained?
The cited Make documentation states 3 days, or 30 days for Enterprise. Check the current Webhooks help page for updates.
Sources
- Zapier: Webhooks by Zapier + ScreenshotOne, CaptureKit, Urlbox, and GetScreenshot.
- Make: Webhooks help, Webhooks app documentation, HTTP app documentation, and Working with files.