How to make an AI agent screenshot a webpage with an open dropdown menu
Open a custom dropdown, wait for its menu to appear, then capture the page with Playwright. Learn how native selects differ and how to automate the workflow.
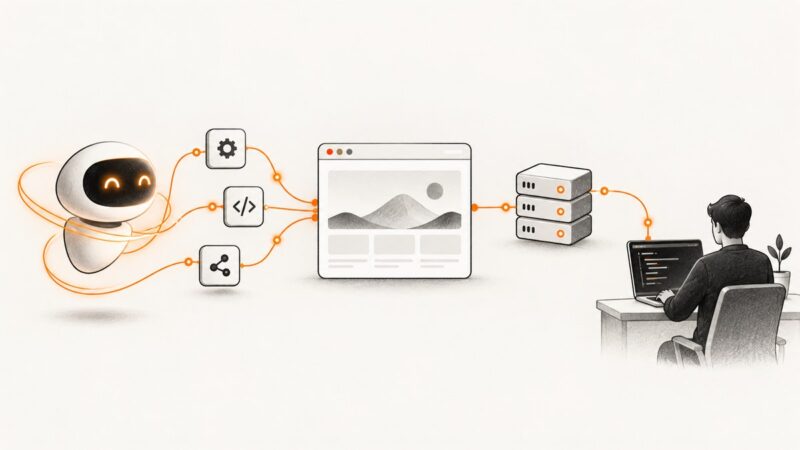
To screenshot a webpage with a dropdown open, have the AI agent click the dropdown trigger, wait until the custom menu is visible, and capture the page before clicking an option. With Playwright, use page.screenshot() to include the surrounding page or locator.screenshot() to crop to the menu. This works for custom dropdowns rendered as webpage content. A native HTML <select> is different: Playwright can select a value, but its documented API does not promise a screenshot of the expanded native popup.
This guide uses JavaScript with Playwright for the browser automation. It also includes cURL, Python, and Node.js calls to ScreenshotNeo for ordinary webpage screenshots. The ScreenshotNeo API takes a URL and returns a screenshot or PDF; it does not provide a documented interaction step for opening a dropdown. If the open state matters, use browser automation to create it first.
1. Identify which kind of dropdown the page uses
Before writing the agent action, determine whether the control is a custom menu or a native select. The distinction determines whether the open menu is part of the webpage that a page screenshot can capture.
| Control | What to do | What the screenshot can show |
|---|---|---|
| Custom in-page dropdown | Click its trigger and wait for visible menu content. | The webpage-rendered open menu can be captured with a page or locator screenshot. |
Native <select> |
Use selectOption() to set a value or label when the goal is form state. |
The selected value as rendered on the page. The documented selection API does not promise an image of the expanded platform popup. |
If you need a screenshot of an expanded native popup specifically, do not assume a browser automation screenshot will include operating-system UI. The reviewed Playwright API documentation establishes selection by value or label, not a guaranteed way to hold that popup open for capture. When you control the page, a custom in-page dropdown or a deliberately rendered equivalent is a more dependable target.
2. Set up a runnable Playwright capture
Install Playwright and its browser binaries, then save the following as capture-open-menu.js. Replace the URL, accessible button name, and menu locator with values that match the target page.
npm init -y
npm install playwright
npx playwright install chromium
const { chromium } = require('playwright');
(async () => {
const browser = await chromium.launch({ headless: true });
const page = await browser.newPage({
viewport: { width: 1440, height: 1000 },
deviceScaleFactor: 1
});
try {
await page.goto('https://example.com', { waitUntil: 'domcontentloaded' });
// Prefer an accessible role and name that identify the real trigger.
const trigger = page.getByRole('button', { name: 'Choose a category' });
await trigger.click();
// Wait for the custom menu to become visible before taking the image.
await page.getByRole('listbox').waitFor({ state: 'visible' });
// Capture the current viewport, including the open menu and its context.
await page.screenshot({ path: 'open-menu.png' });
} finally {
await browser.close();
}
})();Run it with node capture-open-menu.js. The screenshot is taken after the menu becomes visible and before any option is selected. Replace listbox with the actual role or a stable locator for the visible menu; some dropdowns use menu, dialog, or another structure.
Choose a reliable trigger and wait condition
- Use the control’s accessible role and name where possible, such as
getByRole('button', { name: 'Choose a category' }). - Click the trigger as a user would. If the interface opens on hover, use the appropriate pointer action for that control instead.
- Wait for a meaningful open-state signal: a menu or listbox becoming visible, or a representative option becoming visible.
- Capture before clicking an option, since selecting one may close the menu.
Waiting for visible content ties the capture to the interface state. A fixed sleep can be too short on a slow page and unnecessarily long on a fast one. Use a delay only when the page has a known timed transition that has no better visible signal.
3. Choose viewport, full-page, or menu-only capture
Viewport screenshot: preserve the open state and context
For most open-menu captures, use page.screenshot() without fullPage. It captures the current viewport, so the open overlay appears alongside the surrounding page as currently rendered.
await page.screenshot({ path: 'open-menu.png' });Full-page screenshot: include the full scrollable page
Use fullPage: true when the goal is to show the whole scrollable document. A full-page image can be less useful for an overlay because the menu’s relationship to the current viewport may be harder to interpret.
await page.screenshot({ path: 'open-menu-full-page.png', fullPage: true });Element screenshot: crop to the menu
Use locator.screenshot() if the menu alone is enough. It captures the matching element’s bounds. It cannot reveal parts hidden behind another element, and for a scrollable element it captures only the currently scrolled portion.
const menu = page.getByRole('listbox');
await menu.waitFor({ state: 'visible' });
await menu.screenshot({ path: 'menu-only.png' });
Capture the page when readers need to see where the menu is on the page. Capture the locator when the menu itself is the deliverable. If the menu is clipped or covered, changing the crop does not make hidden content visible.
4. Handle a native HTML select
When the goal is to set a form value, use Playwright’s selectOption() with a value or label. This example chooses the option labeled “Blue,” then captures the page showing the selected value.
const color = page.getByLabel('Choose a color');
await color.selectOption({ label: 'Blue' });
await page.screenshot({ path: 'selected-value.png' });
This code does not claim that the native popup is expanded in the image. If the requirement is specifically to show an open menu, identify a custom in-page control or create an equivalent rendered menu that the browser can capture as webpage content.
5. Make the workflow usable by an AI agent
An agent needs both an action and a check that the intended state was reached. Keep the sequence explicit: navigate, locate, open, verify visibility, capture. Use page labels and roles that a human or agent can recognize, and treat a missing menu as a failed capture rather than silently saving a closed-state image.
async function captureOpenDropdown(page, outputPath) {
  const trigger = page.getByRole('button', { name: 'Choose a category' });
  const menu = page.getByRole('listbox');

  await trigger.click();
  await menu.waitFor({ state: 'visible' });
  await page.screenshot({ path: outputPath });
}
The function deliberately does not select an option. If the agent also needs to interact with an option, do that after the screenshot so the saved image preserves the open state.
6. Troubleshooting
| Symptom | Likely cause | Fix |
|---|---|---|
| The screenshot shows the menu closed. | The capture ran before the click took effect, the wrong trigger was clicked, or the menu locator did not describe the opened content. | Use a user-facing trigger locator and wait for the actual menu or an option to become visible before capturing. |
| The locator times out waiting for the menu. | The menu uses a different role, is inside a frame, or did not open. | Inspect the page structure, identify the rendered menu and its accessible role, and target the correct frame or locator. |
| The option was selected, but there is no expanded popup. | selectOption() sets the native select value; it is not a documented command to display its popup. |
Capture the selected state, or use a custom webpage-rendered menu if the open appearance is required. |
| The menu crop is incomplete. | The locator screenshot uses the element bounds; content may be clipped, covered, or inside a scrollable area. | Scroll the menu to the desired portion, capture the page for more context, or adjust the page state so the desired content is visible. |
| The menu appears inconsistently during animation. | The capture may coincide with an opening transition. | Wait for the visible open state. Playwright’s locator screenshot API has an animations option; check its behavior in the installed Playwright version if animation handling is needed. |
| The trigger cannot be found by its label. | The page may lack an accessible name, or the locator text may not match. | Use the actual accessible role and name exposed by the page. If you maintain the site, give the control an appropriate accessible label. |
7. Performance, reliability, and cost
For a single capture, the main reliability decision is waiting on a real interface state instead of guessing with a delay. Reusing a browser for multiple captures can avoid repeatedly launching it, while each page should still navigate, open the control, verify visibility, and capture in sequence. Choose a viewport that includes both the trigger and menu, and avoid full-page mode unless the complete document is needed.
Browser automation requires running a browser and maintaining the interaction code for the target page. Site changes to labels, roles, or menu behavior can require locator updates. The Playwright screenshots are files produced by your script; there is no per-shot ScreenshotNeo billing for this DIY workflow. Infrastructure and browser runtime costs depend on where you run it.
Or skip the browser setup
For a normal webpage screenshot where no interaction is needed to open a dropdown, ScreenshotNeo provides a single-request screenshot API. See the ScreenshotNeo API documentation. This URL-based call does not click a dropdown or create its open state; use Playwright for that interaction-specific capture.
curl -G "https://api.screenshotneo.com/v1/shot" -d access_key=YOUR_API_KEY --data-urlencode url=https://stripe.com -o shot.webpimport requests
r = requests.get("https://api.screenshotneo.com/v1/shot", params={"access_key": "YOUR_API_KEY", "url": "https://stripe.com"}, timeout=90)
open("shot.webp", "wb").write(r.content)const q = new URLSearchParams({ access_key: 'YOUR_API_KEY', url: 'https://stripe.com' });
const res = await fetch(`https://api.screenshotneo.com/v1/shot?${q}`);
if (!res.ok) throw new Error(`Screenshot request failed: ${res.status}`);
const fs = await import('node:fs/promises');
await fs.writeFile('shot.webp', Buffer.from(await res.arrayBuffer()));- Cookie banners, newsletter popups, and chat widgets are removed before the shot; each cleanup step can be turned off.
- Bot checks, blank pages, timeouts, failed loads, and cache hits are never billed; response headers report the page verdict and billing status.
- An MCP server gives AI agents tools for screenshots, page information, and PDF capture.
- 1,000 screenshots a month are free with no card. Paid plans start at $5 for 3,000 screenshots.
Sign up for ScreenshotNeo’s free plan to get 1,000 screenshots a month with no card.
Frequently asked questions
Should the agent click an option before it takes the screenshot?
No. Capture immediately after the menu is confirmed visible. Selecting an option may close the menu or change the displayed state.
Can I capture only the open menu?
Yes. Take a locator screenshot of the visible menu. It crops to the element’s bounds and cannot show obscured content.
Will ScreenshotNeo open the dropdown for me?
The documented ScreenshotNeo request takes a URL and returns a screenshot or PDF. The supplied product facts do not include a click-to-open interaction parameter, so use Playwright to create the open state.