Build an MCP Server in TypeScript: Example and Implementation
Build a working MCP server in TypeScript with the official SDK, validated tools, stdio transport, remote HTTP options, troubleshooting, and deployment guidance.
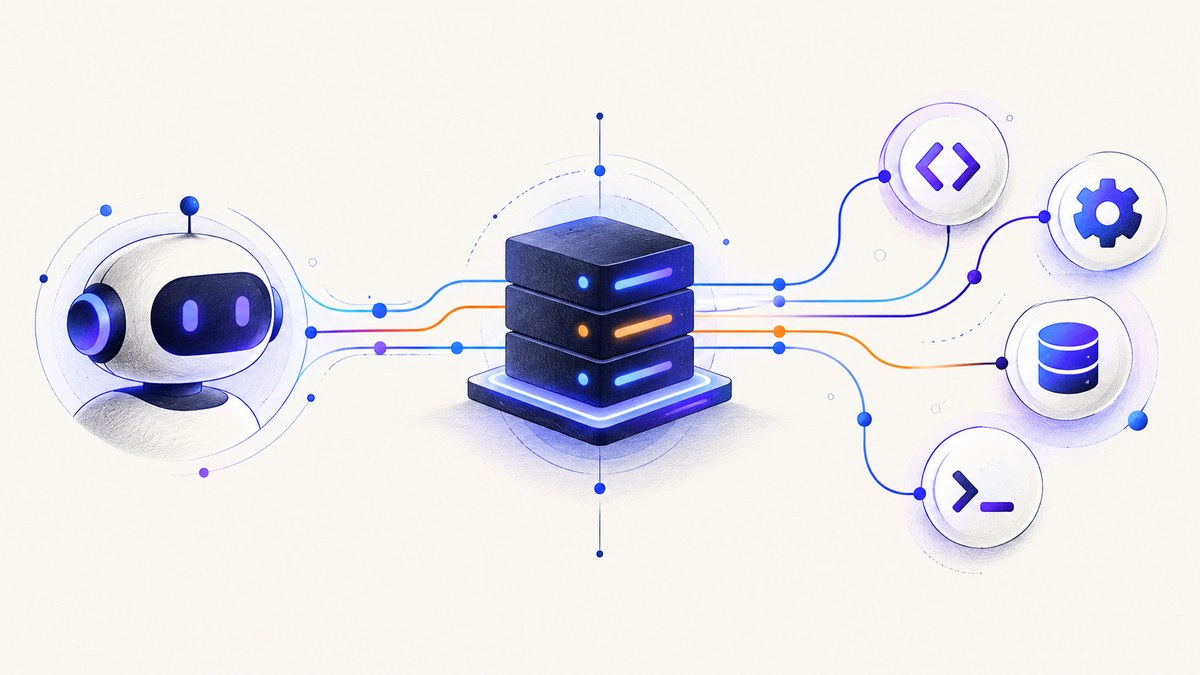
Direct answer: an MCP server in TypeScript is a process that exposes tools, resources, or prompts to an MCP host such as an AI desktop application or coding agent. With the official TypeScript SDK, the implementation pattern is straightforward: create an McpServer, register capabilities, select a transport, and call server.connect(transport). Use stdio when the host launches your local process. Use Streamable HTTP when clients connect to a remotely deployed service.
This guide builds a read-only lookup tool with the SDK v1 package line, then explains how the v2 package layout differs. The example is intentionally small, but the same structure applies to database queries, repository search, internal APIs, browser automation, and other agent tools.
What an MCP server does
MCP separates the application that wants to use a capability from the process that implements it. The application is the host. It connects to a server and discovers the server’s registered tools, resources, and prompts. The server validates inputs, performs work, and returns structured results.
The official TypeScript SDK describes the core sequence as:
- Create an
McpServerwith a stable name and version. - Register each tool, resource, or prompt the host may use.
- Create a transport such as stdio or Streamable HTTP.
- Connect the server to that transport.
See the official MCP server guide and the TypeScript SDK documentation for the protocol concepts and current examples.
Choose the SDK version before writing code
The documentation currently has two major lines. SDK v1 uses the monolithic @modelcontextprotocol/sdk package and commonly installs zod for input validation. SDK v2 is the stable line for the 2026-07-28 MCP specification and uses split packages, including @modelcontextprotocol/server. Do not combine v1 imports with v2 installation instructions.
| Decision | SDK v1 | SDK v2 |
|---|---|---|
| Package organization | @modelcontextprotocol/sdk |
Split packages such as @modelcontextprotocol/server |
| Best use of this article’s code | Copy and run the complete example below | Use the v2 package documentation and adapt the same create/register/connect flow |
| Schema setup | Install zod |
Follow the schema imports shown by the v2 package documentation |
| TypeScript caveat | Use the package’s documented compiler settings | Recent declarations may reference Node’s Buffer; the v2 documentation notes that TypeScript 6 or later may require "types": ["node"] in tsconfig.json |
The runnable implementation in the next sections targets SDK v1 so every import and install command is internally consistent. If your project has already selected v2, keep the architecture and transport choice, then use the v2 import paths and examples from its documentation.
Build a complete stdio server with TypeScript
1. Create the project
mkdir typescript-mcp-server
cd typescript-mcp-server
npm init -y
npm install @modelcontextprotocol/sdk zod
npm install --save-dev typescript tsx @types/node
Add scripts and module settings to package.json:
{
  "type": "module",
  "scripts": {
    "dev": "tsx src/server.ts",
    "build": "tsc",
    "start": "node dist/server.js"
  }
}
Create tsconfig.json:
{
  "compilerOptions": {
    "target": "ES2022",
    "module": "NodeNext",
    "moduleResolution": "NodeNext",
    "outDir": "dist",
    "rootDir": "src",
    "strict": true,
    "esModuleInterop": true,
    "skipLibCheck": true
  },
  "include": ["src"]
}
2. Register a validated tool
Create src/server.ts. This tool accepts a term and returns a deterministic explanation. Replace the lookup function with your database or service call once the transport is working.
import { McpServer } from "@modelcontextprotocol/sdk/server/mcp.js";
import { StdioServerTransport } from "@modelcontextprotocol/sdk/server/stdio.js";
import { z } from "zod";

const server = new McpServer({
  name: "typescript-lookup-server",
  version: "1.0.0"
});

server.tool(
  "lookup_definition",
  "Return a short definition for a programming term.",
  {
    term: z.string().min(1).max(100).describe("The term to define")
  },
  async ({ term }) => {
    const definitions: Record<string, string> = {
      typescript: "TypeScript is a typed superset of JavaScript that compiles to JavaScript.",
      mcp: "MCP is a protocol for exposing tools, resources, and prompts to AI hosts.",
      stdio: "stdio transports messages over the server process's standard input and output."
    };

    const definition = definitions[term.trim().toLowerCase()];
    const text = definition ?? `No definition is stored for ${term}.`;

    return {
      content: [{ type: "text", text }]
    };
  }
);

const transport = new StdioServerTransport();
await server.connect(transport);
The important details are the tool name, human-readable description, schema, and return shape. Keep names stable because hosts may cache or display them. Validate every argument at the boundary. Return concise text for a simple lookup; for richer results, return additional content items supported by the SDK and protocol.
3. Compile and run it
npm run build
npm start
A stdio server normally waits for an MCP host instead of printing a welcome message. Do not write logs to standard output: stdout is the protocol channel. Send diagnostics to stderr instead:
console.error("lookup server starting");
Configure your MCP host to launch the compiled command, for example:
node /absolute/path/typescript-mcp-server/dist/server.js
The host starts the child process, performs initialization, discovers lookup_definition, and sends a tool call with a JSON argument such as {"term":"MCP"}. The host, rather than your server, usually owns the conversation and decides when to invoke the tool.
Adding resources and prompts
Tools perform actions or lookups. Resources expose addressable data, and prompts provide reusable prompt templates. Add only the capability your host needs; every public capability increases the surface that must be documented and secured.
The exact helper signatures can vary between SDK lines, so check the versioned API reference before adding them. The architectural rule remains the same: register the capability on the McpServer before calling connect. A resource should have a stable URI and predictable contents. A prompt should document its arguments and produce a complete message sequence.
Choosing a transport
| Transport | Use it when | Process ownership | Network and sessions |
|---|---|---|---|
| stdio | A desktop host or local agent launches your server | The host owns the child process | No listening port; lifecycle follows the host |
| Streamable HTTP | Multiple clients or a remote host must reach the server | Your deployment runs the service | Supports remote operation; the guide describes stateful sessions with a session ID generator or stateless operation when one is not defined |
| HTTP+SSE | You must support an older client | Your deployment runs the service | Retained for backwards compatibility; prefer Streamable HTTP for new systems |
When stdio is the right default
Use stdio for local integrations because it avoids authentication, port allocation, reverse proxies, and cross-origin configuration. It is also easy to package with a desktop application or repository-specific developer tool. The trade-off is that a client must be able to start your process and provide its executable path.
When to use Streamable HTTP
Choose Streamable HTTP for a remotely reachable service. Put the server behind your normal TLS termination and authentication layer, enforce request limits, and decide whether sessions are needed. A stateful deployment can generate a session identifier and retain connection state. A stateless deployment can omit the generator when each request can be handled independently.
Do not copy the stdio transport into an HTTP deployment and expect a listener to appear. The transport determines how messages enter the process; your HTTP framework and deployment must provide the network endpoint.
Configuration and production boundaries
- Environment variables: read API keys and database URLs from the environment, never from tool arguments or source control.
- Input limits: cap string lengths, array sizes, pagination values, and request duration.
- Authorization: authenticate remote clients before invoking tools and check authorization inside each sensitive handler.
- Output limits: truncate large records or paginate them so one call does not overwhelm the host context.
- Errors: return actionable errors without leaking credentials, SQL, filesystem paths, or internal stack traces.
- Logging: use stderr for stdio and structured logs for HTTP. Include a request or session identifier when available.
- Cancellation: pass abort signals to downstream fetches and database calls so abandoned tool calls stop consuming resources.
Common errors and fixes
| Symptom | Likely cause | Fix |
|---|---|---|
Cannot find package @modelcontextprotocol/sdk |
The package was not installed or the import targets a different SDK line | Install the v1 package shown above, or change every import and install command together for v2 |
| The host exits immediately | The process crashed during startup or returned before connect |
Run the command manually, inspect stderr, and keep the top-level await server.connect(transport) |
| JSON parsing or handshake failures | Logs or banners were written to stdout | Move all diagnostics to stderr and remove startup prints from stdout |
| Tool is not listed | The tool was registered after connecting, or the host cached an older server definition | Register capabilities before connect, restart the host, and verify the configured executable path |
| Arguments are rejected | The call does not satisfy the Zod schema | Inspect the host’s generated arguments, then adjust the schema deliberately; do not remove validation blindly |
| Remote requests hang | HTTP transport, proxy, or session configuration is incomplete | Use the Streamable HTTP example for your SDK line, verify proxy streaming support, and choose stateful or stateless operation explicitly |
TypeScript reports missing Buffer |
Node types are not included, especially with newer v2 declarations | Install @types/node and add "types": ["node"] to tsconfig.json when the v2 documentation requires it |
Performance, reliability, and cost
For stdio, startup time is part of every host connection. Keep initialization light and defer expensive clients until the first tool call. Reuse database and HTTP connections inside a long-lived server. For Streamable HTTP, set explicit connection, upstream, and tool execution timeouts. Bound concurrency so a burst of agent calls cannot exhaust file descriptors or database connections.
Make handlers idempotent where possible. A host may retry after a network interruption, and a retry should not duplicate a destructive operation. For writes, require an idempotency key or expose a separate confirmation step. Return enough structured context for the host to explain a failure without exposing secrets.
The SDK itself does not establish your hosting cost. Your bill comes from the runtime, network, database, and downstream APIs used by handlers. Measure tool latency and error rates at the handler boundary, then set limits based on those measurements. Do not claim protocol-level uptime or performance without data from your own deployment.
Or skip the browser setup
If your MCP server’s job is to provide page screenshots to an agent, ScreenshotNeo supplies an MCP server with take_screenshot, get_page_info, and capture_pdf tools. You can still build the TypeScript server yourself, but a direct API call removes browser installation and page-cleanup code.

See the ScreenshotNeo API documentation for all options. A minimal request is:
cURL
curl -G "https://api.screenshotneo.com/v1/shot" -d access_key=YOUR_API_KEY --data-urlencode url=https://stripe.com -o shot.webpPython
import requests

r = requests.get(
    "https://api.screenshotneo.com/v1/shot",
    params={"access_key": "YOUR_API_KEY", "url": "https://stripe.com"},
    timeout=90,
)
r.raise_for_status()
open("shot.webp", "wb").write(r.content)
Node.js
const q = new URLSearchParams({ access_key: 'YOUR_API_KEY', url: 'https://stripe.com' });
const res = await fetch(`https://api.screenshotneo.com/v1/shot?${q}`);
if (!res.ok) throw new Error(`HTTP ${res.status}`);
const bytes = Buffer.from(await res.arrayBuffer());
await Bun.write('shot.webp', bytes);
ScreenshotNeo removes cookie and consent banners, newsletter popups, and chat widgets before capture. Bot checks, blank pages, failed loads, timeouts, and cache hits are not billed, and response headers identify the page verdict and billing result. The service also supports full-page and element captures, dark mode, device presets, custom CSS and JavaScript, headers and cookies, waiting rules, blocking rules, PDFs, signed links, asynchronous jobs, bulk capture, and a usage API.
An MCP server lets AI agents take screenshots directly. The free plan includes 1,000 screenshots each month with no card; paid plans start at $5 for 3,000 shots. Create a free ScreenshotNeo account.
FAQ
How do I build an MCP server in TypeScript?
Install one SDK major version, create McpServer, register a validated capability, create the transport, and call server.connect(transport). The example above uses v1 and stdio.
Can one server support both stdio and HTTP?
Yes, but expose separate startup paths and configure one transport per process. This keeps lifecycle, authentication, and logging rules clear.
Should a new project use HTTP+SSE?
Use it only for backwards compatibility with clients that require it. The current guidance favors Streamable HTTP for new remote deployments.
Why does the host need a description for every tool?
The host uses names, descriptions, and schemas to decide which capability fits a request and how to construct valid arguments. Clear metadata improves selection and reduces invalid calls.
Is an MCP server the same as an AI model?
No. The model and host decide what to ask; the MCP server exposes controlled capabilities that the host can invoke.