BlogScreenshots on your device
How to Capture Screenshots with PyAutoGUI in Python
Capture full screens or precise regions with PyAutoGUI, save PNG files, fix Linux dependencies, and automate reliable screenshot workflows.

PyAutoGUI can capture the display from Python in one line. Install it with python3 -m pip install pyautogui, call pyautogui.screenshot(), and save the returned Pillow image as a PNG. You can also pass a filename directly or limit the capture to a rectangle with region=(left, top, width, height).
import pyautogui

# Capture the complete visible display and save it.
image = pyautogui.screenshot("screen.png")
print(image.size)
The call returns a Pillow image object, so you can inspect it, crop it, convert it, or save it in another format. The official PyAutoGUI screenshot reference documents the filename and region arguments. This guide covers installation, full-screen and partial captures, multi-monitor considerations, image processing, repeated captures, errors, performance, and when a browser screenshot API is a better fit.
1. Install PyAutoGUI and its screenshot dependencies
Install PyAutoGUI in the environment that will run your script:
python3 -m pip install pyautoguiPyAutoGUI supports Windows, macOS, and Linux. Screenshot functionality requires Pillow. On Linux, the documented capture backend also requires the scrot command:
sudo apt-get update
sudo apt-get install scrot
python3 -m pip install pyautogui
Use a virtual environment when this script is part of an application:
python3 -m venv .venv
. .venv/bin/activate
python -m pip install --upgrade pip
python -m pip install pyautogui
Verify both the import and a small capture before adding automation:
import pyautogui

image = pyautogui.screenshot()
print(type(image).__name__, image.size, image.mode)
If this fails on Linux with a message about a missing screenshot utility, install scrot and make sure the process has access to the graphical session. A headless server normally has no desktop for PyAutoGUI to capture.
2. Capture and save a full-screen image
The simplest form captures the visible display and returns a Pillow image:

import pyautogui

image = pyautogui.screenshot()
image.save("screen.png")
Passing a path combines capture and saving:
import pyautogui

image = pyautogui.screenshot("screen.png")
Both examples produce the same PNG. The first is useful when you need to modify the image before writing it. The second is concise for a recording or diagnostic script. The returned object is a Pillow image, as described in the official reference.
Choose a file format
Pillow selects the format from the filename extension. PNG is lossless and suitable for UI text, test evidence, and archival captures. JPEG is smaller for photographic content but introduces lossy compression. WebP can be useful when your downstream tools support it.
import pyautogui

image = pyautogui.screenshot()
image.save("screen.png", format="PNG")
image.save("screen.jpg", format="JPEG", quality=90)
image.save("screen.webp", format="WEBP", quality=90)
Create the destination directory first so a missing folder does not cause an avoidable error:
from pathlib import Path
import pyautogui

output = Path("captures")
output.mkdir(parents=True, exist_ok=True)
image = pyautogui.screenshot()
image.save(output / "screen.png")
3. Capture only part of the display
Use the region argument for a rectangular capture. Its order is (left, top, width, height), measured in screen coordinates:
import pyautogui

# Start at x=0, y=0; capture 300 by 400 pixels.
crop = pyautogui.screenshot(region=(0, 0, 300, 400))
crop.save("crop.png")
A region can begin anywhere on the desktop:
import pyautogui

left, top, width, height = 640, 120, 800, 600
image = pyautogui.screenshot(region=(left, top, width, height))
image.save("application-area.png")
Region capture reduces the amount of image data you process and store. It is a good choice for a known toolbar, status panel, or test target. It does not identify a window by title; you provide coordinates. If a window moves or display scaling changes, recalculate the coordinates or use an image-location step before capturing.
Crop after capture
When you need several areas from one consistent moment, capture once and crop the returned image:
import pyautogui

screen = pyautogui.screenshot()
# Pillow crop coordinates are (left, top, right, bottom).
header = screen.crop((0, 0, screen.width, 120))
header.save("header.png")
This avoids taking multiple screenshots and gives every crop the same timestamp. Use region instead when you never need the rest of the display.
4. Build a reusable capture script
This complete script accepts a filename and optional region from the command line. It creates the output directory, records the capture size, and exits with a useful error if the backend is unavailable:
#!/usr/bin/env python3
import argparse
from pathlib import Path
import sys
import pyautogui


def main() -> int:
    parser = argparse.ArgumentParser(description="Capture a desktop screenshot")
    parser.add_argument("output", type=Path, help="PNG, JPEG, or WebP output path")
    parser.add_argument("--region", nargs=4, type=int, metavar=("LEFT", "TOP", "WIDTH", "HEIGHT"))
    args = parser.parse_args()

    args.output.parent.mkdir(parents=True, exist_ok=True)
    region = tuple(args.region) if args.region else None

    try:
        image = pyautogui.screenshot(str(args.output), region=region)
    except Exception as exc:
        print(f"Screenshot failed: {exc}", file=sys.stderr)
        return 1

    print(f"Saved {args.output} ({image.width}x{image.height})")
    return 0


if __name__ == "__main__":
    raise SystemExit(main())
Examples:
python capture.py captures/full.png
python capture.py captures/panel.png --region 100 80 900 600
5. Add timing, naming, and repeated captures
For a sequence, generate filenames instead of overwriting the same file. A monotonic counter is predictable; a UTC timestamp is easier to correlate with logs.
from datetime import datetime, timezone
from pathlib import Path
import time
import pyautogui

output = Path("captures")
output.mkdir(exist_ok=True)

for index in range(5):
    stamp = datetime.now(timezone.utc).strftime("%Y%m%dT%H%M%SZ")
    path = output / f"screen-{stamp}-{index:02d}.png"
    pyautogui.screenshot(str(path), region=(0, 0, 1200, 800))
    time.sleep(1)
The PyAutoGUI documentation reports roughly 100 milliseconds for screenshot() on a 1920×1080 screen. Treat that as guidance for that resolution, not a guarantee for every computer. Repeated workflows should capture only the needed region and avoid unnecessary image conversions. Image-location calls can take about one or two seconds; pass a region to those calls when possible to reduce search work.
6. Find an on-screen control before capturing
PyAutoGUI can search the live screen or a screenshot for a reference image. A typical workflow is to locate a button, move the pointer, click, wait for the UI, and capture the result:
import time
import pyautogui

try:
    point = pyautogui.locateCenterOnScreen("save-button.png", region=(0, 0, 1200, 800))
except pyautogui.ImageNotFoundException:
    point = None

if point is None:
    raise RuntimeError("Save button was not found")

pyautogui.click(point)
time.sleep(0.5)
pyautogui.screenshot("after-click.png")
Current documented behavior raises ImageNotFoundException when no match is found. Code written for older releases may have expected None, so check the documentation for the version installed in your environment. Keep reference images at the same scale and theme as the target screen; display scaling, dark mode, animation, and localization can make matching fail.
7. Multi-monitor and display-scaling considerations
Coordinates are tied to the desktop coordinate system. A region that works on one monitor arrangement may capture a different area after a monitor is added, removed, or rearranged. Record the image size during diagnostics and validate coordinates at startup.
import pyautogui

screen = pyautogui.screenshot()
print(f"desktop image: {screen.width}x{screen.height}")
Operating-system display scaling can also make logical application coordinates differ from physical screenshot pixels. Use a visible calibration point or a known screenshot to verify the mapping. PyAutoGUI captures what the desktop compositor presents; this workflow is intended for an available, visible desktop session.
8. Troubleshooting common errors
| Symptom | Likely cause | Fix |
|---|---|---|
ModuleNotFoundError: pyautogui |
Package installed into a different Python environment. | Run python3 -m pip install pyautogui with the same interpreter that runs the script. |
Linux backend or scrot error |
The required command is missing. | Install it with sudo apt-get install scrot, then retry inside a graphical session. |
| Blank, black, or stale image | The desktop session, permissions, display scaling, or protected content prevents the expected pixels from being presented. | Test a normal visible window, confirm the process is attached to the correct display session, and verify the region coordinates. |
| File not found when saving | Parent directory does not exist. | Create it with Path(path).parent.mkdir(parents=True, exist_ok=True). |
| Region has the wrong area | Tuple order or coordinate origin is incorrect. | Use (left, top, width, height); print the full screenshot size and test with a small obvious rectangle. |
| Image search cannot find a control | Scale, theme, animation, or changed UI. | Use a current reference image, restrict the search region, wait for the UI, and handle ImageNotFoundException. |
| Script works locally but not in CI | CI has no interactive desktop. | Use a virtual display configured by the CI environment, or use a browser rendering service for web pages. |
9. Reliability, privacy, and cost notes
PyAutoGUI captures the desktop visible to the process, so notifications, unrelated windows, and personal data can appear in the file. Close or hide sensitive applications before capture, and define an output-retention policy. For deterministic automation, fix the window layout, theme, display scale, and browser zoom; wait for the UI state you need; and log the image dimensions and path.
Capture time and file size depend on display resolution, region size, image format, and disk speed. PNG preserves pixels but can be large. JPEG and WebP reduce size with different quality tradeoffs. If you are collecting many images, capture a smaller region, save at a controlled quality, and rotate old files.
PyAutoGUI is a desktop tool, not a remote web renderer. It is a good fit when the target is an application visible on your machine. For server-side pages, isolated browser sessions, consent-banner handling, or scalable URL capture, a screenshot API avoids maintaining a desktop and browser.
10. Or skip the browser setup
If your input is a URL rather than the pixels on your own desktop, ScreenshotNeo returns a screenshot with one GET request. See the ScreenshotNeo API documentation for all options.
curl -G "https://api.screenshotneo.com/v1/shot" -d access_key=YOUR_API_KEY --data-urlencode url=https://stripe.com -o shot.webpimport requests
r = requests.get("https://api.screenshotneo.com/v1/shot", params={"access_key": "YOUR_API_KEY", "url": "https://stripe.com"}, timeout=90)
open("shot.webp", "wb").write(r.content)const q = new URLSearchParams({ access_key: 'YOUR_API_KEY', url: 'https://stripe.com' });
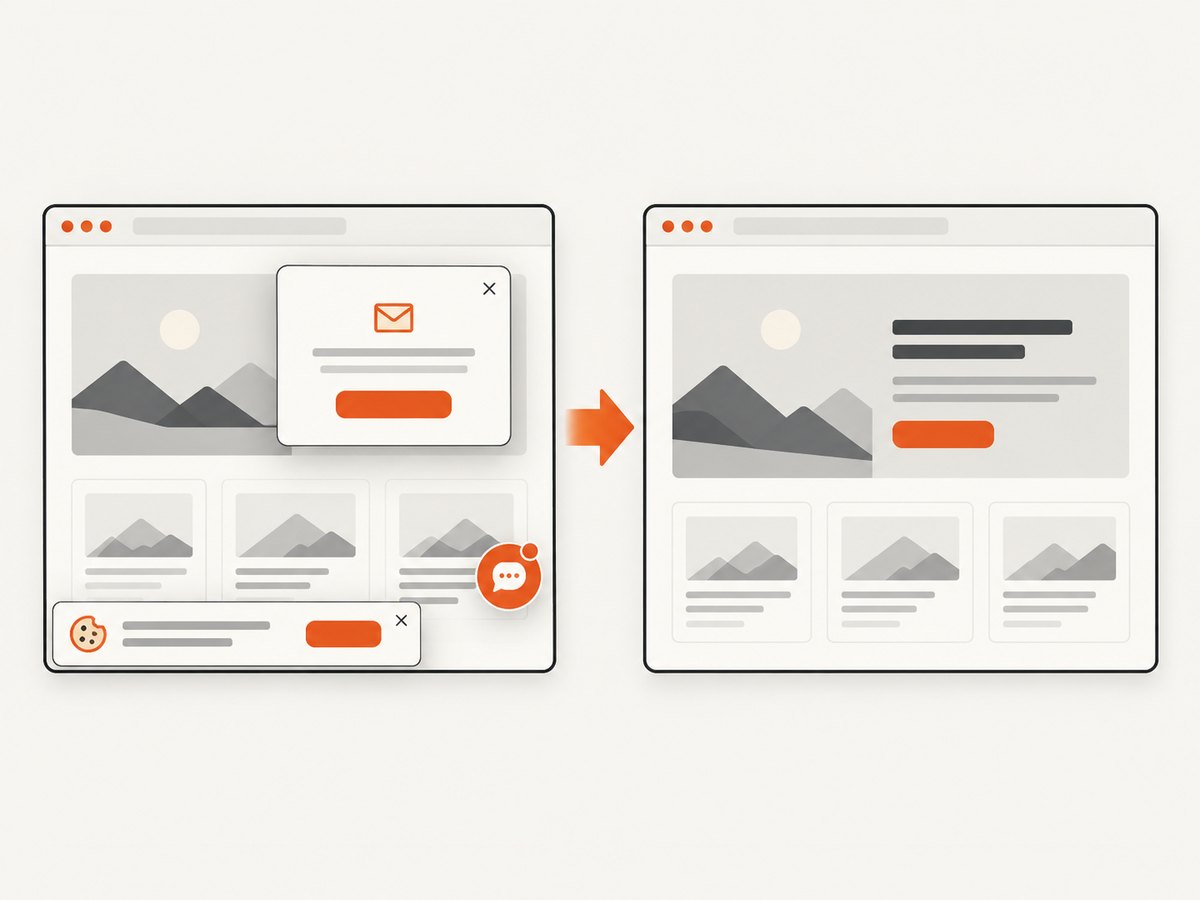
const res = await fetch(`https://api.screenshotneo.com/v1/shot?${q}`);Cookie banners, newsletter popups, and chat widgets are removed before the shot. Bot checks, blank pages, failed loads, timeouts, and cache hits are not billed, and response headers identify the page verdict and billing status. ScreenshotNeo also provides an MCP server so Claude, Cursor, and other MCP clients can take screenshots, inspect pages, and capture PDFs. The Free plan includes 1,000 screenshots each month without a card; paid plans start at $5 for 3,000 shots. Create a free ScreenshotNeo account.
11. PyAutoGUI versus a browser screenshot service
| Need | PyAutoGUI | ScreenshotNeo |
|---|---|---|
| Capture the current desktop | Directly captures visible pixels and supports rectangular regions. | Designed for URL-based rendering instead of your local desktop. |
| Run on a server without a desktop | Requires a graphical session and Linux may require scrot. |
One HTTPS request; no local browser setup. |
| Clean web pages | You must handle banners and overlays in the browser yourself. | Removes known consent platforms, newsletter popups, and chat widgets before capture. |
| Automation scale | Limited by the desktop and process controlling it. | Supports caching, asynchronous jobs, signed webhooks, bulk capture of up to 100 URLs per call, and usage reporting. |
12. FAQ
Does pyautogui.screenshot() return an image?
Yes. It returns a Pillow Image object. You can call save(), crop(), or other Pillow operations on it.
What is the region format?
(left, top, width, height), in desktop coordinates.
Can I save directly to PNG?
Yes. Pass a filename ending in .png, such as pyautogui.screenshot("screen.png").
Why is Linux different?
PyAutoGUI requires Pillow for screenshots, and its documented Linux setup additionally requires the scrot command.
How fast is a screenshot?
The documentation gives roughly 100 milliseconds on a 1920×1080 screen. Actual time varies with hardware, display size, region, and system load.
Can PyAutoGUI capture a web page that is not visible?
PyAutoGUI captures the desktop presented to the process. For URL rendering without an interactive desktop, use a browser screenshot service such as ScreenshotNeo.


